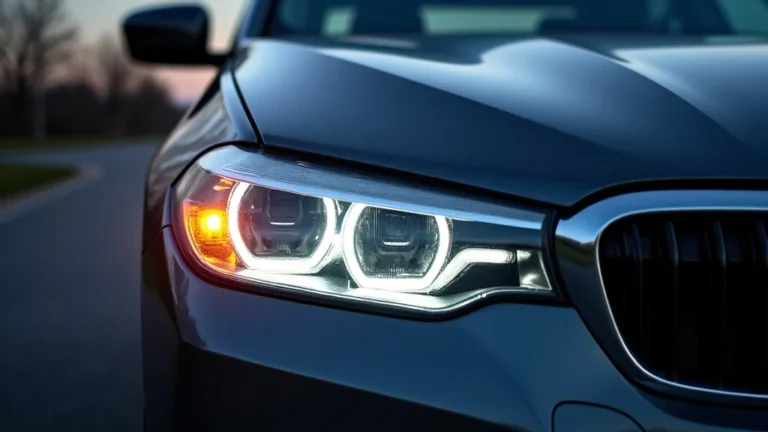
Can I Tint My Headlights Legally And Safely?
Thinking about modifying your car’s look and wondering, can i tint my headlights? It’s a common question! Many car lovers want to customize their vehicles, but it can be tricky to know what’s allowed. There are rules, and safety matters. This guide will take you step-by-step through everything you need to know. We’ll show you how to figure out what’s safe and legal. Let’s get started!
What You Need to Know Before Tinting Your Headlights
Before you even think about grabbing that tint, there’s some important stuff to consider. It’s not just about what looks cool; there are safety issues and the law to think about. Tinting headlights changes how much light they put out. That can affect how well you see the road at night and how visible your car is to other drivers. This first section helps you sort through the key things you need to consider before starting any tinting project. It’s important to make smart choices from the start.
Laws and Regulations Regarding Headlight Tinting
The first thing to investigate is the law. Laws about headlight tinting change from place to place. Some areas might let you use a light tint, while others don’t allow it at all. It’s really important to know your local laws before you do anything. You can often find this information by looking up your state’s vehicle regulations online. Remember, even a small change can make a big difference in how your headlights work.
- State Laws: Each state has its own rules.
Some states don’t have laws that specifically mention headlight tint, which can make it seem okay. However, in many places, laws about vehicle lighting cover all parts of your headlights. A tinted headlight might violate these existing rules.
- Light Transmission Percentage: This measures how much light gets through.
Many laws are based on how much light your headlights can put out after tinting. They often require that your headlights have to let a certain percentage of light pass through. If the tint blocks too much light, it’s against the law.
- Enforcement: What happens if you break the rules?
Breaking the rules can lead to tickets and fines. You might also have to remove the tint to pass an inspection. Plus, if you’re involved in an accident and your headlights are tinted, it could cause big trouble for you with insurance and the law.
It’s crucial to check your local laws before you start. Failing to do so can result in serious legal trouble and a failed inspection.
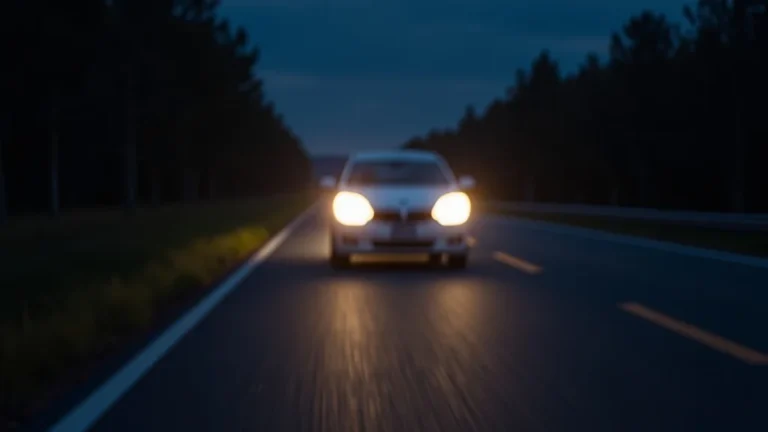
The Safety of Tinted Headlights
Tinting headlights has an impact on safety. Headlights are important for seeing the road and being seen by others, especially at night or in bad weather. If your headlights are too dim, it’s harder for you to spot hazards, and other drivers may not see you as easily. Poorly tinted headlights can reduce visibility in rainy or foggy conditions. It’s essential to remember the role of headlights in safety before thinking about aesthetics.
- Reduced Visibility: Tinting can make headlights dimmer.
When the headlights are tinted, they emit less light. This decreases how far you can see. Less visibility increases the chance of accidents at night. This is especially dangerous on roads with no streetlights or in areas with heavy rain or fog.
- Impaired Reaction Time: Less light gives drivers less time to react.
If you cannot see things quickly, you have less time to respond to hazards. Even a small reduction in the distance you can see can increase your reaction time and crash risk. Make sure your headlights are clear.
- Visibility for Others: Other drivers might not see your car.
Tinted headlights can make it difficult for other drivers to notice your vehicle. This is especially true at dusk or dawn. This can be dangerous for everyone on the road.
Prioritize safety. Dim headlights put you and others at risk. Make sure to consider the safety of everyone on the road.
Different Types of Headlight Tinting Methods
If you’ve decided to move forward with tinting (after making sure it’s legal and safe), there are several ways to do it. Each method has its own steps, tools, and results. Some methods are easier than others. Some can look better and last longer. Knowing the options will help you select the best approach. Each type will alter the look and the lighting capabilities of your headlights.
Spray Tinting
Spray tinting is a method where you apply a special paint or tint solution directly onto the headlight. The process involves cleaning the headlight and applying several thin layers of the tint. Spray tinting gives you good control over the shade. But it needs careful preparation and even application. This method requires some skill to avoid streaks or uneven coverage.
- Materials: Needed for this method.
You need a spray tint made for headlights. You will also need tape, a cleaner, and sandpaper to prepare the surface. Make sure you have gloves and something to protect the area around your vehicle. This can include newspapers or special masking sheets.
- Application: How to use the spray tint.
Clean the headlight thoroughly and mask around it with tape. Apply the tint in thin, even coats, letting each layer dry. You can add more layers to adjust the darkness. Proper preparation helps create the best results.
- Pros and Cons: Advantages and disadvantages of spray tinting.
The pros include that spray tint is easy to apply and offers a custom finish. The cons include the need for careful prep work and possible unevenness. If you don’t take your time, you may need to start over.
Spray tinting is a practical option if you want a custom look. It is important to know the steps and what you need.
Film Tinting
Film tinting is a popular way to tint headlights. You use a pre-cut or custom-cut film that adheres to the headlight. This method is often easier than spray tinting. You get a consistent look. It also protects the headlight from scratches and UV damage. Film comes in different shades and types. This gives you many choices for your car’s style.
- Materials: Things needed for film tinting.
You will need tint film, a spray bottle with water and a little soap, a squeegee, and a knife or cutter. Clean your headlights before you begin. A heat gun is helpful for shaping the film.
- Installation Process: How to apply the film.
First, thoroughly clean the headlight. Then, spray the headlight and the film with the water-soap mixture. Apply the film. Use a squeegee to remove bubbles and excess water. Use a heat gun to help the film fit the curves of your headlight.
- Durability: How long it lasts.
Film tinting generally lasts for several years. It protects your headlights from damage. This protection extends the life of your headlights. This also helps with vehicle resale value.
Film tinting offers a balance between look and protection. The result is a smooth, professional appearance.
Tinted Headlight Covers
Tinted headlight covers are an easy solution for changing the appearance of your headlights. These covers are made from tinted plastic or acrylic. They are designed to fit over your existing headlights. You install them with clips, screws, or adhesive. They are a simple way to change the look without permanently altering the headlights. Covers allow you to change the tint without affecting your headlights.
- Types Available: Different kinds of covers.
You can find covers in various shades and styles. Some are designed for specific car models. Others fit a wide range of headlights. Be sure to select covers that match your vehicle’s make and model.
- Installation: Steps to putting on the covers.
Installation is usually straightforward. You attach the covers using clips, screws, or double-sided tape. The process typically doesn’t take very long. Before you install the covers, clean your headlights.
- Pros and Cons: Advantages and disadvantages.
The main benefit of covers is they are easy to install and remove. However, they might not look as good as film or spray tint. Some covers might not fit perfectly or can impact light output. Always make sure the covers meet the visibility requirements.
Covers provide a convenient option if you want a quick change. They do not involve modifying the headlight.
Step-by-Step Guide to Applying Headlight Tint Film
If you select film tinting, this guide will help you. We’ll go through the process in detail. By following each step, you can apply tint film to your headlights with success. This process requires a little patience and attention to detail. This approach can help you customize your car’s look. It will ensure that the headlights still provide proper illumination.
Prepare Your Headlights
The first step is to get the headlights ready. This means cleaning the surface. This removes any dirt or debris that might cause bubbles or imperfections. It’s also crucial to protect the areas around the headlights to prevent any damage to your car’s paint. A clean surface gives you a great starting point for applying the tint film. A clean surface is key for a successful result.
- Clean the Headlights: Make sure they are super clean.
Wash the headlights with soap and water to remove dirt. Use a cleaning agent to remove any grease or wax. Rinse them with clean water. Then dry them with a microfiber cloth. Make sure you get rid of every bit of dust and other things that may be on the headlight.
- Protect the Surrounding Areas: Take precautions to guard your car.
Cover the areas around the headlights with masking tape and plastic sheeting. This prevents overspray and protects the paint from scratches. This step helps to keep your car looking good.
- Inspect for Damage: Examine your headlights.
Check for any scratches, cracks, or damage to the headlight lenses. If you find any, fixing them beforehand makes the tinting process better. Good prep work leads to a nice end result. Before starting, you need a smooth surface.
Proper preparation is important for a smooth and good-looking finish. Making sure the headlights and surrounding areas are ready will set you up for success.
Apply the Tint Film
Next comes the actual tinting process. It involves applying the tint film to the headlight surface. This requires careful handling to avoid bubbles or creases. Cutting the film to the proper shape is important. This step requires precision and a steady hand. You can find pre-cut film for many car models. If not, you may have to cut your own.
- Cut the Film: Shape the film to fit.
If you are using pre-cut film, make sure it matches the shape of your headlights. If you’re cutting your own, measure the headlight carefully. Use a sharp blade to cut the film. Make the edges match well.
- Wet the Headlight: Apply a soapy solution.
Spray the headlight with a water-and-soap solution. This helps the film slide and adjust into place. It prevents bubbles from forming. Spray the film also to make the application simpler. This prepares the surface.
- Apply the Film: Stick the film to the headlight.
Peel the backing from the film. Carefully place the film onto the wet headlight. Then position it correctly. Use a squeegee to get rid of bubbles and extra water. Start in the center and work your way to the edges.
This phase decides the final look of your headlights. Careful attention and good technique will lead to better results.
Final Touches and Troubleshooting
The last step involves getting rid of any imperfections and getting the film to fully adhere. This phase is about detail. You need to make sure the film is secure and looks good. You can also solve problems that may happen during the process. This stage will get your headlights to look their best and stay that way.
- Remove Bubbles and Water: Make the film smooth.
Use a squeegee to remove bubbles and extra water. Start from the center and move outward. Go slowly. If any bubbles remain, try to press them toward the edges. This process makes sure the finish is smooth.
- Heat the Film (If Needed): Set the film in place.
Use a heat gun on low heat to help the film adhere. Focus on the edges and corners. This helps the film fit better. Be careful not to hold the heat gun too close to the film. You don’t want to damage it.
- Inspect and Trim: Perfect the look.
Look closely at the film for any issues. Use a sharp knife or blade to trim any excess film around the edges. Make the cuts clean and precise. Give your headlights a final check to make sure everything looks right.
This process will make your headlights look better. It also helps to keep them in good condition for a long time.
Can I Tint My Headlights: Common Mistakes to Avoid
It’s easy to make mistakes when tinting headlights, especially if you’re new to it. These mistakes can ruin the look and the safety of your headlights. Understanding the common errors can help you prevent them. If you know what to avoid, you can improve your chances of getting great results.
- Poor Preparation: Not cleaning the headlights well.
Not cleaning the headlights well is one of the most common errors. Dirt and grease can cause bubbles and make the film not stick. Before beginning, make sure the headlight surface is smooth and clean. This sets up a better result.
- Incorrect Film Application: Applying the film unevenly.
Putting the film on unevenly can cause wrinkles and bubbles. Go slowly and carefully. Use a squeegee to get rid of any imperfections. Take your time to make sure everything looks right.
- Using the Wrong Tint: Choosing a tint that is not safe or legal.
Using a tint that is too dark can reduce light output. It makes it hard for other drivers to see you. Always check local laws. Make sure the tint you are using meets all safety rules.
- Rushing the Process: Not giving enough time to complete it.
Rushing can lead to problems like bubbles and poor adhesion. Allow enough time. Do not rush any of the steps. Take your time to get each step right for the best results.
By learning about these common errors, you can improve your chances of success. Proper preparation and a careful approach are keys to a professional finish.
Frequently Asked Questions
Question: Is it legal to tint my headlights?
Answer: It depends on local laws. Rules vary by state and sometimes by city. Check your local regulations.
Question: How dark can I tint my headlights?
Answer: Most places have rules about how much light your headlights must let through. Usually, the tint can’t make the lights too dim.
Question: Will tinting my headlights affect my car’s warranty?
Answer: Tinting might not void your warranty, but it could cause problems if the tint damages your headlights or affects their function.
Question: What’s the best method for tinting headlights?
Answer: Film tinting is popular and offers a good balance between ease of application and durability. Spray tinting and covers are options, too.
Question: Can I remove the tint if I don’t like it?
Answer: Yes, in most cases, you can remove tint film. Removing spray tint can be trickier, and covers can be taken off easily.
Final Thoughts
So, can i tint my headlights and make them look cool? It’s possible, but it’s important to do it safely and legally. We’ve explored different methods, with film tinting being a popular choice for good results. Remember to check local laws first and think about safety. Properly prepare your headlights and apply the tint carefully. Take your time and focus on detail. This can help you avoid common mistakes. Now, you can confidently decide whether to tint your headlights. If you proceed, you’ll be able to create a unique look for your car. Make sure your headlights shine, and stay safe!