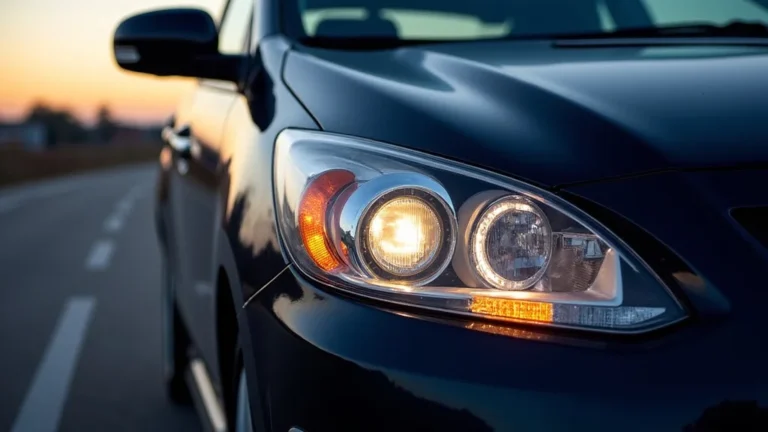
Why Do Headlights Get Cloudy? Simple Causes and Solutions
If you’ve noticed your car’s headlights looking a little hazy, you’re not alone! Many drivers wonder why do headlights get cloudy. This can be a bit tricky for beginners because it involves things like materials and weather. Don’t worry, though. We’ll explore the main culprits behind cloudy headlights and give you a straightforward, step-by-step solution to get those lights shining bright again. You’ll learn everything you need to know to fix this common issue.
The Science Behind Clouded Headlights
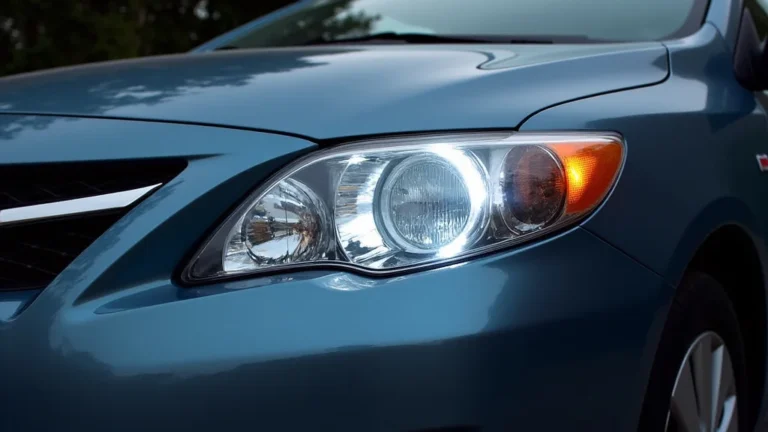
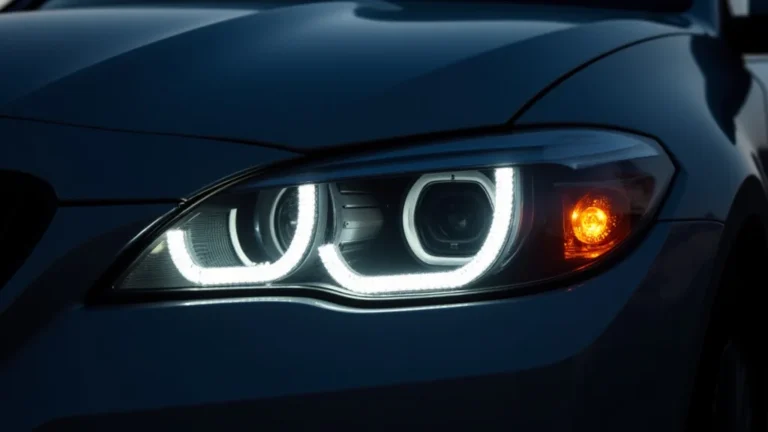
Headlights are built to withstand a lot. They face the sun’s rays, rain, and dirt, all while helping you see at night. However, over time, their clear plastic covers can become cloudy, reducing how well they shine. This cloudiness isn’t just a cosmetic issue; it seriously impacts how well you can see, making night driving much more dangerous. Several factors, from the materials used to the environment the car lives in, contribute to this problem.
UV Radiation and Its Effects
One of the biggest causes of cloudy headlights is ultraviolet (UV) radiation from the sun. The plastic used in headlights, often polycarbonate, can break down when constantly exposed to UV light. This breakdown causes the surface to degrade, creating a hazy appearance. Think of it like sunburn on your skin, but on a much smaller scale. The UV rays slowly wear away at the plastic, making it rough and less transparent. This process is accelerated in areas with high sun exposure, like sunny states.
- What is UV radiation? It’s a type of energy from the sun that can damage materials over time.
- How does it affect headlights? UV rays break down the plastic’s molecules.
- Why polycarbonate? Polycarbonate is a common material, but it’s vulnerable to UV damage.
- Where is it worse? The sun’s impact is strongest in sunny areas.
The rate at which UV damage occurs depends on several factors, including the quality of the plastic and whether the headlights have any protective coatings. Some headlights come with a UV-resistant coating, which slows down the process, but it’s not foolproof. This coating also deteriorates over time, and regular exposure will eventually degrade the plastic, no matter the protection. You might have noticed that older cars tend to have cloudier headlights than newer ones, which is a testament to this constant battle against the sun.
Oxidation and Environmental Factors
Besides UV rays, oxidation plays a big part in clouding headlights. Oxidation is a chemical reaction that occurs when the plastic reacts with oxygen in the air. This process is accelerated by exposure to heat, sunlight, and moisture, leading to a dull or yellowish appearance. Airborne contaminants like pollution and road salt can also stick to the headlight surface, adding to the problem. Over time, these contaminants etch into the plastic, making the cloudiness worse.
- What is oxidation? A chemical reaction with oxygen.
- Why does it happen? Exposure to air, heat, and moisture.
- Contaminants? Pollution, road salt, and other debris stick to the plastic.
- What does it look like? The headlight becomes dull or yellowed.
The environment your car lives in can make a big difference. Cars parked outside are exposed to more UV radiation and harsh weather conditions than those kept in a garage. If you live near the coast, salt spray from the ocean can also cause problems, accelerating the oxidation process. Even frequent car washes can wear down the plastic over time if abrasive cleaning agents are used. To keep your headlights in good shape, consider protecting your car in a garage or using a headlight restoration kit.
Material Breakdown and Chemical Reactions
The plastic composition of headlights is designed for impact resistance and clarity, but it’s not immune to breakdown. The continuous cycle of heating and cooling, along with exposure to various chemicals, causes the plastic to change at a molecular level. Microscopic cracks and imperfections begin to form on the surface, which scatter light and create a cloudy effect. Cleaning products or harsh chemicals, like some windshield washer fluids, can speed up this process by weakening the plastic.
- What is plastic composition? The mix of materials that make up the headlight.
- Why does it break down? Heating and cooling cycles, and chemical exposure.
- Microscopic cracks? These scatter light and cause cloudiness.
- Harsh chemicals? They can worsen the breakdown of the plastic.
The type of plastic and any protective coatings used in the headlight also impact how quickly it clouds. Some plastics are more resistant to UV damage and oxidation than others. Headlights with a good protective coating will last longer before clouding. This is why some cars have headlights that stay clear for years, while others cloud up quickly. It’s not just about the environment; the quality of the materials and any factory-applied protection play a vital role.
Restoring Cloudy Headlights: Simple Steps
Now that we know the causes, let’s explore how to fix those cloudy headlights. Headlight restoration is an excellent way to improve visibility and the look of your car without buying new headlights. You can restore your headlights yourself with a kit or take your car to a professional detailer. Here’s a basic guide you can follow to restore your headlights at home.
Gathering Your Supplies
Before you start, you’ll need a few essential items. A headlight restoration kit is the easiest way to get everything you need in one place. These kits typically include a polishing compound, sanding pads of different grits, a sealant, and sometimes masking tape and gloves. You can find these kits at most auto parts stores or online. Having these items ready will ensure a smooth restoration process.
- Headlight Restoration Kit: Includes the polishing compound, sanding pads, and sealant.
- Masking Tape: To protect the paint around your headlights.
- Water: For rinsing and wet sanding.
- Clean Cloths: For wiping and polishing.
- Gloves: To protect your hands.
You can purchase a headlight restoration kit for anywhere from $15 to $50, making it an affordable fix. The grit of the sanding pads is a key factor; they vary from coarse to fine, each designed to remove scratches and imperfections. The polishing compound and sealant are equally important. The polishing compound removes the cloudiness, while the sealant helps protect the headlights from future damage. Make sure your kit contains all the necessary components before you begin.
Sanding and Polishing Techniques
Sanding is a crucial step in removing the cloudy layer. First, tape around the headlights to protect the paint. Then, start with the coarsest sanding pad included in your kit and wet-sand the headlights. This involves applying water to both the headlight and the pad to reduce friction and minimize scratches. Work in a back-and-forth motion, covering the entire surface of the headlight.
- Why wet sanding? Wet sanding reduces friction and scratches.
- How to sand? Back-and-forth motion, covering the whole surface.
- What about grit? Start with coarse, work to finer grits.
- What next? Rinse and wipe away residue.
As you sand, the headlight will look even cloudier at first. This is normal, as you are removing the damaged outer layer. After using the coarse pad, switch to finer grit pads, repeating the process. Each time, the cloudiness will start to fade. Once you’ve used the finest grit pad, rinse the headlights thoroughly and wipe them clean. At this stage, the headlights should look much smoother and less cloudy.
Here’s an example: Suppose you start with a 800-grit sanding pad, then move to 1500-grit, and finish with a 3000-grit. The lower the number, the coarser the grit. Each step removes scratches left by the previous one. This gradual approach is essential for achieving a clear finish. The goal is to remove all the imperfections that cause light scattering, resulting in clearer headlights.
Applying the Sealant and Protecting Your Work
After sanding and polishing, it’s time to apply the sealant. The sealant creates a protective layer that helps prevent future clouding. It acts as a barrier against UV rays, oxidation, and other environmental factors. Apply the sealant evenly across the headlight surface, following the instructions on your kit. Make sure to cover the entire headlight to provide optimal protection.
- Why apply sealant? It protects against future damage.
- How to apply? Evenly, covering the entire headlight.
- Following instructions: Read the kit directions carefully.
- What’s the goal? To provide long-lasting protection.
Once you’ve applied the sealant, let it dry and cure according to the kit’s instructions. This usually takes around 15-30 minutes, but it can vary. After curing, your headlights should be clear and protected. For optimal results, consider reapplying the sealant every few months or as needed. This will keep your headlights looking their best and extend the life of the restoration. Also, you can consider parking your car indoors when possible, and washing it with a mild soap to maintain the integrity of the headlight plastic.
Professional Headlight Restoration vs. DIY
When considering headlight restoration, you have two main choices: DIY or professional service. Both options have their benefits and drawbacks. Understanding the differences can help you make the best decision based on your needs, skills, and budget.
Comparing the Costs and Benefits
DIY headlight restoration is cost-effective, but it requires time and effort. A headlight restoration kit costs around $15 to $50. You’ll also need some basic tools, like masking tape and clean cloths, which you may already have. The main benefit is saving money. The process can take one to two hours per headlight. While DIY restoration is generally straightforward, you will need to follow instructions carefully. Poor execution can lead to uneven results or damage.
| Feature | DIY Restoration | Professional Restoration |
|---|---|---|
| Cost | Low (kit cost) | Higher (labor + materials) |
| Time | 1-2 hours per headlight | 1-2 hours per headlight |
| Effort | Requires manual work | Less effort required |
| Results | Variable, can be excellent | Typically higher quality |
Professional restoration services, on the other hand, provide higher-quality results and require less effort from you. Professionals use specialized equipment and techniques, like orbital polishers, to get the best results. The cost varies, usually ranging from $50 to $150 per headlight. However, this is offset by the convenience and the assurance that the job will be done correctly. Professional services typically offer a warranty on their work, providing additional peace of mind. The results often last longer, too, as professionals often use higher-quality sealants and techniques.
Choosing the Right Option
The best choice depends on your skills, time, and budget. If you’re comfortable with basic car maintenance and want to save money, DIY restoration is a good option. If you’re short on time or prefer a professional finish, you should choose a professional service. Also, consider the extent of the cloudiness. If the headlights are only slightly hazy, DIY might be enough. If they are severely cloudy or yellowed, professional restoration is often recommended.
- DIY: If you enjoy doing things yourself and want to save money.
- Professional: If you don’t have time or want professional results.
- Consider the cloudiness: Severe damage may require professional help.
Before making a decision, research and read reviews. Look for detailers with a good reputation and experience in headlight restoration. Check out online tutorials and reviews about various DIY kits to find the best option. Whether you DIY or hire a pro, the goal is clear, brighter headlights that improve visibility and make your car look its best.
Preventative Measures for Clear Headlights
Once you’ve restored your headlights, it’s wise to take steps to keep them clear. Preventing cloudiness is much easier than fixing it. Simple habits, regular maintenance, and proper care can extend the life of your headlights and keep them shining brightly for longer. These practices can save you time and money, and they contribute to a safer driving experience.
Regular Washing and Cleaning
Regular washing is the most basic thing you can do. Wash your car frequently, at least every two weeks, or more often if you live in a dusty or polluted area. When washing, pay extra attention to your headlights. Use a mild car wash soap and a soft sponge or microfiber cloth. Avoid harsh chemicals or abrasive cleaners, which can damage the plastic. Also, rinse your headlights thoroughly to remove any soap residue. This will prevent build-up, and you can reduce the amount of damage from dirt, grime, and environmental contaminants.
- Wash frequently: At least every two weeks.
- Use mild soap: Avoid harsh chemicals.
- Soft cloth: Use a soft sponge or microfiber cloth.
- Rinse well: Remove soap residue completely.
Consider washing your headlights separately from the rest of your car to give them the care they deserve. Use a separate bucket and sponge for your headlights, and gently wipe away any dirt and grime. This prevents cross-contamination. You can also use a dedicated headlight cleaner product, if you like. The main idea is to keep the surface of your headlights as clean as possible. Regular cleaning prevents build-up and protects the plastic from damage. This simple habit can make a big difference.
Protective Coatings and Parking Strategies
Using protective coatings and parking your car in a garage are additional steps. After you’ve restored your headlights, apply a sealant or UV protectant. These coatings act as a barrier against the sun’s rays and other environmental factors. Reapply the sealant every few months or as the manufacturer directs to maintain its protective properties. You can also consider parking your car in a garage whenever possible. This will greatly reduce its exposure to UV rays and harsh weather conditions.
- Apply sealant: Use after restoration for protection.
- Reapply regularly: Follow manufacturer’s instructions.
- Garage parking: Reduces UV exposure and weather damage.
If you don’t have a garage, you can use a car cover to shield your headlights from the sun. Also, avoid parking directly in the sun for long periods. Choosing shady spots or covered parking helps protect your headlights. These strategies can significantly prolong their lifespan. Combining these steps with regular cleaning will keep your headlights clear and extend the time before they need restoration again. It’s an investment of your time, but it’s one that pays off in the long run.
Avoiding Harmful Products and Practices
Be careful about the products you use when cleaning your headlights. Avoid using harsh chemicals, solvents, or abrasive cleaners. These products can damage the plastic and accelerate clouding. Also, be careful when using windshield washer fluid. Some fluids contain chemicals that can harm the headlight surface. Read the labels and choose products that are specifically made for car care and are safe for plastic. Make sure you use the right cleaning products to preserve the integrity of your headlights.
- Avoid harsh chemicals: They can damage the plastic.
- Check windshield washer fluid: Some fluids contain harmful chemicals.
- Choose safe products: Use car-specific cleaners.
Another thing to avoid is using abrasive tools, such as scouring pads or steel wool, when cleaning your headlights. These materials will scratch the surface of the plastic and make it more susceptible to clouding. Instead, use soft cloths, sponges, and microfiber towels. Also, avoid applying excessive pressure when cleaning, which can also scratch the plastic. A gentle approach and proper products are your best allies in keeping your headlights clear and in good condition. Taking these steps is very valuable.
Frequently Asked Questions
Question: How often should I restore my headlights?
Answer: It depends on the weather conditions, how often you park your car outside, and the quality of the protective measures you’ve taken. You may need to restore them every year or two, but proper care can extend that time.
Question: Can I use toothpaste to clean my headlights?
Answer: Some people try toothpaste, but it’s not the best method. Toothpaste can work as a mild abrasive, but it might not be effective for significant clouding. Specialized headlight restoration kits are much better.
Question: What’s the best way to prevent my headlights from clouding up?
Answer: Park in a garage, use a good headlight sealant, wash your car frequently, and avoid harsh chemicals. This approach will maximize their lifespan.
Question: How much does professional headlight restoration cost?
Answer: Professional restoration usually costs between $50 and $150 per headlight, depending on the severity of the damage and the detailer.
Question: Is it safe to drive with cloudy headlights?
Answer: Driving with cloudy headlights is not safe because visibility is greatly reduced, especially at night. Restoring your headlights improves your safety.
Final Thoughts
So, we’ve explored the various reasons why do headlights get cloudy. From the constant sun exposure to oxidation and chemical reactions, several factors can cause those once-clear covers to cloud up. We looked at how you can restore your headlights and maintain their clarity. By knowing the causes, understanding the steps in restoration, and taking preventative measures, you can keep your headlights shining brightly, greatly improving your driving safety and the look of your car. Keep your headlights clean and protected, and you’ll enjoy clearer vision and safer drives for years to come. Remember, a little effort goes a long way!