What Is Headlight Restoration A Simple Guide to Clear Visibility
Ever wondered what is headlight restoration? It’s a question that many car owners ask because hazy headlights are a common problem. The good news is, you don’t need to be a mechanic to fix it! This guide will break down the process step-by-step, making it easy to bring back that clear, bright look. Get ready to learn how to see better on the road with a few simple techniques. Let’s get started!
Headlight Restoration Explained
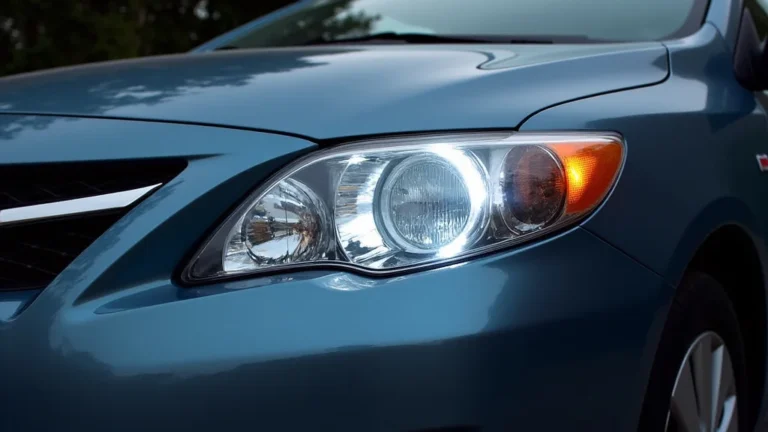
Headlight restoration is the process of cleaning and revitalizing cloudy or yellowed headlights. Over time, plastic headlight lenses become damaged by sunlight (UV rays), road debris, and general wear and tear. This damage reduces the amount of light that shines through, making it harder to see at night. Restoring your headlights improves your visibility and makes your car look better. It’s a cost-effective way to enhance both safety and aesthetics. Many people choose to attempt it themselves, and while it might sound challenging, it’s quite achievable with the right information.
Why Headlights Get Cloudy
Headlights aren’t made of glass like they used to be; they’re made of a strong, clear plastic, usually polycarbonate. This plastic is great at resisting impacts, but it’s not as good at dealing with the sun’s rays. UV radiation from the sun causes the plastic to break down over time. This breakdown leads to yellowing, clouding, and a reduction in clarity. Tiny scratches from road debris also add to the problem. These scratches scatter the light, making it seem even dimmer. This is especially true in areas with harsh weather or high traffic. The good news is, the damage is usually on the surface and can be corrected.
- UV Exposure: The sun’s ultraviolet (UV) rays are the primary culprit behind headlight clouding. These rays break down the plastic’s surface. This breakdown creates a yellow, hazy appearance over time, reducing light output.
- Oxidation: Oxygen in the air reacts with the plastic, a process known as oxidation. Oxidation leads to the formation of a yellowish layer on the headlight surface. This layer prevents light from passing through clearly.
- Road Debris: Tiny particles from the road, like sand and gravel, constantly hit your headlights as you drive. These particles create countless tiny scratches on the surface. These scratches scatter the light and reduce the clarity of the headlights.
To put it simply, think of it like leaving a plastic container in the sun for a long time. The plastic gets brittle and discolored. Headlights experience the same type of deterioration. This is why many headlights appear clear when new but gradually become hazy after years of exposure. Protecting your headlights with a UV-resistant coating can slow down this process.
Oxidation is a chemical reaction. It’s similar to what happens when metal rusts, but it’s much slower. It’s accelerated by heat and moisture. When you drive, your headlights heat up, especially if you have older halogen bulbs. This heat, combined with humidity, speeds up the oxidation process. Removing the oxidized layer is a critical part of headlight restoration.
The constant bombardment of road debris is like a mild form of sandpaper. Each tiny scratch reduces the amount of light that gets through. While a few scratches might not be noticeable, over time, these scratches accumulate. They contribute significantly to the cloudy appearance of your headlights. That is why it is often recommended to use headlight protection film.
Headlight Restoration Methods
There are several methods for restoring headlights, each with its own advantages and disadvantages. These range from simple DIY kits to professional services. The best method depends on the level of damage and your budget. Choosing the right method is important for achieving the best results. The goal is always to remove the damaged layer and polish the plastic to a clear finish. Understanding the different methods will help you choose the most effective way to restore your headlights.
- DIY Headlight Restoration Kits: These kits typically include sandpaper, polishing compounds, and sometimes a sealant. They offer a cost-effective way to restore headlights at home.
- Professional Headlight Restoration Services: Professionals use specialized equipment and techniques for more comprehensive restoration. These often produce superior and long-lasting results.
- Headlight Polishing Compounds: Polishing compounds are effective for removing light oxidation and minor scratches. They can be applied by hand or with a power tool.
These kits offer everything you need in one package. They often include sandpaper of various grits to remove scratches and oxidation. Polishing compounds are used to remove imperfections and bring back the shine. The sealant provides a layer of protection against future damage. The process usually takes a few hours. This makes DIY kits perfect for those who want to save money and enjoy a hands-on approach.
Professional services offer several benefits, including expertise and specialized tools. Professionals have experience in dealing with different levels of damage and plastic types. They use advanced polishing machines and high-quality products. They may also include UV protection coatings for enhanced durability. While they cost more than DIY kits, the results can be significantly better, particularly for severely damaged headlights.
Polishing compounds work by gently abrading the surface of the plastic. This removes the damaged layer, revealing a clear surface beneath. They’re often used in combination with sandpaper. You apply the compound to the headlight surface, then use a polishing pad to remove the imperfections. These compounds are a great choice for light to moderate damage and can improve headlight clarity quickly. Polishing compounds will often give you a quick improvement, but will not last long without proper sealing or coating.
The Step-by-Step Guide to Headlight Restoration
This section will guide you through the DIY headlight restoration process. It’s designed to be simple and straightforward, even for beginners. By following these steps, you can achieve professional-looking results without the high cost. Get ready to transform those cloudy headlights into clear, bright ones that improve your visibility and make your car look its best. Remember to work in a well-ventilated area, and take your time for the best outcomes. Let’s restore those headlights!
Gathering Your Supplies
Before you begin, gather all the necessary supplies. Having everything ready saves time and ensures a smooth process. You’ll need a few common items and some specific restoration products. These supplies are typically found in most auto parts stores or online. Make sure to choose high-quality products. Quality tools and materials will make the restoration process easier and help you achieve better results.
- Headlight Restoration Kit: A complete kit is recommended. These kits usually include sandpaper of different grits, polishing compound, and a sealant.
- Painter’s Tape: Use painter’s tape to protect the paint surrounding your headlights. This will prevent scratches.
- Spray Bottle with Water: You’ll use water during the sanding process to keep the sandpaper wet and prevent clogging.
- Microfiber Cloths: Use these to wipe the headlights clean and apply the polishing compound.
- Optional: Drill with Polishing Pad. Using a drill with a polishing pad can speed up the process.
These kits contain all the essential items for a basic restoration. They’re designed to work together, making the process easier. The sandpaper removes the damaged layers, the compound polishes the plastic, and the sealant protects it. Always follow the instructions provided in the kit.
Painter’s tape is designed to be gentle on paint, making it the perfect choice for this task. Tape off the area around your headlights. This protects your car’s paint from scratches during sanding and polishing. You’ll want to apply the tape carefully, ensuring that it covers the edges of the headlight. Make sure there are no gaps.
Wet sanding is an important part of the process. The water helps to reduce friction and prevents the sandpaper from clogging. It also helps to prevent scratches. Simply fill the spray bottle with clean water. You can also add a drop of dish soap to the water to help lubricate the sandpaper.
Microfiber cloths are soft and won’t scratch the plastic. They also absorb moisture and polish effectively. You’ll use these throughout the process, from cleaning the headlights to applying the compound. Having several cloths available ensures that you always have a clean one on hand.
While not strictly necessary, a drill and polishing pad can make the job much quicker and easier. This is especially true if you are restoring multiple vehicles. Make sure your drill has variable speeds so you can control the polishing process.
The Headlight Restoration Process
Now, let’s explore the practical steps of headlight restoration. This section breaks down the entire process into easy-to-follow actions. Following these steps carefully will lead to a successful restoration. Remember, patience is key. Each step plays a critical role in removing damage and bringing back clarity. It might seem like many steps, but it is manageable. Each part builds on the last, leading to a visible transformation of your headlights.
- Prepare the Area: Park your car in a shaded area and wash the headlights with soap and water. Dry them thoroughly. Use painter’s tape to protect the surrounding paint from scratches.
- Sand the Headlights: Start with the lowest grit sandpaper (usually around 800 grit) from your kit. Wet the headlight with water. Lightly sand the headlight in a back-and-forth motion. Keep the surface wet to prevent scratches and clogging. Gradually work your way up to finer grits (1000, 2000, and sometimes even 3000).
- Polish the Headlights: Apply polishing compound to a clean microfiber cloth or a polishing pad on your drill. Polish the headlight in a circular motion. This removes the fine scratches left by the sandpaper and restores clarity.
- Apply Sealant or UV Protectant: After polishing, wipe the headlights clean and apply a UV protectant or sealant from your kit. This helps protect your headlights from future damage and prolongs their clarity.
This initial step sets the stage for a successful restoration. Washing removes dirt and debris that could scratch the plastic. Taping the surrounding paint prevents accidental damage during sanding and polishing. Take your time with this step, since it is an essential part of the process. This step prevents any issues down the road.
Sanding is the crucial step for removing the damaged surface. The lowest grit sandpaper removes the initial layer of oxidation and scratches. Wet sanding is important to prevent scratches and ensure a smooth finish. As you move to higher grits, the scratches become finer. You will notice the headlights become less cloudy and more transparent as you work through the grits.
Polishing smooths out the surface and brings back the shine. The polishing compound removes minor imperfections and reveals a clear surface. If using a drill, start at a low speed and gradually increase it. Work in small sections, applying even pressure to avoid swirls. This step is about refining the surface. This is where you see the dramatic improvement in clarity.
The sealant creates a protective layer that helps prevent future damage from UV rays and road debris. It’s like applying sunscreen to your headlights. Applying a UV protectant is essential for maintaining the clarity you’ve restored. Follow the instructions on the sealant product to ensure proper application. This step will help keep your headlights looking better for longer.
Troubleshooting Common Issues
Sometimes things don’t go perfectly the first time. This section addresses some common problems that might come up during headlight restoration. It will provide solutions so you can avoid frustration. Understanding these potential issues and their remedies will help you complete the restoration successfully. Being prepared with knowledge and solutions makes a huge difference in the results.
- Sanding Marks: If sanding marks persist after polishing, you may have skipped a grit of sandpaper or not sanded long enough. Go back and re-sand with the appropriate grit, ensuring you are consistent across the entire surface.
- Cloudiness After Polishing: This is often due to insufficient polishing or using the wrong compound. Try using a finer polishing compound or polishing for a longer duration. A power tool can help.
- Uneven Results: This can happen if you don’t sand or polish evenly. Take your time and make sure you’re working consistently across the whole headlight.
Sanding marks can be a sign that you didn’t spend enough time on each grit. When you see sanding marks after polishing, it means there are still deeper scratches. Go back and re-sand with the correct grit. Make sure you sand the entire headlight evenly. It’s also important to make sure you’re using enough water during the process.
Cloudiness after polishing means that the surface still has some imperfections. Try using a more aggressive polishing compound or polishing for a longer duration. Ensure you’re using a clean polishing pad. Using a power tool at the correct speed will often help remove the cloudiness. Remember to apply the compound evenly.
Uneven results come from uneven sanding or polishing. Work on a section at a time. This can cause some areas to appear clearer than others. Ensure that you are using consistent pressure and motion across the entire surface. If you see an area is not clear enough, go back and re-sand that area. Take it slowly and ensure that you treat the entire surface equally.
Alternative to Restoration
Sometimes, restoration might not be the best solution. Understanding the alternatives can help you choose the right approach for your needs. There might be some factors that might make a replacement the better choice. It’s important to consider all the options and make an informed decision based on your specific situation.
- Headlight
If the damage is too extensive, or if the internal components are damaged, replacement is a more reliable approach. New headlights will give you the best light output. You can find replacement headlights at auto parts stores or online. Consider the cost of both restoration and replacement to make the best financial choice.
- Headlight Protection Film: After restoration or replacement, you can apply a headlight protection film. This protects the headlights from UV rays and road debris, helping to prevent future damage and extending their lifespan.
- Professional Headlight
If you prefer not to do it yourself, a professional replacement is an option. They will make sure the headlights are installed securely and correctly. They will also properly aim the headlights. This ensures optimum light output and safety. While more costly, you’ll be assured that it is done correctly.
Headlight protection film provides an extra layer of protection. This film adds a protective layer that is resistant to scratches and UV damage. This will help to keep your headlights looking clearer for longer. This is a worthwhile investment. This film is a relatively low cost solution to reduce future clouding.
Frequently Asked Questions
Question: How long does headlight restoration last?
Answer: The lifespan of a headlight restoration varies, but it typically lasts from a few months to a couple of years. This depends on factors like weather conditions, how often you drive, and the quality of the sealant used.
Question: Is headlight restoration worth it?
Answer: Yes, headlight restoration is often worth it because it improves visibility, enhances safety, and makes your car look better. It’s much cheaper than replacing your headlights.
Question: What’s the best headlight restoration kit?
Answer: The “best” kit depends on your needs. Look for kits that include sandpaper of various grits, a polishing compound, and a UV sealant. Research user reviews to check effectiveness.
Question: Can I use a regular car wax on my headlights?
Answer: No, regular car wax is not designed for plastic headlights. It will not provide adequate protection. You need a UV protectant or sealant designed specifically for headlights.
Question: Are there any risks involved in headlight restoration?
Answer: Yes, there are a few risks. You could damage the paint if you are not careful with the tape. Over-sanding can also damage the headlight. Always follow the instructions in your kit carefully.
Final Thoughts
Now you have explored what is headlight restoration and how to do it yourself, you are prepared to make your headlights shine again. You’ve learned about the causes of cloudiness, the steps involved in DIY restoration, and common issues to watch out for. You also know that headlight restoration can be a rewarding project that saves you money. With the right tools and a little bit of effort, you can significantly improve your car’s appearance and, more importantly, your visibility while driving. Don’t let those cloudy headlights dim your view any longer – grab a kit, follow the steps, and enjoy the difference!