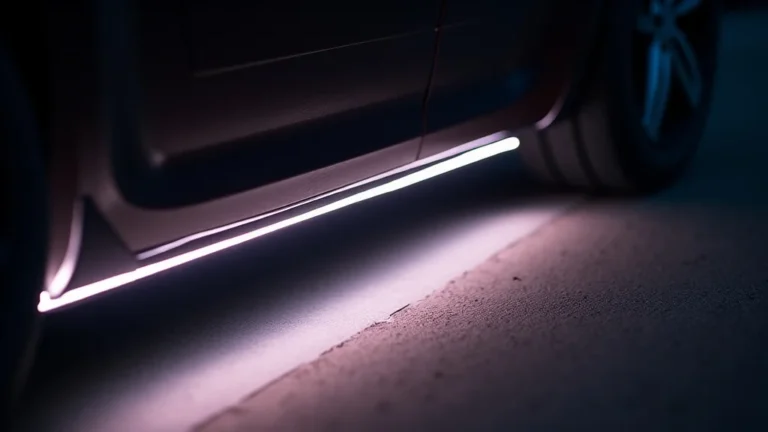
Troubleshooting Your Under Glow Light Strip Power Supply
So, you’re having an under glow light strip power supply problem? Don’t worry, it’s a common bump in the road for anyone setting up these cool lights. Figuring out why they’re not working, flickering, or dimming can be tricky if you’re just starting. Luckily, we’re here to help! We’ll break down the most common issues and give you a simple, step-by-step guide to get those lights glowing. Ready to get started?
Common Under Glow Light Strip Issues
The first step in fixing your light strips is pinpointing the source of the trouble. Often, it’s not the lights themselves but something connected to the power supply. Recognizing common issues like flickering, dimming, or complete failure is key. These problems can stem from several causes, including inadequate power delivery, loose connections, or problems with the power adapter. Knowing the symptoms can assist you in finding the best solutions. You will explore these issues to get the lights working correctly.
Power Supply Basics
The power supply is the heart of your under glow setup. It takes the electricity from your wall outlet and converts it to a voltage your lights can use. Most light strips use either 12V or 24V DC power, while standard outlets use 120V AC. If your power supply isn’t providing the correct voltage or enough amperage, the lights won’t work properly. Make sure you use the right one. It’s like using the wrong charger for your phone – it just won’t charge.
- Voltage Requirements. Light strips require a certain voltage to function correctly. This is usually printed somewhere on the strip itself or in its packaging. Using a power supply that delivers the incorrect voltage can lead to issues. A power supply that provides less voltage might cause the lights to be dim, and one that provides too much could damage them.
- Amperage (Current) Needs. Amperage tells you how much electrical current the power supply can provide. Light strips require a specific amount of current. If your power supply’s amperage is too low, the lights might not illuminate to their full brightness, or they may flicker. This is particularly important for longer light strips because they need more power.
- Power Supply Type. There are different types of power supplies, including AC-to-DC adapters (like phone chargers) and more powerful, sometimes larger, units designed for higher-wattage applications. The type you need depends on the length and wattage of your light strip. Make sure the type is suitable for outdoor use if you have an outdoor application.
- Power Supply Ratings. The power supply has ratings (like voltage and amperage) that you must check. Always select a power supply that meets or exceeds the requirements of your light strips. If your lights use 12V and need 2 amps, then your power supply should be at least 12V and 2 amps. It is fine to have more amperage, but the voltage needs to be the same.
Common Symptoms of Power Supply Problems
Identifying the symptoms can help diagnose the underlying issue. Several signs indicate a power supply problem. They might seem simple, but can still be frustrating. Knowing what to look for can help you fix the issue faster. Think of it like a detective work. You look for clues to solve the mystery.
- Flickering Lights. Flickering is a very common issue with under glow light strips, often due to an unstable power supply. This can be caused by a supply that’s overloaded or is simply not providing consistent power. You may also have a poor connection in the circuit.
- Dim Lights. If your lights are not as bright as they should be, it may indicate that the power supply isn’t delivering enough power. This can be because the supply is underpowered for the light strip’s length or wattage. Also, make sure that the connection is properly seated.
- Lights Not Turning On. Complete failure of the lights to turn on is another symptom. If the lights do not come on, then the power supply may have failed, or the connection to the power supply is interrupted. First, check that the power supply is plugged in and the switch (if it has one) is turned on.
- Uneven Brightness. In longer light strip setups, uneven brightness along the length of the strip can indicate a power issue. This often happens because of voltage drop, where the voltage decreases over the distance, particularly with low-voltage systems.
Diagnosing Your Under Glow Light Strip Power Issues
Once you see a problem, the next stage is diagnosis. This involves checking components and tracing the electrical path. This can be easy to do, and you don’t need special skills or equipment. The basic steps will help you determine the cause of the problem and how to fix it.
Visual Inspection of Connections
Start with a simple visual inspection of all connections. A loose connection is a very common reason why light strips fail to work correctly. Sometimes, all that’s needed is to re-plug something. It’s like checking to see if your phone charger is securely plugged into the wall and the phone. Make sure everything is in place, and that there are no visible signs of damage, like corrosion or breaks.
- Power Supply Connection. Make sure the power supply is securely plugged into the wall outlet. Check for any loose connections or damage. If you see damage, stop and replace the power supply. Make sure the plug fits snugly in the wall outlet.
- Light Strip Connectors. Inspect the connectors between the light strips and the power supply. These connectors must be firmly in place. Light strips are often connected using specialized connectors, which may come loose over time due to vibrations or being bumped.
- Wire Integrity. Check the wires for any visible cuts, kinks, or damage. Damaged wires can create electrical hazards or interrupt the flow of power to the lights. Look closely where the wires connect to the power supply and the light strips.
- Inspect the Light Strip. Examine the light strip itself for any physical damage, such as breaks, cracks, or discoloration. Although uncommon, a damaged light strip can cause problems in the overall system.
Testing the Power Supply
The power supply is the most important part of your system, so it is important to test it to see if it’s working correctly. You can test the voltage and amperage that it provides, and make sure that it’s delivering the right amount of power to your light strips. There are a few ways to do this, ranging from simple to more advanced. Remember safety first. If you are not comfortable working with electricity, then seek assistance from a qualified professional.
- Using a Multimeter. A multimeter is a handy tool to measure voltage and amperage. Set it to the correct DC voltage range (usually 20V for 12V or 24V light strips). Connect the probes to the output terminals of the power supply. The reading should match the voltage specified on your light strip. Measure the amperage, too.
- Load Testing. If you suspect the power supply is failing under load (when the lights are turned on), you can load test it. Connect the light strip to the power supply and use the multimeter to measure the voltage again. If the voltage drops significantly when the lights are on, the power supply may be failing.
- Swap the Power Supply. If you can, try swapping the power supply with a known working one (make sure it’s the same voltage and amperage). If the lights now work properly, then the original power supply was the problem. This is a quick way to isolate the issue.
- Inspect the Power Outlet. Although less common, the wall outlet can also have issues. Plug another device into the outlet to see if it works. This simple test confirms whether the outlet is supplying power.
Checking the Light Strip and Connections
After the power supply, the light strip and its connections are next. Checking the light strip involves inspecting the physical condition of the strip itself, as well as the connections that it has. It also includes looking at the connectors and ensuring that they are securely connected to the power supply and other components in the system. Make sure that all is good with the system, so the lights can function. Here’s a brief review of the key steps.
- Connection Points. Check that all of the connectors and solder joints are secure. Loose connections are one of the most common causes of light strip issues. Ensure the connections are snug, without any movement.
- Inspect the Strip. Examine the light strip for any visible damage. Look for cuts, cracks, or burned spots along the strip. Such damage could mean that a section of the strip might not work or cause it to short out.
- Voltage Drop Test. With longer strips, voltage drop is a very common problem. This means that the voltage decreases along the length of the strip, leading to dimming. Measure the voltage at the start and end of the light strip when it is on. A significant drop indicates a voltage drop problem, especially on longer strips.
- Connection Problems. Test the connections between the power supply and the light strip to make sure that they are securely seated and making solid electrical contact. Disconnect and reconnect the connection to make sure that they are secure.
Troubleshooting Solutions for Power Supply Problems
Once you’ve identified the problem, it’s time to find a solution. The fix depends on the issue. This section will guide you through common problems. The solutions are often simple. Always turn off and unplug the light strip before doing any repairs. Safety is the first thing that you must think about.
Fixing Loose Connections
Loose connections are like a kink in a garden hose. They can cut off the flow. They can create a lot of problems. Often, the solution is simple – make the connection better. It’s a good starting point for resolving many light strip issues. Sometimes, this is all you need to do to fix the problem. Here’s what you should do.
- Reseating Connectors. If your lights flicker or don’t turn on, start by reseating all the connectors. Unplug and then re-plug the connectors between the power supply and the light strip. Make sure that they click securely in place.
- Checking Solder Joints. If you’ve soldered connections, check them for any breaks or cold solder joints. A cold solder joint looks dull and may not conduct electricity well. Resolder any suspect joints to ensure a solid connection.
- Using Waterproof Connectors. For outdoor use, make sure you use waterproof connectors. These connectors are sealed to prevent water and moisture from causing corrosion or electrical shorts. Look for connectors with IP ratings.
- Adding Connectors. If you’re using cut strips or need to join multiple strips, consider using additional connectors to avoid problems. Make sure the connectors are the correct type.
Replacing or Upgrading the Power Supply
If you have a bad power supply, then replacing it is often your best bet. Always get the right one for your setup. It’s like replacing a flat tire on your car. You need the right size. There are two general options: replacement or upgrade. This is what you should consider.
- Choosing the Correct Replacement. When you get a new power supply, make sure it matches the voltage and exceeds the amperage requirements of your light strip. For example, if your light strip needs 12V and 2A, then the power supply must provide at least 12V and 2A.
- Selecting a More Powerful Power Supply. If you are using a light strip that’s long, or planning to add more strips, consider a more powerful power supply. This helps prevent voltage drops and ensures the lights are consistently bright. Go for one with a higher amperage than needed.
- Choosing a More Efficient Power Supply. A more efficient power supply can save electricity and reduce heat generation. Look for power supplies with good energy efficiency ratings. This is especially good for long strips that use a lot of electricity.
- Installing the New Power Supply. Disconnect the old power supply and connect the new one, making sure the connections are secure. Once it’s in place, test the lights to see if they’re working correctly.
Addressing Voltage Drop Issues
Voltage drop can be an issue, especially with long light strips. Voltage drop makes the light at the end of the strip less bright than the light at the start. Fixing voltage drop often includes making changes to the setup to ensure the voltage stays consistent. Think of it like a water hose. When the hose is longer, the water pressure is less at the end. Here are some of the ways that you can handle voltage drop.
- Using Thicker Wires. Using thicker wires helps to reduce the voltage drop by offering less resistance to the flow of electricity. This is especially useful for runs longer than 15-20 feet.
- Boosting Power. Sometimes, if the voltage drop is because of low power, you can use a power supply with a higher amperage rating. A more powerful supply is more helpful on longer strips.
- Injecting Power at Multiple Points. For very long runs, inject power at multiple points along the strip. This involves using multiple power supplies or connecting the power supply at both ends of the strip.
- Lowering Resistance. Use high-quality connections, as they will have lower resistance. Poor connections can make voltage drop problems worse. Make sure your connections are tight and secure.
Practical Examples and Scenarios
Sometimes, seeing how solutions have worked for others can be very helpful. These are examples where people have solved problems. These examples will help you visualize what you must do, and how you can apply the solutions to your setup. Here are some real-life situations.
- Scenario 1: Flickering lights. A homeowner was experiencing flickering in their under glow lights. After visual inspection, they found a loose connection at the power supply connector. They reconnected it. The problem was fixed. The solution was simple.
- Scenario 2: Dim lighting. A user noticed that the lights at the end of their under glow strip were dim. They measured the voltage, which was less at the end of the strip. They then used thicker gauge wires. This reduced the voltage drop. The lights were equally bright.
- Scenario 3: Lights stopped working. A car enthusiast installed under glow lights. The lights worked fine for a few weeks, but then stopped working completely. After checking, they found that the power supply had blown. They
Frequently Asked Questions
Question: Why are my light strips flickering?
Answer: Flickering is typically caused by an unstable power supply, loose connections, or the power supply being overloaded. Check the connections and power supply first.
Question: How do I know if my power supply is the right one?
Answer: The power supply should match the voltage of your light strips and have an amperage that meets or exceeds the lights’ requirements. Check the labels on the light strips.
Question: Can I use a longer light strip than what my power supply is rated for?
Answer: It’s generally not recommended to exceed the power supply’s amperage rating. Doing so can cause the power supply to overheat or fail. You might experience dimming or uneven brightness.
Question: How do I fix a voltage drop in my light strips?
Answer: Use thicker gauge wires, inject power at multiple points along the strip (for long runs), or upgrade to a more powerful power supply.
Question: What’s the difference between voltage and amperage?
Answer: Voltage is the electrical pressure (like water pressure), and amperage is the electrical current (the amount of water flowing). Your lights need the right voltage and sufficient amperage to operate correctly.
Final Thoughts
Dealing with an under glow light strip power supply problem doesn’t have to be a headache. Often, the solution is as simple as tightening a connection or swapping out a power supply. By checking the connections, testing the power supply, and verifying that your light strip is getting the right amount of power, you can easily troubleshoot and fix the issue. Remember to always prioritize safety when working with electricity, and don’t hesitate to seek help if you’re not comfortable. With the right approach and the steps outlined above, you should be able to get those lights glowing brightly in no time. Explore your options, take your time, and enjoy the transformation of your space!