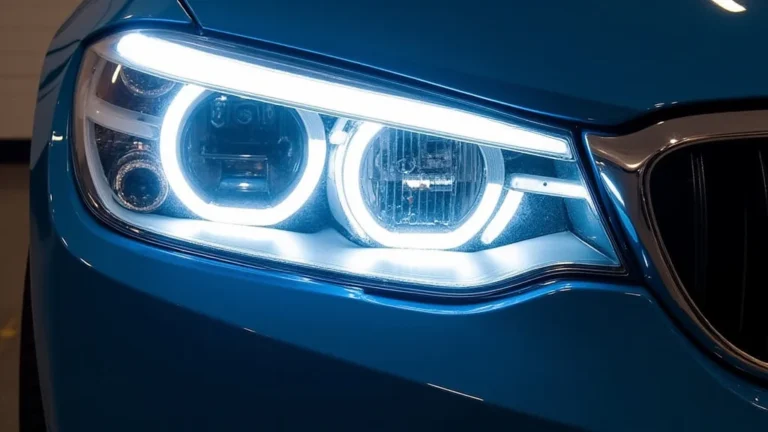
Troubleshooting Under Glow Light Strip Malfunctions
It’s frustrating when your cool underglow light strip only lights up on one side. This is a common problem, especially for people new to car modifications. Don’t worry, though; it’s usually something simple you can fix. We’ll explore why your under glow light strip only one side working and guide you through easy steps to get both sides shining brightly. First, we need to explore common reasons why this might occur, and then we’ll provide detailed guidance on fixing them. Let’s get started!
Possible Causes for Under Glow Strip Issues
When an under glow light strip only one side working, several factors could be at play. Identifying the root cause is the first step in the troubleshooting process. Problems can stem from electrical connections, the light strip’s internal components, or even the power supply. A proper diagnosis can save time and prevent further damage to the system. You might find a loose wire or a faulty connection causing the problem. There could also be damage within the light strip itself. The power supply might be insufficient or experiencing fluctuations, affecting the performance of the LEDs. By checking these areas, you can pinpoint the exact cause.
Electrical Connection Problems
One of the most frequent causes of an under glow light strip malfunction is issues with electrical connections. These connections are vulnerable to environmental factors like moisture and vibration, which can lead to corrosion or loosening over time. Inspecting the wiring, connectors, and power source is a basic but essential step. A broken wire or a faulty connection interrupts the flow of electricity, and the light strip may only partially function. Proper wiring ensures that each LED gets the correct current, lighting up the entire strip as it should. It is also important to consider the type of connector used. Some connectors are more resistant to corrosion and vibration than others.
- Loose Connections: Check all the wire connections, including where the strip connects to the power source and any intermediate connectors. Use a multimeter to test for voltage to identify any breaks.
- Corroded Wires and Connectors: Examine the wires and connectors for corrosion, especially if the light strip is exposed to moisture. Clean any corroded connections with a wire brush or contact cleaner.
- Damaged Wires: Inspect the wires for cuts, abrasions, or other physical damage. Replace any damaged wires to prevent shorts or other electrical problems.
Loose connections can happen from vibration or improper installation. If a wire isn’t properly secured, it can lose contact, leading to the affected side going dark. Tightening these connections ensures a consistent electrical flow. A multimeter will help you check for voltage drops or broken wires.
Corrosion can build up on wires and connectors, reducing or blocking the electrical flow. Cleaning the connections removes the buildup and restores the contact needed for a full light display. This can be caused by exposure to rain or humidity.
Damaged wires can create electrical shorts or interruptions in the circuit. If a wire is worn down or cut, it can be dangerous. Replacing damaged wires is important for the safety and the function of the light strip.
LED and Circuit Board Damage
LEDs and their associated circuit boards are delicate components, and they can be sensitive to voltage spikes or physical impact. Damage to these components is likely the reason why your under glow light strip only one side working. Check the LEDs for any visible signs of damage, such as dark spots or burnt areas. You should also closely examine the circuit board. A defective circuit board disrupts the power flow to the LEDs, causing some sections of the light strip to fail. It’s also important to note the expected lifespan of your LED strips, as components do wear out over time.
- LED Failure: Individual LEDs can burn out or become less bright over time. If a section of LEDs isn’t working, check for any visible damage or dark spots. Replace the damaged LEDs or the entire strip if necessary.
- Circuit Board Damage: Examine the circuit board for any cracks, burns, or other visible damage. Inspect the solder joints for any signs of corrosion or looseness. If there’s any visible damage, you might need to replace the strip.
- Overheating: Excessive heat can damage the LEDs and circuit board. Ensure the light strip has proper ventilation and is not installed in an area that traps heat.
LEDs have a limited life span, and they can fail due to overheating or power surges. When an LED fails, it usually goes dark or changes color. Replacing the faulty LED or the entire light strip ensures consistent and uniform lighting.
The circuit board controls the power flow and ensures LEDs receive the right amount of electricity. Problems on the circuit board, such as cracked traces or damaged components, prevent the light strip from functioning correctly. A close visual inspection can reveal these issues.
LEDs generate heat, and if this heat isn’t managed well, it can lead to damage. High temperatures can shorten the lifespan of the LEDs and potentially cause the circuit board to fail. Ensure adequate ventilation to prevent overheating.
Power Supply and Voltage Issues
The power supply is a key component, and any issues with it can directly affect your under glow light strip’s performance. The power supply needs to provide the correct voltage and current to operate the LEDs correctly. Insufficient power or voltage fluctuations can cause one side of the strip to fail or flicker. You might also want to check the power source itself. This includes the car’s battery and any in-line fuses. Checking these components can help confirm that the light strip receives the needed power, helping to fix a situation when your under glow light strip only one side working.
- Insufficient Voltage: Make sure the power supply provides the correct voltage for the light strip. Use a multimeter to test the voltage at the strip’s power input and compare it to the light strip’s specifications.
- Current Overload: If the light strip draws too much current, it can overload the power supply or damage the LEDs. Check the power supply’s current rating and make sure it’s sufficient for the light strip.
- Flickering or Dimming: Flickering or dimming lights can signal an unstable power supply or a failing component. Inspect the power supply for any signs of damage or wear.
LED strips are designed to operate at a specific voltage, usually 12V DC for cars. If the voltage is too low, the strip won’t light up fully or might only work on one side. Ensuring the power source provides the proper voltage is crucial for the light strip to function.
Too much current can cause the LEDs to burn out or the power supply to fail. This is especially relevant if you’ve connected additional light strips. Checking the current draw and the power supply’s capacity prevents this issue and keeps the LEDs functioning properly.
Inconsistent power often causes flickering or dimming. This is a clear indicator of a power supply issue. Check for loose connections or other issues that affect the power delivery. Replacing the power supply may be needed.
Step-by-Step Troubleshooting Guide
Troubleshooting under glow light strips requires a methodical approach. First, start with a visual inspection to assess the situation. Next, use a multimeter to check the electrical components. This method is the best way to resolve the problem if your under glow light strip only one side working. Safety is also important, so you need to disconnect the power before starting any electrical work. Following these steps helps find and fix the issue. Keep in mind that patience and a careful approach are important during this process.
Initial Visual Inspection
A careful visual inspection can often reveal the problem. Look for signs of physical damage or loose connections. This step is about examining the light strip and its components for anything that looks out of place. It’s a good first step, as it helps identify potential problems like damaged wires or corroded connectors. A simple visual inspection can save time and prevent more complex troubleshooting steps.
- Check the Light Strip: Examine the light strip itself for any visible damage, such as cuts, cracks, or burned spots. Also, inspect the LEDs to see if any are dark or discolored.
- Inspect Wiring and Connectors: Look at all the wiring and connectors that go to the light strip. Are the wires properly connected? Are there any signs of corrosion or looseness?
- Check the Power Source: Look at the power source, typically the car battery. Are the connections clean and secure? Is there any sign of damage?
A close look at the light strip can reveal immediate issues like broken wires or failed LEDs. Any visible damage on the strip’s surface points directly to a potential problem. This can help you focus on specific areas during further tests.
Loose or corroded connections can cause power interruptions. A proper connection ensures that electricity flows without problems. Examine the connectors closely for any signs of damage or wear, as this can affect the electrical performance.
A bad connection at the power source can affect the entire system. Look at the connections to the car battery. Ensure they are secure and free from corrosion. A solid connection ensures that the light strip gets a consistent power supply.
Using a Multimeter for Diagnostics
A multimeter is a handy tool to help diagnose electrical problems. It measures voltage, current, and resistance, helping identify issues with your under glow light strip only one side working. Knowing how to use a multimeter is essential when working with electrical systems. It provides exact measurements to see the electrical function of the components. Also, make sure you know your light strip’s voltage needs. If the voltage is too low, the strip won’t light up correctly.
- Voltage Testing: Set your multimeter to measure DC voltage. Touch the probes to the positive and negative terminals of the light strip’s power input.
- Continuity Testing: Use the continuity test to check wires and connections. Place the multimeter probes on either end of a wire or connection. If the multimeter beeps, the connection is good.
- Resistance Testing: Measure the resistance of the light strip’s components. Higher resistance can indicate a problem or damage. Compare these measurements with the specifications of the light strip.
Checking the voltage gives you a direct reading of the power reaching the strip. The multimeter tells you if the correct voltage is available. If the voltage is low, there might be a problem with the power supply or the wiring.
The continuity test helps find broken wires or loose connections. A beep means the electrical path is complete. If the multimeter doesn’t beep, there is a break in the circuit, showing where the problem lies.
Resistance testing helps identify components that might be damaged. By comparing your readings to the expected values, you can identify faulty components. This step can help locate damaged or failing parts.
Repairing or Replacing Components
After you have identified the problem, the next step is to fix it. This could involve repairing a connection, replacing a wire, or swapping out the light strip. The specific actions will depend on the problem you found. If the under glow light strip only one side working, you might just need to reconnect some wires. More complex problems might need you to replace a whole component. Always disconnect the power before doing any repairs.
- Repairing Connections: If you find a loose connection, carefully reconnect it. If there is corrosion, clean the connections with a wire brush or contact cleaner before reconnecting them.
- Replacing Damaged Wires: If you find damaged wires, cut out the damaged section and
Replacing damaged wires prevents shorts and ensures safe operation. Using the correct wire gauge is important to prevent electrical problems. Properly connecting the wires restores electrical flow to the LEDs.
- Replacing the Light Strip: If individual LEDs are burnt out, or the circuit board is damaged beyond repair, you will need to replace the entire strip. Follow the manufacturer’s instructions for the replacement.
Simple fixes can often solve the problem. Ensuring solid, clean connections restores power. Cleaning off the corrosion removes anything that stops the electrical flow. Careful handling is important while working with wires and connections.
In some cases, the best choice is to swap out the entire light strip. Ensure the new strip matches the old one’s specifications. Following the instructions ensures a proper and correct installation.
Common Mistakes to Avoid
When working with electrical systems, specific mistakes can lead to further problems. Avoiding these mistakes increases the likelihood of a successful repair and maintains the safety of the vehicle. Incorrect wiring, inadequate power supply, and neglecting safety precautions can worsen the problem when you’re trying to fix your under glow light strip only one side working. Also, be careful to use the right components. Not following basic safety guidelines can lead to electric shock or damage to your vehicle’s electrical system. So, it’s very important to avoid common errors.
Incorrect Wiring and Connections
Incorrect wiring and faulty connections are the most common causes of electrical problems. These issues can result in short circuits, damage to the components, or the system not working at all. You need to make certain that the wires are connected correctly and that all connectors are secure. Improperly connected wires are dangerous and can cause electrical problems. Improper connections can lead to more serious issues, or damage to your vehicle’s system. Therefore, proper wiring is essential for the electrical system’s function and your safety.
- Reversing Polarity: Make sure you connect the positive (+) and negative (-) wires correctly. Reversing polarity can damage the LEDs and other components.
- Loose Connections: Ensure all wire connections are secure. Loose connections can lead to intermittent power issues and potential electrical hazards.
- Using Incorrect Wire Gauge: Using wires that are too thin for the current load can cause overheating and potential fires. Always use the right wire gauge for the current your light strip needs.
Reversing the polarity means swapping the positive and negative connections. This simple mistake can cause immediate damage to the LEDs and the control circuit. Check and double-check your connections.
Loose connections can cause a break in the circuit, which leads to your under glow lights not working correctly. Securely fastening all wires prevents interruptions and ensures consistent power. Vibration can cause connections to loosen over time.
If the wires are not able to handle the current, the wires can overheat, which can cause damage and potential fire risks. The correct wire gauge ensures wires can safely carry the required electrical current. Always follow the guidelines for the wire gauge.
Insufficient Power Supply
The power supply provides the needed energy for the light strip to function. If the power supply is not adequate, the light strip might function poorly or fail to work at all. It is important to ensure that the power supply meets the needs of the system. This can be caused by using a power source that isn’t able to deliver the required voltage. Also, using a power supply that cannot handle the current draw of the LEDs can cause similar issues. To fix your under glow light strip only one side working, verify that your power supply meets all the requirements.
- Using a Power Supply with the Wrong Voltage: Verify that the power supply provides the same voltage your light strip needs, usually 12V DC for cars. A voltage difference can lead to damage or failure.
- Overloading the Power Supply: Don’t put too much load on your power supply. Overloading can damage the power supply or cause it to shut down.
- Ignoring the Current Requirements: Make sure the power supply can provide the current the light strip needs. A supply that can’t handle the current draw can lead to problems.
Using an incorrect voltage can cause damage to the LEDs and the control circuitry. Always check the light strip specifications and match the power supply’s voltage. This keeps the electrical system stable and prevents problems.
Overloading your power supply can cause problems like overheating or premature failure. Be sure your power supply can handle all devices. Verify that it has sufficient capacity for all components you are running.
The light strip needs a specific amount of current to operate effectively. If the supply cannot deliver enough current, your light strip may be dim or only partially functional. Always make sure the power supply provides sufficient current.
Safety Precautions and Best Practices
Taking precautions while working with electrical systems is essential. This protects you and your vehicle from harm. You need to follow these best practices for a successful and safe installation. You might experience the same problem, or even get shocked, if you don’t take the right safety measures. Before you start working on your under glow light strip only one side working, keep these rules in mind.
- Disconnecting the Power: Always disconnect the power before starting any electrical work. This can stop accidental shocks and prevent short circuits.
- Using the Right Tools: Use insulated tools to reduce the risk of shocks. Ensure you have the right tools, like wire strippers and crimpers, for your tasks.
- Protecting Against Moisture: If the light strip is used outside, protect it and the connections from moisture. Make sure that all connections are well-sealed.
Disconnecting the power is the first safety step. It keeps you safe from electric shock and prevents electrical problems. Before working with electrical components, cut off the power supply, like the car battery.
Using the right tools reduces the risk of electrical accidents. Make sure you use insulated tools to prevent any electric shock. Having the right tools also makes the task easier and ensures the project’s quality.
Water can cause short circuits and corrosion. Proper sealing protects the electrical components from damage. Always take precautions against weather conditions, like using waterproof connectors and ensuring all connections are well-protected.
Frequently Asked Questions
Question: What is the most common reason for an under glow light strip to fail on one side?
Answer: Loose or corroded electrical connections are the most common cause.
Question: What tools do I need to troubleshoot an under glow light strip?
Answer: You will need a multimeter, wire strippers, crimpers, and a wire brush or contact cleaner.
Question: What do I do if I find a damaged wire?
Answer: Cut out the damaged section and
Question: Can I use any power supply for my light strip?
Answer: No, the power supply must provide the correct voltage and current for your light strip.
Question: What should I do before doing any electrical work?
Answer: Always disconnect the power source before starting any electrical work.
Final Thoughts
When an under glow light strip only one side working, don’t immediately assume the worst. Many times, the issue is something simple, such as a loose connection or a damaged wire. By carefully checking the electrical connections, power source, and LED strip, you can usually identify and fix the problem. By following the troubleshooting guide, you can confidently address and solve the issue. You now have the knowledge to fix the issue and get your lights shining like new again. So, get out there and start troubleshooting, knowing you have the skills to solve the problem.