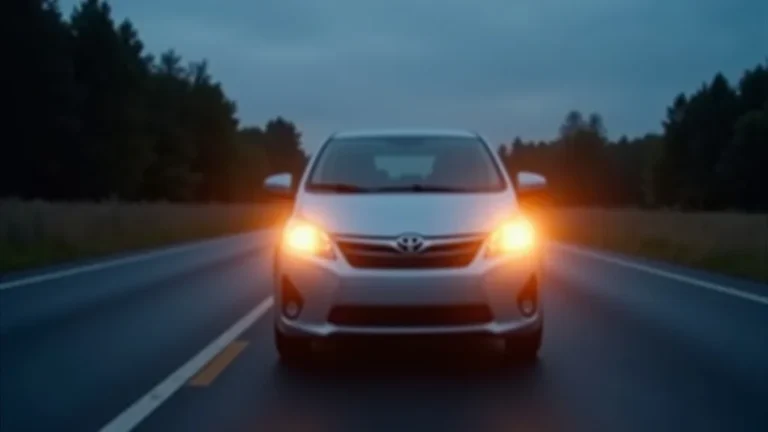
Under Glow Light Strip Maintenance: A Straightforward Guide
If you’re new to the world of underglow lights, you might quickly face an under glow light strip maintenance problem. This is common because things like weather, wiring, and even simple vibration can cause issues. Don’t worry! This guide will break down everything you need to know, making it easy to keep your lights shining bright. We’ll go step-by-step to address common issues and make sure your underglow setup stays in top shape. Ready to get started?
Common Problems and Solutions
Maintaining your underglow light strips might seem tricky at first, but it’s really about knowing the common issues and how to fix them. The main challenges usually come from how the lights are installed and the environment they’re exposed to. For example, water damage, loose connections, and wear and tear are all potential problems. This section will look at the most frequent issues and give you practical solutions to keep your lights working perfectly. These solutions will save you time and money.
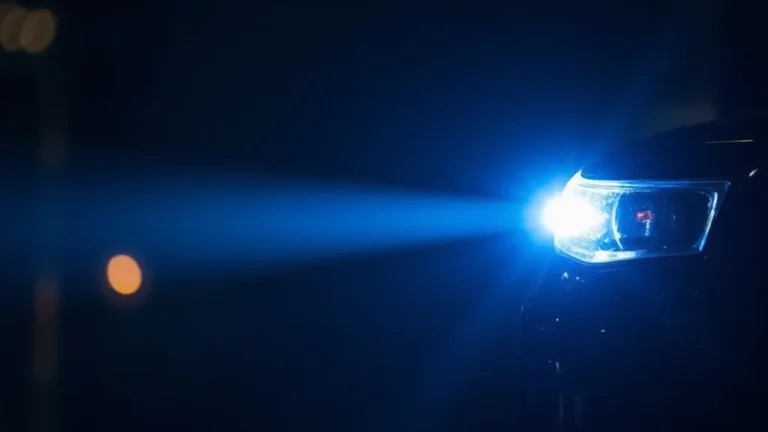
Water Damage and Moisture Issues
One of the biggest concerns for any underglow setup is water. Because the lights are often mounted close to the ground, they can easily be exposed to rain, puddles, or even just high humidity. Water can seep into the light strips or connections, causing them to fail or malfunction. Fortunately, there are ways to protect your lights and address any water damage that does occur. Waterproofing is the name of the game.
- Check the Seal: Make sure your light strips and connectors are properly sealed. Most quality kits come with waterproof connectors. Check the seals around where the wires enter the light strip itself.
- Use Waterproof Sealant: For added protection, apply a waterproof sealant, like silicone, around the connections and any exposed areas where water could enter. This creates an extra barrier.
- Inspect Regularly: Check your lights frequently, especially after driving in wet conditions. Look for any signs of water intrusion, like moisture inside the light strip or corrosion on the connectors.
- Proper Installation: Ensure that the light strips are mounted in a way that minimizes their exposure to water. Avoid placing them in areas where water is likely to pool or splash directly.
Water damage isn’t the end of the road. If you find water inside your light strips, disconnect the lights, let them dry completely, and inspect for damage before reconnecting them. By taking these steps, you can greatly reduce the chances of water causing problems and keep your lights working correctly.
Loose Connections and Wiring Failures
Another major cause for underglow light problems is related to connections. These lights are installed on a vehicle, meaning they are exposed to vibration from driving, bumps, and changes in temperature. Connections can become loose, leading to flickering lights, intermittent operation, or complete failure. It’s important to know how to spot loose connections and deal with them, which is not difficult. Good wiring practices are your friends.
- Secure Wiring: Use wire connectors, zip ties, or electrical tape to secure wiring. This prevents wires from dangling and getting snagged or pulled. Make sure your wire gauge is appropriate for the current draw.
- Check Connections: Regularly check all connections, including those at the power source, the controller, and the light strips themselves. If you notice any loose connections, firmly tighten them.
- Use Quality Connectors: Invest in quality connectors that are designed to withstand vibration and environmental conditions. Avoid cheap connectors that may fail quickly.
- Inspect for Corrosion: Check the connectors for corrosion, which can disrupt the flow of electricity. Clean any corroded connections with an electrical contact cleaner.
By preventing wiring issues, you can enhance the lifespan and performance of your underglow system. Properly securing and protecting the wiring is key to a long-lasting setup. Taking a little time to ensure everything is connected tightly, and protected from the elements, will save you a lot of hassle in the future.
LED Failure and Strip Damage
Even with careful maintenance, the LEDs themselves can fail, or the light strips can become damaged. Physical damage from road debris, impacts, or incorrect handling can lead to broken LEDs or strip failure. Some LEDs have a shorter lifespan than others, depending on quality and usage. Being aware of the risks is a helpful first step in mitigating them. Knowing what to look for and how to handle damage will improve the longevity of your system.
- Regular Inspection: Inspect the light strips for any physical damage, such as cracks, breaks, or burnt-out LEDs. Identify any signs of wear.
- Protect the Strips: When installing the lights, position them in a location that minimizes exposure to road debris and impacts. Consider using protective housings.
- Test Individual LEDs: If only a portion of your light strip is not working, check the individual LEDs with a multimeter to identify any failures.
- Replace Damaged Sections: If a section of the light strip is damaged, the most common solution is to replace it. Many kits are modular, allowing you to replace only the damaged part.
Knowing how to identify damage and replace sections of the light strips will keep your system running correctly. Even if a few LEDs burn out, the problem can usually be fixed quickly. This gives you a more reliable and visually stunning underglow setup.
Troubleshooting Common Symptoms of an Under Glow Light Strip Maintenance Problem
Troubleshooting is about finding the cause of the problem. If you see something wrong with your underglow lights, the next step is figuring out why. This section looks at common symptoms and how to identify their causes. Each symptom often has specific reasons. Understanding these will help you identify what’s wrong and how to fix it.
Flickering or Intermittent Lights
Flickering or lights that turn on and off randomly are common signs of trouble. This can be caused by various issues, from loose connections to power supply problems. Finding the specific cause involves a process of elimination, checking each component in the system. Identifying the root cause requires methodical inspection.
- Check Connections: Start by checking every connection in your setup. Loose connections are one of the most common causes of flickering lights.
- Inspect Wiring: Carefully examine all the wiring for any damage, such as cuts or exposed wires. Look for any signs of wear and tear, and replace any damaged sections.
- Test the Power Supply: A weak or failing power supply can cause the lights to flicker. Test the voltage output of your power supply to ensure it is within the correct range.
- Look at the Controller: Controllers can fail, too. Try bypassing the controller to see if the lights function. If they do, you know the controller is the issue.
Pinpointing the cause of flickering or intermittent lights is a systematic process. By starting with the simplest checks (connections) and gradually moving to the more complex (power supply or controller), you can identify and solve the problem efficiently.
Dim or Fading Lights
Dim or fading lights indicate there’s something preventing the lights from operating at full capacity. This might be a problem with the voltage, or there could be damage to the LEDs themselves. Sometimes, it’s a simple fix, but other times, it can point to a larger issue within the system. These types of issues are usually repairable with careful inspection.
- Check Voltage: Use a multimeter to measure the voltage at the light strips. Ensure that the voltage is within the range specified by the manufacturer.
- Inspect for Corrosion: Corrosion in the wiring or connectors can reduce voltage and cause the lights to dim. Clean any corroded areas with electrical contact cleaner.
- LED Degradation: Over time, LEDs can degrade, causing them to emit less light. This is normal. If the lights are old, consider replacing them.
- Power Supply Issues: A failing power supply may provide insufficient power to drive the lights, leading to dimness. Test the power supply and consider a replacement.
Understanding and addressing the factors that cause dim or fading lights is important to keeping your underglow looking its best. It might require you to test different components of the system to isolate the issue.
Color Problems and Inconsistent Light Display
Color issues and inconsistent displays make your underglow look bad. If you’re using RGB lights, you might find some colors don’t display correctly, or the light colors are not what you want them to be. These are often caused by wiring problems or issues with the controller. Understanding how the system works can make this issue easier to fix.
- Wiring Problems: Make sure all wiring, especially the RGB channels, is correctly connected. Incorrect connections can cause color issues.
- Controller Issues: The controller may have programming problems or be damaged. Try resetting or replacing the controller.
- Test RGB Channels: Test each color channel (red, green, blue) individually to identify any channels that are not functioning correctly.
- Software Problems: If you use a remote control or smartphone app, it could be a software issue. Check for updates or try reinstalling the app.
Correcting color problems involves checking wiring, controllers, and software to make sure everything is working together correctly. Resolving these issues will help the system work and look great, providing a more satisfying underglow experience.
Advanced Techniques to Solve Under Glow Light Strip Maintenance Problem
While the basic solutions are important, advanced techniques help you address more complex issues and make your underglow setup more durable. These methods can also help you avoid future problems. You can protect your investment and keep your lights performing at their best by using them.
Advanced Waterproofing Methods
Adding advanced waterproofing methods goes beyond basic seals. These advanced solutions are about protecting your light strips from moisture and prolonging their lifespan. Proper protection makes underglow systems more reliable in any environment. If you want the most protection, these methods are for you.
- Using Heat Shrink Tubing: Cover exposed wiring and connections with heat shrink tubing to create an extra layer of protection. This tubing shrinks when heated, creating a tight seal.
- Encapsulating Connectors: Encapsulate connectors in a waterproof epoxy or potting compound. This permanently seals the connections, making them impervious to water.
- Applying Corrosion Inhibitors: Use corrosion inhibitors on all connectors and wiring. These inhibitors create a protective layer that stops corrosion before it can start.
- Creating Drainage: If possible, install the light strips in a way that allows water to drain away. This is important if water penetrates any seals.
Using advanced waterproofing methods means that your underglow setup can resist water damage. You will have a system that stands up to rain, car washes, and other situations. Implementing these techniques will extend the system’s life.
Upgrading Wiring and Connections
Upgrading the wiring and connectors is a key step to preventing future issues. This section explores better wiring and connector options. Quality wiring and connections will improve the reliability and performance of your underglow system.
- Using High-Quality Wires: Switch to high-quality, weather-resistant wires. These wires are designed to withstand vibration, temperature changes, and exposure to the elements.
- Using Weatherproof Connectors: Upgrade to weatherproof connectors. These connectors are designed to seal out moisture and dirt, ensuring a secure and reliable connection.
- Adding a Relay: Use a relay to take some of the load off the vehicle’s electrical system, especially if you have a powerful underglow system. This prevents overloading the system.
- Proper Routing and Protection: Route your wires in a way that minimizes their exposure to the elements and potential damage. Use wire looms or conduit for added protection.
Upgrading the wiring and connections of your underglow system will enhance its reliability and performance. This will reduce problems down the road. Quality components and careful installation will result in a more durable and efficient system.
Testing and Diagnostics for Professional Results
Professional results require advanced testing and diagnostics. Learning to use tools such as multimeters will help identify and solve problems quickly. Troubleshooting methods make it easier to ensure the entire system works correctly.
- Using a Multimeter: Use a multimeter to check the voltage, continuity, and resistance of your wiring and components. This helps diagnose the source of problems.
- Using a Logic Probe: A logic probe can test the logic signals in your controller and wiring.
- Following a Troubleshooting Checklist: Create a checklist to methodically identify and resolve problems. This helps prevent missed steps and errors.
- Consulting with a Professional: If you’re not comfortable with the electrical system, seek assistance from a professional auto electrician.
Using advanced testing and diagnostic methods will help you solve problems. These tools improve your ability to identify and resolve issues with your underglow system. With a little practice, you can keep your lights in top condition.
Real-Life Examples and Case Studies
The best way to understand the under glow light strip maintenance problem is to look at real-world examples. Examining case studies helps you see how things go wrong and how to fix them. These examples give you a realistic idea of the issues you might face and how to deal with them.
- Case Study 1: The Waterlogged Rig: A vehicle owner installed an underglow kit, but after a rainy season, the lights stopped working. Upon inspection, they found water inside the light strips and connectors. The solution was simple: they
- Case Study 2: Flickering Issues: A car owner experienced flickering lights. They traced the problem to loose connections at the power source. After tightening the connections and using wire connectors, the flickering stopped. This is proof that a simple check can resolve problems.
- Case Study 3: The Fade: A user noticed his lights were dimming over time. They used a multimeter to check the voltage. They found a drop in voltage to the strips. After further inspection, corrosion in the wiring was the problem. Cleaning the corrosion and replacing the wires brought the lights back to full brightness.
Real-life examples can help you address the problems you may experience. They show you how common problems can be resolved with the right steps and knowledge. Learning from the experiences of others will improve your maintenance skills.
Sample Scenarios to Troubleshoot
Sometimes, figuring out the problem is more about practice than anything else. Here are some scenarios to practice your troubleshooting skills. These sample situations are designed to help you prepare for and resolve issues. This practice will improve your skills.
- Scenario 1: Lights Won’t Turn On: Imagine your underglow lights won’t turn on at all. What steps do you take? First, check the power supply. Then, check all the connections, and inspect the controller for problems. Testing each part methodically helps.
- Scenario 2: One Strip Flickers: Suppose that only one light strip flickers. Start by inspecting the connections related to that particular strip. Then, inspect the light strip for damage. Checking connections first can quickly show you what’s happening.
- Scenario 3: Colors Are Wrong: You notice the colors on your RGB lights are incorrect. Start by checking the wiring connections. Check the controller settings, and test each color channel. Wiring issues are often the cause of the problem.
Practice these and other situations to help you solve problems with your underglow setup. These types of scenarios show how to troubleshoot issues correctly.
Under Glow Light Strip Maintenance: Preventative Steps
Maintenance involves preventative steps to stop problems. This section looks at simple habits that will extend the life of your underglow system. These include routine inspections, proper cleaning, and protecting the lights. Proactive care can save you time and money.
Routine Inspections and Scheduled Checks
Regular inspections are important to keeping your underglow setup working well. Doing routine checks helps spot potential problems early, before they become serious. This helps you catch issues quickly and prevent problems. A quick inspection can prevent many problems.
- Visual Inspection: Regularly inspect your light strips, wiring, and connectors for damage, wear, or loose connections. Look for cracks, breaks, or any signs of corrosion.
- Test Operation: Test your lights regularly to ensure all functions are working correctly. Check all the colors, modes, and brightness settings.
- Check Connections: Inspect all connections for tightness. Ensure they are secure and free of corrosion or any other environmental damage.
- Scheduled Maintenance: Set up a schedule for inspecting your system. This might be weekly, monthly, or after extreme weather conditions.
Routine inspections will prevent small problems from becoming serious issues. Following these steps helps you detect issues and keep your lights performing correctly. Regular care will help you keep the system in great shape.
Proper Cleaning and Care Techniques
Cleaning and care are important for keeping your lights looking great. Cleaning helps maintain the appearance and prevent damage. This section covers the best cleaning techniques and care tips. Keeping them clean will also help you identify problems. Clean lights are good lights.
- Gentle Cleaning: Use mild soap and water to clean the light strips. Avoid harsh chemicals or abrasive cleaners that might damage the lights.
- Avoid Pressure Washing: Do not use a pressure washer to clean the lights. The high pressure can force water into the light strips.
- Dry Thoroughly: After cleaning, make sure to dry the light strips completely. Moisture can cause corrosion and damage the electronics.
- Protection from Sun: Protect your lights from prolonged exposure to direct sunlight. Prolonged exposure can degrade the materials of the light strips.
Careful cleaning and care methods will help you keep your underglow lights looking great. Taking good care of your lights will help maintain their appearance and functionality. Correct care will improve the lifespan of the system.
Protection and Environmental Considerations
Environmental factors can affect your underglow setup. This means you must consider how to protect the system. From extreme temperatures to road salt, there are many things that can damage your lights. These steps protect your lights.
- Temperature Extremes: Avoid exposing your lights to extreme temperatures. Park your vehicle in a garage during hot weather.
- Road Salt and Chemicals: Road salt and other chemicals can corrode the wiring and connectors. Rinse your vehicle frequently during winter months.
- Physical Protection: Consider using protective housings to guard the light strips from road debris. Choose locations that are less likely to be hit by rocks or other objects.
- Storage: If you are not using the lights for an extended time, consider removing them and storing them in a safe place. This will help them last longer.
Taking environmental factors into account will help protect your underglow system. These methods reduce the risk of damage. Protect the system by following these steps and improve its longevity.
Frequently Asked Questions
Question: What causes underglow lights to stop working?
Answer: Various issues, including water damage, loose connections, wiring issues, LED failure, and controller problems.
Question: How can I prevent water damage to my underglow lights?
Answer: Properly seal all connections and wiring. Use waterproof sealants and protective housings.
Question: How do I troubleshoot flickering underglow lights?
Answer: Check all wiring connections, inspect the power supply, and verify that the controller is working.
Question: Can I replace individual LEDs on my light strips?
Answer: It depends on the light strip. Some are designed for modular replacement. Others require replacing the entire strip.
Question: How often should I inspect my underglow light system?
Answer: Inspect your lights regularly, at least once a month, and especially after exposure to harsh weather.
Final Thoughts
Keeping your underglow lights in top shape involves understanding the under glow light strip maintenance problem, knowing how to spot common issues, and using proactive maintenance. By taking steps to prevent water damage, and securing the wiring, you can avoid the most common problems. Troubleshooting is a manageable process, often as simple as checking connections or identifying the faulty component. By cleaning and protecting your lights, and making sure to do routine checks, you can greatly extend the lifespan and maintain the dazzling appearance of your system. With these steps, your underglow will stay shining brightly.