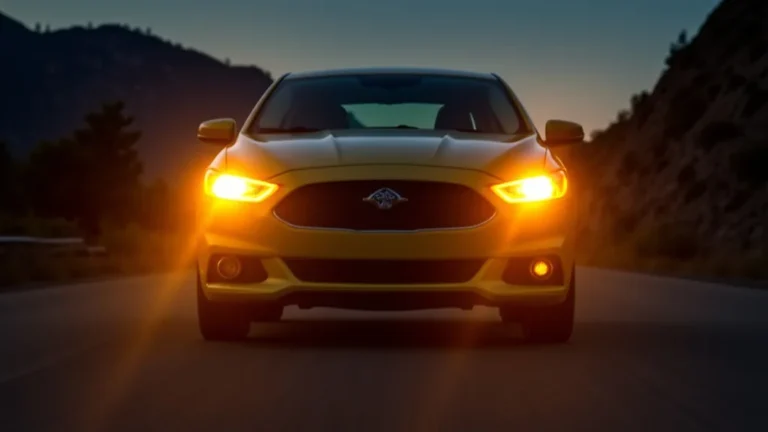
Under Glow Light Strip Installation Problem Solved Easily
So, you’re excited about getting that cool underglow on your car, but the thought of the under glow light strip installation problem has you a bit worried? Don’t sweat it! It’s a common issue, especially for those new to car modifications. Figuring out the wiring, finding the right spots, and making everything look neat can be tricky at first. But don’t worry, it’s easier than you think! We’re here to break down the entire process step by step, so you can transform your ride with confidence. Let’s get started!
Choosing the Right Under Glow Kit and Planning
Selecting the correct kit is the first important step. Many options are accessible, varying in price, features, and quality. You’ll find kits that offer a range of colors, from basic single-color options to advanced multi-color RGB (Red, Green, Blue) kits with numerous patterns and effects. The color options and available features should influence your choice. Also, consider the build quality of the light strips, the controller, and the wiring harness. High-quality materials resist water damage and last longer. Before purchasing, check reviews to see how others feel about the kit’s brightness, durability, and ease of installation. A well-rated kit will make the installation process smoother and the final result more satisfying.
Proper planning is also a good idea. This involves deciding where you want to place the light strips on your vehicle. Consider the design of your car’s undercarriage and where the lights will be most visible and protected from damage. Sketching a simple diagram can help visualize the placement and the wiring path. You’ll need to think about where the power source will come from, usually the car battery, and plan how the wiring will run from the battery to the controller and then to the light strips. Gather all the tools you’ll need beforehand, including wire strippers, crimpers, electrical tape, zip ties, and a multimeter (if you’re unsure about wiring). Taking these steps before you start the actual installation will save time and potential headaches.
Selecting the Right Kit: RGB vs. Single Color
The choice between RGB (Red, Green, Blue) and single-color underglow kits is a significant one, impacting both aesthetics and functionality. Single-color kits offer simplicity and usually cost less. They provide a continuous, uniform color. The advantages of single-color kits include their straightforward installation, typically involving fewer wires and a simpler control unit. However, you’re limited to one color at a time. RGB kits give you the advantage of a spectrum of colors. The control unit of an RGB system can create many color combinations. This is a big plus if you like to change up the look of your car often. RGB kits often come with various modes and flashing effects, too, adding even more fun.
- RGB Kits: Offer a wider range of colors and customizable effects, making them more versatile. They can change color, blink, and create patterns.
- Single-Color Kits: Are simpler and more affordable, offering a clean, consistent look. These kits are usually easier to install.
- Cost: RGB kits are typically more expensive than single-color options because of the added features and complexity.
- Complexity: RGB kits can have more complex wiring. Single-color kits have a simpler setup, ideal for beginners.
When selecting a kit, consider how it attaches to the car. Some use adhesive tape, while others use clips or screws. Choose a method that works for your car and offers a secure fit. Make sure the kit is waterproof or water-resistant. This will protect your investment from road debris, rain, and car washes. Think about your vehicle’s make and model. Some kits are specifically designed for certain car types, which can simplify the fitting process. Read reviews from other owners, paying attention to the kit’s brightness, durability, and ease of installation.
Necessary Tools and Materials
Having the right tools and materials is crucial. This will help you prevent frustrating setbacks and ensure a smooth, successful installation. You will need basic tools such as wire strippers, crimpers, and a multimeter. Wire strippers help remove the insulation from wires without damaging them, which is essential for making clean connections. Crimpers are needed for attaching connectors, such as ring terminals or butt connectors, to the wires. A multimeter is good for testing the connections and making sure everything is working correctly, especially if you’re not sure which wires are positive and negative.
- Wire Strippers: Essential for removing insulation from wires, allowing for clean connections.
- Crimpers: Used to attach connectors (like ring terminals) to wires, providing secure and reliable connections.
- Multimeter: Helps in checking the voltage and continuity of electrical circuits. This is super useful to find the positive and negative terminals.
- Electrical Tape: Use for insulating and securing wire connections.
- Zip Ties: Keep wires organized and prevent them from dangling.
- Ring Terminals and Butt Connectors: These are used to connect wires to the power source and other components.
- Drill (Optional): Might be needed to drill holes for mounting brackets.
- Safety Glasses and Gloves: Protect you while working on your car.
Other materials you might need include electrical tape and zip ties. Electrical tape is used to insulate wire connections and secure them, protecting them from moisture and accidental shorts. Zip ties are great for organizing the wiring harness, securing the wires to the chassis, and preventing them from getting caught on anything. Consider having ring terminals and butt connectors on hand, too. These help in connecting the wires to the power source and other parts of the underglow system. Think about having a drill if you want to mount brackets for the light strips. And, of course, safety first. Always wear safety glasses and gloves while working on your car.
Preparation and Mounting the Under Glow Lights
Before you begin the physical installation, prepare your vehicle. Safely raising and securing the vehicle is a must. This gives you easy access to the underside of the car where you’ll be working. You can use jack stands after lifting your car. Make sure the area is well-lit. Clean the areas where the light strips will be mounted. This is key to ensuring the adhesive tape or mounting hardware sticks properly. The vehicle’s underside should be free from dirt, oil, and any other debris.
You can then mount the light strips. Most underglow kits use either adhesive tape or mounting brackets. If using adhesive tape, clean the surface where the lights will be placed, remove the backing from the tape, and firmly press the light strip onto the surface. For kits using mounting brackets, secure the brackets to the car’s frame using screws or bolts. Make sure the lights are securely mounted and positioned where you want them. Consider the visibility of the lights and their protection from road hazards. Once the lights are mounted, route the wiring harness, securing it with zip ties. This will keep the wires organized and prevent them from dangling or interfering with the car’s components.
Raising and Securing Your Vehicle
The safety of your car and yourself is key. Before starting your installation, properly raise and secure your car. Find a flat, stable surface to work on. Use a jack to raise the car to a comfortable height, allowing easy access to the underside. Never work under a car supported only by a jack. Place jack stands under the vehicle’s frame. Make sure the stands are positioned correctly to provide stable support. Always check that the car is securely supported before you get under it. Wear safety glasses to protect your eyes from debris and gloves to protect your hands.
- Level Surface: Work on a flat, stable surface to prevent the car from rolling.
- Jack: Use a jack to raise the vehicle to a comfortable working height.
- Jack Stands: Place jack stands under the car’s frame for secure support.
- Safety: Never work under a car supported only by a jack.
Once the car is securely supported, double-check that the jack and jack stands are properly positioned. Give the car a gentle push to ensure it is stable and won’t move. If you’re unsure about using jacks and jack stands, it’s best to seek help from someone experienced. Another option is to use ramps if your vehicle’s ground clearance allows. Be certain to take these safety steps to protect yourself and your equipment. Following these simple steps will make the installation process safer and more enjoyable.
Mounting Methods: Tape vs. Brackets
Knowing how to mount the light strips is important. Underglow kits typically use one of two methods: adhesive tape or mounting brackets. Adhesive tape is a common option because it’s simple and usually comes pre-applied to the light strips. Before you install using tape, you must properly clean the surface. Use rubbing alcohol or a degreaser to remove any dirt or debris. Once the surface is clean, remove the backing from the tape and carefully press the light strip onto the car’s frame. Make sure the lights are straight and securely attached. The quality of the adhesive is important, especially when you are installing this on a car. Some adhesive can weaken over time or with changes in temperature.
Mounting brackets offer a more durable way to install your light strips. Brackets usually require screws or bolts. This ensures a firm connection that will last a long time. This is especially good if you like off-roading or driving on bumpy roads. This is also a good option if you want to be sure the light strips stay in place. Brackets require some extra effort since you have to drill holes in the car’s frame. This is something that you should only do if you’re comfortable with car repairs or get help from a professional.
- Adhesive Tape: Simple to install, quick setup, good for smooth surfaces.
- Mounting Brackets: More secure and permanent, good for rough conditions.
- Surface Preparation: Cleaning the mounting surface is key for both methods.
- Durability: Brackets generally offer more durability.
Consider the mounting method that best fits your needs. Tape is great if you need something quick and easy. Brackets are better if you need a long-term solution. No matter which method you use, make sure the lights are positioned to protect them from damage and look great.
Wiring and Electrical Connections
Wiring is often the most confusing part of the under glow light strip installation problem. You’ll need to link the lights to the power source, which is usually the car battery, and connect them to the controller. Begin by identifying the positive and negative terminals on your car battery. Connect the red wire from your underglow kit to the positive (+) terminal using a ring terminal. Connect the black wire to the negative (-) terminal, again using a ring terminal. Most kits include an inline fuse to protect the electrical system from any electrical shorts. Make sure the fuse is properly installed in its holder.
Now you have to connect the controller. The controller is what lets you change colors and select different modes. It connects to the light strips and the power source. Wire the controller to the light strips following the instructions provided with your kit. Route the wires neatly along the car’s frame, using zip ties to secure them and keep them from dangling. Once all connections are made, double-check them to ensure they’re secure and properly insulated. Test the system. Make sure the lights turn on and that you can control the colors and modes. If the lights don’t work, review the connections and wiring.
Connecting to the Power Source
Getting power from the car’s battery is the key step. Always start by disconnecting the negative terminal of the battery. This helps prevent accidental short circuits while you are working. Locate the battery. Find the positive (+) and negative (-) terminals. Use a wrench to loosen the nut on the positive terminal and connect the ring terminal of the red wire from your underglow kit. Tighten the nut securely. Do the same with the black wire, connecting it to the negative (-) terminal. Make sure all connections are secure and tight. Wiggle the wires gently to ensure they don’t disconnect easily. Always make sure the connections are clean and free from corrosion. If any corrosion is present, clean the terminals before making the connection.
- Disconnect Negative Terminal: Prioritize safety by disconnecting the negative battery terminal.
- Positive Terminal Connection: Connect the red wire with a ring terminal to the positive (+) terminal.
- Negative Terminal Connection: Connect the black wire with a ring terminal to the negative (-) terminal.
- Secure Connections: Tighten all connections to ensure they are secure and free of corrosion.
Once you are done with the connections, test the system. Connect the negative battery terminal again. Turn on the underglow system using the remote or the app, depending on your kit. If the lights don’t turn on, double-check all connections, especially the fuse. Make sure the fuse is properly installed and not blown. If the lights still don’t work, there may be a wiring problem. Consult the instruction manual or get help from an expert.
Controller Wiring and Testing
The controller is a central component of the underglow system. It manages the functions of the lights, such as color changing and special effects. Most kits come with a controller that connects to both the power source and the light strips. The controller will have wires that you have to connect to the positive and negative terminals. It will also have wires for connecting to the light strips. Following the manufacturer’s instructions is important. They usually provide a diagram showing how each wire connects. Often, the wires are color-coded to make it easier to link the parts correctly.
You can then test the system. Once the connections are complete, it’s time to test the system and check that everything works as expected. The lights should turn on, change colors, and operate the special effects as directed by the controller. Most controllers include a remote control or a mobile app to manage the lights. Test these features to make sure they all work correctly. If the lights don’t turn on, double-check all the wiring. Make sure all connections are secure and the fuse is not blown. Take your time, follow the instructions carefully, and troubleshoot any problems step by step. If needed, do a search online and look for help from those who have experience with car wiring. Don’t be afraid to ask for help.
- Follow Instructions: Always refer to the kit’s instructions for accurate wiring.
- Controller Functions: Controllers change colors and manage special effects.
- Troubleshooting: If the lights don’t work, check the wiring and connections.
- Remote/App Testing: Test the functionality of the remote or app.
By carefully connecting the wires and testing the system, you can ensure that your underglow kit works properly and that you can enjoy its features. Once you’re certain that everything is working, you can move on to securing the wiring and cleaning up the installation.
Final Touches and Troubleshooting
After you have everything wired and working, there are a few important steps to complete the installation and address any issues. Organize the wiring. Use zip ties or cable clips to hold the wires in place and keep them away from moving parts. This is very important because it protects the wiring from damage and keeps the installation neat and clean. Be sure that no wires are dangling or exposed to heat, moisture, or sharp edges. If you have any extra wire, neatly bundle it and secure it, so it does not get in the way. Proper cable management can prevent problems and increase the lifespan of your underglow kit.
Take care of any problems you come across. If your underglow lights aren’t working, don’t worry. There are some common issues that can be easily fixed. The first thing you should do is check the fuse. If the fuse is blown,
Cable Management and Securing Wires
Cable management is critical. It involves organizing and securing the wiring for your underglow kit. Start by routing the wires along the car’s frame. Make sure the wires stay away from moving parts like the wheels, suspension components, and exhaust system. Avoid areas where the wires could be pinched or damaged. Use zip ties or cable clips to secure the wires to the chassis or existing wiring harnesses. Keep the wires neat and tidy to prevent them from dangling. Make sure the wires are not exposed to excessive heat or moisture, which can cause damage or electrical shorts. Proper cable management will not only enhance the appearance of your installation but also increase its longevity.
- Routing Wires: Route wires away from moving parts, heat, and moisture.
- Securing Wires: Use zip ties to secure wires to the chassis or existing wiring.
- Preventing Damage: Avoid areas where wires can be pinched or damaged.
- Clean Appearance: A neat wiring setup improves the look and functionality.
Consider the placement of the controller. Place the controller in a location that is easily accessible. This will allow you to make changes to the lights without having to crawl under your car. A good location for the controller is inside the car or near the engine bay. Use cable clips to fix the wires. These can easily attach to the car’s metal or plastic parts. They provide a quick, simple way to hold the wires in place. Following these steps will help you create a secure, clean, and professional-looking underglow installation that will last for years to come.
Troubleshooting Common Issues
No project is always perfect. Some common issues can happen during the installation of underglow lights. Don’t panic if you encounter one. Start with the fuse. One of the most common issues is a blown fuse. If the lights do not turn on, check the fuse in the inline fuse holder. If the fuse is blown,
- Check the Fuse:
- Wiring Connections: Ensure all wiring connections are secure.
- Controller Malfunction: Troubleshoot controller issues based on instructions.
- Power Supply: Verify the power source and connections.
If you have any issues, check the controller. The controller might have problems. Follow the manufacturer’s troubleshooting steps. Test the remote or app. Make sure that the remote or app is working correctly. Replace the battery in the remote if needed. Test for power supply problems. If the lights are still not working, use a multimeter to check the voltage at the power source and the controller. Make sure that the system is receiving the right amount of power. Check for any shorts in the wiring. If you are not sure about electrical problems, seek expert help.
Frequently Asked Questions
Question: Can I install underglow lights on any car?
Answer: Yes, you can typically install underglow lights on most cars. However, make sure the kit you choose is compatible with your car’s voltage (usually 12V). Consider the car’s undercarriage design for light placement, and always follow local laws regarding vehicle lighting.
Question: Are underglow lights legal?
Answer: The legality of underglow lights varies by location. Some areas have restrictions on the colors that can be used or when they can be turned on. Be sure to check your local laws and regulations before installing underglow lights.
Question: How long does it take to install underglow lights?
Answer: The installation time can range from a few hours to a full day, depending on your experience and the complexity of the kit. Plan and prepare your vehicle. If you’re unfamiliar with car wiring, budget extra time.
Question: What happens if water gets into the underglow lights?
Answer: Most underglow kits are designed to be water-resistant or waterproof. However, it’s essential to ensure all connections are secure and well-sealed to prevent water damage. If water does get in, it could damage the lights or the electrical components.
Question: Can I control the underglow lights with my phone?
Answer: Yes, many modern underglow kits come with a mobile app that allows you to control the colors, patterns, and brightness of the lights from your smartphone. This adds a level of customization and convenience.
Final Thoughts
The under glow light strip installation problem can seem complex at first, but with a bit of planning and the right approach, you can turn your car into a head-turner. From selecting the appropriate kit and setting up your workspace to mounting the lights and wiring them correctly, each step plays a crucial role. Remember, the key to success lies in preparation, safety, and attention to detail. Don’t be afraid to take your time, double-check your connections, and consult the kit’s instructions. By exploring the process step-by-step and following the tips outlined, you’re well-equipped to overcome any hurdles and enjoy the benefits of a cool and stylish car. Now, it’s time to light up the night and show off your ride!