Under Glow Light Strip Installation Cost: A Complete Guide
Thinking about adding some cool under glow lights to your car, but worried about the under glow light strip installation cost? It’s a common concern! Installing these lights can seem tricky if you’re new to car modifications. Don’t worry, though; we’ll break down everything you need to know. We’ll explore the costs, the steps, and how to get the look you want without breaking the bank. Get ready to illuminate your ride, step by step.
What Influences Under Glow Light Strip Installation Cost?
Several factors play a role in determining the total under glow light strip installation cost. The type of lights you choose is a significant one. Are you looking at basic LED strips, or more advanced options with color-changing capabilities or app control? The quality of the materials also matters; better-quality lights tend to last longer and offer better performance, but come with a higher price tag. Labor costs are another crucial element, and these can differ based on where you live and the experience of the installer. Finally, any extra features or customizations will contribute to the total expense.
Types of Under Glow Light Strips
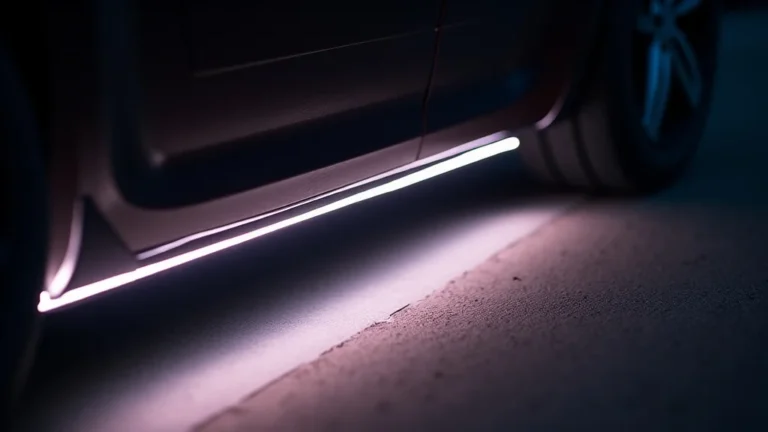
The first thing to consider is the different types of under glow light strips available. The most basic and budget-friendly option is a standard LED strip. These usually offer a single color, like blue, red, or green. They’re easy to install and a good starting point for those new to car lighting modifications. Then there are RGB (Red, Green, Blue) LED strips. These let you create a wider range of colors, often controlled by a small remote. They’re more versatile than single-color strips, giving you options to change your car’s look. At the higher end, you’ll find addressable LED strips, also called “pixel” LEDs. These are the most advanced. Each LED can display a different color, allowing for complex patterns and effects, which usually increases the under glow light strip installation cost.
- Standard LED Strips: These are typically the most affordable option. They often feature a single color and are straightforward to install.
- RGB LED Strips: RGB (Red, Green, Blue) LED strips offer a wider selection of colors. Controlled via remote or an app.
- Addressable LED Strips: Each LED can display a different color, which allows complex patterns. Offers the most advanced features.
Standard LED strips are the simplest type, usually available in a single color. They’re a common choice for those just starting out, offering a clean and straightforward look. Installation involves connecting the strip to your car’s power source, which can be done by connecting directly to the car battery or a fuse box. The simplicity of these strips makes the under glow light strip installation cost very affordable, mainly because the parts are cheaper and the installation is less labor intensive. Standard LED strips are usually the most cost-effective solution for a beginner.
RGB LED strips give you more design choices. They blend red, green, and blue light to create various colors. This offers far more versatility than standard strips. They come with a small remote to change colors and even set lighting effects. Installation is similar to standard strips but involves managing the remote receiver. The increase in features and functionality does increase the under glow light strip installation cost a bit. These are an ideal choice if you like to change up the look of your car often.
Addressable LED strips are the top-tier option, often referred to as “pixel” LEDs. Each tiny LED can show a different color, which lets you create complex, moving light displays. These strips can be programmed to display unique patterns and effects, allowing for unmatched customization. The installation is more involved because you have to connect to a controller unit to manage the different lights. Because of the advanced technology and complexity, addressable LEDs result in the highest under glow light strip installation cost. These strips are an excellent choice for those wanting to create a unique and eye-catching under glow.
Quality of Materials and Its Impact on Price
The materials that make up under glow light strips greatly impact their price and long-term performance. Higher-quality strips use better components, such as durable LEDs and weather-resistant casings. These materials hold up better over time and withstand road conditions, like moisture, temperature changes, and vibration. Cheaper strips use less robust materials that may fail quickly, which can lead to having to replace them sooner, thus increasing the total cost over time. Investing in better materials can seem costly initially, but the extended lifespan and improved performance can save money and trouble down the road.
- LED Quality: High-quality LEDs are brighter, more energy-efficient, and last longer.
- Casing and Wiring Durability: Weather-resistant casings and durable wiring are essential for longevity.
- Power Supply: Reliable power supplies prevent flickering and ensure consistent light output.
The LEDs themselves are a critical factor. Top-quality LEDs deliver more light, use less power, and have a longer lifespan. This means your under glow lights will shine brighter and last longer without needing frequent replacements. Lower-quality LEDs may fade, flicker, or burn out quickly. Because quality LEDs are more expensive to manufacture, the under glow light strip installation cost is slightly higher initially, but it provides better long-term value.
The casing that houses the LEDs and the wiring that connects them need to be built to last. Weather-resistant casings will protect against moisture and road debris, helping to prevent corrosion and damage. Durable wiring is vital for making the lights work properly and preventing issues like shorts or failures. Cheaper materials are vulnerable to weather. This can increase the chances of needing replacements, ultimately pushing up the under glow light strip installation cost in the long run.
A reliable power supply is just as important as the quality of the LEDs. It provides the right amount of power to the lights without causing issues like flickering or reduced brightness. High-quality power supplies are better at handling variations in voltage from the car’s electrical system, which guarantees that the lights remain stable. Cheaper power supplies can lead to problems, so that can decrease the lifespan of the lights and may require you to replace the entire system, potentially hiking up the under glow light strip installation cost.
Labor Costs for Under Glow Light Strip Installation
Labor costs can add a significant amount to the under glow light strip installation cost. If you decide to have a professional install your under glow lights, the labor charges will depend on the installer’s experience, the complexity of the installation, and the rates in your area. Installations can range from basic strip placement to more involved wiring and mounting. Higher prices may be observed in areas with a higher cost of living. Choosing an experienced professional often ensures a quality installation, reducing the chances of future problems. However, if you are familiar with car electrical systems, you may consider a DIY approach.
- Professional Installation vs. DIY: Weigh the cost of labor against your skill and time.
- Installation Complexity: Complex setups with advanced features cost more to install.
- Installer’s Experience and Location: Experience and location affect labor rates.
The big decision is whether to do the installation yourself or hire a professional. Doing it yourself can save money on labor costs, but it requires some technical know-how and time. If you’re not comfortable with car electrical systems, it’s best to have a professional do it to prevent damage or safety issues. Professional installers have the right tools and experience, which typically results in a better installation. Remember, while the initial under glow light strip installation cost is higher with a professional, it can save you from costly mistakes in the long run.
The more complicated the setup, the more it will cost to install. Simple installations involving basic LED strips are easier and faster, meaning lower labor costs. If you want addressable LEDs with custom programming, the installer will spend more time setting up the lights, wiring them, and connecting them to a controller. The complexity of the installation directly influences the labor time and therefore the under glow light strip installation cost. The more complex the system, the more the labor fees will be.
The experience of the installer and your location also influence the under glow light strip installation cost. A shop with more skilled and experienced technicians might charge more for labor, but the quality of the installation will likely be higher. Location is another factor, as labor rates often vary by region. Major cities and areas with higher costs of living usually have higher labor charges compared to rural or less populated areas. Researching local shops and getting multiple quotes will help you find the best value.
DIY Installation vs. Professional Installation
Deciding between a DIY (Do-It-Yourself) installation and professional installation is one of the important decisions you’ll make when adding under glow lights. Both choices have pros and cons. DIY installation can save you money, but it requires some technical knowledge and time. A professional installation costs more upfront but guarantees a quality, safe install. The best choice depends on your skills, comfort level, and budget. Taking into account these factors will help you make the right choice.
The Advantages and Disadvantages of DIY Installation
DIY installation is a great option for people who enjoy working on cars and want to save money. However, it requires some knowledge of your car’s electrical systems. Taking on a DIY project means you are responsible for making sure everything is done correctly, and any mistakes could lead to problems with your car. The cost savings can be significant if you have the necessary skills and confidence. You also have total control over the process.
- Cost Savings: You can save a lot on labor costs by installing the lights yourself.
- Learning Experience: It’s a chance to learn about your car’s electrical system.
- Time Commitment: DIY installations take more time compared to professional installations.
- Risk of Mistakes: Mistakes can be costly and may damage your car’s electrical system.
The main advantage of a DIY installation is the money you’ll save. Labor costs can add up quickly, and by doing it yourself, you only pay for the materials. This can be a huge benefit for those on a tight budget. When considering the under glow light strip installation cost, the savings from doing it yourself can be significant, sometimes cutting the total cost by half or more.
Installing your under glow lights is a good way to gain practical knowledge of how your car’s electrical system works. You’ll learn how to connect wires, manage fuses, and understand the power flow. This knowledge can be useful for future car projects. By working on your car, you’ll gain useful skills that can serve you well in the future. The experience is valuable, and it can help you in future car modifications.
The main downside of doing it yourself is the time commitment. Installing under glow lights can take a few hours or even a full day, depending on your experience and the complexity of the setup. You’ll need to carefully plan the layout, do the wiring, and test the lights. Professional installers are faster because they have the experience and the right tools. When calculating the under glow light strip installation cost, factor in the value of your time. Are you willing to spend the extra hours to save money?
There’s a risk of making mistakes when doing the installation yourself, especially if you’re not familiar with car electrical systems. Incorrect wiring can lead to short circuits, blown fuses, or even damage to your car. If something goes wrong, you may end up spending more on repairs than you saved by doing it yourself. You must know what you are doing before you get started. The under glow light strip installation cost may increase if you have to pay for the repairs.
Pros and Cons of Professional Installation
Professional installation offers the peace of mind that comes with knowing the job is done right. Professionals have the experience, tools, and expertise to install your under glow lights quickly and safely. While you’ll pay more upfront, you’ll benefit from the quality of the installation and a guarantee against potential problems. This can be the best option if you’re not comfortable working with your car’s electrical system or if you want a complex setup.
- Expertise and Experience: Professionals have the knowledge and experience to install the lights correctly.
- Quality and Safety: Professional installations are typically safer and of higher quality.
- Warranty and Support: Professionals often offer warranties and support.
- Higher Upfront Cost: Professional installation is more expensive than a DIY project.
When you choose professional installation, you’re getting the benefit of expertise. Professionals have installed lights before and understand how to handle your car’s electrical system correctly. They know where to run wires, how to make the right connections, and how to avoid potential problems. This reduces the risk of making mistakes that can damage your car or cause the lights to malfunction. This is something to consider when calculating the overall under glow light strip installation cost.
Professionals are trained to ensure the installation is safe and reliable. They use high-quality tools and equipment and follow industry best practices. This lowers the risk of short circuits, fires, or other electrical hazards. A high-quality installation will also look better and perform better. You will likely get a warranty from the shop as well. The higher under glow light strip installation cost is worth it if you have safety concerns.
One of the biggest advantages of professional installation is that most shops offer warranties on their work. If something goes wrong, the shop will fix it at no extra cost. This is not the case if you do it yourself. This warranty will protect you against any issues that might arise. The support from the shop is another benefit; they can answer questions and troubleshoot problems that you have. This adds to the value, which needs to be considered in the overall under glow light strip installation cost.
The main downside of hiring a professional is the higher upfront cost. You’ll pay for the labor, which can increase the overall cost significantly. If you’re trying to keep the budget low, professional installation might seem like an unnecessary expense. However, you should see it as an investment in the quality and safety of the installation. When you are determining the under glow light strip installation cost, make sure to consider all the benefits, such as a warranty. The extra cost might be worth it in the long run.
Steps to Install Under Glow Light Strips
If you’re opting for a DIY approach, the installation steps for under glow light strips generally remain the same. The exact process can vary slightly depending on the light strips you purchase and your car. Here’s a general guide. Remember to always consult the manufacturer’s instructions for your specific product and follow all safety precautions. Ensure you have the right tools, and if you are unfamiliar with car electrical systems, it is better to seek a professional.
Preparing Your Car for Installation
Before you begin installing under glow light strips, it’s vital to get your car ready. This includes gathering the necessary tools, selecting the best locations for the light strips, and taking safety precautions. This preparation ensures a smooth and safe installation, helping you achieve a great outcome. Proper preparation also prevents damage to your car. Doing a good preparation will help you throughout the entire installation process.
- Gathering Necessary Tools and Materials: Make sure you have the right tools.
- Choosing Mounting Locations: Decide where you want to place the light strips on your car.
- Safety Precautions: Always disconnect the car’s battery before starting any electrical work.
You’ll need basic tools, such as screwdrivers, wire strippers, electrical tape, and a multimeter (to test for voltage). You might need a drill and zip ties for mounting the strips. Make sure you have all the parts that came with the light strip kit, including the power adapter, the remote, and any necessary mounting hardware. Having the right tools and materials will help you to install the lights efficiently. This can make the entire process easier and improve the quality of your work. By being prepared, you can avoid frustrating delays and ensure a smooth installation process. Be sure you have everything you need before you start.
Consider where you want the light strips to be placed. Common mounting locations include under the front bumper, along the sides, and under the rear bumper. Make sure the spots you select are clean, dry, and free of any obstructions, like exhaust pipes or moving parts. The chosen locations should provide even lighting and look good. Before attaching the strips, make a plan of how you will route the wires. This will prevent damage, making the wiring neat. Selecting the right spots will have a major effect on how your car looks when the lights are on. Be sure you like how it looks.
Safety is the most important thing. Before starting any electrical work on your car, disconnect the negative terminal of the car battery. This will prevent any short circuits or electrical shocks. Wear safety glasses to protect your eyes. Also, work in a well-ventilated area, especially if you’re working with wires. If you aren’t sure about any part of the process, it’s better to ask an experienced person or consult a professional. Prioritizing safety will keep you safe during the installation. Following these precautions is vital for a safe and successful project.
Mounting the Light Strips
The key to a good-looking under glow setup is the correct mounting of the light strips. Proper mounting ensures that the lights are secure, evenly spaced, and protected from the elements. There are different methods, and the best way will depend on your light strip design and the car’s undercarriage. Following the manufacturer’s instructions is critical. Also, you have to be careful during this stage; this includes making sure you select the correct locations.
- Cleaning the Mounting Surfaces: Prepare the areas where you will attach the light strips.
- Using Adhesive and Mounting Hardware: Securely attach the light strips using adhesive or mounting clips.
- Wire Management: Run the wires neatly and securely.
Before mounting the light strips, you’ll need to clean the areas where they will be attached. Use rubbing alcohol or a similar cleaner to wipe down the surfaces. This will remove any dirt, grease, or debris. A clean surface will help the adhesive on the light strips stick better. This ensures that the lights stay in place. Allow the surfaces to dry completely before applying the light strips. Taking this step will help you get a clean, secure installation. This will also help to prevent the lights from falling off.
Most under glow light strips come with adhesive backing, which you can use to stick them to the car. Peel off the backing and carefully press the lights into place. Some kits come with mounting clips or brackets for extra security. These clips can be attached using screws or by using existing bolts. Make sure the lights are straight and evenly spaced. Make sure to follow the manufacturer’s instructions for using the adhesive and any mounting hardware. For a secure and reliable installation, it’s best to use both the adhesive and any additional mounting hardware. This approach will help to ensure the long-term performance.
Wiring is a major part of the installation. After mounting the light strips, it’s important to manage the wires. Route the wires along the car’s undercarriage, and make sure they are away from moving parts, hot exhaust components, or other hazards. You can use zip ties to secure the wires to existing components, such as frame rails or suspension arms. Make sure the wires are not dangling or dragging on the ground. This will help to protect them from damage and keep them safe. Proper wire management will improve the appearance of the installation. Also, it prevents electrical problems. The correct wiring is a key for a clean and professional-looking setup.
Wiring and Electrical Connections
Proper wiring and electrical connections are vital for the under glow light strips to work correctly and safely. This involves connecting the light strips to the car’s power source, usually the car battery or a fuse box. You will need to take great care to make secure, water-resistant connections. Always double-check your work to avoid any electrical problems. If you’re not confident with car electrical systems, it’s best to seek assistance from a professional. Safety should always come first when working with electrical components.
- Connecting to the Power Source: Identify the appropriate power source.
- Making Electrical Connections: Use wire connectors or solder the wires.
- Testing the Lights: Test all connections before finalizing the installation.
The first step in wiring is to identify the proper power source. The usual option is to connect the light strips directly to the car battery. This will provide a steady and reliable power supply. Another option is to tap into the car’s fuse box, which requires using a fuse tap. This method protects the lights from overcurrent situations. You must choose a power source that can handle the electrical load of the light strips. You must always use the correct gauge wire and any needed fuses. When connecting to the power source, make sure you know what you are doing.
After you have selected your power source, it is time to make the actual electrical connections. You have two options. You can use wire connectors, like crimp connectors or quick-splice connectors. These are easy to use and require no special tools. Another option is to solder the wires together. Soldering will make a stronger, more reliable connection. If you choose to solder, you will need a soldering iron and solder. After making the connections, make sure that the wires are securely connected and will not come loose. You should protect all connections with electrical tape or heat shrink tubing. This will protect them from moisture and help prevent short circuits.
After making all the electrical connections, you must test the lights to ensure that they are working. Turn on the lights and check to see if they turn on and display the correct colors and patterns. You should check each light strip to ensure that every LED is working correctly. Also, double-check that the remote control, if used, works as expected. If the lights are not working, inspect all of the connections. Make sure that there are no loose wires or incorrect connections. If everything checks out, you can finalize the installation. When you are done, make sure that you properly secure all the wires and components.
Frequently Asked Questions
Question: How long does it take to install under glow lights?
Answer: The time it takes to install under glow lights can vary widely. Simple single-color LED strip installations can take a few hours, especially for beginners. More complex setups, like those with multiple colors or addressable LEDs, can take several hours or even a full day. Professional installations are usually quicker, but it still depends on the complexity and your car’s features.
Question: Is it legal to have under glow lights on my car?
Answer: The legality of under glow lights varies depending on where you live. Some areas have specific restrictions on the colors that can be used or when you can use them. For example, some jurisdictions might prohibit red or blue lights while driving. Check your local laws and regulations before you buy or install any lights. Make sure your lights meet all local requirements to avoid issues.
Question: What tools do I need to install under glow lights?
Answer: For a basic installation, you’ll need tools like screwdrivers, wire strippers, electrical tape, and a multimeter to test voltage. You might also need a drill and zip ties for mounting the strips. Advanced setups could require a soldering iron or special wiring tools. Always read the light kit instructions to see what’s specifically required. Having the correct tools makes the installation easier and will give you better results.
Question: How much power do under glow lights use?
Answer: The power consumption of under glow lights depends on the type and number of LEDs. Basic LED strips are generally very energy-efficient and draw minimal power. RGB and addressable LED systems use more power, particularly when running multiple colors or complex patterns. Always check the light kit specifications. Be sure your car’s electrical system can handle the load. Make sure the lights don’t drain your car battery, especially if you have a lot of lights.
Question: Can I install under glow lights on any car?
Answer: Under glow lights can be installed on most cars, but there are some things to consider. You’ll need access to the car’s undercarriage to mount the light strips. You’ll also need to have a power source accessible for connecting the lights. Some cars might have limited space or unique undercarriage designs, making installation harder. In most cases, you can install under glow lights on your car. Just make sure to examine your car before you purchase the kit and verify that you can do the installation.
Final Thoughts
Figuring out the under glow light strip installation cost involves many choices. You have to consider the type of lights, quality of materials, and whether you want to do it yourself or hire a professional. DIY installation can save money, but it needs skill and time. Professional installation ensures quality, but costs more upfront. Each option has advantages. You should compare your budget, skillset, and how much time you have. Think about your goals, which will help you in making the best decision for your needs. Researching your options and comparing prices will help make sure you get the best deal. With careful planning, you can get a setup that looks great and adds personality to your car.