Under Glow Light Strip Install Without Drilling Simplified
Thinking about adding some cool under glow lighting to your ride but worried about drilling holes? You’re not alone! Many people find the idea of under glow light strip install without drilling a little tricky, especially if they’re new to car modifications. Don’t sweat it, though! Installing these lights can be super fun and rewarding. This guide is all about making the whole process easy and safe, so you can transform your car’s look without damaging it. Let’s get started!
Choosing the Right Under Glow Light Kit
Picking the perfect under glow light kit is the first step. There are tons of options out there, so it’s important to do your research. You’ll want to think about the colors you want, the features (like flashing modes), and the overall quality. Cheaper kits might be tempting, but they can be a headache down the road. High-quality kits are usually worth the extra cost because they’re brighter, more durable, and often easier to install. Remember to check online reviews before purchasing, as this can give you a lot of helpful insight from people who have already bought and installed the product.
Light Strip Types and Features
There are a few different types of light strips you can choose from. LED strips are the most common and popular choice because they use very little power and come in a huge variety of colors. Some strips offer a single color, while others are RGB (Red, Green, Blue) and can change to any color you want. Some kits even let you control the lights with a remote or a phone app. Consider how you’ll power the lights: You will need to attach your lights to the car’s power source, whether by plugging into the cigarette lighter or connecting directly to the car’s battery. Consider the length of the wiring that you have to work with, to ensure it will be long enough to reach your power source.
- LED Strips: These are the workhorses of the under glow world. They’re energy-efficient, long-lasting, and come in every color imaginable. Some high-end LED strips have individual addressable LEDs for custom lighting effects.
- RGB Kits: RGB stands for Red, Green, and Blue. These kits allow you to create a vast range of colors by mixing those three primary colors. They’re perfect for anyone who likes to customize their car’s look.
- Bluetooth/App Control: These kits offer the ultimate convenience. You can control your lights from your smartphone via a Bluetooth connection.
- Waterproof Rating: Look for a kit with a high waterproof rating (like IP67 or higher) to protect the lights from rain and road spray.
LEDs, or Light Emitting Diodes, are tiny electronic components that produce light when electricity passes through them. Compared to older lighting technologies like incandescent bulbs, LEDs use much less energy and generate very little heat. They are very durable and have a long lifespan, making them ideal for automotive use. The energy savings also translate to less strain on your car’s electrical system.
RGB kits offer fantastic flexibility. Modern RGB kits often allow you to choose from hundreds or even thousands of colors. Many also have pre-programmed modes like flashing, fading, and strobing. Some high-end kits even allow you to create custom lighting patterns or synchronize your lights with music.
Bluetooth and app-controlled kits let you change colors, brightness, and modes with a tap on your phone. Some also offer advanced features like music sync, which makes the lights dance to the beat of your music. The ease of control makes them an excellent choice for anyone who wants a user-friendly experience.
Waterproof ratings are critical for any under glow kit. The “IP” stands for Ingress Protection, followed by two numbers. The first number indicates protection against solid objects (like dust), and the second indicates protection against liquids (like water). IP67 means the kit is dust-tight and can withstand immersion in water up to 1 meter for 30 minutes.
Important Kit Components and Accessories
Make sure your chosen kit has everything you need. You’ll want to ensure it includes the light strips themselves, a control box (if it has multiple functions), the wiring, and any necessary mounting hardware. Some kits even come with extra fuses or mounting clips. Checking the contents list and taking inventory before you start the installation process will prevent frustration later. You should also ensure the light strips are durable and can withstand road conditions.
- Light Strips: These are the main lights. Consider the length and number of strips you need for your vehicle.
- Control Box: This box controls the lights’ functions (color, modes, etc.). It’s the brain of your lighting system.
- Wiring Harness: This carries the power and signals to the lights. Look for high-quality, weather-resistant wiring.
- Mounting Hardware: Clips, brackets, or adhesive tape to secure the light strips. Choose hardware that is durable and suitable for your car’s undercarriage.
Light strip length depends on your car’s size and the style you want. Measure the areas where you plan to install the lights (under the front and rear bumpers, and along the sides) to determine the appropriate lengths. Consider that longer strips will likely require more power and a stronger power source. If you want a full, complete look for your under glow, you will want more light strips.
The control box manages the power and the signals that make the LEDs shine with the colors and patterns you have chosen. It often includes the receiver for the remote control (if applicable) and a fuse for added protection. The control box also provides features like dimming, strobe effects, and music synchronization.
The wiring harness must be durable and weather-resistant to withstand the environment under your car. Make sure the wiring is long enough to reach from the light strips to the power source (usually the car battery or a fuse box). Protect the wires by using wire loom or conduit. Make sure your wire gauge is appropriate for the current draw of the lights.
Mounting hardware is what keeps the light strips securely attached to your car. Many kits use adhesive tape. However, some have brackets or clips. Make sure the mounting hardware is compatible with your car’s materials (plastic, metal, etc.). Inspect the mounting locations to ensure that the area is clean and dry to allow for the best performance.
Under Glow Light Strip Install Without Drilling: The No-Drill Methods
The best part about under glow light strip install without drilling is that you can avoid damaging your car. There are several effective ways to mount your lights without making holes. These methods use strong adhesive or existing parts of your car to keep the lights in place. This is especially good if you have a leased vehicle where drilling is not allowed, or if you simply don’t want to void your car’s warranty.
Using Adhesive Tape
Adhesive tape is the simplest method for mounting your light strips. Most kits come with double-sided tape that is strong enough to hold the strips in place. However, the quality of the tape is very important. Always start with a clean surface for maximum adhesion, and consider using an adhesion promoter for extra security. Some kits come with 3M tape which is highly recommended for its durability. Also, make sure that the surface is dry before starting this process. The tape’s effectiveness can be reduced with water exposure.
- Surface Preparation: Clean the mounting surfaces thoroughly with rubbing alcohol. This removes dirt and grease.
- Adhesive Promoter: Apply an adhesive promoter for a stronger bond. This helps the tape stick better to the car’s surface.
- Tape Quality: Use high-quality double-sided tape, such as 3M VHB tape, for a secure hold. Avoid cheap tape that may fail.
- Application: Press the light strips firmly onto the surface for several seconds. Ensure the tape has good contact.
Proper surface preparation is crucial for ensuring the adhesive tape sticks correctly. Use rubbing alcohol to clean the area where you’ll be attaching the light strips. This will remove any dirt, grease, or wax that can prevent the tape from adhering properly. Make sure the area is completely dry before applying the tape.
An adhesive promoter enhances the bond between the tape and the surface. Apply it before sticking the light strips. You can usually find adhesive promoters at auto parts stores. Apply it according to the manufacturer’s directions, and let it dry for the recommended time before mounting the lights.
The quality of the tape significantly impacts the longevity of your installation. 3M VHB (Very High Bond) tape is a premium choice known for its strength and durability. While this is not included with all kits, if you have the option to buy it or use it, it will significantly help to ensure a permanent bond. Also, make sure to read the tape’s temperature range to ensure it can withstand the undercarriage heat and conditions.
When applying the light strips, press them firmly against the surface for at least 30 seconds. This activates the adhesive and ensures a strong bond. Press along the entire length of the strip. If your kit includes clips, space them out properly to provide support and added stability.
Utilizing Existing Car Components
Another way to mount your lights is to use the existing parts of your car. This can involve using clips, zip ties, or mounting to factory-installed components. This method is great because it requires no extra materials and makes your lights more secure. It’s also hidden from view, providing a clean and tidy look.
- Clips and Zip Ties: Attach the light strips to existing clips or use zip ties to secure them to the undercarriage.
- Mounting Brackets: Use small brackets to attach the strips to the frame or other sturdy parts.
- Avoid Moving Parts: Make sure the light strips don’t interfere with moving parts like suspension components or exhaust systems.
- Weather Protection: Ensure the mounting method protects the lights from road debris and water.
Clips and zip ties are excellent for securing light strips to existing components. Look for factory-installed clips or areas where you can easily thread zip ties. This method is particularly useful when you have access to areas like the frame or subframe. Make sure the zip ties are weather-resistant and positioned to prevent any movement of the light strips.
Mounting brackets offer a more robust method for securing the light strips. These can be made of metal or strong plastic. Attach the brackets to the car’s frame or other rigid areas using screws or bolts. Ensure that the brackets don’t interfere with any moving parts or wires. Make sure the brackets are rustproof.
The most important consideration when installing under glow lights is to avoid any interference with moving parts. This includes suspension components, exhaust pipes, and any other elements that could move or generate heat. Plan the route of your light strips and wiring to stay clear of these hazards. Failure to do so could lead to damage to the lights or your car.
Even when using a no-drill method, it’s essential to protect the lights. Position the lights to avoid direct exposure to road debris and water. Use waterproof mounting hardware and sealant. This will extend the life of your light strips. You can also use wire looms and waterproof connectors to protect the wiring.
The Step-by-Step Installation Process
Now that you know how to choose your kit and the best mounting methods, here’s a simple guide to help you put it all together. This will help you succeed with your under glow light strip install without drilling project. Taking your time, following these steps, and being patient will make the whole process much easier. A good installation makes a huge difference in the final look and durability of the lights.
Pre-Installation Checks and Planning
Before you start sticking anything to your car, plan your layout and make sure you have everything you need. You want to make sure the wiring can reach the power source and any other components that are needed. This step is about preparation; it will make the actual installation process smooth and efficient. It will also help you identify any potential problems before you start.
- Gather Your Tools: Make sure you have all the necessary tools and materials before you begin.
- Plan Your Layout: Decide where you want to place the light strips and how you will route the wiring.
- Test the Lights: Before mounting, plug in the lights and test them to make sure they work.
- Power Source: Determine where you will connect the lights to your car’s power source.
Before you begin the installation, ensure you have all the tools and materials on hand. This includes the light strip kit, measuring tape, rubbing alcohol, adhesive promoter (if using), zip ties, pliers, a screwdriver, and any other tools that may be needed for your chosen mounting method.
Before installing, plan where the light strips will go. Measure and mark the locations on your car. Consider the visibility of the lights, the ease of mounting, and the routing of the wiring. Take your time to make sure that the lights look great from every angle. This will also help you organize your mounting hardware.
Before anything else, plug in the lights and check the functions. This ensures the lights and the control box are working properly. This is very important. This also helps you identify any manufacturing defects. If the lights are not working at this stage, you know you need to deal with the problem before you go any further.
Decide where you will connect your lights. Many kits are designed to connect to the car battery or a fuse box. You might also be able to use the cigarette lighter socket. If you’re going to use the car battery, make sure to connect through a fuse to protect the lights and the car’s electrical system.
Mounting the Light Strips
This is where you put your planning into action. Make sure the area is ready for your light strips. Also, make sure that you are working in a well-lit area, so you can clearly see the mounting location and any potential problems. Double-check your wiring to make sure there will not be any issues in the future.
- Clean the Surfaces: Use rubbing alcohol to clean the areas where the light strips will be attached.
- Apply Adhesive Promoter (if using): If using an adhesive promoter, apply it according to the manufacturer’s instructions and let it dry.
- Apply the Light Strips: Carefully peel off the backing and apply the light strips to the prepared surfaces, pressing firmly.
- Secure with Additional Hardware (if needed): Use clips, brackets, or zip ties to provide extra support and security.
Using rubbing alcohol will get rid of any dirt, grease, or wax that can affect the adhesion. Make sure the surface is completely dry before moving on to the next step. You can use a clean, dry cloth to remove any excess alcohol. Ensure you clean the area thoroughly.
Apply the adhesive promoter before sticking on the light strips. Be careful when working with adhesive promoters and use the proper safety equipment. Allow it to dry for the recommended time before mounting. This helps the tape stick better.
Slowly peel the backing from the adhesive tape on the light strips and carefully apply the light strips. Press firmly for at least 30 seconds to ensure good contact. Make sure the strip is straight and aligned according to your plan.
If you’re using clips, brackets, or zip ties, now is the time to add them to support the light strips. Place them at intervals along the light strips. Fasten them securely to provide extra stability and to prevent the strips from falling or moving due to vibrations.
Wiring and Power Connection
Wiring is a critical part of the process, and you need to take your time. Incorrect wiring can cause your lights to malfunction or even damage the electrical system. Always disconnect the negative battery terminal before starting any electrical work. Take the time to route your wires neatly, securely, and in a way that will not be damaged by road conditions. Make sure the fuse is easily accessible.
- Route the Wiring: Run the wiring from the light strips to the control box and then to the power source.
- Connect the Control Box: Plug the light strips into the control box, and then connect the control box to the power source.
- Connect to Power Source: Connect the power wires to the car battery or fuse box, using the appropriate wiring and fuse.
- Check Functionality: Turn on the lights and check all functions to make sure everything works correctly.
Carefully run the wiring from your light strips to the control box and from the control box to the power source, like the car battery or a fuse box. Make sure the wires are not exposed to high heat sources, sharp edges, or moving parts. Use wire loom or conduit to protect the wires.
Connect the light strips to the control box following the directions included with your kit. Then, connect the control box to your car’s power source. Always ensure you are connecting the power supply through a fuse to protect the lights and the car’s electrical system. Be sure to check your car’s manual before working on electrical components.
Connect the power wires from the control box to your car’s battery or fuse box, ensuring you use the correct wiring and fuse. If you’re using the car battery, make sure to connect through a fuse to protect the lights and your car. Also, make sure all connections are secure to avoid any shorts or other problems.
Turn on the lights and use the remote or the app (if applicable) to check all functions. Make sure all the colors, modes, and features are working as expected. If something isn’t working, check the connections, the wiring, and the fuse. If you encounter any problems, always consult the kit’s instructions or, if necessary, an auto electrician.
Ensuring Safety and Compliance
Safety should always be your top priority. Make sure that your installation doesn’t interfere with any safety systems on your car and that it’s legal in your area. Incorrect wiring or placement can cause damage to the car or even create a safety hazard.
Safety Guidelines and Considerations
Safety is not just about avoiding electrical problems, it’s also about ensuring that your lights don’t distract other drivers or interfere with your car’s operation. Taking the time to properly install the lights will prevent problems. If you’re unsure about any aspect of the installation process, it’s always best to seek professional help from an experienced auto electrician.
- Disconnect the Battery: Always disconnect the negative terminal of the car battery before starting any electrical work.
- Secure Wiring: Route and secure all wiring properly to prevent it from getting pinched, cut, or damaged.
- Fuse Protection: Use the fuse provided with the kit or an appropriately sized fuse for the lights.
- Grounding: Ensure proper grounding to prevent electrical issues.
Disconnecting the negative terminal of your car battery is a crucial safety measure to prevent electrical shorts. This step protects you from electric shock and keeps the car’s electrical components safe. Disconnecting the battery also prevents the lights from accidentally turning on during installation.
Secure the wiring to prevent damage. Use wire loom or conduit. Make sure the wiring is not near moving parts or heat sources. This will prevent short circuits and ensure that the lights work correctly. Proper wiring will prevent problems down the line.
A fuse is a safety device designed to protect your car’s electrical system from overcurrent situations. Using the correct fuse (included in most kits) will prevent damage to your lights and your car’s wiring. If the lights malfunction or there’s an electrical issue, the fuse will blow, preventing further damage.
Proper grounding is a must. All electrical components need a good ground connection to complete the circuit. Ensure that you have a secure ground connection for the control box and any other components. A bad ground can cause the lights to flicker or not work at all.
Legal Considerations and Regulations
Different areas have different rules about under glow lights. Before you start, check the local rules in your area to make sure your lights are legal. Ignoring these regulations can lead to fines or even issues with your insurance. Familiarize yourself with these rules to ensure that your setup is within the legal boundaries and doesn’t violate any restrictions.
- Local Laws: Research the local laws and regulations regarding under glow lighting.
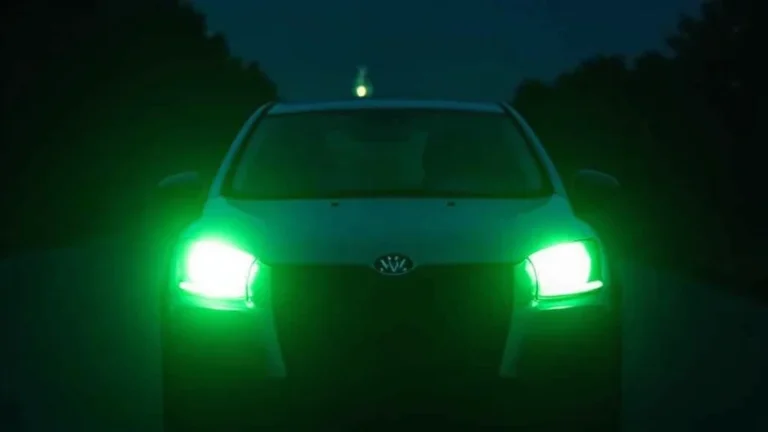
- Color Restrictions: Be aware of any color restrictions, such as the prohibition of red or blue lights in some areas.
- Visibility Rules: Ensure the lights are not too bright or distracting to other drivers.
- Professional Help: If you’re unsure about legal requirements, consult with an auto electrician or local authorities.
Before installing your lights, research local laws and regulations. Some areas may restrict the colors of lights allowed. Make sure the lights do not flash. Also, make sure that the lights are not visible from the driver’s seat. Make sure you are familiar with the specific rules in your area. This will help you prevent any legal problems.
Some regions have restrictions on the colors that can be used for under glow lighting. Blue and red are often restricted because they can be confused with emergency vehicle lights. Check the local regulations to find out which colors are permitted. This will help you avoid any violations.
Make sure that your under glow lights are not so bright as to distract other drivers. Ensure the light strips are positioned so they don’t shine directly into other drivers’ eyes. Check your local regulations for specific brightness limits. Be courteous of other drivers and keep the roads safe for everyone.
If you’re unsure about the local regulations, consider consulting with an auto electrician or contacting your local authorities. They can provide clarification and ensure you comply with all applicable laws and regulations. This will give you peace of mind and help you avoid any potential legal issues.
Frequently Asked Questions
Question: Can I install under glow lights without any prior experience?
Answer: Yes, installing under glow lights without drilling is a project that many beginners can do. Just take your time, follow the instructions carefully, and don’t hesitate to ask for help if you get stuck.
Question: How long does the installation typically take?
Answer: The installation time can vary. It usually takes a few hours, depending on your car and the kit you choose. It’s better to take your time and do it right than to rush through it.
Question: What if the adhesive tape doesn’t stick well?
Answer: If the tape isn’t sticking well, make sure the surface is clean and dry. Use an adhesive promoter for extra strength. You can also try a different brand of double-sided tape.
Question: What if my lights stop working after a while?
Answer: First, check the wiring and connections. Make sure everything is secure and that the fuse hasn’t blown. Also, check the control box and the light strips themselves for any damage.
Question: Will under glow lights affect my car’s battery life?
Answer: Under glow lights use very little power, so they shouldn’t drain your battery significantly. However, if you leave them on for extended periods when the car isn’t running, it could drain the battery.
Final Thoughts
Installing an under glow light strip install without drilling is a straightforward and rewarding way to customize your car. By following these easy steps, you can avoid drilling into your car and still achieve a stunning look. Choosing the right kit, preparing your car correctly, and following the no-drill mounting instructions will lead to a successful outcome. The key to making your car stand out is in the details, from the type of lighting you choose to how you secure it. Remember to prioritize safety and follow all local regulations. So, grab your kit, gather your tools, and get ready to transform your car into a head-turner! Enjoy your newly lit ride and the attention it brings!