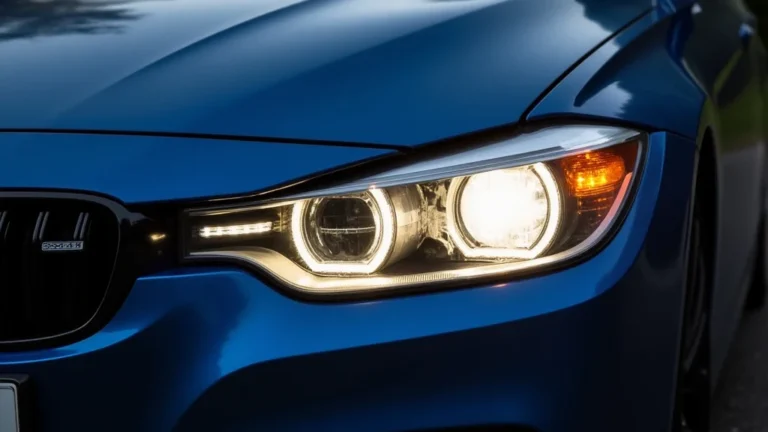
Interior LED Dome Light Replacement: A Step-by-Step Guide
Replacing the lights in your car can seem tricky, especially if you’re new to it. Many people find the process of interior led dome light replacement a little difficult because they worry about breaking things or not knowing where to start. Don’t worry, though! This guide is here to help you get the job done easily. We’ll break down the entire process into easy steps so you can brighten up your car’s interior. We’ll cover everything you need to know, from gathering your supplies to installing the new lights. Let’s get started!
Gathering Your Supplies for Interior LED Dome Light Replacement
Before you start, it’s important to have everything you need ready. This helps you avoid stopping in the middle of the project. This preparation helps ensure a smooth process. You’ll need specific tools and the right replacement lights. Being prepared saves time and frustration.
Essential Tools and Materials
For your interior led dome light
- LED Replacement Lights: Choose the right type of LED bulbs for your car. These are available in various sizes and styles. You can find them at auto parts stores or online. Make sure they match your car’s make and model. Check your car’s manual to find the right bulb type.
- Plastic Pry Tools: These tools are used to carefully remove the plastic covers of your dome lights without scratching or damaging anything. Metal tools could scratch the plastic. Plastic pry tools are available at most auto parts stores. They have different shapes to fit different gaps.
- Screwdriver: A Phillips head screwdriver is sometimes needed to remove screws that hold the light fixture in place.
- Gloves: Gloves protect your hands while working. They also provide a better grip on tools and parts.
- Work Light: A work light provides extra light. This is helpful when working in a dimly lit car interior.
Choosing the correct LED replacement lights is an important step. Using the wrong size or voltage can damage your car’s electrical system. LED lights are better than old-style bulbs because they use less power and last longer. They also give off a brighter, cleaner light. Make sure to get bulbs that are the same voltage as your car’s electrical system. This will usually be 12 volts for most vehicles. Consider the color of the light you want. Many LEDs come in different color temperatures, like warm white or cool white.
Plastic pry tools are essential. They protect your car’s interior from damage. Using a screwdriver or metal tool can scratch or break the plastic cover. This makes your car look less clean. Gently insert the pry tool into the gap between the cover and the car’s headliner. Carefully pry the cover loose. Work slowly and gently to avoid breaking anything.
A Phillips head screwdriver is a common tool. You might need it to remove screws, and it’s good to have one ready. The screws can be used to hold the light fixture in place. Many cars use this type of screw. Make sure your screwdriver fits the screws correctly. Choose a screwdriver that is the right size to avoid stripping the screws.
Gloves protect your hands. They keep them clean and provide a better grip. They can be made of rubber or latex. This is especially helpful if you’re working with grease or dirt. They also provide a better grip on tools and small parts, preventing them from slipping. Choose gloves that fit your hands well for maximum dexterity.
Having a good work light is essential. A work light helps you see small details. This will help you see the wires and fixtures more clearly. This is especially helpful if your car is parked in a garage. Choose a work light that can stand on its own or clip onto something. Make sure the light is bright enough to see the details clearly. A good work light will make the job much easier.
Understanding LED Bulbs
LED bulbs are a huge upgrade over older bulbs. They have many benefits. LEDs are energy-efficient and last much longer. This saves you money in the long run. There are several kinds available. Knowing about them helps you choose the best ones for your car. They also offer a brighter, more focused light. They are also available in different colors.
- Brightness (Lumens): This measures how much light the bulb produces. A higher lumen number means a brighter light. For interior led dome light replacement, you typically want a moderate brightness. You don’t want lights that are too bright. The appropriate level will depend on where the lights are in the car.
- Color Temperature (Kelvin): This determines the color of the light. Lower numbers (around 2700K) mean a warmer, yellowish light. Higher numbers (around 6000K) mean a cooler, white or blueish light. The light color can affect the car’s interior. Choose a color temperature that you like and is easy on your eyes.
- Type (Size): Make sure to choose the correct size and type of bulb for your car. This information is in your car’s manual. The bulb type must match your car’s existing light fixtures. Using the wrong size will not work.
Lumens are important when choosing LED bulbs. Think about where the lights will go in your car. A dome light usually needs a moderate brightness. It should be bright enough to see, but not too harsh. Different types of bulbs also have different lumen ratings. Research the right lumen count for your specific car model. Choosing the right lumens will make the car interior comfortable and functional.
Color temperature is important for aesthetics and functionality. Choose a color that fits your style. A cooler color temperature may give a more modern feel. The warmer colors are easier on the eyes. Make sure the color temperature of your LEDs matches or complements the rest of the car’s interior lighting. Consider how the color will look at night. Choose a color that will provide enough visibility without being distracting.
Using the correct bulb type is very important. Getting the wrong size can cause the light to not work. Incorrect installation could damage the car’s electrical system. Before you buy, check your car manual or the old bulb. There will be a code. It tells you the type of bulb needed. Double-check this information to be certain.
Taking Out the Old Bulbs and Putting in the New Ones
Replacing the bulbs requires careful steps. This part is not hard. Taking your time makes the process go smoothly. You’ll be able to enjoy the new lights quickly. You can do this by following the correct steps. It’s a satisfying task you can do yourself. This also saves you money on car repairs.
Removing the Old Dome Light Cover
The first step in interior led dome light replacement is removing the cover. This is a careful job. You want to avoid breaking anything. It’s also simple. Follow these steps.
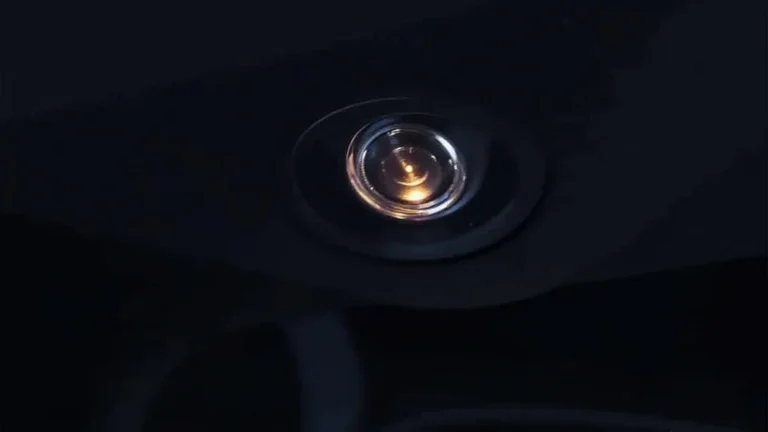
- Locate the Light Cover: Find the dome light in your car. It is usually in the center of the roof or in the overhead console.
- Use a Pry Tool: Insert the plastic pry tool carefully. Put it in the gap between the cover and the headliner.
- Pry the Cover Loose: Gently pry the cover loose. Work around the edges to release the clips. Be careful to avoid breaking any of the clips.
Finding the light cover is the first step. Look for the dome light in your car. Dome lights are typically in the roof of the car. Check in the middle. Sometimes the dome light is in an overhead console. Make sure you know where the lights are before you start. Knowing the location ensures the process is easy.
The plastic pry tool helps you open the cover. Gently .
Gently remove the cover. Work along the edges of the cover. This will release the clips. Clips hold the cover in place. It will probably take some gentle pressure to get the cover off. Do not force it. If it doesn’t come off easily, double-check that you’ve found all the clips. This will make removing the cover easier and less stressful.
Removing the Old Bulb
Removing the old bulb is the next step. After removing the light cover, you can access the bulb. You have to be careful when removing the old bulb. Make sure the car is off before you start. Avoid touching the bulb too much. It might be hot.
- Disconnect the Power: Turn off the car’s ignition. It is a good idea to disconnect the car battery. This will prevent any short circuits.
- Remove the Old Bulb: Remove the old bulb from its socket. Some bulbs have clips or a twist-and-lock system.
- Check the Socket: Make sure the socket is clean and in good condition. Clean any dirt or debris with a soft cloth. Damaged sockets can cause problems with the new bulbs.
Disconnecting the power is a safety precaution. Turn off the car before you start. For extra safety, you can disconnect the car battery. This will stop any electrical accidents. This step makes sure you do not get shocked. This also prevents damage to your car’s electrical system. Put the car key far away from the car, too.
Take the old bulb out of the light fixture. The way you take the bulb out depends on the type. Some bulbs have clips that hold them in place. Others have a twist-and-lock system. Gently remove the old bulb from the socket. Do not use too much force. Do not touch the glass part of the bulb. Your hands can make it less efficient.
Before installing the new bulb, examine the socket. Make sure it is clean. Remove any dust with a soft cloth. Check the socket for any damage. Check the metal contacts inside. If the socket is damaged, the new bulb won’t work right. If you see damage, you might need to replace the entire light fixture. It is rare, but good to know.
Installing the New LED Bulb
Installing the new LED bulb is easier than removing the old one. This is also a good moment to check your work. This helps to avoid problems. Make sure everything is working correctly before putting everything back together. It’s also important to follow these simple steps.
- Insert the New Bulb: Put the new LED bulb into the socket. Make sure it is secure.
- Test the Bulb: Turn the car back on. Test the new LED bulb to make sure it works. Turn on the dome light switch.
- Replace the Light Cover: Put the light cover back on. Align the clips, and press gently.
Gently put the new LED bulb into the socket. Check the bulb’s orientation. If you have any questions, check the car manual. Make sure the bulb is securely in place. The bulb should fit snugly in the socket. It is the same process as removing the old one. If the bulb doesn’t go in easily, double-check that you have the right type.
Turn the car back on. Test the new LED bulb to see if it works. Turn on the dome light switch. This lets you know right away if the bulb is working. If it does not light up, check the bulb. You might need to turn it around in the socket. If it still doesn’t work, there might be a problem with the wiring or the bulb. This is where you would address these problems.
Put the light cover back on. Align the clips on the cover with the openings. Press gently. The cover should snap back into place. If the cover does not fit easily, check the alignment. Make sure you haven’t pinched any wires. When the cover is in place, you are finished.
Troubleshooting Common Issues
Sometimes problems occur. It’s important to know what to do. Having the correct knowledge helps you fix any issues. The goal is to identify what is wrong. You might need to take additional steps. Being able to fix problems saves you time and stress.
- Bulb Doesn’t Light Up: Check the bulb. Make sure it’s installed correctly. Check the fuse for the dome light. A blown fuse will prevent the light from working.
- Flickering or Dim Light: Check the bulb connection. The bulb could be loose. This could cause the bulb to flicker. Check the car’s battery voltage.
- Cover Doesn’t Fit: Make sure you have the cover aligned. Check for any obstructions. You could be pinching the wires.
If the bulb doesn’t light up, there are a few things to check. First, make sure the bulb is in the socket correctly. It might not be making a good connection. Next, check the fuse box. Find the fuse for the dome light. A blown fuse will prevent the light from working. If the fuse is blown,
Flickering or dim lights can be frustrating. First, check the connection to the bulb. Make sure it’s securely in place. A loose connection can cause flickering. Check your car’s battery voltage. If the battery is low, it can cause the lights to dim. You might need to replace the battery. Also, examine the electrical wiring. You can have an issue that is causing the problem.
If the cover does not fit, it is frustrating. Double-check the alignment of the clips. There could be an obstruction. Make sure you haven’t pinched any wires. If the cover still doesn’t fit, check the instructions. You might be missing something. If you do not know, ask a professional for help.
Frequently Asked Questions
Question: Can I replace my car’s dome lights myself?
Answer: Yes, you absolutely can! Replacing your car’s dome lights is a simple project. This guide provides easy steps to follow. You don’t need to be an expert.
Question: What tools do I need for this project?
Answer: You will need a few simple tools, such as plastic pry tools, a screwdriver, and gloves. Be sure to have the correct LED replacement bulbs for your car.
Question: What if the new LED bulb doesn’t work after I install it?
Answer: Check the bulb’s position in the socket. It might not be seated correctly. Also, check the fuse that controls the dome light. You might need to change it.
Question: How do I choose the correct LED bulbs for my car?
Answer: Check your car’s manual. It will tell you the bulb type you need. Also, choose the right brightness and color temperature to suit your preferences.
Question: What if I break something during the process?
Answer: If you are extra careful and take your time, you should be fine. If a clip breaks or a piece of plastic cracks, don’t worry. It is usually fixable.
Final Thoughts
Now that you know how to do an interior led dome light replacement, you can improve your car. You have the tools, the knowledge, and the confidence to brighten your car’s interior. This is a simple job, so enjoy the process. It’s a satisfying feeling to complete a project yourself. Now you can easily enjoy brighter, more efficient lighting. If you follow these easy steps, you will have better lights. Get ready to enjoy a more comfortable driving experience. Go ahead and get started today!