Interior LED Dome Light Kit Installation Simplified Guide
Thinking about upgrading your car’s lights? The interior led dome light kit installation might seem tricky at first, especially if you’re new to car modifications. Don’t worry, many people find this project accessible, and with the right steps, it’s totally manageable. We’re here to help you get your new lights in and shining. Next, we’ll walk you through everything you need to know.
Choosing the Right LED Dome Light Kit
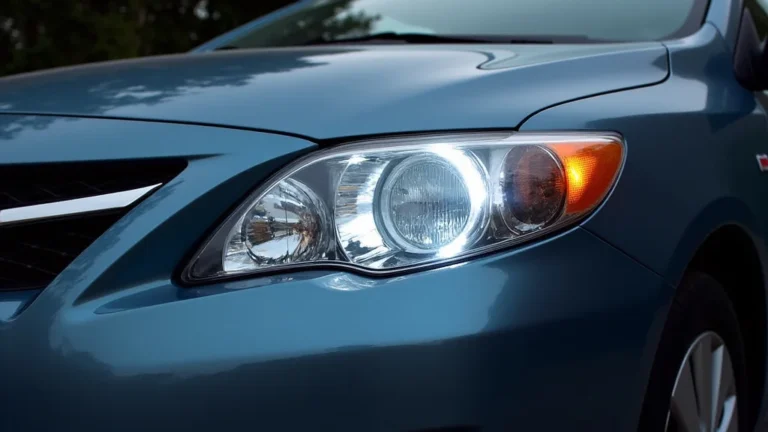
Before you even touch a screwdriver, selecting the correct kit is important. This involves more than just picking a color you like. You need to consider the size, type, and compatibility of the LED dome lights with your vehicle. The wrong choice can lead to wasted money or worse, damage to your car’s electrical system. So, taking your time in the selection process is a good idea. Different cars require different types of bulbs, so doing your homework first saves future headaches. Many websites allow you to enter your car’s details to find suitable options, making the process easier. Think about brightness level as well. LEDs come in various intensities, so pick one that gives the desired amount of light for your needs. Do you mostly want ambient lighting, or do you need something bright for finding dropped items? Also, make sure the kit has all the components you need.
Assessing Compatibility and Features
Choosing the correct kit means more than just finding one that fits the physical space in your car. Vehicle compatibility is the primary consideration. You need to check the exact make, model, and year of your car to ensure the kit is designed for it. Many kits will list the compatible vehicles, often in a drop-down box on the product page. This avoids any issues with plug sizes or other physical constraints. It also prevents any interference with your car’s electronics. The type of light socket your car uses is important. Check your car’s manual or the existing bulb to identify the correct bulb type (e.g., festoon, wedge, or bayonet). There are also different light output choices. The color temperature, measured in Kelvin (K), affects the light’s appearance. Choose a color temperature that suits your preference. 6000K gives a cool, bright white, whereas a lower rating will create a warmer light.
- Vehicle Year, Make, and Model: Always confirm the kit suits your car’s exact specifications.
- Bulb Type: Understand the existing bulb to pick the right LED type (festoon, wedge, etc.).
- Color Temperature: Choose your preference between bright white (6000K) or warmer tones (3000-4000K).
- Brightness (Lumens): Consider the lumen output for the desired light level inside your car.
- Additional Features: Consider kits with built-in resistors for error-free operation.
This is the most critical step. Kits are designed for specific vehicles. Mismatched kits may not fit, or worse, damage your car’s electrical system.
Different cars use various bulb types, and LEDs are made to fit into these different sockets. Trying to force an incompatible bulb will cause failure.
Color temperature is measured in Kelvin (K). This affects the way the light looks. Make a good choice for your preferred interior ambiance.
Lumens measure the amount of light emitted. More lumens equal brighter light. Too bright might be annoying; too dim won’t offer useful illumination.
Some LEDs require resistors to prevent the car’s computer from throwing an error. Look for kits that already have these to keep things simple.
Kit Quality and Durability
The quality of an LED dome light kit directly affects its lifespan and performance. Buying from a reputable seller is essential. Look for LEDs with a high-quality build. Check the product specifications for information on the expected lifespan, usually measured in hours. A good kit will use durable materials that can withstand temperature changes and vibrations within your car. LEDs made with better components will often last longer and perform better than cheap options. Also, check the reviews. Real customer feedback is useful to assess the product’s reliability and performance. Reading reviews can help you get a real-world perspective on how the kit works over time. Also, consider the warranty. A good warranty indicates the manufacturer’s confidence in their product. A longer warranty period often points to better quality.
- Material Quality: Search for kits made from durable, heat-resistant materials.
- LED Chipset: Research the LED chipset used (e.g., CREE, Philips).
- Heat Dissipation: Ensure the kit has heat sinks or other methods of heat removal.
- Water Resistance: Choose a kit with some water resistance.
- Warranty: Prioritize kits with a manufacturer’s warranty for replacement or repairs.
Quality materials can resist wear and tear. They prevent premature failure due to extreme changes in temperature and vibration.
High-quality chipsets are more efficient. They’ll also emit more light and last longer than cheaper alternatives.
LEDs generate heat. Good heat management helps extend the lifespan and maintain consistent brightness.
Water resistance helps against moisture. It is particularly helpful if you live in a rainy climate. This protects your lights from damage.
A warranty provides added peace of mind. It assures the kit is reliable and supports the manufacturer.
Gathering Your Tools and Preparing for Installation
Before beginning the interior led dome light kit installation, preparation is key. Having the right tools and knowing how to use them safely makes the process easier. It minimizes the risk of mistakes and damage to your vehicle. The most common tools needed are simple, but their quality and your knowledge matter. Take your time to carefully get everything together.
Essential Tools for the Job
You probably already have many of the tools you’ll need. But confirming you have everything ready before you start can save you trips back and forth. You will need a set of plastic trim removal tools. These are essential for safely removing the old dome light cover. They prevent damage to your car’s interior trim. A flathead screwdriver is often required for prying or removing various components. Always use one that fits securely and won’t slip to protect your trim. You’ll likely also need a Phillips head screwdriver, a staple in any tool kit. An electric tester or multimeter helps in checking for any stray voltages before starting the electrical work. Safety glasses are crucial for protecting your eyes from any debris that might fall while you are working. A work light will also illuminate your work area. Keep the area around your vehicle clean and well-lit to prevent any accidents.
- Plastic Trim Removal Tools: Essential for gently removing the dome light cover.
- Screwdrivers (Flathead and Phillips): For removing screws or prying parts.
- Electrical Tape: To insulate any exposed wires, offering an extra layer of protection.
- Work Light or Flashlight: To provide sufficient illumination in low-light conditions.
- Safety Glasses: To protect your eyes from any falling debris during work.
These tools prevent damage to the plastic trim around your dome light. Using metal tools can cause scratches.
Make sure you have both types in good condition. Select the correct size for the job.
Electrical tape secures connections and protects against short circuits. It is a good idea to keep it handy.
Bright lighting can help you see tiny components and see how the parts fit together. A good light is essential.
Safety glasses are a simple but vital tool. Always use them, no matter the task.
Safety Precautions Before You Begin
Electrical work requires caution, and working on your car is no different. Safety comes first, so it is necessary to take a few steps before you start. The first step is to disconnect the car’s negative battery terminal. This eliminates the risk of electrical shock and prevents any potential short circuits. Use a wrench or the appropriate tool to loosen the nut on the negative terminal, then carefully remove the cable. Always double-check this step. Work in a well-ventilated area to avoid fumes. If you are working in a garage, make sure there is adequate airflow. Also, do not work near any open flames or sources of ignition. Wear appropriate safety gear, including safety glasses, to protect your eyes. Always be careful around electrical components. Also, inspect all tools for damage before you begin. Never force any components or connections. Take your time to avoid causing damage or injury.
- Disconnect the Negative Battery Terminal: To prevent electrical shock and short circuits.
- Work in a Well-Ventilated Area: To avoid inhaling any fumes or noxious gases.
- Wear Safety Glasses: To protect your eyes from debris that might fall during your work.
- Inspect Your Tools: Make sure tools are not damaged or faulty.
- Avoid Forcing Components: If something doesn’t fit easily, review the installation steps.
This is the most critical safety step. It disables the car’s electrical system, making the work safe.
Poor ventilation can lead to a buildup of dangerous vapors.
Even small particles can damage your eyes. Safety glasses are a simple precaution that makes a difference.
Using damaged tools can increase the risk of injury. Take a moment to examine each tool before starting.
Forcing parts can cause damage to the lights or your car. Always proceed with care.
Step-by-Step Interior LED Dome Light Kit Installation
With the right kit, tools, and safety measures in place, you can move forward with your interior led dome light kit installation. The process involves a few steps to
Removing the Old Dome Light Assembly
This is the first physical step of the process. The process might vary slightly depending on your car model. Consult your car’s manual or an online guide. Use plastic trim removal tools to gently pry the dome light cover from the housing. Start at one edge of the cover and work your way around, carefully releasing the clips that hold it in place. Once the cover is off, you’ll see the old light bulb. Carefully remove it. The type of bulb removal will vary. Some bulbs just pull straight out, while others need to be twisted. Be careful not to break the bulb or the socket. Sometimes, a tiny flathead screwdriver is needed to assist in removal. Once the old bulb is out, unplug the connector. Sometimes, you need to detach the entire light fixture from the car. Depending on your car, you might need to unscrew it from the roof. This is where a flashlight can be useful to examine all the connections.
- Locate the Dome Light Cover: Identify its location in the car.
- Use Trim Removal Tools: Carefully pry the cover to release the clips.
- Remove the Old Bulb: Carefully take out the old bulb and inspect the connections.
- Unplug the Connector: Disconnect any electrical connections attached to the dome light.
- Unscrew the Assembly: If needed, remove the entire light assembly from the roof.
The dome light is usually mounted in the center of the car’s roof, or above the back seats.
Trim removal tools help you to avoid damaging the surrounding plastic.
Make sure the socket is in good condition and ready for the new LED bulb.
This will allow you to remove the entire assembly from the car.
This will provide more room for working on the connections.
Installing the New LED Dome Lights
With the old light out, it’s time to install the new LED lights. Start by inserting the new LED bulb into the socket. Make sure it fits securely. Then, reconnect any connectors you detached earlier. Next, if your kit includes a new light assembly, install it in the dome light housing. Most kits come with a simple plug-and-play design. The LEDs might have polarity. If the light does not turn on when you test it, try reversing the bulb’s position. This ensures the electrical connections are correct. Once you have installed the LED, test it to see that it works properly. If the light works, attach the cover back onto the assembly. Make sure all the clips are securely fastened.
- Insert the LED Bulb: Put the new LED bulb into the socket.
- Reconnect the Connectors: Reattach any connectors you disconnected earlier.
- Install the New Assembly: If your kit includes a new light assembly, install it.
- Test the Lights: Test the LEDs to make sure they are working correctly.
- Secure the Cover: Reattach the dome light cover, ensuring all clips snap back in place.
Ensure it fits securely and connects with the right orientation.
This is a crucial step to restore the light’s power.
Follow the manufacturer’s instructions to ensure it fits properly.
Activate the lights and check for any issues with functionality.
Make sure the cover is secure and fits flush against the roof’s interior.
Testing and Finalizing the Installation
Before you consider the interior led dome light kit installation complete, several checks are necessary. Reconnect the negative battery terminal you disconnected earlier. This restores power to the car’s electrical system. Then, test the new LED dome lights. Turn on the lights using the car’s interior light controls. If the LEDs work as expected, you can proceed. Check that the lights turn on and off correctly. If they don’t light up, double-check all connections and confirm the LED bulb is correctly installed. Ensure that there are no error messages or unusual behavior from your car’s electrical systems. Then, carefully replace all interior trim or panels that you may have removed. Check the area around the dome light for any loose wires or parts. You want a neat and tidy look. Once everything is confirmed, you are finished, and you can enjoy your new lighting.
- Reconnect the Battery: Restore power to your car by reconnecting the negative terminal.
- Test the Lights: Turn the lights on and off.
- Check for Error Messages: Make sure no warning lights appear on your dashboard.
- Replace Interior Trim: Reinstall any panels or trim you removed.
- Final Inspection: Review the installation to ensure everything is tidy.
This activates the car’s electrical system, preparing for the final tests.
Confirm the lights operate correctly using the car’s light switches.
Ensure there are no issues, such as an incorrect bulb warning.
Return your car’s interior to its original condition.
Check that all connections are secure and all components are correctly installed.
Troubleshooting Common Issues
Even with careful planning and following the instructions, you might encounter issues during the interior led dome light kit installation. Don’t worry; most problems are easily resolved. Troubleshooting the issues can save you time and prevent unnecessary trips to a mechanic. Here are some of the most common issues and how to solve them.
Lights Not Working After Installation
The most common issue is the lights not working after installation. This can result from multiple factors. The first thing to check is the bulb’s polarity. LEDs have a positive and negative side. If the LED doesn’t work, try flipping it 180 degrees in the socket. This changes the direction of the electrical current. Check the fuse that controls the dome light circuit. Fuses are designed to protect the electrical system. A blown fuse will prevent the lights from working. Locate the fuse box, find the correct fuse, and
- Check Polarity: Flip the LED bulb if it doesn’t turn on initially.
- Inspect the Fuse:
A blown fuse is a frequent cause of no light. Inspect your car’s fuse box.
- Review Connections: Make sure all wires are securely connected.
- Check Battery Connection: Ensure that the battery terminals are firmly attached.
- Consult the Manual: Review the kit’s instructions for any specific tips.
LEDs are polarity-sensitive. Reversing the bulb will likely solve the problem.
Loose connections can disrupt the electrical circuit, stopping the lights from working.
A loose connection can interfere with the operation of the lights.
Manufacturers often include instructions for troubleshooting and issue resolution.
Flickering or Dimming of the LED Lights
Sometimes, the lights work, but they flicker or dim. Several things can cause this. LED lights are designed to work properly with a stable voltage. If the voltage fluctuates, the lights may flicker. Check your car’s voltage regulator. Ensure there is a constant power supply to the LEDs. Some LEDs are not compatible with certain vehicles. Many modern cars have systems that monitor the electrical current used by the lights. If the LEDs do not have the right resistors, the car’s computer might cause flickering. Check if the LEDs require any extra components, like a load resistor. Make sure the connections are solid. Any loose or corroded connections can cause intermittent power issues, leading to flickering. Finally, check the quality of your LED bulbs. Inexpensive bulbs might not last as long. Make sure the kit is of good quality. If you have done the above and still get flickering, consider replacing the LEDs.
- Check the Voltage: Ensure a stable power supply to the LEDs.
- Load Resistors: Install resistors if needed for your car’s system.
- Check for Loose Connections: Review all connections to avoid intermittent power.
- LED Quality: Consider the quality of the LED bulbs and kit.
- Grounding Issues: Confirm the ground connections are secure and clean.
Voltage fluctuations can cause flickering or irregular light output.
Resistors can help correct issues with the electrical system.
Faulty connections can cause flickering or dimming effects.
High-quality LEDs often provide more stable and consistent performance.
Poor grounding can lead to intermittent electrical problems and cause flickering.
Error Messages on the Dashboard
When you
- Install Load Resistors: These trick the car into thinking the old bulbs are still there.
- Use CAN bus Compatible LEDs: These LEDs are made to work with the car’s computer.
- Reset Error Codes: Use an OBD2 scanner to clear the codes.
- Check Wiring: Make sure the wiring is correctly installed.
- Seek Professional Help: If problems persist, consult with a mechanic.
Load resistors prevent the car’s computer from detecting an error condition.
These bulbs are built to avoid triggering error codes.
Removing the old codes might solve your dashboard issue.
Incorrect wiring can lead to error messages and other problems.
A professional mechanic will diagnose and fix the issue.
Frequently Asked Questions
Question: What do I do if my new LED lights do not fit?
Answer: Double-check the kit’s compatibility. Ensure it matches your car’s make, model, and year. Compare the new bulbs to the old ones. Measure the new bulbs against the space available. If they still don’t fit, consider contacting the kit seller or manufacturer for assistance or a replacement.
Question: How do I know if I need load resistors?
Answer: Check your car’s manual. Look for error messages on the dashboard after installation. If you see a warning light, you probably need load resistors. If your new LED dome lights flicker or dim without them, load resistors might be required. Generally, if your car has a system that monitors the bulb’s power draw, load resistors are recommended.
Question: Can I damage my car by installing LED dome lights?
Answer: Yes, but you can avoid damage. Always disconnect the battery’s negative terminal before starting work. Use the correct bulbs and tools. Follow all installation instructions carefully. Double-check all connections before applying power. If you are unsure, consult a professional to avoid damaging your car’s electrical system.
Question: How long do LED dome lights last?
Answer: LED dome lights typically last much longer than standard incandescent bulbs. High-quality LEDs can last for thousands of hours, sometimes even up to 50,000 hours or more. This long lifespan means you likely won’t have to replace them very often.
Question: What is the best color temperature for my car’s interior lights?
Answer: The “best” color temperature depends on your preferences. The cool white (6000K) is a bright, modern look. The warm white (3000K-4000K) provides a softer, more inviting ambiance, similar to traditional bulbs. Consider your use case. Do you need bright light for detailed tasks, or do you prefer a relaxing interior? Choose what best matches your driving style.
Final Thoughts
Upgrading to an interior led dome light kit installation is a great way to improve your car’s interior. As you have seen, it’s a manageable project that many vehicle owners can handle. It can give your car a modern appearance and brighter interior. By following the steps outlined, you can choose the correct kit, prepare your vehicle, and complete the installation correctly. Remember to focus on safety first, double-check all connections, and take your time. If you run into problems, remember to troubleshoot the issues and ask for assistance when needed. You’ll quickly see the difference with clearer lighting. You can customize the look of your car while improving visibility inside the cabin. Take the leap, and enjoy your new LEDs.