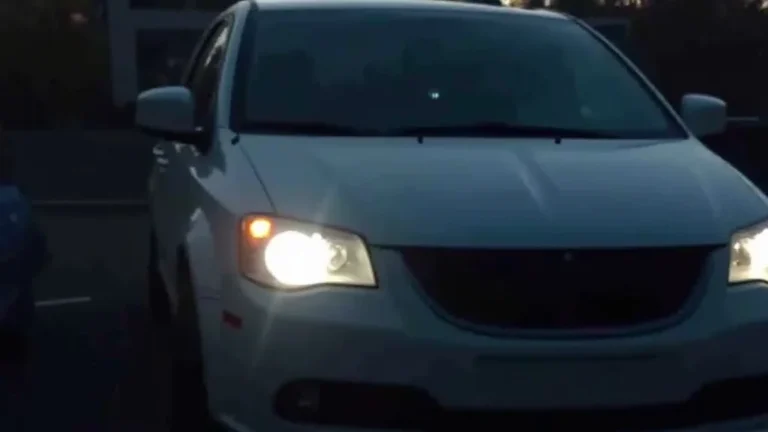
Interior LED Dome Light Fuse Blown Troubleshooting Guide
Having your interior led dome light fuse blown can be frustrating! It’s a common issue, especially if you’re new to car maintenance. Don’t worry, though; it’s usually a simple fix. This guide will walk you through the steps, making it easy to troubleshoot and get your lights working again. We’ll explore the common causes and how to identify them, then provide a simple, step-by-step process for replacing the fuse and getting everything back in order. Let’s get started!
What Causes an Interior LED Dome Light Fuse Blown?
The interior LED dome light fuse, like any electrical component, is designed to protect your car’s electrical system. A blown fuse acts as a safety device, preventing damage from excessive current flow, which can be caused by various factors. Finding the root cause is necessary before replacement. Identifying the triggers ensures the fix is permanent and your dome light is up and running safely. The fuse’s job is important, protecting the entire electrical system from potential hazards.
Common Culprits That Lead to a Blown Fuse
Several things can lead to that tiny fuse failing. Understanding these common culprits helps you prevent future issues. Overloading the circuit, using the wrong type of bulbs, or a short circuit are common reasons. A short circuit, where electricity takes an unintended path, is a particularly frequent issue. This can result from damaged wires, or faulty components.
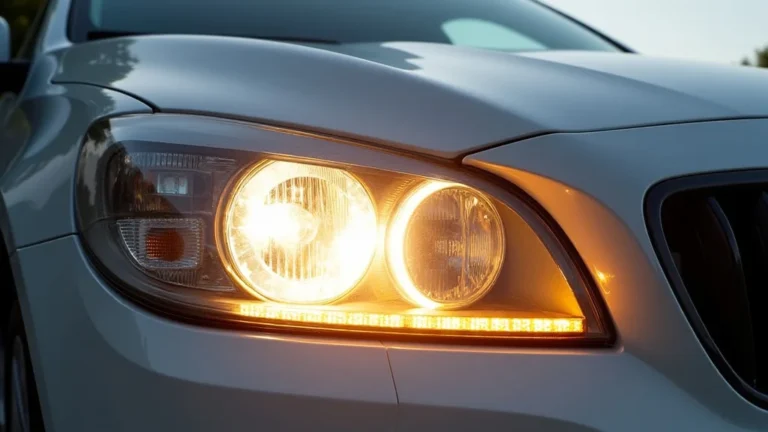
- Incorrect Bulb Type: Using a bulb that draws more power than your system is designed for is a frequent issue. LED lights need less power. If you try using a higher wattage bulb than the fuse is rated for, it can quickly blow. Always check the bulb specifications and make sure they align with your car’s requirements.
- Short Circuit: A short circuit is where electricity bypasses its intended path, flowing through a wire, or damaged component. This causes a sudden surge of current, which blows the fuse. Short circuits can occur due to damaged wiring, frayed wires, or a faulty switch. The insulation on the wires might be damaged, leading to exposed wires touching each other or the vehicle’s body.
- Water Damage: Water entering the dome light fixture or electrical components can cause short circuits. Water acts as a conductor, and when it comes into contact with the electrical parts, it can create unintended paths for the current. This leads to a blown fuse. Water damage can be more frequent in older vehicles or in situations where the seals have been damaged.
- Overloading the Circuit: Adding too many devices to the same circuit, like installing multiple LED lights without upgrading the fuse, is a frequent mistake. The circuit is designed to handle a certain amount of current. Exceeding this limit causes the fuse to blow. If you’ve recently added extra lights or accessories, this may be the cause.
Make sure the replacement bulb meets the voltage needs of your car. For example, a 12-volt system uses a 12-volt bulb. If you use a lower voltage, the bulb may not function. If you use a higher voltage, it can damage the bulb and potentially affect the electrical system, resulting in a blown fuse or other problems. Verify the bulb’s specs before installation.
Short circuits can be tough to locate, but it’s important to find and fix them to avoid repetitive fuse issues. Look for any visible wire damage, particularly around the light fixture, and the switch. Use a multimeter to check for any continuity between the wires and the chassis or frame of the vehicle to spot short circuits. Replace any worn or damaged wires immediately. Professional help might be needed.
Moisture can cause corrosion. This will impact the electrical contacts and cause shorts. To avoid this, inspect the dome light housing and surrounding areas. Make sure the seals are intact and tight. Replace any damaged seals to prevent water from entering. Consider using dielectric grease on the electrical connections to protect them from moisture and corrosion.
The solution is to determine the current draw of all devices connected to the circuit. Make sure it doesn’t exceed the rating of the fuse. Distribute the load by using separate circuits. This is usually managed by an electrician. Upgrading the fuse to a higher amperage is not a good idea unless you’ve confirmed that the wiring and other components can handle it safely. This can be very dangerous.
Finding the Blown Fuse
Locating the fuse box and identifying the right fuse is critical. Car manufacturers usually place fuse boxes in a few common areas. These can include the dashboard, the engine compartment, or even the trunk. Once you find the correct box, you need to understand the layout and identify the fuse specifically connected to your interior lights. Use the fuse box diagram to help you. A blown fuse often has a visible break in the filament.
Step-by-Step Guide to Locate the Fuse Box
The first step is locating the fuse box. This sounds easy, but the location varies from car to car. The car’s manual is the best resource for the exact location. Typically, you will find it in the cabin or the engine compartment.
- Check Your Owner’s Manual: The car owner’s manual has the exact location of all fuse boxes. It will also have a diagram showing you what each fuse controls. If you do not have a hard copy, search online using your car’s make, model, and year.
- Common Locations: Most cars have an interior fuse box, usually on the driver’s side dashboard. This area is easily accessible. You may find another fuse box in the engine compartment. It’s generally next to the battery or near the firewall. Some vehicles also have a fuse box in the trunk.
- Opening the Fuse Box: Once you find the fuse box, open it by removing the cover. Some covers snap off. Others have screws or clips. Be careful when removing the lid to avoid damaging it.
Your manual shows the location. It also gives a layout of each fuse. This will make the identification process quicker. It’s the most reliable source for the specific details related to your vehicle.
Check these locations first. Look for a small, rectangular box with a lid. These areas are typically the ones where the fuses reside. Look for labels that say “Fuses” or “Fuse Box.”
Once you remove the cover, you will see the fuses inside. Take care when handling the cover and keep it in a safe place. This cover often has a diagram that helps with fuse identification.
Identifying the Interior Light Fuse
After locating the fuse box, you must identify the correct fuse for your interior lights. Use the diagram on the fuse box cover or the owner’s manual to find the fuse’s location. Typically, the diagram provides a clear layout. It may use symbols or abbreviations to show which component each fuse is connected to. The diagram will also indicate the amperage rating of each fuse, which is important when replacing it.
- Check the Diagram: The fuse box cover or owner’s manual has a diagram. This diagram tells you which fuse controls the interior lights. Look for symbols representing lights or interior components. The diagram will also give you the fuse amperage rating (e.g., 10A, 15A).
- Visual Inspection: Once you’ve identified the suspected fuse, examine it closely. A blown fuse will show a break in the thin wire inside the clear plastic housing. Sometimes, you may also see a darkened area or a melted metal component. A good fuse will have a continuous wire.
- Fuse Puller: Many fuse boxes include a fuse puller tool. This tool makes it easier and safer to remove fuses. If your fuse box doesn’t have a puller, use needle-nose pliers or small tweezers. Be gentle to avoid damaging the fuse or the fuse box.
The diagram is your primary guide to finding the right fuse. Take your time to understand the diagram. Match the fuse locations shown on the diagram with the actual fuses in the box. This will help you identify the correct fuse. If the diagram is missing, consult your car’s manual online.
A blown fuse is usually easy to spot because of the broken wire. If the wire is intact, the fuse is still good. Use a flashlight in low-light conditions to see better. Be careful when handling the fuses to avoid accidental damage.
Use the fuse puller to remove the fuse from the box. If you don’t have a fuse puller, gently grip the fuse with the needle-nose pliers. Wiggle the fuse gently to loosen and remove it. Don’t use excessive force, which could damage the fuse box. Make sure you are using the correct type of tool.
Replacing the Blown Fuse
Replacing the fuse is a straightforward process. You need to get the right
Selecting the Right Replacement Fuse
Choosing the correct
- Amperage Rating: The amperage rating is marked on the fuse. It tells you the maximum current the fuse can handle before blowing. The diagram on the fuse box cover or your owner’s manual tells you the correct rating. Match the number on the old fuse with the new one. Use the right amperage for a safe and effective replacement.
- Fuse Type and Size: Fuses come in various types and sizes. They include blade-type, mini-blade, and others. Make sure you get the same type and size of fuse as the original. The fuse box diagram or your manual will specify the type of fuse needed.
- Where to Purchase Fuses: Fuses are usually easy to get. You can purchase them at auto parts stores, hardware stores, or online. Keep a set of spare fuses in your vehicle’s glove box. This allows for quick replacements if another fuse blows.
If the fuse is rated at 10 amps,
The type and size of the fuse must fit correctly into the fuse box. You will not be able to install it if the sizes don’t match. Blade-type fuses are common. These have flat metal blades that insert into the fuse box. Mini-blade fuses are smaller and are used in more modern vehicles. Some cars may use specialty fuses. These will be clearly noted in your owner’s manual.
Buying extra fuses ensures you have spares when needed. Choose a reputable retailer. You can ensure you are buying quality fuses. Check the packaging to verify that the fuses meet the necessary safety standards. Always use new fuses rather than used ones to ensure proper performance.
Installing the New Fuse
Inserting the new fuse is simple once you have the right one. Make sure your car is off before you begin. Then, you place the new fuse in the correct spot. The goal is to ensure the fuse is properly seated in the fuse box. Improper seating can cause intermittent contact or a failure of the lights.
- Turn Off the Car: Turn off the engine and remove the car keys from the ignition. This will help avoid any short circuits. It will also protect you from electrical shocks during installation.
- Insert the New Fuse: Carefully insert the new fuse into the empty slot in the fuse box. Make sure the fuse is pushed in firmly until it is fully seated. This is essential to ensure it makes proper electrical contact. Check the fuse’s orientation.
- Test the Interior Lights: After installing the new fuse, turn on the interior lights to check if they work. This confirms that the replacement was successful. If the lights still do not work, check the fuse again. Make sure it is securely seated.
The car’s electrical system will be dormant, and this prevents any unexpected power surges. This is especially important for safety. Do not touch any metal parts or electrical connectors while installing the new fuse.
Make certain the new fuse is in the right position. Make sure it lines up correctly. Use the fuse box diagram if you are uncertain. If the fuse is not properly seated, the electrical current will not flow. This prevents the interior lights from working. If the fuse is not secure, it may become loose. This can cause intermittent problems or prevent the lights from working.
If the lights work, your problem is solved! If the lights still do not work, it indicates an underlying issue. There may be a short circuit. If you have any concerns, consult a mechanic. They will examine the car’s electrical system. This ensures the issue is resolved safely. If the fuse blows again soon after replacement, a more serious problem may exist.
Troubleshooting If the New Fuse Blows Again
If the replacement fuse blows again immediately, or shortly after installation, the problem is more complex than a simple fuse failure. This indicates an ongoing electrical issue. Finding the cause involves careful inspection and, sometimes, specialized diagnostic tools. The most common causes are short circuits, damaged wiring, or faulty components. To prevent a cycle of blown fuses, you must take the time to find the underlying issue.
Further Investigation Steps
If the new fuse blows, perform these steps to discover the problem. Start with the most obvious and straightforward checks. Then you can move to more detailed diagnostics.
- Inspect the Light Fixture: Examine the interior light fixture. Look for any loose or damaged wires, and make sure that the bulb is correctly seated and is the right type. Check the connections to the wiring harness. This helps you identify short circuits or other issues.
- Check the Wiring: Inspect the wiring that leads to the interior lights. Look for any signs of damage, such as cuts, abrasions, or insulation that is worn away. These damaged areas can lead to short circuits and repeatedly blown fuses. Look for any signs of corrosion or exposed wires.
- Test the Switch: The switch controls the dome lights. If it is faulty, it can cause problems. A faulty switch may create a short circuit or may not function correctly. Test the switch with a multimeter to check the continuity and ensure it is working correctly.
Loose wires or incorrect bulbs often cause short circuits. Ensure the bulb is correctly installed and compatible with your car. Damage inside the light fixture, such as frayed wires, can create short circuits. Look for any signs of melting or burning. These could suggest an electrical problem. Check for water intrusion. Water can cause short circuits.
Carefully trace the wires from the interior lights back to the fuse box. Look for any damage or areas where the wires are touching the metal parts of the car. Use a multimeter to test the wiring for continuity. This can identify short circuits. Professional repair may be necessary for complex wiring problems.
If the switch is faulty, replace it. When the switch malfunctions, it may cause an overload on the circuit. This makes the fuse blow. Disconnect the power before removing the switch. Compare the old switch to the new one to make sure they match. Proper switch functionality helps keep the electrical system safe.
When to Seek Professional Help
While some electrical repairs are easy to accomplish, others require special skills and equipment. There are situations where seeking professional help from a qualified mechanic is the best choice. This ensures the issue is diagnosed and fixed safely and correctly. Improper electrical work can cause further damage to your car. It may create serious safety risks. If you are not comfortable working with electrical systems, or if you encounter any difficulties, do not hesitate to seek expert advice.
- Complexity: If you are unfamiliar with car electrical systems, it’s best to consult a professional. If the wiring is complex or hard to access, or if the problem is not straightforward, a professional can diagnose the issue quickly and accurately. Attempting repairs you are not familiar with can cause additional problems.
- Safety: Electrical work can be dangerous. It can lead to electric shock or even damage to the car’s electrical components. If you are not comfortable working around electricity, let a mechanic handle it. A qualified mechanic will follow all safety protocols to prevent accidents.
- Specialized Tools: Professionals have access to specialized tools and diagnostic equipment that can find and solve electrical problems. These tools are often too expensive for casual car owners. They are necessary to identify some problems that might otherwise be difficult to detect.
If you have any doubts, do not risk it. A professional mechanic can provide a diagnosis using specialized tools. They will have access to information. They can fix the problem. This saves you time and avoids potential safety hazards.
Working on electrical components can expose you to live wires. Always disconnect the battery before working on electrical systems. A professional will take the right safety measures to work with electrical parts. You can keep your vehicle and yourself safe.
Specialized tools can detect the source of problems. They allow for accurate diagnosis and repair. Professionals use these tools to troubleshoot and pinpoint the exact cause of a blown fuse. They will have the experience to interpret the results correctly. This leads to a lasting repair.
Frequently Asked Questions
Question: Can I use a higher amperage fuse than the original?
Answer: No, never use a higher amperage fuse than the one specified for your vehicle. Using a higher-rated fuse can cause damage to the wiring and other components and can potentially lead to a fire.
Question: What does it mean if the fuse blows immediately after replacing it?
Answer: If the new fuse blows immediately, this indicates there is a short circuit or another electrical problem within the circuit that needs to be located and fixed before the lights will work.
Question: Where can I find the fuse box diagram for my car?
Answer: The fuse box diagram is typically found on the fuse box cover or in the owner’s manual of your vehicle. You can also find it by searching online using your car’s make, model, and year.
Question: How can I tell if a fuse is blown?
Answer: A blown fuse will usually have a break in the wire inside the fuse. You can often see this visually. You can also use a multimeter to test for continuity.
Question: Is it safe to replace a fuse myself?
Answer: Replacing a blown fuse is generally safe if you know the correct fuse type and amperage. However, if you are unsure or uncomfortable, you should consult a professional mechanic.
Final Thoughts
Addressing the issue of an interior led dome light fuse blown can seem complex at first. The truth is, with the correct knowledge and a step-by-step guide, it can be a manageable DIY project. We’ve explored the common causes like bulb issues and short circuits, and provided a clear process for identifying the fuse. You’ll then learn how to