How to Wire Halo Headlights: A Beginner’s Wiring Guide
Figuring out how to wire halo headlights can seem tricky. It’s common for people just starting out with car modifications to feel a bit lost. Don’t worry, many people are in the same boat! This guide will break down the process into easy-to-follow steps. We’ll explore the basics and show you everything you need to know. Get ready to learn how to do it without all the head-scratching. We’ll start with the essential tools you’ll need.
Gathering Your Supplies for Halo Headlight Wiring
Before you begin, you need the right tools and parts. This will make the job much easier and safer. Using the correct items helps to prevent short circuits and other problems. Safety should always be your top priority. Make sure you have all the necessary components before starting to work.
Essential Tools and Components
Here’s a list of everything you’ll need to successfully how to wire halo headlights:
- Halo Headlights: These are the main lights, with the halo rings built in. Make sure they fit your car’s model.
- Wiring Harness: A wiring harness is a set of wires, connectors, and terminals that connect the headlights to your car’s electrical system. This helps streamline the installation and makes the wiring process easier. Look for a harness that is made for your specific headlight model. It’s usually included with the headlights.
- Relays: Relays help control the power flow to the headlights. They protect your car’s electrical system from overload. You’ll likely need a relay to ensure the halo lights get enough power without damaging the original wiring.
- Inline Fuse Holder and Fuse: This adds an extra layer of protection against electrical faults. A fuse will prevent damage from surges. A fuse holder houses the fuse.
- Wire Strippers/Crimpers: These tools are for preparing the wires for connections. They strip insulation and attach terminals.
- Electrical Tape: Used for insulating wire connections and protecting them. It secures connections and shields against water or abrasion.
- Connectors (Butt Connectors, Spade Terminals): These are used to connect wires securely. They come in different types and sizes. They make the job much easier.
- Screwdrivers and Wrenches: For removing and installing the headlights in your car. Make sure you have the right sizes.
- Multimeter: Used to check the voltage and continuity of the wires. This will help confirm the connections are correct and working properly.
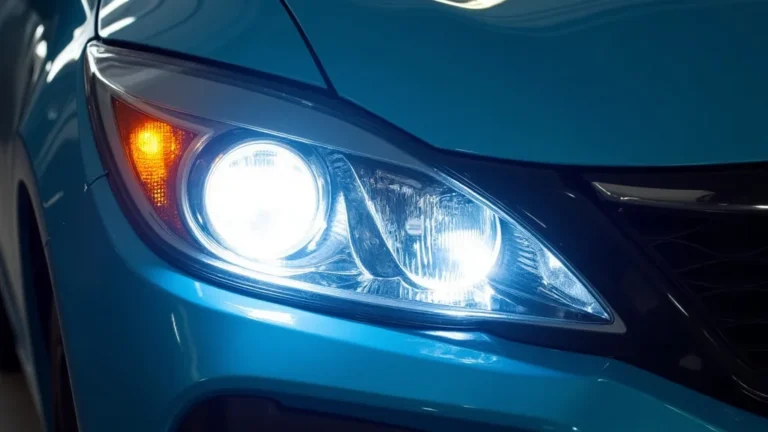
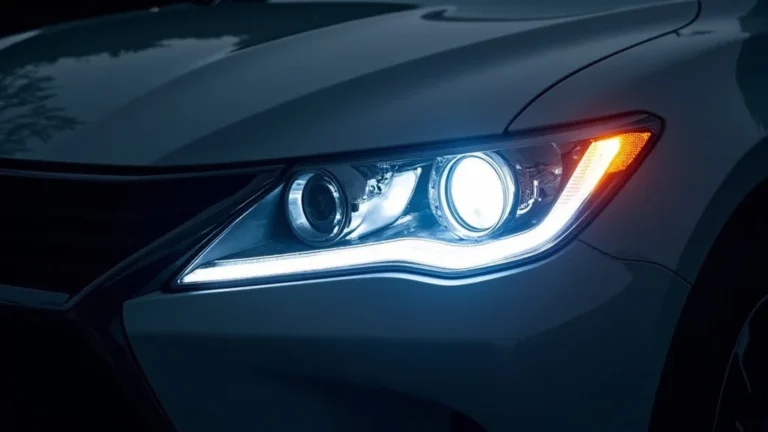
Halo headlights, also called angel eye headlights, include the main light plus a circular ring. The ring is lit by LEDs and creates a glowing effect around the main light. These are available in various sizes, colors, and designs, often adding a unique look to your vehicle. Some halo headlights also feature projector lenses, which offer improved light distribution compared to older reflector-type headlights. This combination of style and function makes them a popular choice for car enthusiasts.
A wiring harness is a bundle of wires that connects electrical components in a car. It organizes these wires to help reduce clutter. These harnesses are important for safety. They also make installation easier. Quality harnesses are essential to ensure the headlights work as expected and to minimize the chances of electrical problems. They include various connectors, relays, and sometimes fuses to protect the electrical system of your vehicle.
A relay is an electrical switch that uses a small amount of power to control a larger amount of power. It has an electromagnetic coil that closes or opens a switch. When you apply current to the coil, it creates a magnetic field. This field pulls the switch closed. Relays are used in car electrical systems to protect sensitive components, such as the headlights. Relays allow for the use of a high-power circuit without drawing excessive current through the switch. This helps prevent overheating and damage.
An inline fuse holder is a protective device used in electrical circuits. It protects electrical components from damage caused by excessive current. The fuse is designed to melt and break the circuit if the current exceeds a certain level. This prevents damage to the headlights and other electrical parts of your vehicle. The fuse holder provides a secure place to put the fuse. This will make it easier to replace if needed.
Wire strippers are designed to remove the insulation from electrical wires without damaging the copper strands. This is key for creating solid electrical connections. Crimpers are used to attach connectors (like terminals and splices) to the wire. Using the right tools is important for a secure and long-lasting connection. Incorrectly stripped or crimped wires can cause shorts, loose connections, and other electrical issues.
Electrical tape is made of a special plastic (usually vinyl) that is good for insulating electrical wires and connections. It has a sticky side that easily sticks to itself and other surfaces, making it great for wrapping around wires. It protects them from moisture, abrasion, and other damage. Electrical tape is easy to use and a quick way to keep everything safe and organized. It can be found in a variety of colors, useful for easily marking different wires or circuits.
Connectors are essential for making secure and reliable connections in electrical circuits. Butt connectors are sleeves that allow you to connect two wires end-to-end. Spade terminals are designed to connect to screw terminals. By using these types of connectors, you will create solid electrical links without soldering. Using the proper connectors is crucial to prevent loose connections, which can lead to intermittent operation or even complete failures.
Screwdrivers and wrenches are essential for removing and replacing parts when upgrading your car’s headlights. They are helpful for securing the headlight unit and for making the electrical connections. Having a set of screwdrivers and wrenches in multiple sizes will ensure you’re equipped for any type of bolt or screw you may encounter. Always use the right size tools to prevent stripping screws or damaging components.
A multimeter is a handy tool for testing electrical circuits. You can use it to measure voltage, current, and resistance. It’s useful for finding problems in your car’s electrical system, like an open circuit. You can also use a multimeter to ensure your halo lights are receiving the right amount of power. They help identify any voltage drops or issues. They are very important for making sure your electrical work is done correctly and safely.
You may also need zip ties to keep the wires neat and out of the way. Get your tools and components together before moving to the next section.
Getting Ready to Install and How to Wire Halo Headlights
Now that you have your tools and parts, it’s time to prepare your car and the new headlights. This part involves making sure everything fits correctly and that you can access the wiring.
Prepping Your Vehicle
First, make sure the car is off and the battery is disconnected for safety. Then, you can remove the old headlights. This will give you room to work. Once the old headlights are out, compare the new ones to make sure they match. This process will differ based on the car’s model. Refer to your car’s manual if you have any questions.
- Disconnect the Battery: This is a key safety step. It prevents accidental short circuits or electrical shocks. Always remove the negative (-) terminal first.
- Remove the Old Headlights: Most headlights are held in place by screws or clips. Carefully remove these. Unplug the existing wiring harness from the back of the headlights.
- Check the Fitment of the New Headlights: Before proceeding with the wiring, make sure the new halo headlights fit properly in the car’s housing. Align the headlights with the mounting points.
- Identify the Headlight and Halo Wiring: The halo lights typically have separate wires from the main headlight bulbs. Know which wire is for which function.
Disconnecting the battery is essential before starting any electrical work on your car. Locate the battery. Find the negative (-) terminal. Loosen the nut that holds the cable clamp to the terminal post. Pull the cable off the post. Make sure the cable doesn’t touch the battery terminal. This helps prevent electrical shocks and protects the car’s electrical system. This protects your car’s electrical system from short circuits and damage during the installation.
The process to remove headlights varies by car model, but usually involves removing screws, bolts, or clips that secure the headlight assembly to the car’s body. Once loose, carefully disconnect the electrical connector at the back of the headlight, which sends power to the bulb. Be gentle to avoid breaking any parts. If the headlights seem stuck, check for any hidden fasteners. Consult your car’s manual for specific instructions if needed.
It’s important to test the new headlights before you start wiring. Carefully place the new headlights in the same place where the old ones were. Check to see if the mounting holes match up correctly. Look for any obstructions that might prevent the headlights from fitting properly. If everything looks good, the headlights should sit flush with the car’s body. If there are any issues, like gaps or misalignments, you might have the wrong headlights. Or, adjustments might be necessary to the mounting brackets or the car’s body.
Halo headlights have two separate wiring systems. One is for the primary headlight bulbs and another for the halo rings. Inspect the wiring harness for the halo lights. Typically, there will be two separate connectors, one for the headlight bulbs and the other for the halo rings. The halo wires often have different colors or markings. This will help you to know which wire controls the halo lights. Using the diagram that comes with the headlight kit will help you confirm which wires are for the halo lights and which ones are for the main headlights.
These preparation steps are essential to keep you safe and make the installation easier. Following these steps helps make sure the lights fit well and makes the rest of the job easier.
How to Wire Halo Headlights: Step-by-Step Guide
Now, it’s time to wire the headlights. This involves connecting the halo lights to the car’s electrical system. Carefully follow each step. If you’re not comfortable working with electrical systems, consider getting help from a professional.
Wiring the Halo Lights
The halo rings need a power source and a ground connection. There are several ways to get power for the halo rings. You can connect them to the parking lights or the ignition. This guide will show you how to do both. Always follow the manufacturer’s instructions for the headlights.
- Connecting to the Parking Lights: This way, the halo rings will turn on when you turn on your parking lights. Locate the parking light wires in the car’s wiring harness. These are the wires that go to your parking light bulbs.
- Connecting to the Ignition: This causes the halo lights to turn on when the car’s ignition is switched on. Locate a wire that receives power when the ignition is turned on.
- Connecting the Ground Wire: Grounding completes the electrical circuit. Connect the ground wire from the halo lights to a ground point on the car’s frame or body. A ground point is a place where metal parts of the car are connected.
- Wiring in a Relay (Recommended): A relay can protect your car’s electrical system and ensure the halo lights get enough power. It will reduce the load on your existing wiring. It acts as a switch.
- Using an Inline Fuse: Place an inline fuse between the power source and the halo lights. This is a safety measure to protect your headlights from power surges.
Connecting the halo lights to the parking lights is a simple setup. First, find the parking light wires. They’re usually near the car’s existing headlights or parking lights. Use a multimeter or test light to locate the wires. Once you’ve found the correct wires, you can then connect the halo lights. Use wire connectors like butt connectors or spade terminals to securely connect the halo light wires to the parking light wires. Make sure the connections are good to prevent any issues. You may need to use electrical tape to insulate the connections. This setup means the halo lights will turn on whenever the parking lights are on, adding a stylish look to your car.
Connecting the halo lights to the ignition switch will have the halo rings light up when the car starts. First, look for a wire that has power when the ignition is on. Use a multimeter or test light to test the wires and find the one that fits your car. You can connect the halo light power wire to this ignition wire using connectors. This means the halo lights will be on whenever the car is running. Use wire connectors like butt connectors or spade terminals for good connections. This set up will require you to run the wire from the halo lights to the engine bay or the fuse box.
Grounding is very important for the halo lights to work correctly. Grounding provides a pathway for the electrical current to return to the battery, completing the circuit. Locate a ground point on the car’s body. Use a multimeter to make sure it’s a good ground. Connect the ground wire from the halo lights to this ground point. Using a ring terminal will help. Make sure the connection is strong and secure. This ground connection is essential for the halo lights to light up properly. It prevents electrical interference and keeps everything working smoothly.
Wiring in a relay is a good idea to protect your car’s electrical system. A relay will help make sure the halo lights get enough power. The relay uses a small amount of power to control a larger amount of current. This keeps the load off your car’s existing wiring. Connect the relay to the halo lights’ power wire. The relay should connect to the ignition or parking light wire. This setup will protect your car’s electrical system. This ensures that the halo lights work properly. Be sure to follow the wiring diagram that comes with the relay. It is best to consult with a professional if you are unsure how to wire a relay.
Putting an inline fuse is an important safety step when you how to wire halo headlights. The inline fuse protects the halo lights from getting too much current. If there is a power surge or electrical issue, the fuse will blow. This will prevent damage to the headlights and other parts of your car. The inline fuse holder should be placed on the power wire of the halo lights. Always check the fuse rating specified by the manufacturer of the headlights. Make sure the fuse is securely installed in the holder. Then, you can close it to complete the circuit.
Wiring the Main Headlight Bulbs
The main headlight bulbs are the part that actually lights up the road. Usually, these are connected in a similar manner to the original headlights. However, some halo headlight kits may require changes to make the main headlights work.
- Connect the Main Headlight Wiring: Plug the connector from the headlight into the car’s existing headlight connector.
- Check for Polarity: Make sure you connect the positive and negative wires correctly. Reverse polarity can damage the bulbs.
- Using a New Wiring Harness (If Included): Some halo headlight kits come with a new wiring harness. This helps simplify the installation. Connect the new harness to the car’s wiring.
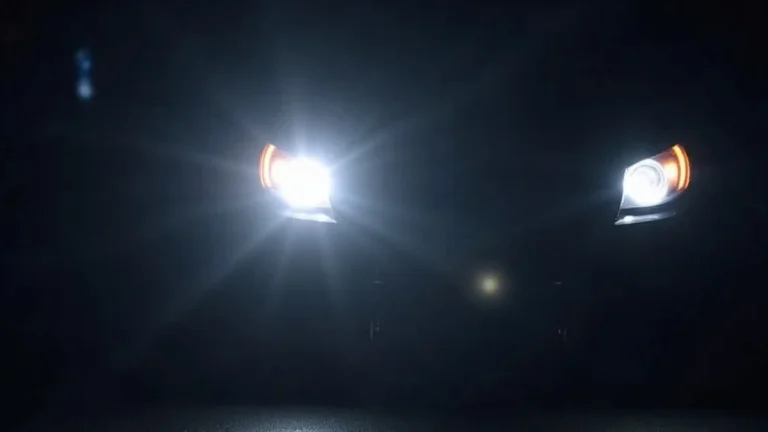
- Testing the Headlights: Turn on the headlights and make sure both the main bulbs and the halo rings are working correctly.
Connecting the main headlight wiring is often straightforward. Find the headlight connector on the back of the new headlight assembly. This connector matches the one already connected to your car’s wiring harness. Connect the two by plugging them together. Make sure the connection is snug. If the new headlights have a different connector, you might need an adapter. These adapters are sometimes included with the headlight kit. After the connection, test the headlights. Turn on the car’s headlights to make sure everything works correctly.
Checking the polarity is essential when how to wire halo headlights. Ensure you connect the positive (+) and negative (-) wires correctly. Incorrect connections can damage the headlights and other electrical parts. Polarity is often marked on the wires or the headlight assembly. Use a multimeter to double-check the polarity if you’re unsure. You can test the wires by placing the multimeter probes on each wire to confirm the polarity. If the wires are reversed, switch them. This will make sure the lights work properly and prevent any damage.
When you have a new wiring harness, it’s designed to make installation easy. This harness is often included with the halo headlight kit. It usually has connectors that match your car’s existing headlight wiring. Connect the new wiring harness. Then, attach the new headlight to the car’s wiring connectors. This makes it easier to install the new headlights. Follow the instructions that came with the harness to be sure you install it properly. This will make it easier to add new lighting features to your vehicle. This can provide a simpler and more secure way to connect the headlights.
After wiring your headlights, it’s key to test them to make sure everything is working. Turn on the headlights to check both the main bulbs and the halo rings. Observe that the main headlights turn on. Also, confirm the halo rings turn on when you turn on the parking lights or ignition. Test all the headlight functions. This will help you find any wiring mistakes. If everything works as expected, your wiring job is successful. If not, go back and check the connections.
Following these steps will help you get the headlights working. Remember, you can consult the wiring diagrams or ask for help from a professional.
Troubleshooting and Safety Tips
Sometimes, things don’t work right the first time. It is common to encounter problems. This section will help you troubleshoot. Always work safely and carefully.
Common Problems and Solutions
Even with careful planning, things can go wrong. Here are some of the problems you might encounter, along with some solutions.
- Lights Don’t Turn On: This is one of the most common issues. Start by checking the connections and power sources.
- One Light Works, the Other Doesn’t: This usually means there’s a problem with the wiring on the non-working side. Check the connections, fuses, and power source on that side.
- Flickering or Dim Lights: This can be a sign of a bad connection, low voltage, or a failing component. Inspect all the connections. Also, check the voltage and replace any suspect parts.
- Short Circuits: A short circuit can cause the fuse to blow or other electrical problems. Disconnect the power. Look for any exposed wires that are touching.
- Halo Lights Don’t Turn On: If the main headlights work, but the halo lights do not, it might be an issue with the wiring or power source for the halo rings. Review the wiring.
If the headlights don’t turn on, there are several things you should check. First, check all of the wire connections. Make sure they are secure and properly connected. Then, confirm the power source is working. Test the fuse to make sure it is not blown. Use a multimeter to see if there is power getting to the lights. If the connections and power are fine, inspect the ground connections for proper connection. The lights might not be getting enough power if they are not connected properly. These steps will help you identify the problem and get your lights working.
If only one light is working, the problem is most likely with the wiring on the side that doesn’t work. Check all of the connections. Confirm they are secure and properly connected. Check the fuses for the non-working light. There may be a loose wire or a problem with the ground connection. This will affect only one headlight. Use a multimeter to make sure the light is getting power. Start by checking these areas. This should help you find the problem and get the other light working again. Double-check all wire connections on the side that is not working.
Flickering or dim lights are often due to a problem. Check all connections to make sure they are secure and clean. Check the power source. Use a multimeter to see if the lights are getting the right voltage. Low voltage can cause lights to flicker or appear dim. Check the ground connections for any corrosion. Replace the wires or parts that might be causing the problem. Make sure the lights are getting enough power and the connections are clean. You may need to replace components if they are failing.
A short circuit is a major problem to watch out for. It can cause fuses to blow and damage electrical components. If you suspect a short circuit, disconnect the power source immediately. Check all the wiring for exposed wires. Ensure they are not touching any metal parts of the car or each other. Check for any damaged insulation. Short circuits often happen when wires are pinched or cut. Repair any damaged wires and insulate all exposed connections. When you find the problem, it can prevent further damage to the electrical system.
If the main headlights work but the halo lights do not, the issue is with the wiring of the halo rings. Go back and check the connections of the halo light wires. Make sure they have a good connection to the power source. Confirm the ground wire is properly connected to the car’s body. If the halo lights use a separate fuse, check to see if it’s blown. Check the wiring diagram and ensure the halo lights are correctly connected to the power source, like the parking lights or ignition. This should help you to identify the problem and get the halo lights working.
Safety Precautions
Electrical work always has risks. It is best to be safe. Here are some basic safety tips.
- Always Disconnect the Battery: Before beginning any work, disconnect the negative (-) terminal.
- Use the Correct Tools: Using the right tools will make the job safer and easier. This will prevent mistakes.
- Double-Check Your Connections: Once you’ve made a connection, make sure it’s secure and properly insulated.
- Avoid Working in Wet Conditions: Water and electricity don’t mix. Electrical circuits and moisture are a dangerous combination.
- If in Doubt, Seek Professional Help: If you’re not comfortable working with electrical systems, it’s best to consult a professional.
Before you how to wire halo headlights, it’s important to disconnect the battery. This will help keep you safe. Find the negative (-) terminal of the battery. Loosen the nut that holds the cable clamp to the terminal post. Carefully remove the cable from the battery post. Make sure the cable doesn’t accidentally touch the battery terminal. This helps prevent electrical shocks and protects the car’s electrical system. Working with electricity can be dangerous. Disconnecting the battery should always be the first step.
Using the correct tools is very important when doing any kind of electrical work. Make sure you have the right tools, like wire strippers, crimpers, and a multimeter. The right tools will help you make sure you don’t damage any wires. They will also make sure the connections are good. If you are not sure what you need, ask for advice. The right tools are also useful for diagnosing problems. They will help you find any problems and make the job easier and safer.
Double-check all your connections after you make them. Ensure the connections are tight. Use the proper connectors like butt connectors or spade terminals. Electrical tape is helpful for insulating the connections to help make them safe. Good connections are essential for the headlights to work correctly. Bad connections are a common cause of electrical problems. Check the connections to make sure there are no loose wires. Also, check to see that they are properly insulated. Double-checking your work will help make sure everything is safe and works the first time.
Avoid working on the electrical system in wet conditions. Water can cause short circuits and other electrical problems. If it’s raining or damp, find a dry place to work. Water can cause corrosion and rust, which can damage electrical components. Protect your work area from moisture. If you must work outside, make sure everything is dry. By taking these precautions, you reduce the chance of electrical shocks and component damage.
If you’re not comfortable, you should always get help from a professional. Electrical work can be dangerous if you don’t have experience. If you’re unsure about any step, it’s best to consult an expert. A professional mechanic or electrician can assist you with how to wire halo headlights. They have the knowledge, tools, and expertise to do the job safely and correctly. This can save you time, money, and potential problems. A professional will know the best and safest ways to do the work. This is the best way to handle any wiring project you’re not familiar with.
Following these tips will make the process safer. Keep in mind that some cars may have different wiring systems. Always check the manufacturer’s instructions for your headlights and car.
Frequently Asked Questions
Question: Can I wire halo headlights without cutting any wires?
Answer: Yes, in some cases, you can use wiring harnesses or adapters that allow you to connect the halo lights without cutting the car’s original wires. However, it will depend on the headlight kit. It will also depend on your car’s electrical system.
Question: Where can I find a wiring diagram for my halo headlights?
Answer: The wiring diagram should come with the halo headlight kit. You can also search online for a diagram specific to your headlight model and car’s make and model. Always check with the manufacturer for the most accurate information.
Question: How do I know which wire is positive and which is negative?
Answer: Usually, the positive (+) wire is red or has a stripe, and the negative (-) wire is black. You can also use a multimeter to test the wires and confirm their polarity. You can verify it against the wiring diagram.
Question: Can I use the existing headlight fuse for the halo lights?
Answer: It’s best to use a separate fuse for the halo lights. This will protect your car’s original electrical system. It prevents overloading the circuit. Always check the instructions with the headlights, and use the size recommended.
Question: What if the halo lights don’t work after I install them?
Answer: First, check all connections to make sure they are secure. Then, check the fuses and make sure they are not blown. Use a multimeter to see if there is power. If the lights still don’t work, refer to the troubleshooting steps above, or seek professional help.
Final Thoughts
Now, you have a solid understanding of how to wire halo headlights. You’ve learned about the necessary parts, how to prepare your car, and the step-by-step process. You’ve also explored common problems and essential safety precautions. Remember to always double-check your connections and test the lights after the wiring is done. Taking your time and following the steps will make the project easier. Always consult the instructions that came with your headlights. You’re ready to add some style to your car. Enjoy the process of upgrading your vehicle!