How to Wire Fog Lights to Headlights: A Step-by-Step Guide
Wiring fog lights can seem tricky at first, especially if you’re new to car modifications. Many people find it tough because it involves dealing with electricity and understanding car circuits. Don’t worry, though! It’s totally doable with the right instructions. This guide breaks down how to wire fog lights to headlights in simple steps, making the process easy to follow. Get ready to explore the process from start to finish. Let’s get started!
Choosing the Right Fog Lights and Components
Before you even touch a wire, you need to gather your parts. Picking the correct fog lights is key, considering your car’s make and model. You’ll also need a relay, a switch, wiring, fuses, and connectors. Quality components are important for safety and the lights’ longevity. Selecting the correct lights affects your car’s appearance and how well you can see in bad weather. Make sure the fog lights you select are designed for your vehicle, offering the right fit and brightness. Doing so ensures proper installation and safe operation.
Selecting the Fog Lights
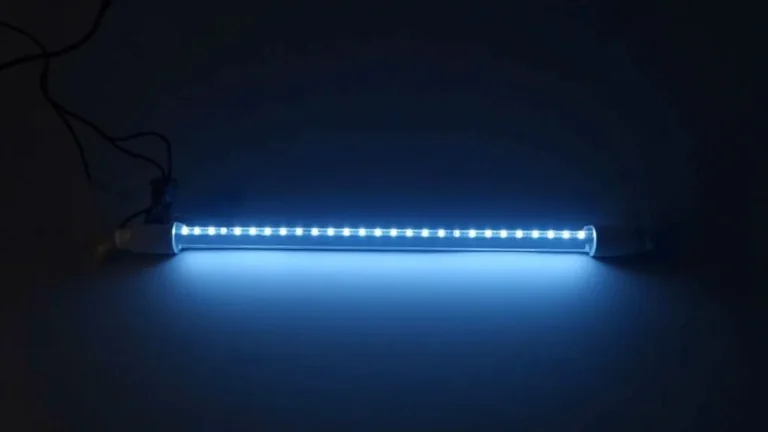
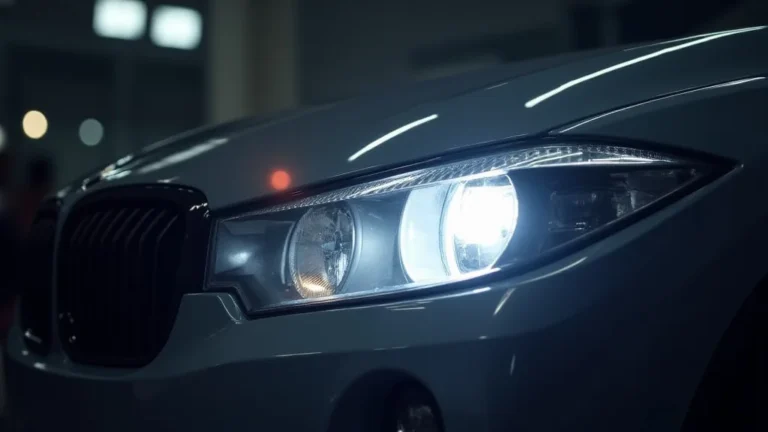
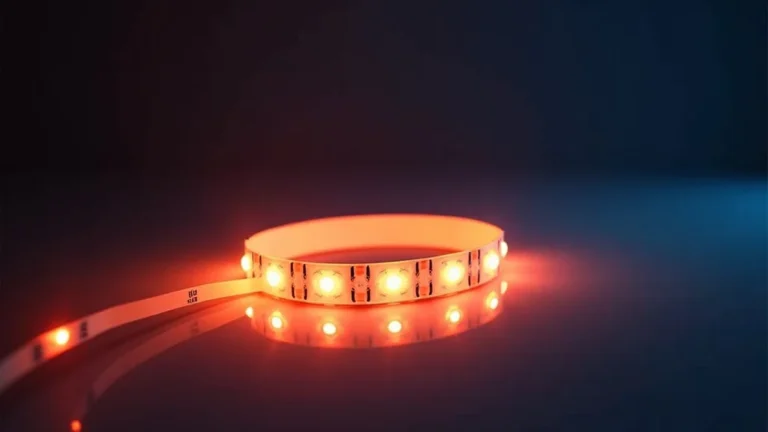
Picking the correct fog lights involves more than just liking the way they look. It starts with checking your car’s manual to find the right type and size. There are many types, including LED, halogen, and HID. LED fog lights usually provide brighter light and last longer than halogen ones. Consider the weather conditions where you live because this can influence what color light works best for you. Also, be sure the lights you choose fit your car’s bumper and that you know what wattage is appropriate for your car’s electrical system.
- Research your vehicle’s specifications: Find the correct fog light size and type for your car.
- Consider the light output: Choose the appropriate brightness and beam pattern.
- Decide on light type: Decide between LED, halogen, or HID fog lights.
- Check for DOT certification: Make sure the fog lights are legal in your area.
Different vehicles require different sizes and mounting styles. Looking at your owner’s manual or doing a quick online search for your car’s model and year can help you determine the correct fit. Also, make sure the fog lights you’re considering meet local regulations.
Fog lights are generally designed with a wide, low beam pattern to illuminate the road. Consider the lumen output of the lights (the higher the lumens, the brighter the lights). LED lights are typically brighter, but they also use less energy than halogen ones. Selecting the right beam pattern ensures you can see well in foggy or adverse conditions without blinding other drivers.
Each type has its pros and cons. LED lights are energy-efficient and last a long time, but they tend to be more expensive. Halogen lights are cheaper but don’t last as long and use more power. HID lights provide great light output but are more complex to install. Consider the initial cost, your budget, and how frequently you’ll use the fog lights when deciding.
The Department of Transportation (DOT) sets standards for vehicle lighting. Make sure the fog lights you are considering meet these standards, as failure to comply could lead to problems. Always look for the DOT certification mark to ensure the lights are approved for use on public roads. Compliance with DOT regulations helps prevent legal issues.
Gathering Essential Components
Besides the fog lights, other components are needed. You will need a relay, which is an electrical switch that controls the fog lights, a switch to turn the lights on and off, wiring to connect everything, a fuse to protect the circuit from overloads, and connectors to make everything fit together. The quality of these parts is important for the lights to work properly and for safety. Poor-quality components may not function well and could pose fire risks or electrical hazards. Making sure your components are compatible with each other and your car’s electrical system is a good idea.
- The relay: Choose a relay with the correct amperage rating.
- The switch: Select a switch that is easy to access.
- Wiring: Select the correct gauge wiring.
- Fuses and fuse holder: Use a fuse to protect the circuit.
- Connectors and terminals: Ensure you have all the necessary connectors.
The relay is a key component; it’s like a gatekeeper that controls the power to the fog lights. The amperage rating must match the power draw of your fog lights. Select a relay of 30 or 40 amps to ensure it can handle the load. A relay that is too small can burn out and may cause the fog lights to not turn on, or worse, can lead to electrical issues.
You’ll need a switch inside your car to turn the fog lights on and off. Choose a location where you can easily reach the switch while driving. Rocker switches, toggle switches, or even factory-style switches can be used, depending on the look you want. Think about where you want to mount it. Many people opt to place it on the dashboard or near the steering column.
Choosing the correct gauge wire is a must, as it determines how much current can flow safely. The gauge should be suitable for the amperage draw of your fog lights and the length of the wires. Consult a wiring chart to select the right gauge. This is important to ensure your fog lights receive enough power and to prevent overheating and potential fire hazards. Using too thin of a wire can cause the wires to heat up, potentially damaging the lights or your car’s electrical system.
A fuse protects the fog light circuit from damage if there’s a power surge or a short circuit. The fuse’s amperage rating should be slightly higher than the total amperage draw of the fog lights. The fuse holder is the spot where you’ll put the fuse in the circuit. Ensure the fuse holder is rated for the correct amperage. A fuse that is too big won’t protect the circuit correctly, while a fuse that is too small will blow too often.
You’ll need connectors like wire crimps and terminals to connect the wiring to the fog lights, relay, and switch. These ensure secure and reliable connections. Use weather-resistant connectors to guard against corrosion, and ensure all connections are tight. Consider using heat-shrink tubing to protect the connections from the elements. Properly connected wires are crucial for your fog lights to function correctly and for safety.
Understanding the Basic Wiring Diagram
A wiring diagram is like a road map for your electrical project, showing how all the parts connect. When you know how to read it, you can easily follow the steps. The diagram illustrates how the power flows from the car’s battery through the fuse, relay, switch, and fog lights, completing the circuit. Knowing these basics before you start helps the installation go smoothly and safely. Before you touch any wires, take a look at the wiring diagram.
Decoding the Wiring Diagram
Every wiring diagram uses symbols to represent electrical components and wires. For example, a battery is represented by a pair of parallel lines, and a light bulb is usually represented by a circle with a filament inside. Wires are lines, and the direction of the lines shows how the current moves. Reading the diagram helps you figure out where each wire goes and how to make the connections. Understanding these basics is important for avoiding mistakes and ensuring the system works as it should.
- Battery Symbol: Recognize the battery symbol.
- Fuse Symbol: Know how a fuse looks in a diagram.
- Relay Symbol: Learn the relay’s symbol.
- Switch Symbol: Identify the switch representation.
- Ground Symbol: Find the ground symbol.
The battery symbol usually looks like two parallel lines, one longer than the other. The longer line represents the positive (+) terminal, and the shorter line represents the negative (-) terminal. The positive side is what you need to connect to the fuse and the relay.
A fuse is a safety device that protects the circuit. The fuse is represented by a small rectangle or a box with a line through it. This symbol is placed in the wiring diagram to indicate where the fuse should go. The fuse’s purpose is to break the circuit if too much current flows through it, protecting the rest of your fog light components.
A relay is a switch controlled by an electrical current. In a wiring diagram, a relay is usually shown as a rectangle with multiple terminals and a coil symbol inside. The relay acts as a middleman, letting a small current control a larger current to power the fog lights. The diagram will show which terminals need to be connected to the battery, the fog lights, and the switch.
The switch in the diagram is usually shown as a line that can be either open or closed. When open, the circuit is broken, and when closed, it is connected. The switch is usually connected between the relay and the car’s interior. This allows you to turn the fog lights on or off from inside your vehicle.
The ground symbol looks like a set of horizontal lines getting shorter, one below the other. The ground connects to the car’s chassis, providing a return path for the electrical current. This connection is essential to complete the circuit and allow the fog lights to work. You’ll need to ground the fog lights and the relay to complete the circuit properly.
Following the Wiring Path
The wiring path is the route electricity takes from the power source through the system. Usually, the path starts at the battery’s positive (+) terminal, goes through the fuse for protection, then through the relay, which controls the lights, and finally, to the fog lights. The current then returns through a ground connection. Following the wiring path in the diagram lets you trace the route and ensure all connections are done correctly. By understanding the flow of current, you can pinpoint any issues more easily.
- From the Battery: Begin with the positive (+) terminal.
- Through the Fuse: Connect the fuse holder.
- To the Relay: Wire the relay terminals.
- To the Switch: Wire the switch.
- To the Fog Lights: Connect the fog lights.
Start by connecting a wire from the positive (+) terminal of your car’s battery to the fuse holder. Ensure you use the correct gauge wire to handle the current. Add a ring terminal to the wire end. This ring terminal will connect to the battery. Always disconnect the negative (-) terminal of the battery before starting any electrical work.
After the positive wire reaches the fuse holder, it passes through the fuse. This protects the circuit from overloads. The fuse holder should be placed close to the battery. Always use the recommended fuse size. Make sure the connections are secure to avoid any loose connections or shorts.
The relay is a key component. The wire from the fuse holder connects to one of the relay terminals. Other terminals connect to the fog lights, the switch, and the ground. Refer to the wiring diagram for the specific terminal connections. The relay acts as a remote switch, allowing the fog lights to be powered on and off easily.
The switch is the device that controls the lights from inside your car. One wire from the relay goes to the switch. The other wire from the switch goes to a power source, usually an accessory or fuse box. The switch completes the circuit, allowing the relay to power the fog lights. Choosing a proper switch helps make sure you can use it safely and easily.
After the relay, wires go to the fog lights, completing the circuit. The positive wires from the relay connect to the fog lights’ positive terminals. Ground the fog lights to the car’s chassis by connecting their negative terminals to a ground point on the car’s frame. Make sure the ground connection is clean and secure to ensure proper operation.
The Step-by-Step Installation Process
Now that you have all the parts and a basic understanding of the wiring, it’s time to start the actual installation. This section walks you through each step, including finding the fog light mounting location, running the wires, making connections, and testing the system. Be certain to take safety precautions when working with electricity, like disconnecting the battery and using the right tools. Taking it step by step guarantees the job is done correctly.
Preparing for the Installation
Before you start, there are a few things you need to do to prepare. First, gather all your tools and components. Then, disconnect the negative (-) terminal of your car’s battery to prevent electrical shorts. Also, make sure you have enough space to work and that the area is well-lit. Having everything ready saves time and makes the process safer. Proper preparation sets the stage for a successful installation.
- Gather Your Tools: Get all the tools ready.
- Disconnect the Battery: Make sure you disconnect the battery.
- Find a Good Workspace: Make sure you have enough space.
- Read the Manual: Consult the car’s manual.
You’ll need essential tools like wire strippers, crimpers, pliers, screwdrivers, a drill, and a multimeter. The wire strippers will help you expose the wire for connection, while the crimpers make strong and reliable connections. A multimeter checks for voltage and ensures the circuit is working properly. Having all the tools readily available will prevent stops during the installation.
Safety first! Disconnect the negative (-) terminal of the car battery. This will prevent any accidental shorts or electrical shocks while you’re working. Remove the terminal and make sure it doesn’t touch any metal parts of the car. Use a wrench to loosen the terminal bolt and carefully remove the cable.
Find a well-lit and spacious area to work in. Make sure you can comfortably reach all areas of the car where you’ll be working. You’ll need access to the front bumper, the engine bay, and the interior of the car. It can be in a garage, a driveway, or any location with good lighting. Using proper lighting will also make the process much easier.
Your car’s manual can provide valuable information about your vehicle’s electrical system and locations of components. Look for specific diagrams or instructions. Knowing the locations of fuse boxes, ground points, and other components can help with the installation. Checking the manual will help you avoid problems and make the installation more efficient.
Mounting the Fog Lights and Running the Wires
Mounting the fog lights and running the wires is an important step. Start by deciding where to mount the fog lights on your car, then securely attach them to the bumper or other suitable locations. Next, run the wiring from the lights to the engine bay, through the firewall, and into the cabin. Taking your time here guarantees a tidy and secure installation. Careful wiring ensures both safety and the fog lights’ proper function.
- Mounting the Fog Lights: Attach the fog lights to your vehicle.
- Running Wires to the Engine Bay: Route the wires carefully.
- Passing Wires Through the Firewall: Get the wires into the cabin.
- Running Wires to the Interior: Finish the wiring inside the vehicle.
Find a suitable location on your car’s bumper or another mounting point. Use the hardware included with your fog lights to securely mount them. Ensure the lights are level and properly aligned to maximize their effectiveness. Take extra care to ensure the lights won’t interfere with the vehicle’s operation or other components. If you’re not sure, get help from a professional.
Run the wires from the fog lights back to the engine bay, making sure they are protected from damage. Use wire looms or conduits to protect the wires. Secure the wires using zip ties or clips along the frame. Avoid placing the wires near hot engine parts or sharp edges. Also, make sure the wires are out of the way of moving parts, such as the fan. Ensure the wiring is neat and professional-looking.
The firewall separates the engine bay from the interior of the car. Locate an existing grommet or drill a new hole in the firewall. Run the wires through this hole, being careful not to damage the wires. Add a rubber grommet to protect the wires from abrasion. You will need to get the wiring for the switch inside the cabin. Be sure to seal the hole you drilled to prevent water and exhaust fumes from getting inside the car.
Route the wires for the switch and relay inside the car to your desired switch location. Keep the wires neatly tucked away, perhaps under the dashboard or along existing wiring harnesses. Use wire clips or zip ties to secure the wires. Make sure the wires do not interfere with the driver’s feet or other controls. You may need to remove trim panels to hide the wiring effectively.
Making the Electrical Connections and Testing
Once you’ve run the wiring, it is time to make the electrical connections. This involves connecting wires to the relay, the switch, the fog lights, and the power source. After making the connections, test the system to ensure everything works as it should. Double-check all connections to ensure they are secure and free of shorts. Then, before you move to testing, inspect all your work to ensure everything is correct.
- Wiring the Relay: Connect wires to the relay.
- Wiring the Switch: Connect the switch wires.
- Wiring the Fog Lights: Finish the connections.
- Testing the System: Turn the lights on and off.
Connect the wires to the relay according to the wiring diagram. Typically, one terminal connects to the battery, another to the fog lights, one to the switch, and the last one to the ground. Use crimp connectors for secure connections. Make certain the connections are secure and tight to avoid any loose wires. Refer to the wiring diagram to make sure you have it correct.
Connect the wires to your interior switch according to your wiring diagram. One wire will come from the relay, and another will be connected to a power source, such as the fuse box or an accessory wire. Make sure the switch is properly grounded. Use the correct connectors and ensure all connections are secure and reliable. Choose a switch location that’s easy to access and visually appealing.
Connect the positive and negative wires to the fog lights. Ensure you connect the positive wire from the relay to the fog lights’ positive terminal. Connect the negative wire from the fog lights to a reliable ground on the car’s chassis. Double-check your connections to ensure the lights are securely wired and ready for testing. Make sure your connections are weather-resistant and well-insulated.
After all connections have been made, it’s time to test the system. Turn on the fog lights from the switch and see if they come on. Check the fog lights in a dark area to test their function, looking at the beam pattern. If the lights do not work, check your connections and review the wiring diagram. Inspect the fuse to ensure it isn’t blown. If there are any issues, troubleshoot the problem by examining each connection and component.
Alternative Wiring Scenarios and Solutions
Sometimes, things don’t go exactly as planned. You might face issues with the wiring, the switch, or the lights themselves. This section covers some common problems and provides solutions. Whether your lights won’t turn on or they flicker, it provides solutions to diagnose the issue. There are also alternative ways to wire the system if you’re comfortable making modifications to your car’s existing wiring.
Troubleshooting Common Issues
Even with careful planning, things can still go wrong. Lights might not turn on, or fuses might blow. Recognizing and fixing these problems requires some troubleshooting skills. Common issues include loose connections, blown fuses, and faulty relays. If the lights do not work, start with the simple things, like checking the fuse and connections. Finding the problem can be fixed by understanding what the issues are.
- Lights Won’t Turn On: What to do.
- Flickering Lights: What causes flickering and how to address it.
- Blown Fuse: Identify the cause and solutions.
If the fog lights won’t turn on, start by checking the fuse. A blown fuse is a common culprit.
Flickering lights are often caused by loose connections or a failing relay. Check all wiring connections, especially those at the lights, relay, and switch. Ensure the ground connections are solid and free of corrosion.
A blown fuse indicates an overload or a short circuit in the system. First, disconnect the fog lights and inspect the wiring for any damage or exposed wires. Look for any wires that have come into contact with the chassis. Check the light bulbs for any problems. If you can’t find anything, there might be a short in your wiring.
Exploring Alternative Wiring Options
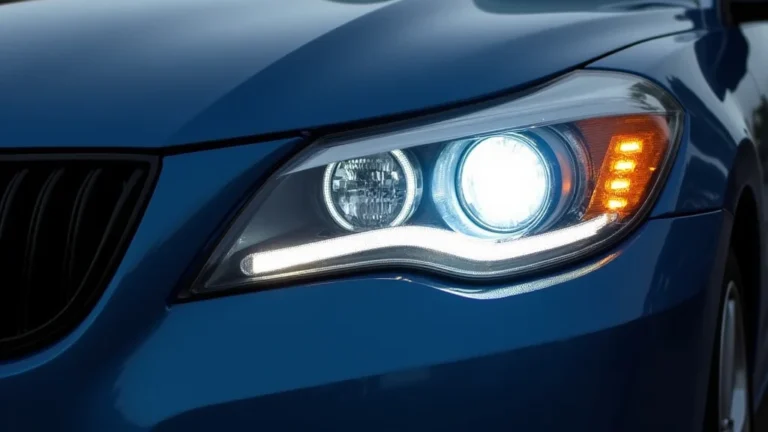
There are alternative ways to wire fog lights to your car. You can connect them to your headlights so they turn on with the headlights, but this might not be possible on all cars. You may also think about using a different switch or tapping into the car’s existing wiring. Each method has its pros and cons. Choosing the right method depends on your comfort level and the features of your car. These options provide more options and versatility to fit your needs.
- Headlight Integration: Connect to the existing headlights.
- Using the Existing Switch: Try tapping into the car’s switch.
- Professional Installation: What professionals offer.
Connecting the fog lights to the existing headlight circuit means the fog lights will turn on when the headlights are on. This can be simpler than a separate switch. To do this, you will need to find the headlight power wire and tap into it. Make sure the fog lights have their own fuse to protect the circuit. The downside to this is that you cannot turn the fog lights on or off independently.
Some cars have a spare switch location that you can use for the fog lights. You can tap into the power for that switch to power your fog lights. This simplifies the wiring process and keeps a factory look. This way, you don’t need to add a switch to the dashboard. You will need to check the wiring diagram to make sure the switch has power when you want it. This method keeps the car looking clean and professional.
If you’re unsure about any of these methods, consider professional installation. A professional has the knowledge and equipment to wire fog lights safely and properly. They can diagnose and fix any problems quickly. They also ensure the wiring is neat and that your car’s electrical system won’t be damaged. While it may cost more upfront, professional installation provides peace of mind and guarantees a reliable outcome.
| Feature | Standard Wiring | Headlight Integration | Using Existing Switch | Professional Installation |
|---|---|---|---|---|
| Complexity | Moderate | Simple | Moderate | Lowest Risk |
| Control | Independent | Dependent | Independent or Dependent | Optimal |
| Appearance | Clean, Customizable | Clean | Factory Look | Perfect |
| Cost | Lower | Low | Low to Moderate | Higher |
Frequently Asked Questions
Question: Can I wire my fog lights directly to the battery?
Answer: It’s not recommended to wire fog lights directly to the battery without a fuse and relay. Doing so can cause a short circuit or damage the lights or your car’s electrical system.
Question: What size fuse should I use for my fog lights?
Answer: The fuse size depends on the total amperage draw of your fog lights. Consult the fog lights’ specifications or the wiring diagram to determine the correct fuse size. Usually, a fuse of 10 to 20 amps will be fine for many fog light setups.
Question: Can I use any switch for my fog lights?
Answer: Yes, but it should be rated to handle the electrical load of the fog lights. A rocker switch, toggle switch, or factory-style switch is good. A high-quality switch will give your lights more life.
Question: What is a relay and why do I need one?
Answer: A relay is an electrical switch that uses a small current to control a larger one. You need a relay because it allows you to control your fog lights with a low-current switch inside the car. A relay also helps protect your car’s electrical system from damage.
Question: How do I find a good ground for my fog lights?
Answer: Look for a clean, bare metal surface on the car’s chassis or frame. The best ground is one that’s free of rust and paint. You can use a multimeter to ensure there is a good ground connection.
Final Thoughts
Successfully wiring fog lights to your headlights involves understanding the basics, choosing quality components, and following a step-by-step process. First, choose the lights and gather your components, then understand the wiring diagram and how the current flows. Next, prepare your car, mount the lights, and run the wires. Once the wires are run, make the electrical connections and test the system. Remember to address any problems that may occur, like blown fuses or flickering lights. Now, with the knowledge and confidence to complete this task, you are ready to make a change. Go out there and install those lights, and light up the road ahead!