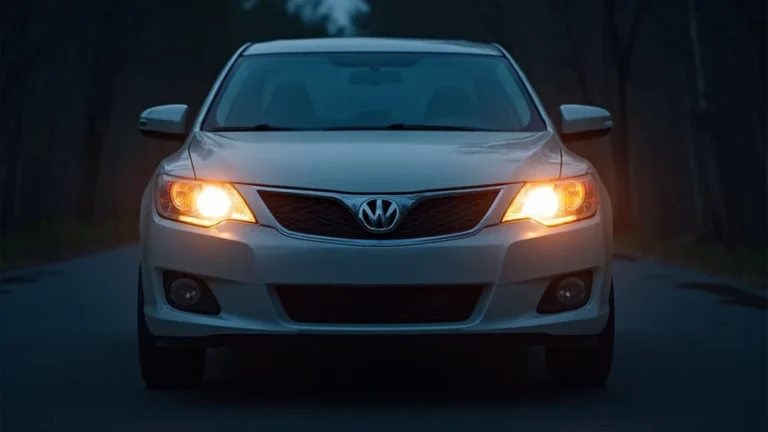
How to Upgrade Headlights to LED: A Beginner’s Guide
Thinking about upgrading your car’s headlights? You’re not alone! Many people want brighter, more modern lights. The good news is, learning how to upgrade headlights to led isn’t as hard as it might seem. Some people find the different types of lights and wiring a little confusing at first. But don’t worry! This guide breaks everything down step-by-step to make it super simple. We’ll explore everything you need to know to get started, so let’s jump right in.
Choosing the Right LED Headlight Bulbs
Selecting the correct LED headlight bulbs is the first and most vital step when planning to upgrade. This choice affects everything from the light’s brightness and focus to how easily you can install them. Many options exist, each with different features and benefits. Making an informed decision ensures you get the best performance and compatibility for your vehicle. We’ll explore the main considerations to guarantee the bulbs you pick will provide optimal visibility and safety on the road.
Understanding Bulb Types and Sizes
The first step is figuring out what type of bulbs your car currently uses. Your car’s owner’s manual or a quick search online using your vehicle’s make and model will give you the answer. Different vehicles have different bulb types, such as H4, H7, H11, and 9005. Each type has a specific base design and size. Using the wrong type of bulb can prevent it from fitting or working correctly. Knowing the correct size ensures a seamless fit and optimal light output. Compatibility is key for a successful upgrade.
- H4 Bulbs: These are often found in older vehicles and are known for their dual-filament design. This means one bulb handles both low and high beams.
- H7 Bulbs: H7 bulbs are another common choice, particularly in European cars. They usually handle the low beam and use a separate bulb for the high beam.
- H11 Bulbs: Often used for low beams, fog lights, or both, H11 bulbs are a popular choice due to their versatility.
- 9005 Bulbs (HB3): These are frequently used for high beams and sometimes as low beams.
H4 bulbs are a common choice for older car models. They have two filaments. One filament provides the low beam, for driving in normal conditions. The other creates the high beam, used for increased visibility on dark roads. They usually have three prongs to connect to your car’s wiring harness. It’s an older design but still popular and easy to upgrade.
H7 bulbs are frequently seen in vehicles. These bulbs are single-filament, with a separate bulb typically used for high beams. They are known for their bright, focused light. The design usually has a specific base for easy installation and a good light pattern. They are a significant upgrade over older halogen types, providing much better visibility.
H11 bulbs are often used in various vehicles, especially in the low beam setup. They can also be used in fog lights, which is excellent. They provide a brighter, more focused light. They are a common option when considering a switch to LED headlights. The brighter light output increases safety on the road.
9005 bulbs, also known as HB3 bulbs, are powerful bulbs used in high beam setups. Some cars use them for low beams too. They offer a strong, focused light, making them suitable for situations that demand more illumination. When upgrading, knowing the vehicle’s specific requirements is crucial. This ensures optimal functionality and visibility.
Comparing LED Chip Types
The type of LED chip within the headlight bulb significantly influences the light’s performance. Different chip designs affect brightness, beam pattern, and lifespan. The chip type determines the quality of light. Some of the leading LED chip technologies used in the market include CSP, COB, and SMD. Knowing these variations helps in selecting the most effective upgrade for your needs.
- CSP (Chip Scale Package): These are small, compact chips, typically very bright, and designed to mimic the filament placement of halogen bulbs.
- COB (Chip on Board): COB chips consist of multiple LED chips that are directly mounted onto a single substrate, creating a panel-like light source.
- SMD (Surface Mounted Diode): SMD LEDs are the most common type and consist of individual LEDs mounted on a circuit board.
CSP chips are known for their small size and high brightness. These chips are usually placed close together to create a light pattern similar to halogen bulbs. They offer great light output and are often a popular choice when upgrading to LED headlights. They are highly efficient, using less power while providing more light.
COB chips present a different approach, with multiple LED chips mounted directly onto a single base. This design creates a panel-like light source. They offer a uniform light output, which can be great for overall visibility. They are often less expensive. They may not always provide as focused a beam pattern as other types, so this can affect performance.
SMD LEDs are the most common in LED headlights. They involve mounting individual LED chips onto a circuit board. This makes them relatively easy to manufacture and they are very cost-effective. The light they emit can vary depending on the arrangement and quality of the chips, with some SMDs giving off a brighter, more focused beam than others.
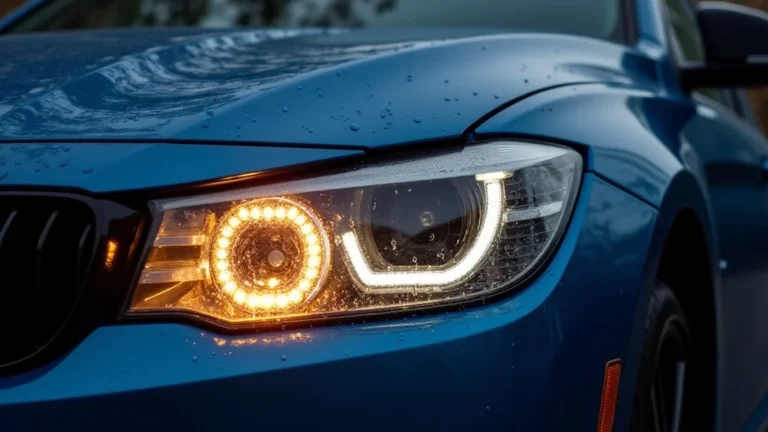
Color Temperature and Brightness
The color temperature and brightness of LED headlights are important factors. These aspects determine how the light appears to the driver. Color temperature is measured in Kelvin (K). It indicates the color of the light emitted. Brightness is measured in lumens. It describes the total amount of light produced. Balancing both helps in achieving optimal visibility and driving comfort. Knowing how these factors affect your night vision will lead to safer driving.
- Color Temperature (Kelvin): A color temperature of 6000K-6500K is a common choice, providing a bright white or slightly bluish light.
- Brightness (Lumens): The higher the lumens, the brighter the light. Look for bulbs that offer a high lumen output but don’t exceed your vehicle’s specifications.
- Beam Pattern: Consider how the LED bulbs project light to avoid glare.
Color temperature is measured in Kelvin (K). It directly affects the color of the light. A lower Kelvin number gives a warmer, yellowish light, while a higher number gives a cooler, bluer light. 6000K to 6500K is a common range. It offers a bright white light, which is excellent for visibility without appearing too blue. It strikes a good balance for optimal visibility.
Brightness is quantified in lumens. This indicates the light’s output. Higher lumen numbers mean a brighter light. It’s important to choose bulbs that provide high lumen output for better visibility. Ensure that you do not exceed your vehicle’s specifications, as overly bright lights can cause glare for other drivers.
The beam pattern refers to how the light is distributed on the road. LED headlight beam patterns are designed to mimic the light distribution of your car’s original halogen bulbs. Look for bulbs with a beam pattern that directs light downward to maximize visibility. It also minimizes glare for oncoming drivers.
Installing LED Headlight Bulbs
Installing LED headlight bulbs is a manageable process for many car owners. The steps are usually straightforward. However, the process can vary slightly depending on your vehicle’s make and model. The main steps involve accessing the headlight housing, replacing the old bulbs, and securing the new LED units. Following the correct steps ensures a safe and successful upgrade. Taking your time, and using the right tools, will result in the right outcome.
Safety Preparations Before Installation
Before you start, safety is a priority. Make sure the car is turned off and the key is out of the ignition. Allow the engine and the headlights to cool down. Wear safety glasses and gloves. Have the necessary tools ready before you begin. Following these simple steps will protect you from potential hazards. By taking these precautions, you are ensuring a secure and efficient installation process.
- Park in a Well-Lit Area: Ensure the area is safe and well-lit. This helps you see clearly and avoid any hazards.
- Disconnect the Negative Battery Terminal: This step prevents electrical shorts. It is a crucial safety measure.
- Gather Necessary Tools: Common tools include screwdrivers, pliers, and the car’s owner’s manual. A flashlight can also be very useful.
Choose a well-lit space. This will improve visibility and reduce the risk of accidents. Good lighting makes it easier to see the components. It also helps you correctly identify and manipulate the parts of the headlight assembly.
Disconnecting the negative battery terminal ensures that no electricity can flow through the car’s electrical system. This reduces the risk of electrical shorts. It helps prevent damage to the new LED headlights. This extra precaution is very important.
Have all the tools you need ready. The car’s manual will provide instructions. A flashlight and basic tools will come in handy. Proper tools help to easily remove and install the bulbs. This makes the job easier and prevents damage to your car.
Step-by-Step Installation Guide
Once you’ve taken the safety steps, follow a step-by-step approach. This will help you
- Access the Headlight Housing: Remove any covers or clips that block access to the headlight bulb. You might need to consult your car’s manual.
- Remove the Old Bulb: Disconnect the wiring harness from the back of the bulb. Then, remove the old bulb from its socket.
- Install the LED Bulb: Insert the new LED bulb into the socket. Secure it with any clips or retainers.
- Connect the Wiring Harness: Plug the wiring harness into the LED bulb.
- Test the Lights: Turn on your headlights to ensure the LED bulbs are working correctly.
Locate the headlight housing. Remove any covers or clips to gain access to the bulb. The car’s manual is a great resource. This provides specific instructions for your vehicle’s design. This ensures you can access the bulb without damaging any parts.
Disconnect the electrical connector from the back of the original bulb. Carefully detach the old bulb from its socket. Avoid touching the glass part of the bulb. This can leave oils from your skin. Always handle the bulbs gently to prevent damage.
Insert the new LED bulb into the headlight socket. Ensure that it clicks or locks in place securely. Use any clips or retainers to fasten the LED bulb. Confirm that the LED bulb is properly aligned to deliver optimal light output.
Reconnect the wiring harness to the new LED bulb. Make sure the connection is secure. If you have any extra parts or adapters, follow the instructions that came with the LED kit. A secure wiring connection is essential for the lights to function correctly.
Once everything is connected, turn on your car’s headlights. Test both the low and high beams to check if the new LED bulbs are working properly. If the lights do not work, double-check all connections. Make sure that all the bulbs are properly installed. Resolve any problems before completing the process.
Troubleshooting Common Issues
Sometimes you might encounter problems during installation. The most common issues are related to fitment, flickering, or error messages. Each problem has a straightforward solution. Having this troubleshooting guide ready will save time and frustration. It allows you to address common problems. This will ensure your upgrade is a success.
- Fitment Issues: If the LED bulb doesn’t fit, double-check the bulb type. Sometimes you may need an adapter.
- Flickering or Strobing: This is often due to the car’s electrical system not providing enough power. Install a CANbus adapter.
- Error Messages: Your car’s computer might detect the lower power draw of LEDs. A CANbus adapter can also resolve this.
If the LED bulb doesn’t fit properly, the bulb type might be incorrect. Double-check your car’s manual or the product packaging. Some LED bulbs require adapters to fit correctly. These adapters can often be found in the LED upgrade kit. Make sure all parts are aligned correctly. Check for any obstructions.
Flickering or strobing lights can happen in some cars. The car’s electrical system may not supply the right amount of power to the LED bulbs. This can be resolved by installing a CANbus adapter. These adapters ensure the bulbs receive the proper voltage. This makes the lights operate smoothly. This solves the flickering problem.
Your car may display an error message on the dashboard after the upgrade. This happens because the car’s computer senses a lower power draw. This is common with LED bulbs. The easiest solution is to use a CANbus adapter. This tricks the car’s system into thinking the bulbs are traditional halogen bulbs. This solves the error message problem.
Maintaining LED Headlight Bulbs
Once you have successfully upgraded your headlights, proper maintenance will extend their lifespan and ensure optimal performance. LED bulbs are known for their durability. They will require less maintenance than traditional halogen bulbs. However, taking a few simple steps will keep them in top condition. These include regular cleaning and protecting them from damage. Taking care of your headlights can ensure their long-term effectiveness.
Regular Cleaning and Inspection
Regularly cleaning your LED headlights can help keep them functioning at their best. Dirt, dust, and grime can diminish the light output. Routine inspections ensure that the bulbs are working properly. This will catch any potential problems early. Following these easy steps will ensure your LED headlights provide optimal visibility for your vehicle.
- Cleaning the Headlight Lenses: Clean the lenses regularly with a soft cloth and a gentle cleaner.
- Inspecting for Damage: Look for any cracks, chips, or condensation inside the headlight housing.
- Checking the Wiring: Inspect the wiring connections for any corrosion or loose connections.
Keep your headlight lenses clean to maintain maximum light output. Use a soft cloth. Apply a gentle cleaner that is safe for automotive plastics. Avoid using abrasive materials. This can scratch the surface of the lenses. Wipe away any dirt, dust, and grime. This is important to ensure optimal light projection.
Regularly inspect your LED headlights for any physical damage. Check for cracks, chips, or any signs of moisture, like condensation, inside the headlight housing. These issues can affect light performance. Address problems promptly. This protects the LED bulbs from further harm. This can ensure they keep working as intended.
Pay attention to your headlight wiring connections. Look for corrosion, which can cause the lights to fail. Check that the connections are tight. Loose connections can lead to intermittent operation or total failure. Regularly maintaining the wiring can extend the lifespan of your headlights. This reduces the need for repairs.
Preventive Measures and Extending Lifespan
By taking a few preventive steps, you can greatly extend the lifespan of your LED headlights. This includes protecting them from extreme conditions. Consider these extra tips to maximize the value and performance of your headlight upgrade. Following these steps will help protect the lights. Your LED headlights will last longer.
- Protection from UV Rays: Use headlight protectant to guard against UV damage.
- Avoiding Harsh Chemicals: Don’t use strong solvents or abrasive cleaners.
- Driving Habits: Avoid frequent and prolonged use of high beams.
Protect your LED headlights from the damaging effects of ultraviolet (UV) rays. UV rays can fade and degrade the headlight lenses. Use a high-quality headlight protectant that is specifically designed for automotive use. Apply this protectant regularly to safeguard against yellowing and clouding. This will keep your headlights looking and performing their best.
Avoid harsh chemicals and abrasive cleaners when cleaning your LED headlights. These materials can damage the lens or the LED components. Stick to mild soaps and gentle cleaners to keep your headlights looking good. Check the product labels. Make sure the cleaner is safe to use on automotive plastics.
Be mindful of your driving habits to extend the lifespan of your LED headlights. Reduce the frequent and prolonged use of high beams. The high beams can put extra stress on the LED bulbs. Only use high beams when needed. This will help them to last longer. Proper driving habits can increase the time before you need to replace your headlights.
Legal Considerations for LED Headlights
Before upgrading your car’s headlights, it’s very important to understand the legal requirements. These requirements vary by location. The laws can cover aspects like bulb types, beam patterns, and color temperature. Staying informed about the local laws ensures your LED headlight upgrade complies. This helps to avoid problems with authorities. This also promotes road safety.
Local Regulations and Compliance
Different regions have different regulations concerning vehicle lighting. These rules often specify acceptable headlight characteristics. These include the bulb type and light color. Knowing the regulations can ensure that your upgrades are in compliance. This will help you avoid legal issues. Make sure your vehicle meets the local safety requirements.
- State and Local Laws: Research your local regulations regarding headlight upgrades.
- DOT Compliance: Ensure your LED bulbs are DOT-compliant if required.
- Beam Pattern Regulations: The beam pattern must match the original headlight design.
Research the laws in your specific state or locality. These laws often dictate what modifications are allowed. It may include the types of bulbs you can use. Check for any restrictions on color temperature or brightness levels. This research will help you comply with all applicable legal requirements. This helps to avoid penalties.
Confirm that the LED bulbs you select are DOT-compliant if it’s required in your area. DOT (Department of Transportation) compliance means the bulbs meet specific safety standards. DOT-approved bulbs are designed to provide the correct beam pattern and light output. They are meant to reduce glare for other drivers. This compliance ensures your headlights are safe and legal.
Pay close attention to the beam pattern of the LED bulbs. The beam pattern must match the original design of your car’s headlights. LED bulbs must be designed to direct light correctly. They must avoid excessive glare to oncoming drivers. Ensure that your LED bulbs have an appropriate beam pattern. This guarantees that your lights are legal and do not cause problems for others on the road.
Insurance and Vehicle Inspections
Your vehicle insurance and regular inspections can be affected by your LED headlight upgrade. Knowing how these areas may be affected is very important. This ensures that you stay compliant and avoid any unexpected issues. Insurance policies may require you to disclose any changes to your vehicle’s lighting. Inspections may require your headlights to meet specific standards.
- Informing Your Insurance Company: Always inform your insurance company about any headlight modifications.
- Vehicle Inspections: Ensure your LED headlights meet all inspection requirements.
- Documentation: Keep receipts and documentation of your LED headlight purchase.
Notify your insurance company about any changes you’ve made to your vehicle’s lighting system. Modifications like LED headlight upgrades may affect your insurance coverage. Your insurance provider will need to know about these changes. Informing them ensures that your insurance coverage remains valid. The adjustments may also affect your insurance premiums.
When undergoing a vehicle inspection, your headlights must comply with the local standards. These standards often cover light output, beam pattern, and bulb type. If your LED headlights are not DOT-compliant, they might not pass inspection. Prepare by checking the regulations. Ensure your headlights are in good working order. This will help your vehicle pass inspection.
Keep a record of your LED headlight purchase. Save all receipts and documentation related to the upgrade. This documentation can be helpful if you need to provide proof of compliance. This can include information about the bulb type, specifications, and certifications. Keep this information with your vehicle records. This could be useful if your insurance company needs any information.
Frequently Asked Questions
Question: What’s the main benefit of upgrading to LED headlights?
Answer: LED headlights generally provide brighter and more focused light, which enhances visibility and safety while driving, especially at night. They also often use less energy and last longer than traditional halogen bulbs.
Question: Can I install LED headlights myself, or do I need a professional?
Answer: You can often install LED headlights yourself, as the process typically involves simple steps. However, if you are uncomfortable, consider seeking professional help to ensure the installation is done correctly.
Question: What do I do if my new LED headlights flicker or show an error message?
Answer: Flickering or error messages are common issues. In many cases, installing a CANbus adapter can resolve these problems. These adapters help your car’s electrical system communicate with the LED bulbs.
Question: Are there any legal restrictions I should consider before upgrading?
Answer: Yes, you should check your local laws. These laws might have requirements for bulb types, color temperatures, and beam patterns. Ensure your LED headlights comply with all applicable regulations to avoid any issues.
Question: How do I maintain my LED headlights to ensure they last?
Answer: To maintain your LED headlights, regularly clean the lenses with a soft cloth. Check for any damage or condensation. You should also protect the lenses with a UV protectant. Keep the wiring connections clean and tight to keep them in good condition.
Final Thoughts
You’ve explored the process of how to upgrade headlights to led. From choosing the correct bulbs to the installation steps and maintenance. Knowing the different bulb types, understanding color temperature, and brightness, is important. You’re now equipped to enhance your car’s lighting. Taking the safety precautions and using the right tools will make the process smooth. Don’t forget to maintain your new LED lights. Ensure they last by keeping them clean and protected. By following the guidelines in this article, you can make an informed decision. You can improve your vehicle’s visibility. Upgrade your headlights with confidence. Enjoy the brighter, safer driving experience that LED headlights provide!