How to Identify a Faulty Headlight Bulb: A Simple Guide
Figuring out how to tell if headlight bulb is bad can be tricky, especially if you’re new to car maintenance. It’s something many drivers face, and it can be a bit confusing at first. Don’t worry, though! It’s usually a straightforward process. This guide will walk you through the steps, making it super easy to check your headlights. You’ll soon be able to diagnose the problem like a pro. Let’s get started and illuminate the process!
Spotting the Signs of a Failing Headlight
When a headlight bulb starts to go, there are usually some clear signals. These signals are the first clues you’ll get, and they can help you understand what’s happening. Recognizing these signs early can save you from getting a ticket or, more importantly, ensure you can see the road clearly at night. There’s a lot you can see by simply examining the lights.
This section will break down the common signs, from dimming to complete failure. We’ll explore each sign in detail, helping you identify and understand these signals effectively.
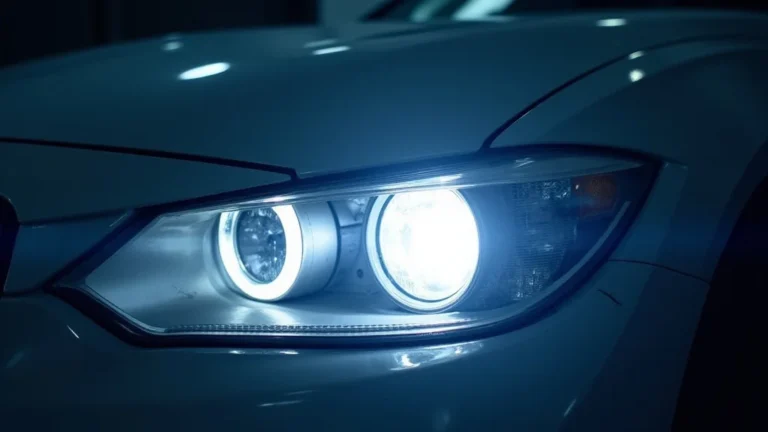
Dimming or Flickering Light
One of the earliest signs is a dimming or flickering light. Instead of a bright, steady beam, the light might appear weaker than usual. You could notice it looks faded or changes in brightness intermittently. This is a common indication that the bulb’s filament is starting to break down. The filament is a thin wire inside the bulb that glows when electricity passes through it. As it ages, it becomes fragile and can start to break. This breakage can cause the light to dim or flicker. The color of the light can change to a yellowish tint over time when it’s dimming.
- Dimness: The light isn’t as bright as it used to be. You’ll notice it’s less powerful compared to the other headlight.
- Flickering: The light turns on and off sporadically, which can be distracting and dangerous.
- Color Change: As a bulb ages, it can shift from a clear white light to a yellowish or even bluish hue.
For example, imagine driving on a dark road. If one headlight appears significantly dimmer than the other, it’s a clear sign of a problem. Another situation might be when your headlight flickers while you’re driving over a bumpy road. This could mean a loose connection, but it’s also a common sign of a failing bulb.
Complete Headlight Failure
Sometimes, the headlight stops working altogether. This is the most obvious sign that your bulb has gone bad. The light might have been dimming or flickering before, but now, it simply won’t turn on. When a headlight fails completely, it means the filament has likely broken entirely. Without the filament, the electrical current cannot create light. There may also be issues with the wiring or the connection to the headlight.
- No Light: The headlight doesn’t emit any light when turned on. This is the most straightforward indicator.
- Check the Other Headlight: Check the other headlight to see if it is working properly. If one is out, this is a clear indicator that the bulb needs to be replaced.
- Safety First: If a headlight is out, it’s essential to fix it promptly to ensure safe driving at night or in low-light conditions.
A driver might turn on their headlights and find that one of them doesn’t illuminate. Or, after parking in a garage and turning off the lights, the driver returns later to see one light completely off. A failure like this is common. The bulb needs to be replaced immediately.
Checking Headlight Bulbs: A Step-by-Step Guide
Once you’ve identified the signs, the next step is to physically check your headlight bulbs. You don’t need to be a car expert to do this. We’ll break down the process into easy-to-follow steps. This will make it easier to see if you have to replace the bulb. This section will guide you through all the necessary steps, ensuring the process is safe and straightforward.
This will help you become a car-care expert, saving you time and money on auto repairs.
Prepare Your Vehicle and Gather Tools
Before you begin, make sure your vehicle is safely parked and prepared for the task. This will help you to work safely and efficiently. Proper preparation makes the whole process smoother and more accessible. It will also help you to avoid any potential injuries or complications.
- Park Safely: Park your car on a level surface, away from traffic.
- Turn Off the Engine: Switch off the engine and remove the key from the ignition.
- Gather Tools: You may need a screwdriver, the right replacement bulb, and possibly a pair of gloves.
- Read the Manual: Consult your car’s manual for specific instructions on accessing the headlight bulbs.
For instance, imagine you’re at home on a weekend and notice a problem. You realize that you should
Accessing the Headlight Bulb
The location of your headlight bulb can vary depending on your car’s make and model. Some are easy to access. Others might require a bit more effort. Most cars have a panel or cover that can be removed to reach the bulb. This panel is usually located behind the headlight assembly. It’s often secured by clips or screws. Once the cover is off, you should see the back of the headlight bulb. This is where you can disconnect the electrical connector and remove the bulb.
- Locate the Access Panel: Find the access panel or cover behind the headlight assembly.
- Remove the Panel: Carefully remove the panel using the appropriate tools.
- Disconnect the Electrical Connector: Gently disconnect the electrical connector from the bulb.
- Remove the Bulb: Release any clips or retainers holding the bulb in place and remove it.
For example, you might be working on your vehicle in your garage. You will likely have to remove the access panel. You will then disconnect the electrical connector and the bulb. Sometimes, a mechanic might need to do this step, but in many cases, it’s simple.
Inspecting the Bulb and Socket
Once you’ve removed the bulb, inspect it closely. Look for any visible signs of damage, like a broken filament or discoloration. Also, inspect the socket for any corrosion or damage. Corrosion can prevent the bulb from making a good connection. Replacing a corroded socket might be needed. Any damage to the wiring or connectors should also be addressed. If the bulb appears to be in good shape, it could be a wiring or electrical issue.
- Inspect the Bulb Filament: Check the filament inside the bulb for breakage.
- Look for Discoloration: Check for any discoloration or blackening of the bulb.
- Check the Socket: Inspect the socket for corrosion or damage.
- Inspect Wiring: Examine the wiring and connectors for any signs of wear or damage.
For example, you might remove a bulb and notice that the filament is broken. This confirms the bulb is bad and needs replacing. On the other hand, you might notice that the socket is corroded. In this case, you will have to repair or replace the socket.
Replacing a Faulty Headlight Bulb
Once you’ve confirmed that a headlight bulb is bad, the next step is to replace it. This process is usually simple. However, it’s essential to handle the new bulb carefully and ensure it is installed correctly. Incorrect installation can damage the new bulb or affect its performance. This part will guide you through the process, providing all the information you need to successfully replace the bulb and get your headlights working again.
This will assist you in ensuring your vehicle is equipped with the right bulb and you’re driving safely.
Selecting the Correct Replacement Bulb
Before replacing the bulb, it’s important to make sure you have the right one. Not all headlight bulbs are the same. Each vehicle uses a specific type and size. The wrong bulb won’t fit or work correctly. The correct information can usually be found in your car’s owner’s manual. Or, you can search online using your car’s make, model, and year. Another option is to check the old bulb’s markings, which should indicate the bulb type. Buying the correct bulb ensures your headlights function properly. This step prevents common mistakes and helps you avoid getting the wrong product.
- Check Your Owner’s Manual: Find the correct bulb type in your car’s manual.
- Search Online: Use your car’s make, model, and year to find the correct bulb.
- Examine the Old Bulb: The old bulb might have markings indicating its type.
- Consider Upgrades: You can consider upgrading to brighter or longer-lasting bulbs.
For instance, if you’re replacing a bulb for a Honda Civic, you will need to find the correct bulb model. This information is typically found in the owner’s manual or on an online parts website. Choosing the correct replacement ensures that the new bulb fits and functions correctly.
Installing the New Headlight Bulb
Installing the new headlight bulb is a straightforward process. First, remove the old bulb. Then, carefully insert the new bulb into the socket. Make sure it’s properly seated and secured. Reconnect the electrical connector. Then, replace the access panel or cover. Make sure it’s properly aligned. Double-check your work to ensure everything is connected and secure. Now you can check that the lights function. By following these steps, you can ensure a successful installation.
- Insert the New Bulb: Carefully insert the new bulb into the socket.
- Secure the Bulb: Make sure the bulb is securely held in place by the clips or retainers.
- Reconnect the Connector: Plug the electrical connector back into the bulb.
- Test the Lights: Turn on your headlights to ensure the new bulb is working.
Imagine you’re replacing the bulb in your car’s headlight assembly. You carefully insert the new bulb and ensure it clicks into place. Then, you reconnect the electrical connector and replace the access panel. Finally, you turn on the headlights to check if the new bulb works. If it does, you have successfully replaced the bulb.
Troubleshooting Common Issues
Even after replacing the bulb, sometimes problems can occur. You might find that the new bulb doesn’t work. Or, it might fail soon after installation. Troubleshooting these common issues can help you diagnose the problem and find a solution. Identifying these issues can help to ensure that your new bulb works. This can avoid frustration and save you from unnecessary trips to the mechanic. This involves some common checks, such as verifying the connections and checking the fuse. A fuse is a safety device in the electrical system.
- Check Connections: Make sure all connections are secure. A loose connection could prevent the bulb from working.
- Inspect the Fuse: Check the headlight fuse. A blown fuse will prevent the bulb from turning on.
- Verify Bulb Compatibility: Double-check that you’ve used the correct bulb type.
- Seek Professional Help: If you’ve tried everything and the light still does not work, it might be an electrical issue.
For example, after replacing the bulb, you turn on the headlights and nothing happens. You check the connections and find one of the wires is loose. You tighten the connection and the light turns on. Alternatively, you replace the bulb and it still doesn’t work. The problem might be a blown fuse. Replacing the fuse fixes the problem.
Advanced Diagnostics and Potential Issues
If the simple steps don’t fix the problem, further diagnostics are needed. Complex issues might involve electrical problems that require professional help. Some problems could be in the wiring, the lighting control module, or even issues with the car’s computer system. Diagnosing these complex issues requires specialized tools and expertise. This section provides an overview of advanced troubleshooting. This will help you know when it’s necessary to seek professional help.
This will help you understand more complex issues if they come up.
Examining Wiring and Connectors
Sometimes, the problem isn’t the bulb. It could be in the wiring or connectors that deliver power to the headlight. Examine the wires and connectors for any signs of damage or corrosion. Wires might be frayed or broken. Connectors could be corroded, preventing a good electrical connection. A damaged connector can interrupt the flow of electricity. This will stop the bulb from working. If you find any damage, you might need to repair or replace the affected wires or connectors. You might also want to seek professional help.
- Inspect the Wires: Look for any breaks, fraying, or damage to the wires.
- Check the Connectors: Check for corrosion or damage to the connectors.
- Test for Voltage: Use a multimeter to test for voltage at the connector.
- Seek Professional Assistance: If you find severe damage, professional help may be needed.
Consider a scenario where you replace the bulb, but the headlight still doesn’t work. Upon inspection of the wiring, you find a cut wire. After you repair the wire, the light works. On the other hand, you check the wiring and find corrosion on the connectors. You will need to replace the connector.
Testing for Electrical Problems
If the wiring looks fine, the issue could be with the electrical system itself. Testing for electrical problems requires specialized tools. A multimeter can be used to test for voltage. You’ll use it at the headlight connector. This testing will help you find if power is reaching the bulb. If no power reaches the bulb, the problem could be a blown fuse or a problem with the lighting control module. The lighting control module is a component that controls the headlights. Advanced testing might involve using a scan tool to diagnose the electrical system.
- Use a Multimeter: Test for voltage at the headlight connector.
- Check the Fuse Box: Inspect the headlight fuse for continuity.
- Inspect the Lighting Control Module: Check for proper function.
- Consider Professional Diagnostic Tools: If the problem is complex, a scan tool might be needed.
For instance, you’ve
Frequently Asked Questions
Question: How often should I replace my headlight bulbs?
Answer: It varies, but most bulbs last around one to three years. Consider replacing both at the same time to ensure consistent lighting.
Question: Can I touch the headlight bulb with my bare hands?
Answer: It’s best to avoid touching the glass part of the bulb directly. Skin oils can reduce the bulb’s lifespan.
Question: What’s the difference between halogen, LED, and Xenon headlights?
Answer: Halogen bulbs are the most common and affordable. LEDs are more energy-efficient and last longer. Xenon bulbs provide brighter light but are more expensive.
Question: My new bulb isn’t working after I installed it. What should I do?
Answer: Double-check the connections, and inspect the fuse. Also, verify you have the correct bulb type.
Question: Can I upgrade my headlights to LED or Xenon?
Answer: Yes, but you must ensure that any upgrade is compatible with your vehicle’s electrical system and complies with local regulations.
Final Thoughts
Knowing how to tell if headlight bulb is bad is a skill that can be pretty helpful. It starts with recognizing the signs, like dimming or flickering lights. Then, you can follow simple steps to check and replace the bulbs. Remember to always make sure you’re using the right bulb for your car. This guide has shown you the steps to follow to troubleshoot your headlights. By following these steps, you can keep your car in top shape and make sure you have safe driving at night. So, the next time you spot a problem, you’ll know exactly what to do. You’re now equipped to solve the problem and drive confidently.