Replacing Headlight Lens: A Simple Guide for Your Car
Figuring out how to replace headlight lens can feel tricky if you’re new to car repairs. Many people think it’s something only mechanics can do. However, it’s often a doable task at home! Don’t worry, it’s easier than you might believe. This guide will take you step-by-step through the process, making it simple to get those foggy lenses crystal clear again. Let’s get started!
What Causes Headlight Lenses to Become Cloudy?
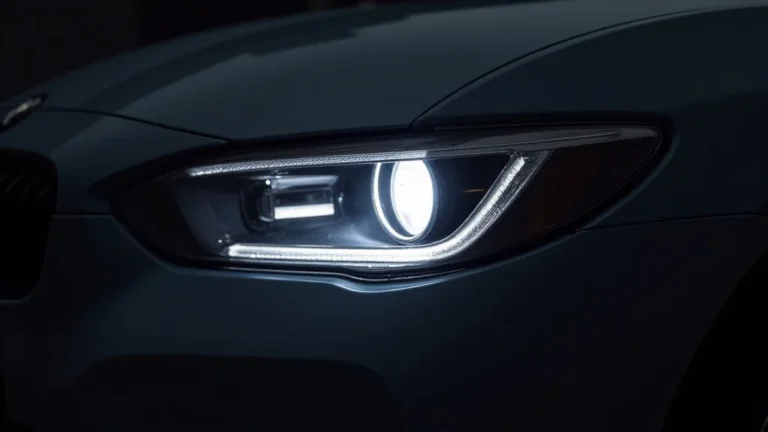
Over time, the plastic lenses of your headlights can become cloudy, yellowed, or hazy. This is usually from exposure to sunlight, road debris, and general wear and tear. The sun’s ultraviolet (UV) rays are particularly harmful. They break down the plastic, making it lose its clarity. Road salt, dirt, and even harsh car washes can also contribute to this problem. The cloudiness makes it hard for the light from your bulbs to shine through properly, which lowers visibility at night and can be a safety hazard. Replacing the headlight lens fixes this. Many car owners explore options for restoration or lens replacement to fix this issue.
The Science Behind Headlight Cloudiness
The plastic used for headlight lenses is typically a type of polycarbonate. Polycarbonate is a tough and clear material, which works great to protect the headlight bulbs. However, it’s not immune to the elements. The UV rays from the sun cause the outer layer of the plastic to degrade. This degradation results in tiny cracks and imperfections on the surface. These imperfections scatter the light, causing the lens to look cloudy. Think of it like a screen protector that gets scratched over time. The scratches block your view, just like the cloudiness blocks light.
- UV Radiation: Sunlight’s UV rays break down the plastic’s chemical bonds, leading to discoloration. This is the main culprit behind the yellowing and cloudiness of headlights.
- Oxidation: Oxygen in the air reacts with the plastic, further degrading its surface. Oxidation makes the lens less transparent, reducing the amount of light that passes through.
- Abrasion: Road debris, such as sand, gravel, and small rocks, constantly hits the lens. This causes scratches and small chips, which scatter the light.
- Temperature Fluctuations: The rapid changes in temperature, from hot summer days to cold winter nights, can cause the plastic to expand and contract, leading to stress cracks.
Knowing what causes the cloudiness helps you realize why replacing the lens is a good idea. Many DIY kits are available for cleaning and polishing your lenses, but in many cases, especially with severe cloudiness, replacement is the more effective solution. The process can seem difficult, but the results make it worth the effort.
Gathering Your Tools and Supplies
Before you start, make sure you have everything you need. This helps the job go smoothly. The specific tools may change depending on your car model. Check your car’s manual or look up a video specific to your vehicle. Some headlight assemblies might need special tools or techniques. Getting prepared saves time and energy.
Essential Tools and Supplies
Having the correct tools makes all the difference when you’re learning how to replace headlight lens. Make sure you have these things ready before you start.
- Replacement Headlight Lens or Assembly: You’ll need the correct lens or a complete headlight assembly. You can find these at auto parts stores or online. Make sure it’s the right one for your car’s make and model.
- Screwdrivers (Phillips and Flathead): These are often needed to remove screws holding the headlight assembly in place. Having different sizes is useful.
- Wrenches (Metric): You may need wrenches to remove bolts. A set of metric wrenches is important for most cars.
- Socket Set: A socket set might be needed for bolts in the engine bay or around the headlight. Ratchet sockets with extenders can reach difficult areas.
- Gloves: These will help protect your hands from dirt and sharp edges. Nitrile or latex gloves work well.
- Safety Glasses: It’s critical to protect your eyes from any debris that might fall during the process.
- Penetrating Oil (optional): If the bolts or screws are rusty, penetrating oil can help loosen them.
- Painter’s Tape: Painter’s tape can be used to protect the surrounding paint from scratches.
Where to Buy Replacement Headlight Lenses
There are many places to get a new headlight lens. Choosing the right place depends on your budget, car model, and the urgency of the repair. Some options offer convenience, while others offer cost savings. Knowing your options helps you make a better choice.
- Auto Parts Stores: Local auto parts stores like AutoZone, Advance Auto Parts, and O’Reilly Auto Parts usually carry headlight lenses or entire assemblies. They often have knowledgeable staff who can help you find the correct part for your car. This is often the fastest way to get a replacement, especially if you need it quickly.
- Online Retailers: Websites like Amazon, eBay, and specialized auto parts websites offer a huge selection. You can often find great prices, and it’s easy to compare different brands and reviews. This is a great choice if you have time to wait for shipping.
- Dealerships: The car dealership is another place to buy parts. Dealerships often offer genuine parts designed specifically for your car. They can be more expensive, but you’re guaranteed to get the correct part.
- Junkyards or Used Parts: If you’re looking for a budget-friendly option, consider a junkyard. You can often find used headlight assemblies in good condition for a fraction of the cost of new ones. Keep in mind that used parts may have some wear and tear.
When selecting your replacement headlight lens, make sure the lens matches the make and model of your vehicle for proper fit and performance. Remember to compare prices and read reviews before making a choice. Many car owners replace their headlights when they become cloudy.
Step-by-Step Instructions: Replacing Your Headlight Lens
This is where we go through the step-by-step process of learning how to replace headlight lens. The steps may change a little depending on the car model. However, the general idea remains the same. Make sure you read the instructions carefully before you begin and have all your tools ready.
Preparation Is Key
Before you begin the process, do these important preparation steps to make the job easier and safer.
- Safety First: Park your car on a level surface and turn off the engine. Put on the parking brake. If you’re working in direct sunlight, move your car to a shaded area to make the task more comfortable.
- Disconnect the Battery: Disconnect the negative (black) terminal of your car’s battery. This will prevent any electrical shorts while you’re working on the headlights. Use a wrench to loosen the nut holding the cable to the terminal. Remove the cable.
- Locate the Headlight Assembly: Open the hood and find your headlights. Headlights are usually on the front of the car, next to the grille. Identify where the headlight assembly is held in place.
- Protect the Surrounding Area: Use painter’s tape to cover the areas of the car around the headlight. This helps avoid scratches if you accidentally bump the car.
Removing the Old Headlight Assembly
Now, let’s move forward and take out the old headlight assembly. This is often the hardest part, because you need to know how the car is put together. Take your time and be patient. Don’t force anything. Refer to your car’s manual for help.
- Unbolt the Headlight: Look for the screws or bolts that secure the headlight assembly to the car. They’re often on top, sides, or bottom of the headlight housing. Use the correct screwdriver, wrench, or socket to remove them. Keep the screws or bolts in a safe place.
- Disconnect the Wiring Harness: Once the headlight assembly is loose, find the electrical connectors. These are the wires that power the headlight bulbs. Carefully unplug them. Sometimes there’s a clip you need to press to disconnect them.
- Take Out the Headlight Assembly: Gently pull the headlight assembly away from the car. It might be held in place with clips or tabs. Wiggle it gently until it comes loose. Some assemblies might need to be tilted or rotated to come out.
Installing the New Headlight Lens
Now that the old headlight assembly is out, it’s time to put in the new lens. This step is about putting everything back together. Follow these instructions closely, and you’ll be fine.
- Remove the Lens from the Assembly (If Necessary): If you’re only replacing the lens, you need to detach it from the headlight housing. Some headlights have the lens attached with clips or screws. Others might be sealed with adhesive. If there’s adhesive, you’ll need to warm it up to loosen it. A heat gun on a low setting or a hairdryer can help. Be careful not to damage the housing.
- Install the New Lens: Attach the new lens to the headlight housing. If you’re using a
- Reinstall the Headlight Assembly: Carefully put the headlight assembly back into place. Line it up with the holes. Make sure the alignment is correct.
- Reconnect the Wiring Harness: Plug the electrical connectors back into the headlight assembly. Make sure they click securely into place.
- Reattach the Bolts: Fasten the screws or bolts to the headlight assembly. Tighten them.
Final Steps and Testing
Now that the new lens is on, there are a few important steps to complete the job and make sure everything works correctly.
- Reconnect the Battery: Reconnect the negative battery terminal. Tighten the nut securely. Be careful not to overtighten.
- Test the Headlights: Turn on your headlights and other lights. Check that all lights are working properly. Make sure the high beams, low beams, and turn signals work. If any bulbs do not work, check your connections.
- Check Alignment (Optional): After replacing the headlight lens, you may want to check the headlight alignment. The lights may need to be aimed so they shine at the correct angle. Your car manual will tell you how.
- Clean Up: Remove the painter’s tape. Put your tools and any leftover supplies away.
With these steps, your headlights should be much clearer, and you will have succeeded in learning how to replace headlight lens. Take pride in your efforts, and enjoy the improved visibility and safety on the road!
Common Challenges and How to Overcome Them
While the steps for how to replace headlight lens seem straightforward, you may encounter some challenges. These challenges are usually easy to solve if you have the right knowledge. If you do encounter difficulties, do not worry! It’s all part of the learning process. Here are some of the most common issues and how to manage them.
Dealing With Stuck or Rusty Bolts
Rust and corrosion can make bolts hard to remove. This is a common problem, especially on older cars. Don’t try to force them. If you do, you could strip the head of the bolt or break it. Using the right techniques can help.
- Use Penetrating Oil: Apply penetrating oil to the bolt and let it sit for 15-30 minutes. The oil helps to loosen the rust. You may want to repeat the process.
- Use the Right Tools: Make sure you are using the correct size wrench or socket. Using the wrong size can strip the bolt head.
- Try a Bolt Extractor: If the bolt head is stripped, you might need a bolt extractor to remove it. These tools are designed to grip the stripped bolt head and help you turn it.
- Apply Heat: In some cases, applying heat to the bolt can help to loosen it. Use a heat gun or a propane torch. Be careful not to damage the surrounding areas.
Remember to be patient. Apply a little force at first, and if that doesn’t work, try some of the techniques above. Taking the time to free the bolt safely is worth it to avoid more issues.
Dealing With a Stuck Headlight Assembly
The headlight assembly might not come off easily. It may be stuck because of clips, tabs, or even dirt and grime. Trying to force it can cause damage to the assembly or the car. This can become an issue when figuring out how to replace headlight lens. This is how to get it unstuck.
- Check for Hidden Fasteners: Make sure you’ve removed all bolts and screws. Often, there are hidden fasteners that must be released before removing the assembly. Check your car’s manual.
- Carefully Wiggle and Rock: Try to gently wiggle and rock the assembly back and forth. This can help to loosen it from the clips.
- Use a Trim Removal Tool: A trim removal tool can help to gently pry the assembly away from the car. These tools are made to prevent damage to the plastic or paint.
- Check for Adhesive: In some cases, there might be adhesive holding the assembly in place. Use a heat gun or hairdryer to soften the adhesive.
Taking your time and being gentle is key. Work around the assembly. Look for any parts that might be holding it in place.
Choosing the Right Replacement Parts
Getting the wrong parts can add frustration. You want the correct replacement parts to ensure a proper fit and that your headlights work the way they should. Taking time to double-check before buying is important. Many car owners explore options for replacement, and it’s essential to get it right.
- Confirm Your Car’s Make and Model: Make sure you know the make, model, and year of your car. Different models have different headlight assemblies.
- Check the Part Number: If you can find the part number on your old headlight lens or assembly, use it to search for a match.
- Compare Headlight Styles: Some vehicles may have different headlight styles available depending on trim level or options. Double-check photos to ensure you purchase the correct style.
- Read Reviews: If you are buying online, read reviews from other buyers to ensure the parts are good quality and fit well.
When in doubt, compare the replacement parts to the old ones. The fit should be perfect. Remember that the right part will lead to a successful replacement.
Wiring and Electrical Issues
When dealing with electrical components, safety is important. Make sure that you disconnect the battery. If you’re not comfortable working with wires, it’s best to ask a professional. Here are some basic tips for troubleshooting:
- Double-Check Connections: When you have reconnected everything, make sure all the electrical connectors are fully seated and clicked into place. Loose connections are a common cause of issues.
- Inspect the Bulbs: Ensure the headlight bulbs are not burned out. Replace the bulb.
- Check the Fuses: Fuses protect the electrical system. If the headlight does not work, check the fuse box for blown fuses. Replace any blown fuses.
- Seek Professional Help: If you are not comfortable working with wires, seek help from a professional. Electrical work can be dangerous if done incorrectly.
Take your time and double-check your work, and you should be able to solve most issues. Don’t hesitate to ask for help if needed.
Headlight Lens Repair vs. Replacement: What’s Right For You?
When your headlights get cloudy, you must decide what to do. You have two main choices: repair or replace. Each choice has pros and cons. The best choice for you will depend on the state of your headlights and your budget. This is an important part of learning how to replace headlight lens.
Headlight Lens Repair Methods
Repairing a headlight lens involves cleaning and polishing the existing lens. Several methods are available. Repair is often a good idea for mild cloudiness. The purpose is to remove the outer layer of the plastic that has been damaged by UV rays and weather. This will restore some clarity to the lens.
- Headlight Restoration Kits: These kits provide the materials to clean and polish your headlight lenses. They come with special polishing compounds, sandpaper, and often a sealant to protect the lens. These kits are often a good choice for light to moderate cloudiness.
- DIY Polishing: You can use sandpaper and polishing compounds to remove the damaged outer layer. This method needs some time and effort. Using sandpaper with increasing grit removes scratches and cloudiness. You can use a power drill with a polishing pad.
- Professional Headlight Restoration: Many auto detailers offer headlight restoration services. They have professional equipment and can often achieve good results. This option is usually more costly than doing it yourself.
Repair can improve the appearance of the headlights, but its effectiveness depends on the damage. While repair is cheaper initially, the results may be temporary. Regular maintenance can extend the life of a repair.
When to Replace the Headlight Lens
Replacing the headlight lens involves removing the old lens (or the whole headlight assembly) and installing a new one. This is a good idea when the damage is severe. Replacement can improve visibility and safety.
- Severe Cloudiness or Yellowing: If your headlights are severely cloudy, yellowed, or hazy, repair may not be enough. The damage may be too deep. Replacing the lens gives you the best results.
- Cracks or Damage: If your headlight lens has any cracks, chips, or other damage, you should replace it. Cracks can allow water and moisture to get inside the headlight.
- Fogging or Condensation: If you notice condensation inside the headlight, it means the seal is damaged. This can cause the headlight to fail.
- Long-Term Value: While replacing the lens costs more initially, it provides a longer-lasting solution. You will not have to repeat the repair process.
Consider the condition of your headlights. Think about the long term. If the damage is beyond repair, or if you want the best results, replacing the lens is the best choice.
Comparison: Repair vs. Replacement
To help you decide, here is a comparison of headlight lens repair and replacement:
| Feature | Repair (Restoration) | Replacement |
|---|---|---|
| Cost | Generally cheaper | More expensive |
| Durability | Shorter lifespan; results may fade over time | Longer-lasting solution |
| Effectiveness | Works well for mild to moderate cloudiness | Best for severe cloudiness, yellowing, or damage |
| Effort | Requires time and effort | Involves more steps, but often easier with a new assembly |
| Tools | Requires restoration kit or polishing supplies | Requires basic hand tools, potentially more depending on the car |
Making the right choice depends on your specific situation. Consider your budget, the severity of the damage, and how long you want the repair to last. Replacing the lens is often the better idea for lasting results.
Frequently Asked Questions
Question: How long does it take to replace a headlight lens?
Answer: The time needed can vary. Usually, it takes between 30 minutes to a couple of hours. This depends on your car model and your experience. If you are new to this process, it might take a bit longer. Taking your time will help ensure that the job gets done correctly.
Question: Do I have to replace the entire headlight assembly?
Answer: It depends. Some headlight assemblies have the lens built-in. For those, you’ll have to replace the whole assembly. If the lens can be separated, you can replace just the lens. Check your car’s manual or look up the specific model online. It will tell you.
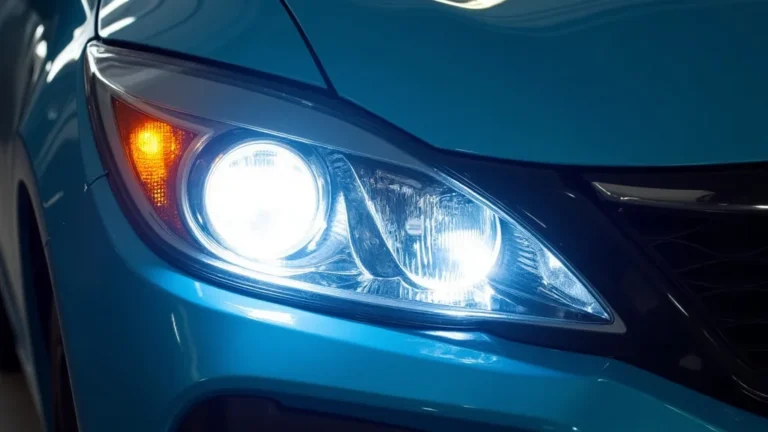
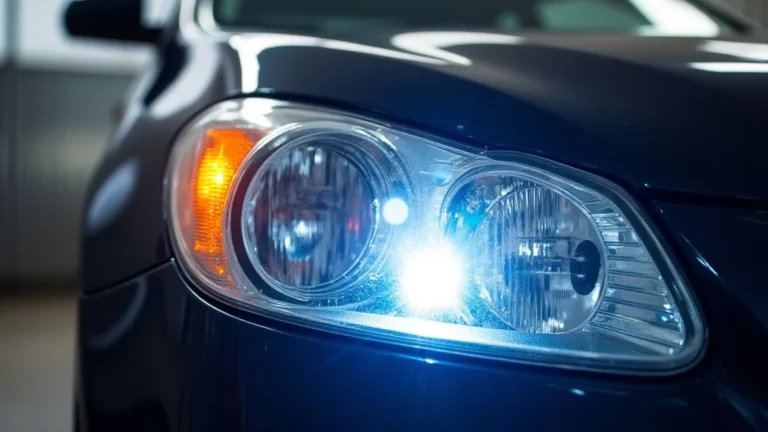
Question: Will replacing the headlight lens improve the light output?
Answer: Yes, replacing the headlight lens will usually improve light output. Cloudy lenses block light. By replacing the lens, you remove the cloudiness and let more light pass through. You will get a brighter view.
Question: Can I use any type of cleaner on the headlight lens?
Answer: Not all cleaners are safe for headlight lenses. Avoid using harsh chemicals or abrasive cleaners. Use cleaners made for plastics or car surfaces. You can damage the plastic. Look for cleaners. They will say they are safe for headlights.
Question: What if the new headlight lens doesn’t fit?
Answer: If the new lens doesn’t fit, stop immediately. Check the part number to make sure it matches your car. Check the product description to see if it is compatible with your car’s year, make, and model. If it still doesn’t fit, contact the seller and ask for help.
Final Thoughts
Knowing how to