Replacing a Car Headlight Bulb Made Easy: A Step-by-Step Guide
Changing a car headlight bulb seems simple, but it can be tricky for many drivers. It often involves tight spaces and unfamiliar parts, which can be frustrating if you’re not used to working on your vehicle. Don’t worry, though! This guide will break down how to replace car headlight bulb into easy steps, so you can do it yourself and save money. Let’s get started, and you’ll soon be lighting up the road again!
Gathering Your Supplies Before Replacing a Headlight
Before you begin the process of replacing your car’s headlight bulb, it’s essential to prepare and ensure you have all the necessary items. This upfront preparation will save you time and frustration during the actual replacement process. Having everything at your fingertips means you can work smoothly and efficiently.
Essential Tools and Components
To successfully change a car headlight, you will need a few key tools and components. Having these ready will prevent unexpected interruptions. Each item plays a role in the process, from ensuring your safety to securing the new bulb correctly.
-
New Headlight Bulbs: These are, of course, the most crucial component. Make sure you purchase the correct type of bulb for your vehicle. You can usually find the right type in your car’s owner’s manual or by searching online with your car’s make, model, and year. Consider buying a pair, so you can replace both at the same time to ensure even lighting.
The type of bulb matters because different vehicles require different bulb sizes. If the bulb doesn’t match your car’s specifications, it won’t fit correctly and your headlights won’t work. The bulbs are usually identified by a code (e.g., H7, H11, 9006). Make sure you have the right type.
-
Screwdriver Set: You’ll need various screwdrivers. A set with different head types (Phillips head, flathead) and sizes is a good idea. Some headlight housings are held in place with screws, so a screwdriver is essential for removing them.
Screwdrivers are important because they are used to loosen or tighten screws on various vehicle components. Headlight assemblies can be attached to the body of the car with screws. The correct screwdriver size and type will ensure that you don’t strip the screw heads or damage the surrounding components.
-
Gloves: Wear gloves to keep your hands clean and to protect the new bulb from oil and dirt. Handling the bulb with bare hands can shorten its lifespan.
Gloves are especially helpful if you’re working in a dirty environment or if you have sensitive skin. They provide a barrier that prevents dirt and grease from getting on the bulb, which can cause it to burn out faster. They are also essential for safety, protecting your hands from sharp edges or potential electrical hazards.
-
Owner’s Manual: Your vehicle’s manual is a valuable resource. It provides specific instructions for your car’s model, including how to access the headlight housing and the type of bulb needed.
The owner’s manual often includes diagrams that show the location of the headlight housing, the retaining clips, and other components. It also specifies the correct bulb type and wattage. Consult the manual to avoid damaging any part of your car and to make the process easier.
-
Optional: Consider having pliers, electrical tape, and safety glasses on hand, just in case. They’re often useful for various situations, such as removing stubborn parts or protecting your eyes from debris.
Electrical tape can be useful to secure any loose wiring. Safety glasses are also important to protect your eyes from any debris that might fall while you are working. Pliers can help with removing clips or stubborn connectors.
Safety First: Prepping for the Replacement
Before you begin to how to replace car headlight bulb, prioritizing your safety is critical. Taking these precautions will protect you from potential injuries and make the entire process safer.
Turning Off and Securing the Vehicle
This is the initial step to make sure you are in a safe environment. You’ll want to ensure that the car won’t move while you are working and that there is no electrical current running to the headlights.
-
Turn Off the Engine and Remove the Keys: This ensures there is no power going to the headlights. It is the first step toward preventing electrical shock.
Doing this ensures that the electrical system of your car is not active during the procedure. This is the first and most important step to prevent any electrical hazards. Taking out the keys eliminates any chances of turning the lights on accidentally while you’re working.
-
Engage the Parking Brake: Make sure the parking brake is firmly engaged to stop the car from moving, even on a level surface. It’s a key part of your safety measures.
This will prevent the car from rolling while you are working on it. The parking brake helps keep the vehicle stationary, giving you a safe and stable environment to work in. Even if the car is on a flat surface, the parking brake is essential.
-
Work in a Well-Lit Area: Try to
Good lighting is crucial for visibility, which can prevent accidents and ensure you can see all the details of the assembly. Sufficient lighting is also helpful for identifying parts, such as clips and connectors, and ensuring they are correctly installed.
-
Let the Car Cool: If the car has been running recently, allow the engine and headlight housing to cool down before starting. Working on hot components increases the risk of burns.
Allowing the vehicle to cool prevents burns. Headlight bulbs can get very hot while in use, so it’s safer to wait until everything has cooled down. The engine may also be hot and you don’t want to be exposed to burns.
Gaining Access to the Headlight Assembly
Once you’ve taken the essential safety steps, the next action is to access the headlight housing. This part can change in difficulty based on the car’s model. Usually, the steps involve opening the hood and locating the headlight assembly.
Opening the Hood and Locating the Headlight
Start by opening the hood of your car. This provides you with access to the headlight assembly. Identify the location of the headlight housing, which is generally on the front of the vehicle.
-
Locate the Hood Release Latch: Find the lever inside your vehicle, usually near the driver’s side footwell. Pull the lever to release the hood latch.
The hood release lever is inside the car so you can easily access it. You must pull the lever before you can lift the hood. Always consult your owner’s manual if you are unsure about the location of the hood release.
-
Release the Secondary Latch: After the main latch is released, you will still need to release the secondary latch under the hood to completely open it. This usually involves a small lever or switch near the front of the hood.
The secondary latch is a safety feature that prevents the hood from opening accidentally while driving. It is a necessary step to open the hood fully. This can vary by car model; consult your owner’s manual if you’re not sure.
-
Prop the Hood Open: Use the hood prop rod to keep the hood securely open. Insert the rod into its designated holder to prevent the hood from closing on you.
The hood prop rod is a metal rod that holds the hood up. It is essential for safety, keeping the hood from falling while you work. Make sure the rod is properly inserted to prevent injury or damage.
-
Identify the Headlight Assembly: The headlight assembly is usually located on the front of the car, near the front corners. It is typically a clear or translucent plastic cover that encloses the bulb and associated components.
The headlight assembly houses the headlight bulb and helps direct the light. This is the part that you need to access to replace the bulb. It may be partially covered by other components. Refer to your owner’s manual to find the exact location for your car model.
Replacing the Headlight Bulb: Step-by-Step Instructions
Now that you’ve accessed the headlight assembly, it’s time to replace the bulb. This section provides a detailed, step-by-step guide to make the replacement process straightforward.
Removing the Old Bulb
The first stage involves taking out the old bulb. This process will vary slightly depending on your vehicle’s make and model, but the general steps remain consistent. Work carefully and be prepared for potential variations.
-
Disconnect the Electrical Connector: Locate the electrical connector attached to the back of the headlight housing. Carefully detach it. This is typically done by squeezing a tab or pressing a release button, then pulling the connector straight off.
The electrical connector sends power to the headlight bulb. Disconnecting it ensures that electricity doesn’t flow through the bulb while you’re working, preventing shorts and possible harm. Always unplug the connector carefully, and do not pull the wires.
-
Remove the Retaining Clips or Screws: Some headlight assemblies use clips, while others use screws, to secure the bulb in place. Carefully detach any clips or unscrew any screws that hold the bulb. Use a screwdriver if needed.
These retaining mechanisms hold the bulb securely in the housing. Remove them carefully to allow you to remove the old bulb. Different car models will have different retaining methods; refer to your owner’s manual for precise instructions.
-
Remove the Old Bulb: Gently remove the old bulb from the housing. Some bulbs may pull straight out, while others might require a slight twist. Note the bulb’s position for reference when inserting the new one.
The old bulb is now ready to be removed. Pay attention to how it’s oriented in the housing so you can install the new one in the same manner. Be careful not to touch the glass part of the bulb with your bare hands.
-
Inspect the Housing: Check the headlight housing for any debris, corrosion, or damage. Clean the housing if necessary. This will ensure that the new bulb fits properly and functions correctly.
This will improve the lifespan of the new bulb, allowing for a better light output. If there is corrosion, clean it off with a suitable cleaner. Inspecting the housing ensures the new bulb operates efficiently.
Installing the New Bulb
Once you’ve removed the old bulb, it’s time to install the new one. This involves inserting the new bulb into the housing and reattaching the various components.
-
Insert the New Bulb: Carefully insert the new bulb into the headlight housing. Make sure it’s correctly aligned. If it requires a twist to lock it into place, do so gently.
Ensure the bulb is correctly positioned for optimal light output. Aligning the bulb correctly ensures that the light beam is correctly directed, providing the best possible illumination. Handle the new bulb carefully, and avoid touching the glass part with your bare hands.
-
Secure the Bulb: Reattach any retaining clips or screws that were used to hold the old bulb in place. Ensure the bulb is securely fastened. This prevents any rattling or vibration.
Securely fastening the bulb ensures that it doesn’t move while you are driving. Properly securing the bulb is essential for the bulb to function correctly and for long-term durability. Double-check that it is firmly held in place to prevent any light output issues.
-
Reconnect the Electrical Connector: Plug the electrical connector back into the headlight housing. Ensure it is firmly and securely attached. A solid connection ensures that the bulb receives the necessary power to function.
A proper electrical connection is essential for the bulb to light up. Make sure the connector clicks into place securely. A loose connection can cause the bulb to flicker or fail to light at all.
-
Test the New Bulb: Before reassembling everything, turn on your headlights to ensure the new bulb is working. This lets you confirm everything functions correctly before you put everything back together.
Testing the new bulb is a key step to confirm your work has been completed correctly. If the bulb doesn’t light up, double-check all connections. This will save you time and prevent the need for additional work.
Reassembling the Headlight Assembly
After installing the new bulb, the final stage is reassembling the headlight assembly. This involves putting everything back in its original place. Make sure all components are correctly aligned and secured.
Closing Up the Assembly
The last steps involve putting the headlight assembly back together. This involves ensuring all parts are secure and the headlight housing is correctly sealed.
-
Replace Any Covers or Seals: If your headlight assembly has any covers or seals, reattach them now. This helps protect the bulb and the housing from moisture and debris.
Covers and seals protect the bulb from damage and moisture. They help extend the bulb’s life and ensure optimal performance. Ensure the covers and seals are correctly positioned for a secure fit.
-
Reattach the Headlight Assembly (if removed): If you removed the entire headlight assembly, reattach it to the vehicle, securing it with screws or clips. Make sure it is securely fastened.
This will ensure the headlight is safely in place and functioning. The headlight assembly should be securely attached to the car’s body. If the headlight assembly has been removed, follow the reverse of the removal process to reattach it.
-
Close the Hood: Carefully lower the hood and latch it securely. Make sure the hood is completely closed and locked to prevent it from opening while you are driving.
Closing the hood properly is a necessary safety step. Ensure the hood is fully closed and locked to prevent it from opening while driving. Always verify the hood is secure.
-
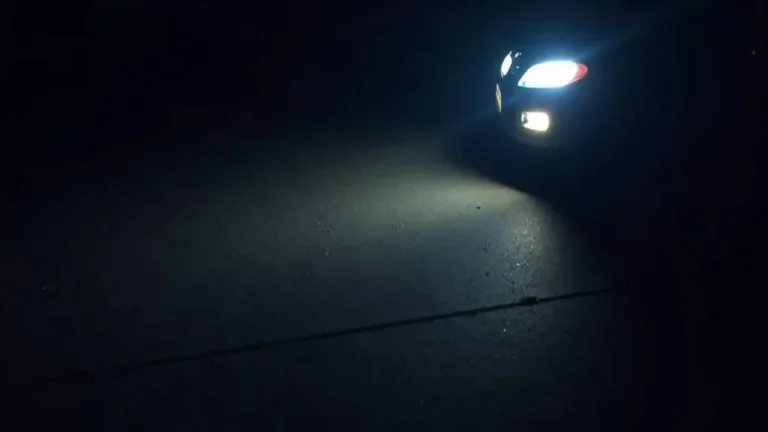
Test the Headlights Again: After reassembling the headlight and closing the hood, turn on your headlights. Check both the high beams and low beams to make sure they are working correctly.
Testing the headlights again confirms all the steps have been done correctly. Checking the lights ensures they function properly and will properly illuminate the road. Ensure that the new bulb and assembly are working correctly.
Troubleshooting Common Problems
Sometimes, things don’t go as planned. Here are a few troubleshooting tips to assist you if you experience problems during the how to replace car headlight bulb process.
Addressing Issues During the Process
It’s helpful to be prepared for some issues that might come up during the headlight replacement process. Here are some of the most common issues and how to fix them.
-
Bulb Doesn’t Light Up: If the new bulb doesn’t light up, first check the electrical connector to make sure it’s fully connected and secure. Also, check the fuse related to your headlights. The fuse could be blown, preventing the bulb from receiving power.
Sometimes the electrical connector isn’t fully seated, or there could be a problem with the fuse. Inspect the connector and ensure it is firmly connected. Check your car’s fuse box and replace the appropriate fuse if it is broken. Consulting your owner’s manual can help you find the correct fuse location.
-
Bulb Flickers or Dims: If the bulb flickers or dims, the connections might be loose or there might be an issue with the wiring. Make sure the electrical connector is secure and that the bulb is properly seated in the housing. Check for any damaged or exposed wires.
Loose or damaged connections can cause the bulb to flicker or dim. If the connections are loose, remove the connector and reseat it, making sure it snaps firmly into place. If you find any damaged wiring, get it repaired by a professional to avoid further electrical issues.
-
Difficulty Removing or Installing the Bulb: If you’re struggling to remove or install the bulb, check your owner’s manual for specific instructions for your vehicle model. Use the correct tools, and be patient. Sometimes, the housing or clips are tricky to work with.
Some car models can be more difficult than others. Consulting the owner’s manual helps find specific instructions for the car model. Use the correct tools to avoid damaging the housing. If the housing or clips are tricky, try to carefully study how they were assembled before attempting removal.
-
Condensation Inside the Headlight Housing: If you see condensation inside the headlight housing after replacing the bulb, it could mean the seal isn’t tight, or a cover isn’t properly in place. Recheck all seals and covers to ensure they are correctly installed.
Condensation inside the headlight housing can reduce the effectiveness of the light. Make sure all covers and seals are in place to keep the moisture out. If the problem persists, inspect the housing for cracks or damage that might be letting moisture in.
Frequently Asked Questions
Question: How often should I replace my headlight bulbs?
Answer: It’s a good idea to replace your headlight bulbs in pairs, even if only one has burned out. This helps ensure both headlights provide the same level of illumination, improving safety.
Question: Can I touch the new headlight bulb with my bare hands?
Answer: It’s best to avoid touching the glass part of the new bulb with your bare hands, as the oil from your skin can shorten its lifespan. Use gloves or handle the bulb by the metal base.
Question: What should I do if the new bulb doesn’t light up?
Answer: First, check the electrical connector to ensure it’s firmly attached. Also, check the fuse related to your headlights; it might have blown. Consult your car’s manual for the fuse location.
Question: Where can I find the correct type of headlight bulb for my car?
Answer: You can find the correct type of headlight bulb in your car’s owner’s manual, or by searching online with your car’s make, model, and year. Auto parts stores can also help.
Question: Can I replace my headlight bulbs in any weather conditions?
Answer: It’s best to replace headlight bulbs in dry conditions. Avoid working in rain or snow to prevent moisture from affecting the electrical connections. Also, choose a well-lit area to improve visibility.
Final Thoughts
Replacing a car headlight bulb doesn’t have to be a difficult task. By following these steps, you can successfully how to