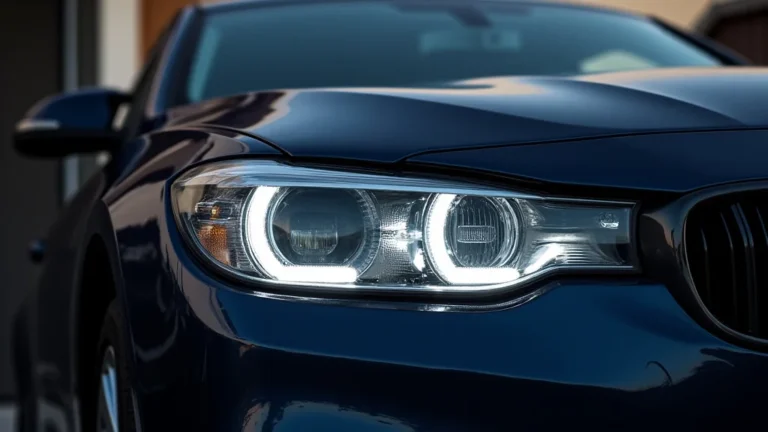
How to Polish Plastic Headlights: A Simple Guide
Do you find yourself staring at cloudy, yellowed headlights and wondering how to fix them? Many car owners face this problem, and it can be tricky if you’re not sure where to begin. Fortunately, learning how to polish plastic headlights doesn’t have to be hard. This guide will walk you through the process step-by-step. Get ready to explore the easy ways to restore your headlights to their former glory, so you can see better at night. Let’s get started!
What Causes Headlights to Become Cloudy?
Over time, plastic headlights can become hazy and discolored. This is mostly because of the sun’s harsh UV rays. The plastic material, often made of polycarbonate, has a protective coating that breaks down with exposure to sunlight. This breakdown leads to oxidation, where the plastic surface reacts with oxygen. As the coating degrades, it allows water, dirt, and other contaminants to stick, making the headlight look cloudy or yellow. These changes reduce the amount of light that the headlights can give off, which makes it harder to see while driving at night or in bad weather conditions. Also, the heat generated by the headlight bulbs contributes to the degradation process.
The Science Behind Headlight Degradation
The plastic used in headlights isn’t just one solid piece of material; it’s made up of molecules that are constantly vibrating. Ultraviolet (UV) radiation from the sun delivers energy to these molecules, causing them to break their bonds and weaken the plastic’s structure. This process is called photodegradation. The original protective coating on the headlight, which helps to defend against UV rays, eventually wears away or becomes compromised. Once that protection is gone, the plastic underneath becomes more vulnerable. Oxidation happens when the plastic surface meets oxygen in the air. This chemical process causes the surface to change, often turning yellow or cloudy. Think of it like metal rusting, but on a much smaller scale and caused by light instead of water.
- UV Radiation: This is a type of electromagnetic radiation emitted by the sun. When UV rays hit the plastic of headlights, they break down the chemical bonds in the material. This creates surface imperfections that scatter light, which makes the headlights appear cloudy. The higher the UV exposure, the faster the degradation happens. The amount of sunlight a vehicle gets, and the intensity of that sunlight, affects how quickly the headlight fades.
- Oxidation: This is a chemical reaction that occurs when the plastic surface is exposed to oxygen. It’s similar to how metal rusts. This reaction changes the plastic’s appearance, often turning it yellow. This happens faster if the protective coating on the headlight has worn away.
- Heat: Headlights generate heat, particularly when they use incandescent or halogen bulbs. Heat can speed up the process of degradation. The heat can make the plastic more porous, allowing dirt and other pollutants to get trapped in the surface, making the light output worse.
The Role of Protective Coatings
Headlights come with a protective coating to guard against UV rays and other environmental elements. This coating is like sunscreen for your headlights. But, over time, it will wear down, usually within a few years of a vehicle’s life. The protective layer is there to slow down the process of oxidation and photodegradation. If the coating is missing or damaged, the plastic underneath is more exposed and will degrade more quickly. So, choosing a high-quality sealant or a UV-resistant coating when you polish the headlights can help extend their life.
- Composition: The coating is a clear, thin layer of a material designed to absorb or reflect UV rays. Its components are often polymers that are resistant to degradation.
- Functionality: The main job of the coating is to block or reduce the amount of UV radiation that gets through to the plastic. By doing so, it slows down the rate of fading, yellowing, and cracking.
- Longevity: The coating won’t last forever. Its effectiveness declines over time due to exposure to sunlight, heat from the headlight bulbs, and the repeated impact of road debris.
Materials You Need to Polish Plastic Headlights
Gathering the right materials is the first and most important step to restoring your headlights. You don’t need expensive equipment, but having the correct tools can make the process easier and more effective. You can find most of these materials at any local auto parts store. Make sure you get all the things you need to ensure a smooth workflow and great results. The list below gives you a clear idea of what you’ll require.
Essential Supplies
Several products are essential for effectively polishing your headlights. These materials not only clean and restore the clarity of your headlights but also help protect them from future degradation. These are the tools you’ll need.
- Sandpaper: You’ll need different grades of sandpaper to remove the damaged layer of plastic. Start with coarser grits (like 800-1000 grit) to get rid of heavy oxidation, then move to finer grits (like 2000-3000 grit) to smooth the surface. This variety allows for a methodical restoration.
- Polishing Compound: This compound is designed to remove the fine scratches left by the sandpaper and bring back the clarity of the plastic. Choose a compound made for plastic or headlight restoration. It contains abrasives that will smooth the surface.
- Polishing Pads: You’ll need polishing pads to apply the compound. You can use a hand pad, or if you have a buffer, attach a foam pad to it. Foam pads are the most common choice, as they help polish evenly.
- UV Sealant/Headlight Protectant: After polishing, you need to protect the headlights. A UV sealant will create a barrier that protects against the sun’s damaging rays and slows down the future degradation. This will help make your hard work last.
Optional Equipment
These are not necessary, but these extra items can make the process faster or give you better results. Consider these if you’re going for professional results.
- Masking Tape: To protect the paint around the headlights, use masking tape. It prevents scratches during sanding and polishing. Apply tape to the areas around the headlight.
- Spray Bottle with Water: Keeping the sandpaper and the headlight wet helps reduce friction and keeps the process flowing smoothly. This is especially helpful during the sanding stage.
- Microfiber Towels: Use clean microfiber towels for wiping away the polishing compound and applying the sealant. They are gentle on the plastic and won’t leave scratches. You can get these at any auto parts store.
- Electric Drill/Polisher (Optional): While you can polish by hand, a drill or polisher makes the task quicker and less tiring, with more consistent results. Attach the polishing pad to the tool for application.
Step-by-Step Guide: How to Polish Plastic Headlights
Now, let’s explore how to polish plastic headlights in a way that’s simple and effective. This will guide you through each stage from preparation to the finished result. Following these instructions will allow you to do the task correctly, leaving your headlights looking better. Whether you’re a first-timer or experienced, these steps will help you achieve clear, bright headlights.
Preparation is Key
Before you begin, proper preparation is important. Start by parking your car in a well-lit area, preferably out of direct sunlight. Clean the headlights with soap and water to remove any loose dirt and grime. Dry the headlights completely. This helps to give you a clear view of the damage, and ensures the sanding and polishing will be effective. With your car prepared, you’re ready to start restoring your headlights.
- Clean the Headlights: Use soap and water to clear off any dirt, grime, or debris. This initial cleaning step ensures you have a clean surface for the polishing process.
- Mask the Surroundings: Place masking tape around the headlights to protect the paint on your car. This prevents scratches during the sanding and polishing process. Make sure to tape around the edges.
- Assess the Damage: Look closely at the headlights to determine the extent of the damage. This helps you select the correct grit sandpaper to start the sanding process. Heavier damage needs coarser grit to start.
Sanding the Headlights
Sanding is a vital step in removing the oxidized layer and getting rid of imperfections. Start with a coarser grit sandpaper (like 800-1000 grit) to remove the heavy oxidation and yellowing. Wet the sandpaper and the headlight surface with water to keep the surface lubricated and to prevent the sandpaper from clogging. As you work, consistently check your progress to see that you’re smoothing the surface evenly. Changing to finer grits (2000-3000 grit) will make sure that the surface is smooth before the polishing stage. Keep the surface wet at all times during this step.
- Start with Coarse Grit Sandpaper: Begin with a coarser grit (800-1000) to remove heavy oxidation. Wet the sandpaper and the headlight surface. Apply light pressure, sanding in a back-and-forth motion. Keep the surface wet throughout the process.
- Progress to Finer Grits: After removing the heavy oxidation, switch to finer grits (2000-3000). This helps to get rid of the scratches from the coarser paper, leaving a smooth surface. Keep the surface wet.
- Sand Evenly: Ensure that you sand the entire headlight surface evenly. This way, all of the imperfections are smoothed out. Use consistent pressure and move in a consistent pattern. If using a power tool, ensure that you don’t stay in one place.
Polishing to Restore Clarity
Once you’ve finished sanding, it’s time to polish your headlights. This step will remove the tiny scratches left by sanding. Apply the polishing compound to the headlight. Using a polishing pad, spread the compound evenly across the surface. This will begin the process of removing any remaining scratches and imperfections. You can polish by hand or use a power tool. When you are done, wipe away the compound with a clean microfiber towel to see the results of your effort. It may take a couple of times to get them perfectly clear. This will help bring back the clarity of your headlights.
- Apply Polishing Compound: Apply a small amount of polishing compound to a polishing pad. Make sure to use enough to coat the headlight surface. Spread it out evenly.
- Polish the Headlights: Polish the headlights using a back-and-forth motion. If using a power tool, use a slow speed and moderate pressure. Keep the pad moving. Continue this until the surface clears.
- Wipe Away the Compound: After polishing, use a clean microfiber towel to wipe away the compound. This reveals the results. Check the headlights for clarity. Repeat the process if necessary.
Protecting Your Work
The final step is to apply a UV sealant or headlight protectant. This will protect your freshly polished headlights from the sun’s harsh rays. This protective layer helps to prevent future oxidation and yellowing. Apply a thin, even coat of the sealant to the headlights. Allow it to dry fully according to the instructions on the product label. This will prolong the lifespan of your headlights, and prevent all your hard work from going to waste. This will help preserve the clarity and brightness of your headlights for a long time.
- Apply UV Sealant: Apply a thin, even coat of UV sealant or protectant to the headlight surface. This coating will protect against the sun’s damaging rays. This will extend the life of your freshly polished headlights.
- Allow to Dry: Let the sealant dry completely according to the product instructions. This drying time is crucial for the sealant to form a protective barrier. Avoid touching the surface until it’s fully dry.
- Maintenance: To keep the headlights looking clear, occasionally wash them with mild soap and water. If you notice any clouding or yellowing, you can repeat the polishing process. Regular cleaning can help maintain the headlights’ clarity.
According to a study conducted by the National Highway Traffic Safety Administration (NHTSA), headlight clarity impacts a driver’s ability to see objects and other vehicles at night. The study showed that headlights affected up to a 50% loss in visibility when they became cloudy. In one test, a vehicle with dull headlights needed an additional 50 feet to stop compared to one with clear headlights. These statistics highlight the importance of regularly checking and polishing headlights to ensure visibility.
Advanced Techniques and Troubleshooting
While the basic steps are easy, mastering the art of headlight restoration involves understanding a few advanced techniques. This also means knowing how to fix some common problems that you may encounter. These techniques will help you achieve professional-looking results. They are especially useful if you’ve already tried polishing before and are hoping to improve the outcome.
Dealing with Deep Scratches and Damage
Dealing with deep scratches and severe damage can be more challenging. It might require more aggressive sanding. In such cases, start with a lower grit sandpaper (like 400-600 grit) to get rid of the deepest scratches. Be careful not to remove too much material. This process demands a cautious approach and patience to prevent further harm to the plastic surface. Be careful not to sand through the plastic. Always remember to progress through finer grits after starting with a coarser one.
- Start with Coarser Grit: Use a grit like 400-600 to get rid of deep scratches. It’s important to only use this for serious damage, and always use water to help. Go slowly and check the progress often.
- Wet Sanding is Key: Keep the surface wet while sanding, to reduce friction and heat. This will reduce the risk of further damage and keeps the sanding process under control.
- Blend the Edges: Smooth the edges of the scratches by slowly sanding outward. This ensures a consistent finish. Blending helps to lessen the visibility of the scratches and gives the headlight an even appearance.
Choosing the Right Polishing Compound
Choosing the right polishing compound is important to the quality of your finish. Several types of compounds are available, including those for cutting, polishing, and finishing. The compound you choose will depend on the condition of your headlights. For heavy oxidation, you may need a cutting compound with more abrasive particles. For light scratches and haziness, a polishing compound will work well. Check the product information to confirm that the compound is suitable for plastic headlights. Also, remember to look for compounds that have UV protection to give your headlights extra protection.
- Cutting Compounds: These are for removing heavy oxidation and scratches. They contain coarse abrasives. Use these for headlights with significant damage.
- Polishing Compounds: Polishing compounds are for removing fine scratches and restoring clarity. They contain finer abrasives. Use them after sanding with finer grits.
- Finishing Compounds: Finishing compounds make the headlights look their best, leaving a clear and smooth surface. They also contain gentle abrasives. You can apply them after the polishing step to enhance shine.
Troubleshooting Common Issues
Despite your best efforts, you might encounter some common issues. For example, you may see swirl marks, which are tiny scratches from the polishing process. You may also notice uneven clarity, which can be due to uneven sanding. The yellowing may return. With the right adjustments, these problems are usually fixable. By knowing how to fix problems, you can achieve better results. These steps can help you correct these problems and restore clarity.
- Swirl Marks: If swirl marks remain, use a finer polishing pad and a less aggressive compound. Slow down your polisher speed. This can help to remove them.
- Uneven Clarity: This is often due to uneven sanding. Ensure that you’re sanding evenly across the surface. Try using the same amount of pressure across the entire surface.
- Yellowing Returns: The protective coating can fade. If yellowing returns, you may need to re-polish and re-apply a UV protectant. Make sure to apply the sealant evenly.
A recent market analysis found that the demand for headlight restoration products is growing, with a projected increase of 8% annually. This growth is driven by the rising number of older vehicles on the road. The result is that more owners are looking for cost-effective ways to improve their vehicle’s safety and appearance. As the number of older cars grows, so does the demand for products and services related to headlight restoration.
| Issue | Cause | Solution |
|---|---|---|
| Swirl Marks | Aggressive Polishing | Use a finer pad and compound |
| Uneven Clarity | Uneven Sanding | Sand evenly across the surface |
| Yellowing Returns | UV Exposure | Re-polish and re-apply a UV protectant |
Frequently Asked Questions
Question: How often should I polish my headlights?
Answer: It depends on your car and the environment. You might need to polish them every 6-12 months, or sooner if you see cloudiness or yellowing.
Question: Can I use household products to polish my headlights?
Answer: It is best to use products specifically made for this task. Household items may not be abrasive enough or can damage the plastic.
Question: Is it possible to completely remove all the scratches?
Answer: While you can dramatically improve the headlights, completely removing all scratches might not always be possible, especially with deeper damage.
Question: How do I choose the correct sandpaper grits?
Answer: Begin with coarser grits (like 800-1000) for heavy oxidation and move to finer grits (2000-3000) to get rid of the scratches.
Question: Is it safe to use a power drill for polishing?
Answer: Yes, but keep the speed low and be careful to avoid applying too much pressure or staying in one place too long. Also, be sure to use a polishing pad.
Final Thoughts
Now you know the essential steps on how to polish plastic headlights and breathe new life into your vehicle. You’ve explored the reasons behind headlight clouding, and you know how to prep your headlights, what materials you will need, and each stage of the process. From gathering the right supplies to applying a protective sealant, this guide provides the knowledge and resources for success. Restore your headlights to their former glory, so you can see better at night, and improve the look of your vehicle. With patience and attention to detail, you can achieve results that not only enhance the look of your car but also improve your safety on the road. Now that you’ve got the skills, grab your supplies, get to work, and enjoy the satisfaction of clear, bright headlights!