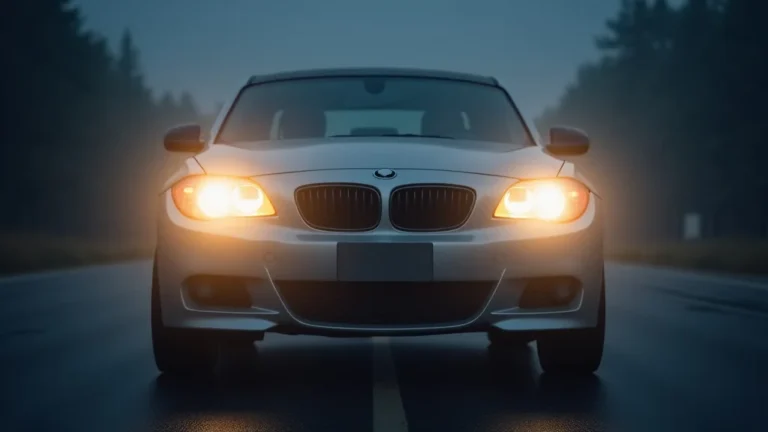
How to Make Car Headlights Brighter for Better Visibility
If you’re wondering how to make car headlights brighter, you’re not alone! It’s a common concern for drivers. Getting your headlights to shine better can sometimes seem like a tricky project, especially if you’re new to car maintenance. Don’t worry, though. This guide breaks down the process into simple steps that anyone can follow. We’ll explore easy fixes and improvements that don’t require advanced skills. Let’s explore how to get your headlights shining their brightest!
Checking Your Headlight Bulbs
One of the first things to inspect when you want to increase headlight brightness is the bulbs themselves. Over time, bulbs lose their ability to emit light as efficiently, or they burn out entirely. Checking the bulb type that your car uses is the initial step, then selecting the correct replacement bulbs. Many vehicles have easy access to the bulbs, while others may require you to remove parts of the headlight assembly.
Understanding Different Headlight Bulb Types
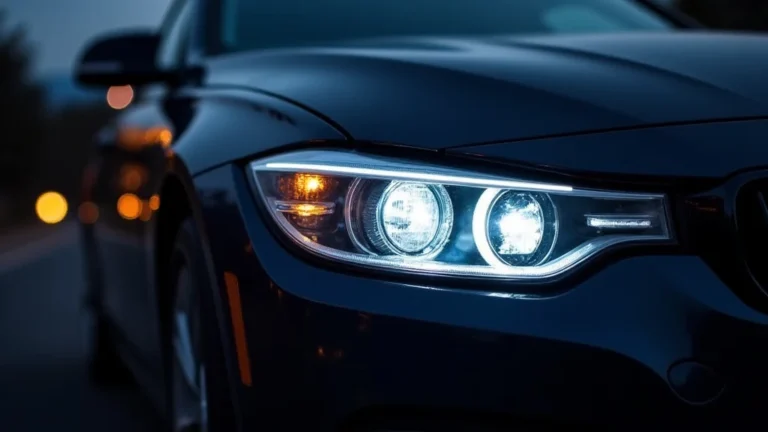
There are several types of headlight bulbs available. Each uses a different technology to produce light, and each type has its own brightness and lifespan. Knowing the differences can help you make an informed decision when you’re looking for brighter headlights. The most common types include halogen, LED (Light Emitting Diode), and HID (High-Intensity Discharge) or Xenon bulbs.
- Halogen Bulbs: These are the most traditional and are found in many older vehicles. They work by heating a filament inside a glass bulb. They are relatively inexpensive but have a shorter lifespan and are typically less bright than other options.
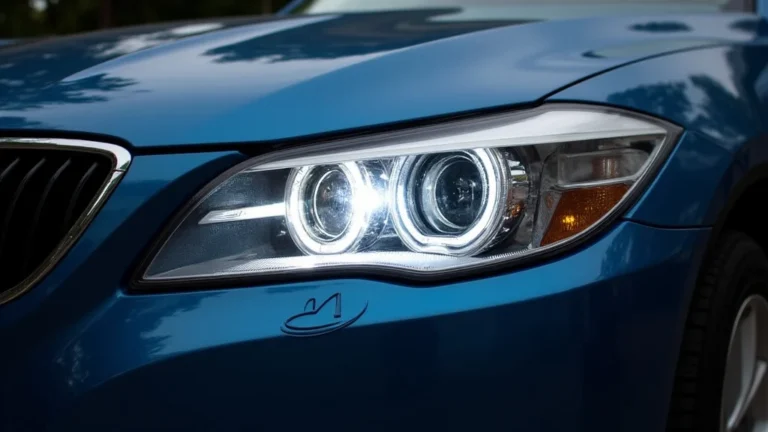
- LED Bulbs: LED bulbs are becoming increasingly popular because they are more energy-efficient and last much longer than halogen bulbs. They use light-emitting diodes that produce light when an electrical current passes through a semiconductor material. They are known for their instant-on capability and brighter, whiter light.
- HID/Xenon Bulbs: HID (High-Intensity Discharge) or Xenon bulbs use an electrical arc to vaporize metal salts within a quartz or glass bulb. These bulbs produce a very bright, bluish-white light. They require a ballast to regulate the voltage. HID bulbs can be brighter than both halogen and LED bulbs.
Halogen bulbs operate by passing an electric current through a tungsten filament, which then heats up and glows, producing light. They are often filled with halogen gas like iodine or bromine to improve efficiency and longevity compared to older incandescent bulbs. This gas helps to redeposit the tungsten back onto the filament, which extends the bulb’s life. The color temperature is usually warmer, around 2,700 to 3,000 Kelvin, giving off a yellowish light. They are a good option for people who want budget-friendly headlights.
LEDs (Light Emitting Diodes) convert electrical energy directly into light, making them highly efficient. They don’t have a filament like halogen bulbs, so they’re much more durable and less susceptible to damage from vibrations. They generate less heat and consume less power, which puts less strain on your car’s electrical system and can improve fuel efficiency. LED bulbs come in various color temperatures, from cool white to warm white. LEDs are also usually brighter than halogen bulbs.
Xenon bulbs use a discharge process with xenon gas to create an intense light. They don’t have a filament; instead, they contain xenon gas and metal salts that produce a bright, bluish-white light when an electrical arc passes through them. HID bulbs typically offer a much higher light output compared to halogen. They require a ballast to regulate the voltage, providing the necessary high-voltage power to ignite and maintain the arc. HID bulbs are known for their long lifespan and better visibility at night compared to halogen bulbs.
Inspecting Your Bulbs
Visually checking your headlights is essential. A burned-out bulb is an obvious reason for diminished brightness. Look for bulbs that appear cloudy, discolored, or have a broken filament. If you see any of these issues, it is time to replace them. It’s often helpful to swap bulbs from side to side to see if the issue changes sides, which helps pinpoint the problem.
- Visual Inspection: Carefully examine each headlight bulb. Look for any signs of damage, like cracks in the glass or a broken filament. If a bulb is dark or cloudy, it’s likely burnt out or nearing the end of its life.
- Testing with a Multimeter: If you’re comfortable using a multimeter, you can test the electrical connections. This helps determine whether power is reaching the bulb. This can help identify issues related to fuses, wiring, or other electrical components.
- Check the Connections: Make sure the electrical connectors are clean and properly connected. Loose or corroded connections can cause a drop in voltage, affecting brightness.
A thorough visual check involves inspecting the glass of the bulb for any cracks, cloudiness, or discoloration, all of which can significantly diminish light output. Look closely at the filament inside the bulb; if it is broken or appears distorted, the bulb is not working properly. Additionally, check for any signs of moisture inside the headlight housing, which can indicate a leak that may cause premature bulb failure and reduce brightness.
A multimeter can test for voltage, resistance, and continuity in electrical circuits. To test a headlight bulb, set the multimeter to the appropriate voltage range (usually DC). Connect the probes to the bulb’s terminals when the headlight is turned on. If the meter reads the correct voltage, then the bulb is likely the problem, or at least receiving power. A zero reading indicates that no power is reaching the bulb, indicating a problem in the electrical circuit, such as a blown fuse or a wiring issue.
Proper electrical connections are key for optimal headlight performance. Make sure the connectors are tightly fitted to the bulb and the wiring harness. Look for signs of corrosion or rust on the contacts, which can cause poor conductivity. Clean the connections if necessary using electrical contact cleaner, and apply a bit of dielectric grease to help prevent future corrosion. By making sure these connections are clean and secure, you can maximize the power delivered to the bulbs, which can have an impact on how to make car headlights brighter.
Cleaning Headlight Lenses
Over time, headlight lenses can become clouded or yellowed due to UV exposure, oxidation, and road debris. This significantly reduces the amount of light that passes through. Cleaning your headlight lenses can make a noticeable difference in their brightness and the visibility they provide. It’s an affordable way to improve light output, and if your headlights are very clouded, you can look into lens restoration kits.
Understanding Lens Materials and Their Degradation
Most modern headlights use polycarbonate lenses, a type of plastic that is durable but susceptible to damage over time. Ultraviolet (UV) light from the sun, oxidation, and abrasion from road debris can cause the lenses to cloud, yellow, or become hazy. This impacts how the light shines.
- Polycarbonate Material: Modern headlights are usually made of polycarbonate plastic. It is a tough, durable material. Polycarbonate is a good choice for headlight lenses because it resists impact damage.
- UV Damage: Prolonged exposure to UV light causes the plastic to break down. This causes the surface to become hazy and reduces light transmission. Proper UV protection is important.
- Oxidation and Abrasion: Oxidation is the process where the plastic reacts with oxygen, causing the surface to become cloudy. Abrasion from road debris causes scratches that scatter light.
Polycarbonate is used extensively in headlight lenses because it is lighter and more resistant to impact than glass. This is good for safety and fuel efficiency. However, polycarbonate is vulnerable to degradation from environmental factors. The lenses can become cloudy, yellow, or hazy over time, diminishing the brightness and effectiveness of the headlights. This is caused by UV exposure, oxidation, and abrasion from road debris.
The plastic in headlight lenses degrades due to the constant exposure to UV light from the sun. The ultraviolet radiation breaks down the molecular structure of the plastic, causing it to become brittle and discolored. This process is accelerated by heat, moisture, and pollutants in the air. Over time, UV damage will result in the lens becoming hazy or yellowed, which reduces the amount of light passing through the lens. This lowers the effectiveness of the headlights. Using products with UV protection can slow down the process and help to preserve the clarity of the lenses.
Oxidation occurs when the plastic in the headlight lens reacts with oxygen and other elements in the atmosphere. This reaction results in a degradation of the lens material, causing cloudiness, yellowing, and haze. Abrasion, on the other hand, comes from physical wear and tear caused by road debris, such as dust, sand, and small rocks. This creates small scratches on the surface of the lens, which scatter light and reduce overall brightness. Both oxidation and abrasion contribute to a decrease in light output, making it harder to see at night.
Methods for Cleaning Headlight Lenses
Several methods can be used to clean headlight lenses, from simple household solutions to more advanced restoration techniques. The method you use will depend on the degree of cloudiness and the condition of the lenses. Before you start, park your car in a well-ventilated area, and gather your supplies.
- DIY Cleaning with Household Items: For lightly clouded lenses, you can use common household items such as toothpaste or baking soda. Apply the abrasive cleaner to the lens and gently scrub in a circular motion. Rinse with water and dry.
- Using Headlight Restoration Kits: For more severely damaged lenses, headlight restoration kits provide all the necessary tools and products to sand, polish, and seal the lenses. These kits can provide significant improvement.
- Professional Headlight Restoration: If you are not comfortable doing the work yourself or the lenses are severely damaged, consider professional headlight restoration. Professionals have specialized tools and materials to achieve the best results.
Simple household items can be used for cleaning lightly clouded headlights. Toothpaste is a good choice as it has mild abrasive properties. Baking soda can also be used as a light abrasive. Apply the chosen cleaner to the headlight lens and rub it gently in circular motions using a microfiber cloth. This process helps to remove light oxidation and grime. Rinse the lens with water and then dry it with a clean cloth. This can provide some improvement and give you brighter headlights.
Headlight restoration kits are useful for more heavily damaged lenses. They usually contain sandpaper of varying grits, polishing compounds, and a sealant. The process involves sanding the lenses to remove the outer layer of oxidation and scratches. Then, a polishing compound is used to smooth the surface, followed by a sealant to protect the lenses from future damage. Using the proper restoration kit can restore clarity and greatly increase the amount of light that shines through.
Professional headlight restoration services offer the best and most durable results. Professionals can assess the damage and use specialized tools, such as orbital polishers and specific polishing compounds, to bring the lenses back to near-new condition. They also have access to higher-quality sealants and coatings that provide longer-lasting protection. Getting your headlights professionally restored can deliver the clearest and brightest results, providing the best visibility and a safer driving experience. If you are unsure of how to make car headlights brighter, this is a good solution.
Checking Your Electrical System
A weak or faulty electrical system can affect headlight brightness. Problems with the battery, alternator, or wiring can reduce the voltage reaching your headlights, making them appear dimmer. Ensuring your electrical system is in good condition is important when you want to get better light output.
The Role of the Battery and Alternator
The battery and alternator work together to provide power to your car’s electrical components. The battery starts the engine, and the alternator recharges the battery while providing power to all electrical systems when the engine is running. A weak battery or a failing alternator can lead to reduced headlight brightness.
- Battery Voltage: The battery provides the initial power to start your car. The headlights use electricity to function. A battery that isn’t providing the proper voltage can cause the headlights to appear dimmer.
- Alternator Output: The alternator is responsible for recharging the battery and providing power to the car’s electrical systems once the engine is running. A faulty alternator may not generate enough power, leading to dim headlights.
- Testing the Battery and Alternator: You can test both the battery and alternator with a multimeter to check voltage output. This is a common way to identify any underlying electrical issues.
The battery is crucial for starting the vehicle and supplying power to various electrical components, including the headlights. A fully charged battery should have a voltage reading of about 12.6 volts. When the engine is running, the voltage should be between 13.7 and 14.7 volts. If the battery voltage is low, the headlights will receive less power, resulting in a dim light. Having a good, properly charged battery is one of the important keys for how to make car headlights brighter.
The alternator takes over the job of providing power to the car’s electrical components, including the headlights, when the engine is running. A faulty alternator may not produce enough voltage or current. This can lead to a decrease in headlight brightness. Signs of an alternator issue include flickering lights, dimming headlights, and difficulty starting the car. It is important to address alternator problems promptly to ensure all electrical systems receive sufficient power.
A multimeter can be used to measure the voltage output of both the battery and the alternator, giving you information about their functionality. When testing the battery, measure the voltage at the terminals with the engine off. When the engine is running, the voltage should be higher, indicating the alternator is charging the battery. If you observe low voltage readings or variations, it may indicate a problem with either the battery or the alternator. You can also measure the alternator’s output at the battery terminals and compare it to the manufacturer’s recommended output. Proper testing with a multimeter provides important diagnostic information.
Inspecting Wiring and Connections
Corroded, loose, or damaged wiring can cause a voltage drop, reducing the power that reaches the headlights. Wiring issues often cause the headlights to flicker. Inspecting the wiring and connections is an important step when you’re working on how to make car headlights brighter.
- Checking for Corrosion: Look for corrosion on the wiring connectors and terminals. Clean these connections with a wire brush or electrical contact cleaner to ensure good contact.
- Examining Wiring for Damage: Check the wiring for any signs of fraying, cracking, or damage. Replace any damaged wires to prevent shorts or voltage drops.
- Voltage Drop Test: A voltage drop test can help identify any areas in the wiring where voltage is being lost. This test is done with a multimeter and involves measuring the voltage at different points in the circuit.
Corrosion on electrical connectors and terminals can create resistance, reducing the flow of electricity to the headlights. When inspecting your car’s wiring, check for any signs of corrosion, such as a white or green buildup. Use a wire brush or electrical contact cleaner to remove this corrosion. After cleaning, apply dielectric grease to the connections to help prevent future corrosion. Ensuring clean and corrosion-free connections maximizes the power delivered to the headlights, contributing to their brightness.
Inspect the wiring connected to your headlights for any damage, such as fraying, cracking, or exposed wires. Damage to the wiring can lead to short circuits or a significant voltage drop, which can significantly reduce headlight brightness. If you see any damaged wires, replace them promptly. Use the correct gauge wire and ensure the connections are secure to avoid future problems. Repairing or replacing damaged wiring restores the proper electrical flow, helping the headlights shine brighter and operate reliably.
A voltage drop test is used to measure the loss of voltage across a circuit, helping to identify problematic areas in the wiring that could be impacting headlight brightness. To perform this test, set your multimeter to DC voltage mode. Connect one probe to the positive terminal of the headlight bulb and the other probe to the positive terminal of the battery. The reading should be small, usually less than 0.5 volts. If the voltage drop is higher, it indicates that there’s a problem, likely due to corroded connections, damaged wiring, or a faulty switch. The test provides key insights into the electrical efficiency of your car’s headlight system.
Upgrading Your Headlight System
Sometimes, simply cleaning or replacing bulbs isn’t enough. Upgrading your headlight system can significantly improve brightness and visibility. This can include upgrading to more advanced bulbs, adding auxiliary lights, or other changes. These upgrades may require professional installation to ensure proper and safe operation.
Upgrading to LED or HID Bulbs
Switching to LED or HID bulbs can greatly improve the brightness of your headlights. LED and HID bulbs offer more light output compared to halogen bulbs. These upgrades can be more expensive than simple bulb replacements but can provide significant improvements in night visibility.
- Brightness and Efficiency: LED and HID bulbs offer more light output and often use less power than halogen bulbs. They can be more energy-efficient and offer a clearer, brighter light.
- Color Temperature: LED and HID bulbs come in various color temperatures. Choose a color that enhances visibility without causing glare.
- Installation Considerations: Make sure the LED or HID bulbs are compatible with your car’s headlight housing and electrical system. Professional installation may be required for optimal performance and safety.
LED and HID bulbs are known for their efficiency and higher light output compared to halogen options. LED bulbs produce a bright white light while using less power, reducing strain on the car’s electrical system. HID bulbs, such as xenon lights, provide a very bright, bluish-white light, resulting in improved visibility. The advantages include greater illumination, improved energy use, and enhanced safety. Choosing either one is a good way to improve how to make car headlights brighter.
LED and HID bulbs offer various color temperatures, which affect the appearance of the light. Color temperatures are measured in Kelvin (K). Lower Kelvin ratings produce warmer, more yellowish light. Higher Kelvin ratings produce cooler, bluish-white light. The choice of color temperature impacts visibility. A color temperature between 4,000K and 6,000K is good for visibility. It offers a balance between brightness and reduced glare. Make sure the color choice enhances night driving safety.
When upgrading to LED or HID bulbs, it is important to ensure compatibility with your car’s headlight housing and electrical system. Incorrect bulb sizes or mismatched electrical specifications can cause problems. It’s a good idea to seek professional installation for the best results. Professionals can ensure proper wiring, correct alignment, and safe operation. Following these steps helps maximize the performance and safety of the new headlights, providing the driver with greater illumination and a better driving experience.
Adding Auxiliary Lights
Adding auxiliary lights, such as fog lights or light bars, can supplement your headlights and improve visibility in various conditions. These lights offer additional illumination. They can improve safety, particularly in poor weather conditions, such as rain or fog.
- Types of Auxiliary Lights: Fog lights are designed for use in foggy conditions, while light bars and driving lights provide long-range illumination. Consider the needs and driving conditions to choose the right lights.
- Installation and Wiring: Proper installation is necessary for auxiliary lights. This includes correctly mounting the lights and wiring them to the car’s electrical system, often through a relay and switch.
- Legality and Safety: Check local regulations regarding auxiliary lights. Ensure that the lights are aimed correctly to avoid blinding other drivers.
Auxiliary lights provide extra illumination and include a variety of options. Fog lights are designed to be used in foggy or low-visibility conditions. They are typically mounted low on the vehicle to direct light below the fog. Light bars and driving lights are designed to provide long-range illumination. They usually provide a focused beam of light to enhance visibility at night. The selection of lights should depend on the kind of driving situations and needs to improve night driving safety.
Installing auxiliary lights involves more than just mounting the lights. You’ll need to run wiring to connect the lights to the car’s electrical system. This usually includes installing a relay to handle the higher current draw of these lights, and a switch to turn them on and off. The wiring must be correctly sized. A professional installation is recommended to guarantee the lights function correctly. Proper installation and wiring ensures that the auxiliary lights function as intended. It also maintains the car’s electrical system and provides maximum safety for the driver.
Local regulations regarding auxiliary lights can vary, so it is important to be aware of and follow them. These rules often include restrictions on the type of lights, their brightness, and their placement. Lights must be aimed correctly. Improperly aimed lights can cause glare for oncoming traffic. Also make sure the lights are used appropriately to improve road safety for everyone. Adhering to these safety standards and legal guidelines ensures that the auxiliary lights can improve visibility without creating any hazards on the road.
Headlight Aiming and Alignment
Proper headlight aiming is crucial for ensuring that your headlights shine where you need them. Misaligned headlights can reduce visibility and cause glare, which can be dangerous for other drivers. Make sure your headlights are aimed correctly to maximize their effectiveness.
- Importance of Correct Aiming: Properly aimed headlights ensure that the light is directed onto the road, improving visibility without causing glare to other drivers.
- How to Adjust Headlights: Headlight adjustments can typically be made using screws or bolts on the headlight housing. Consult your car’s manual for specific instructions on how to adjust your headlights.
- Professional Alignment: If you’re unsure how to adjust your headlights or if you suspect they need significant adjustment, consider professional headlight alignment. Professionals have the tools and expertise to ensure your headlights are properly aimed.
Correct headlight aiming is key for both driver visibility and road safety. Well-aimed headlights illuminate the road ahead, providing maximum visibility and allowing drivers to see hazards sooner. This reduces the risk of accidents. Misaligned headlights, whether too high or too low, significantly reduce the effectiveness of the lights. They can also create glare that can blind other drivers. Regular inspections and adjustments are necessary to maintain proper aim, and a safer driving experience.
Headlight adjustment is performed using adjusting screws or bolts, which are typically found on the headlight housing. Many vehicles have both vertical and horizontal adjustment mechanisms. It’s best to consult your car’s manual for the exact locations of these adjusters and instructions on how to use them. The aim is to ensure the headlights are aimed at the correct height and direction. Properly aimed headlights improve visibility and reduce the risk of accidents by providing better illumination.
If you’re unsure about adjusting your headlights or if they require significant adjustments, consider a professional headlight alignment. Professionals use specialized tools and equipment to accurately measure and adjust your headlights, ensuring they are correctly aimed. This service is a good option when you are not confident in your skills. Professional alignment improves visibility. It also reduces the risk of blinding other drivers. A professional headlight alignment will offer the most accurate and safe solution.
| Feature | Halogen Bulbs | LED Bulbs | HID/Xenon Bulbs |
|---|---|---|---|
| Brightness | Less bright | Brighter | Very Bright |
| Lifespan | Shorter | Longer | Long |
| Power Consumption | Higher | Lower | Lower |
| Cost | Lowest | Moderate | Higher |
The table above gives a comparison of headlight types: Halogen, LED, and HID/Xenon bulbs. This helps drivers decide which bulb type will best meet their needs. It compares brightness, lifespan, power consumption, and overall cost.
- A driver notices their headlights seem dimmer than usual at night, which makes it harder to see the road. They decide to check their headlight bulbs for any signs of damage or wear. They find one bulb is burned out and replace it, immediately improving their visibility. This is a common and easy example.
- A driver frequently drives on dark, rural roads. They decide to upgrade from halogen to LED headlights, which offer brighter, whiter light. This improves their night vision and helps them to see potential hazards sooner. This driver made a smart upgrade.
- A driver experiences cloudy and yellowed headlight lenses. They purchase a headlight restoration kit. Following the kit’s instructions, they sand, polish, and seal the lenses, which results in a clear and brighter light output. They made their headlights look brand new.
Frequently Asked Questions
Question: What’s the easiest way to make my headlights brighter?
Answer: Check your headlight bulbs and make sure they are not burned out. Cleaning the headlight lenses can also make a big difference.
Question: Are LED headlights brighter than halogen bulbs?
Answer: Yes, generally, LED headlights are significantly brighter and more efficient than halogen bulbs.
Question: What causes headlight lenses to become cloudy?
Answer: Headlight lenses become cloudy due to UV exposure, oxidation, and abrasion from road debris.
Question: How often should I check my headlights?
Answer: Check your headlights regularly, especially before long trips, to ensure they are working correctly and producing enough light.
Question: Can I replace my headlights myself, or do I need a professional?
Answer: You can often replace headlight bulbs yourself, but for more complex upgrades, like LED or HID conversions, professional installation is recommended.
Final Thoughts
Improving your headlight brightness can significantly enhance your driving experience, especially during nighttime or in bad weather conditions. We’ve explored different steps to take, from simple bulb replacements and cleaning to more advanced upgrades and electrical checks. Remember to check your bulbs and lenses regularly. By following these steps, you can explore how to make car headlights brighter and improve your safety on the road. Now that you know the basics, you’re well-equipped to get started and enjoy brighter, clearer headlights.