Cleaning Oxidized Headlights: A Simple, Step-by-Step Guide
Getting your car’s headlights clear again can seem tricky if you’ve never done it before. Many people find the process confusing because they aren’t sure where to start. You might worry about damaging your car or not getting the results you want. But don’t worry! This guide will make it easy to learn how to clean oxidized headlights and bring back their shine. We’ll show you exactly what to do, step by step, so you can see better at night. Let’s explore how!
What Causes Headlight Oxidation?
Headlight oxidation is a common issue for vehicle owners. The clear plastic covering on headlights degrades over time, becoming cloudy or yellowed. This happens because of a combination of factors, primarily exposure to ultraviolet (UV) light from the sun, which breaks down the plastic’s protective layers. Additionally, other elements contribute to this, including heat, road debris, and harsh weather conditions. The plastic gradually loses its clarity, reducing the amount of light that passes through. This results in reduced visibility, especially when driving at night or in inclement weather. Recognizing the root causes of this common problem is the initial move toward maintaining your headlights.
The Science Behind Oxidized Headlights
The plastic used in headlights, typically polycarbonate, has a protective coating meant to shield it from environmental damage. However, this coating isn’t indestructible. UV rays are potent enough to break down the chemical bonds in the plastic, leading to oxidation. Think of it like a sunburn on your car’s headlights. Over time, this process creates tiny scratches and imperfections on the surface, which scatter light and reduce its intensity. This is what leads to that hazy, yellowed appearance. The combination of these factors slowly erodes the plastic, making it more difficult for light to shine through.
- UV Radiation: The sun’s ultraviolet rays are the primary culprits. They break down the plastic’s chemical structure, leading to oxidation.
- Heat Exposure: Heat from the engine and the sun can accelerate the oxidation process, causing the plastic to become brittle.
- Road Debris: Small particles like sand, dirt, and gravel can scratch the headlight surface, increasing the amount of light scattering.
- Environmental Factors: Exposure to rain, snow, and pollution can also cause damage to the headlight’s surface.
Identifying Oxidized Headlights
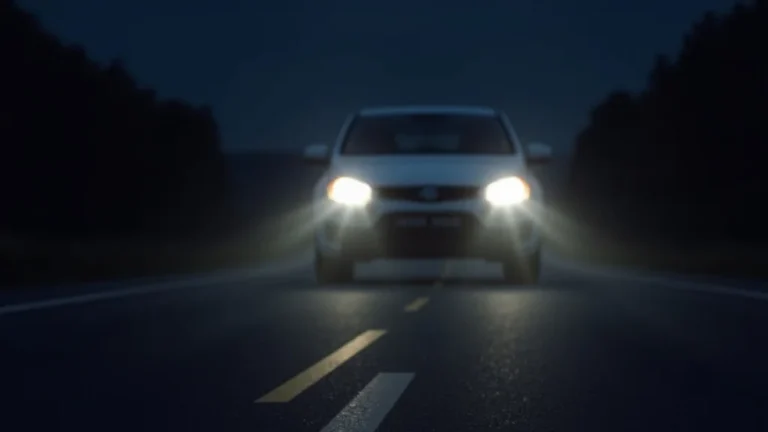
Recognizing the signs of oxidation is a primary step in knowing when to take action. The most obvious sign is a cloudy or yellowed appearance to the headlights. This can range from a light haze to a severe yellowing. In addition to discoloration, you might observe other indicators, such as reduced light output, making it harder to see at night. This can be dangerous and could affect your ability to drive safely. You might see small cracks or surface imperfections. These can scatter the light and reduce visibility. Spotting these changes early lets you address the issue before it gets worse.
- Yellowing or Clouding: The most common sign. Headlights will change from clear to yellow or opaque.
- Reduced Light Output: If your headlights seem dimmer than before, oxidation is likely to blame.
- Surface Imperfections: Small cracks or scratches can indicate oxidation and UV damage.
- Difficulty Seeing at Night: This is a direct consequence of reduced light output and can compromise driving safety.
How to Clean Oxidized Headlights: The Process
Restoring your headlights to their former clarity can be done through a few different methods. There’s a lot of options, from simple do-it-yourself solutions to more complex professional approaches. The steps below are a guide to a commonly used method that involves using products that are easily found at a store. These instructions provide a detailed breakdown of how to how to clean oxidized headlights using readily available materials. Remember, being patient and following each step carefully is important for achieving the best results.
Gathering Your Supplies
Before you begin the headlight cleaning process, gather all the necessary materials. Having these items on hand will make the task smoother and more efficient. It is also good to have everything you need before you start, so you’re not interrupted. This basic collection of materials will allow you to make your headlights crystal clear again. Make sure you work in a well-ventilated area, preferably in the shade, to avoid direct sunlight and improve your working experience.
- Sandpaper: You’ll need different grit levels of sandpaper, such as 600, 1000, and 2000 grit, to remove the oxidation.
- Masking Tape: To protect the paint around the headlights from getting scratched.
- Water and Spray Bottle: To keep the sandpaper wet during the sanding process.
- Headlight Restoration Kit or Polish: These kits often include sandpaper, polish, and sealant.
- Microfiber Cloths: Several microfiber cloths are ideal for cleaning, polishing, and wiping the headlights.
- Protective Gloves: To keep your hands clean and protected.
Step-by-Step Cleaning Instructions
Here’s a step-by-step guide on how to clean oxidized headlights using the wet sanding method. This is a good way to see a big difference in how your headlights look. Following these steps carefully will help you get clear, bright headlights again, leading to improved visibility and a safer driving experience. Don’t rush; take your time and follow the instructions closely for the best outcomes. Patience is key to success!
- Prepare the Area: Park your car in a shady spot. Tape around the headlights to protect the paint.
- Sand the Headlights: Start with 600-grit sandpaper, wet it, and sand the headlights in a crosshatch pattern. Keep the surface wet. Then, switch to the finer grits (1000 and 2000) for a smoother finish, wet sanding each time.
- Polish the Headlights: Apply the headlight polish to the headlight and use a microfiber cloth to rub it in until the plastic is clear.
- Apply Sealant: Once the headlights are polished and dry, apply a sealant to protect them from future oxidation.
- Clean Up: Remove the tape and wipe down the area with a clean microfiber cloth.
Safety Precautions During the Process
It’s important to take the correct safety precautions when cleaning your headlights. Always work in a well-ventilated area and wear appropriate protective gear. Protect your eyes, skin, and the surrounding areas of your car from any of the products. Following these safety guidelines can help ensure a safe and successful headlight restoration process. Taking these steps is essential for protecting both yourself and your vehicle.
- Wear Safety Glasses: Protect your eyes from any sanding dust or chemical splashes.
- Use Protective Gloves: Protect your hands from contact with cleaning solutions.
- Work in a Well-Ventilated Area: Ensure good airflow to avoid inhaling chemical fumes.
- Protect the Vehicle: Use masking tape to protect the paint around the headlights.
- Read Product Instructions: Always follow the product’s safety guidelines on the packaging.
Alternative Methods for Headlight Restoration
While the wet sanding method is popular, other ways exist to deal with headlight oxidation. These methods offer different levels of effectiveness, cost, and effort. Depending on the severity of the oxidation and your resources, you can choose the best solution. Whether you prefer the do-it-yourself approach or a professional service, here are some options to consider. Finding the right solution for your needs will help you see better when driving at night.
Using a Headlight Restoration Kit
Headlight restoration kits are a popular choice for their convenience and effectiveness. These kits generally include all the necessary components, such as sandpaper, polishing compounds, and sealant. They provide a step-by-step solution for removing oxidation and restoring clarity to your headlights. Using a kit can be a good choice for someone who is not that handy. The ease of use and often the quality of the results make it a smart choice for many car owners. They’re typically designed for ease of use, making them a good option for beginners.
- What’s Included: Kits usually include sandpaper of varying grits, polishing compounds, a sealant, and sometimes a buffing pad.
- How to Use: Follow the kit’s instructions. Often, this involves sanding the headlights, polishing them with the compound, and applying the sealant.
- Advantages: Kits offer all-in-one solutions, making the process straightforward and easy to follow. They can provide impressive results with minimal effort.
- Things to Consider: Results can vary based on the kit’s quality and the level of oxidation. Some kits may require more effort and time.
Professional Headlight Restoration
For those who want a simple solution or who are dealing with extreme oxidation, professional headlight restoration is a great option. Professionals have the experience, tools, and materials to ensure a high-quality result. While more costly than do-it-yourself options, the outcome is often far superior, and the process is less time-consuming for you. This choice is well-suited for people who want the best possible results without the time and work of doing it themselves. This approach usually involves using more advanced tools and techniques than the DIY methods.
- Expertise and Tools: Professionals have the expertise and use specialized tools like power buffers, and more effective polishing compounds.
- Thorough Restoration: Professional services can address deeper oxidation and achieve longer-lasting results compared to DIY options.
- Convenience: You can simply drop off your car and have the headlights restored without having to do any work yourself.
- Cost Considerations: Professional services are more expensive, but the quality of results often justifies the cost.
Comparing Restoration Methods
| Method | Cost | Effort | Results | Longevity |
|---|---|---|---|---|
| DIY Wet Sanding | Low | High | Good | Moderate |
| Headlight Restoration Kit | Moderate | Moderate | Good to Very Good | Moderate |
| Professional Restoration | High | Low | Excellent | High |
This table compares the various headlight restoration methods regarding cost, effort, expected results, and the durability of the outcome. This can help you to decide the best method for your needs and budget. A good approach helps in making an informed decision about the approach to select. Keep in mind that the best method depends on your budget, time, and the condition of your headlights.
Maintaining Your Headlights After Restoration
After you’ve restored your headlights, it is important to take steps to keep them clear and protected. Implementing some basic maintenance practices can significantly extend the life of your headlights and prevent the return of oxidation. Making a small effort to preserve your headlights will save you from having to repeat the whole cleaning process too often. Following these tips will help maintain the clarity of your headlights.
Protective Measures for Headlights
Various measures help protect your restored headlights from future damage and oxidation. Applying these steps will ensure your headlights stay bright and clear. Regular maintenance can significantly extend the life of your headlight restoration. These steps are a cost-effective way to preserve the appearance and functionality of your headlights.
- Apply a Headlight Sealant or Coating: This protects the plastic from UV rays and environmental factors.
- Wash Your Car Regularly: Cleaning off road grime and debris helps prevent scratches and damage.
- Park in the Shade: If possible, protect your car from direct sunlight.
- Use UV-Protectant Products: Look for car wax or detailing products that offer UV protection.
Regular Inspection and Care
Regular inspection and care are essential for maintaining the clarity and functionality of your headlights. A quick check-up will let you identify any early signs of oxidation or damage. Addressing small issues quickly will stop them from turning into more serious problems. Integrating these checks into your car care routine can help you keep your headlights bright and help you see more clearly.
- Inspect Headlights Regularly: Check for any clouding, yellowing, or surface damage.
- Clean Headlights Regularly: Use a mild soap and water solution to remove dirt and grime.
- Address Minor Issues Promptly: Sand out small scratches or apply a protective coating to prevent oxidation.
Frequently Asked Questions
Question: How often should I clean my headlights?
Answer: It depends on your driving conditions and the environment. Inspect them every few months and clean them as needed.
Question: Can I use household cleaners to clean my headlights?
Answer: It’s best to avoid household cleaners as they may contain harsh chemicals that can damage the plastic. Use car-specific cleaners instead.
Question: How long does headlight restoration last?
Answer: The results can last from a few months to a few years, depending on the restoration method, the quality of the sealant used, and environmental conditions.
Question: Is it necessary to apply a sealant after cleaning my headlights?
Answer: Yes, a sealant or protective coating helps to protect the headlights from UV rays and prolong the clarity.
Question: Can I use a power buffer to polish my headlights?
Answer: Yes, a power buffer can speed up the polishing process, but use it with caution to avoid damaging the plastic.
Final Thoughts
Now that you’ve explored the process of how to clean oxidized headlights, you can say goodbye to those foggy lenses. This guide walks you through the steps, making the process less daunting and giving you the skills to restore your headlights. We started by looking at what causes the haziness and why it happens. Then, we explored how to tackle it, from choosing your materials to actually cleaning the headlights, including alternatives. Whether you opt for a kit or professional help, understanding the methods means you can make a smart choice for your car. These steps will make driving at night safer and improve the look of your vehicle. Remember to keep up the care! Regular washing and applying a sealant will keep your headlights clear for a long time. Get out there and make those headlights shine!