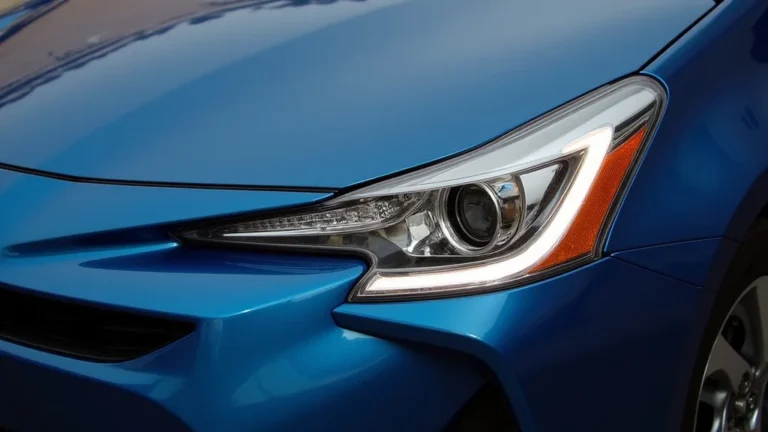
How to Clean Headlights With Vinegar Step by Step
Cleaning your headlights seems easy, but getting them crystal clear can be a bit tricky. Many people want to know how to clean headlights with vinegar, as it’s a popular home remedy. The good news is, you don’t need any special skills or tools to get started. This guide will show you a simple, step-by-step method to restore your headlights to their original brightness. Let’s explore how to make your car’s headlights shine brighter!
What Causes Headlights to Get Cloudy?
Headlights become cloudy for a few main reasons. Over time, the plastic lenses of your headlights are exposed to harsh elements like sunlight, rain, and road debris. The sun’s UV rays break down the plastic, making it oxidize. Oxidation is a chemical reaction where the plastic reacts with oxygen, leading to a yellow or cloudy appearance. This cloudiness reduces the amount of light that shines through, making it harder to see at night. Road grime, dirt, and even tiny scratches from driving also contribute to the clouding. The accumulation of these elements gradually diminishes headlight clarity. Proper maintenance can help slow down this process, but eventually, cleaning is a must.
The Science Behind Headlight Degradation
Headlights are typically made from polycarbonate plastic, a durable material that is also susceptible to environmental damage. Ultraviolet (UV) radiation from sunlight is a key player in degrading headlights. UV light causes the polymer chains in the plastic to break down. This process weakens the plastic, making it brittle and prone to cracking. The damage isn’t always visible right away. It starts with microscopic changes on the surface. These changes then create areas that scatter light, which is what we see as cloudiness or yellowing. The process is accelerated by heat, moisture, and exposure to pollutants like exhaust fumes. These factors combined contribute to a significant reduction in the efficiency of your headlights over time.
- UV Radiation Damage: Sunlight’s UV rays break down the plastic’s chemical bonds, leading to oxidation.
- Oxidation Process: This is a form of corrosion caused by exposure to oxygen, leading to a cloudy appearance.
- Road Debris Impact: Small rocks and sand constantly chip away at the surface, creating tiny scratches.
- Chemical Reactions: Exposure to pollutants like acid rain can further erode the plastic.
- Temperature Fluctuations: The expansion and contraction due to temperature changes can worsen the damage.
Identifying When Your Headlights Need Cleaning
Knowing when to clean your headlights can help you maintain optimal visibility. The easiest way to tell is by the appearance of the lenses. If they look yellow, hazy, or cloudy, it’s time for cleaning. At night, if your headlights don’t seem to illuminate the road as well as they used to, that’s another sign. Reduced visibility is a safety concern. Dim headlights make it more challenging to see other vehicles, pedestrians, and road hazards. Reduced brightness can also make it more challenging for other drivers to see you. Regular headlight checks are essential. Checking your lights regularly will ensure you can see well while driving. This also helps other drivers see your vehicle. You can easily spot the need for cleaning through visual inspection, particularly in daylight.
- Visual Inspection: Examine your headlights regularly for cloudiness, yellowing, or haziness.
- Brightness Check: Compare the brightness of your headlights to when they were new.
- Nighttime Performance: Observe how well your headlights illuminate the road at night.
- Professional Opinion: Have a mechanic assess your headlights during routine service.
How to Clean Headlights With Vinegar: A Simple Guide
Using vinegar to clean headlights is a budget-friendly and effective option. It requires a few common household items and a little elbow grease. The acetic acid in vinegar helps break down the grime and oxidation on the headlight surface. This process is generally safe for the plastic. Vinegar is often preferred as it is less harsh than some commercial cleaners. It’s also an environmentally friendly choice, as it doesn’t contain any strong chemicals. Cleaning your headlights with vinegar can be a quick and satisfying project. It can significantly improve your car’s appearance and enhance driving safety. The following steps outline how you can get started, with each element detailed to assure successful cleaning.
Gathering Your Supplies
Before you begin, make sure you have everything you need. This will make the process much smoother and more efficient. The good news is, most of these items are easily found around your home. Proper preparation will ensure a successful outcome. You don’t need anything fancy or expensive. The goal is to collect all the necessary components so you can complete the process without interruption. Having everything ready saves time and effort, making the job much easier.
- White Vinegar: Plain white vinegar is the main ingredient and is readily available.
- Water: For rinsing and diluting the vinegar.
- Spray Bottle: This will make applying the vinegar easier and more controlled.
- Microfiber Cloths: Soft cloths are essential to avoid scratching the headlight surface.
- Painter’s Tape: To protect the paint around the headlights.
- Dish Soap (Optional): For cleaning off any initial heavy dirt.
- Bucket: For mixing and rinsing.
Step-by-Step Cleaning Process
Now, let’s explore how to clean headlights with vinegar. Follow these steps for the best results. Proper technique is key to achieving a clear and bright finish. Take your time, and be careful with each step. Patience is important when cleaning your headlights. The process is not overly complicated, but careful execution is critical to a good outcome. Avoid rushing, and focus on each step to maximize the effectiveness of the vinegar and your efforts.
- Prepare the Area: Park your car in a well-ventilated area, away from direct sunlight. This is particularly important because direct sun can dry the vinegar before it has time to work. Apply painter’s tape around the headlights to protect the paint on your car.
- Wash the Headlights: If the headlights are very dirty, start by washing them with soap and water to remove any loose dirt and grime. This is a basic step, using dish soap and water. The aim is to clean the surface, so that the vinegar can work directly on the headlight plastic. Rinse thoroughly and dry the headlights with a microfiber cloth.
- Mix the Solution: In a spray bottle, mix equal parts white vinegar and water. For particularly stubborn headlights, you can use straight vinegar, but this might be too harsh for some plastics. A diluted solution is generally a good starting point.
- Apply the Vinegar: Spray the vinegar solution liberally onto the headlight. Make sure to cover the entire surface evenly. Ensure complete coverage to break down oxidation evenly across the surface of the headlights.
- Let it Sit: Allow the vinegar solution to sit on the headlight for 5-10 minutes. This gives the vinegar time to break down the cloudiness and yellowing. Avoid letting the solution dry on the headlights.
- Scrub Gently: Using a clean microfiber cloth, gently scrub the headlight in a circular motion. Apply light pressure to remove the oxidation and grime. Do not apply excessive force, which could scratch the plastic.
- Rinse Thoroughly: Rinse the headlight with clean water to remove all traces of vinegar. Make sure to remove all residues. Any remaining vinegar can continue to affect the plastic over time.
- Dry and Inspect: Dry the headlight with a clean microfiber cloth. Inspect the headlight. If cloudiness remains, repeat steps 4 through 7.
- Optional: Apply a Headlight Sealant: For added protection, consider applying a headlight sealant after cleaning. This will help to protect the headlights from future oxidation and UV damage.
Advanced Techniques and Tips
To go beyond the basics, you can apply a few advanced techniques and tips to help optimize the process of cleaning your headlights. These strategies can help make the cleaning process easier and more effective. Sometimes, basic methods might not achieve the desired results. Understanding and implementing these methods can improve the brightness of your headlights. They also extend the period before the cloudiness comes back.
Using a Polishing Compound
After cleaning with vinegar, you can take your headlight restoration a step further by using a polishing compound. Polishing compounds are designed to remove light scratches and further refine the surface of the plastic. This can significantly improve clarity. Be sure to use a polishing compound that is safe for plastic headlights. These compounds contain microscopic abrasives that smooth the surface. The process involves applying the compound to the headlight using a clean microfiber pad. Then, you can use either a machine polisher or apply it by hand in a circular motion. Follow the instructions on the product packaging. After polishing, clean the headlight again to remove any residue.
- Choose the Right Compound: Select a polishing compound made for plastic or headlights.
- Apply the Compound: Use a clean microfiber pad to apply the compound to the headlight surface.
- Polish the Headlight: Rub the compound in a circular motion, either by hand or with a machine polisher.
- Remove the Residue: Wipe off any remaining compound with a clean microfiber cloth.
Applying a UV Protectant
Preventative care is key to maintaining clear headlights. Applying a UV protectant after cleaning can extend their lifespan. The UV protectant will safeguard your headlights from future damage from the sun’s harmful rays. UV protectants act as a barrier. They block or absorb the UV light, preventing it from reaching the plastic surface. The protectant forms a clear layer that is similar to a sealant. Apply the UV protectant. Make sure that the entire headlight surface is covered and protected. This will enhance the clarity of the headlights, reducing the need for cleaning in the future.
- Choose a UV Protectant: Select a UV protectant specifically made for headlights.
- Clean the Headlight: Make sure the headlight is clean and dry.
- Apply the Protectant: Apply the UV protectant in an even layer across the headlight surface.
- Allow to Dry: Let the protectant dry completely, following the product instructions.
Dealing With Stubborn Cloudiness
Sometimes, the cloudiness on your headlights is more stubborn. It requires additional effort and possibly different approaches. Older headlights or those exposed to severe conditions often require more than just a quick vinegar clean. If you encounter stubborn cloudiness, you might need to use more aggressive techniques. This could include using specialized headlight restoration kits. These kits typically include different grades of sandpaper, polishing compounds, and sealants. If the headlights are severely damaged, you might want to consider professional restoration or
- Use a Heavy-Duty Cleaner: If the vinegar method isn’t enough, try a commercial headlight cleaner.
- Try a Restoration Kit: Purchase a headlight restoration kit that includes different grit sandpaper and polishing compounds.
- Consider Professional Help: For severely damaged headlights, consider professional restoration or replacement.
Headlight Cleaning: What to Expect and When to Seek Help
When you start to clean your headlights, it is helpful to have realistic expectations. The outcome of your cleaning efforts can depend on the severity of the damage and the method you select. Understanding what to expect and knowing when to seek professional help are crucial. Remember that the goal is not only to improve the look of the headlights but also to maintain road safety. Knowing the limitations of different cleaning methods allows you to make informed decisions and take the right action.
Realistic Results
The results can vary depending on the extent of the damage. For headlights with mild oxidation and cloudiness, the vinegar method may provide a noticeable improvement. It might restore your headlights to near-original clarity. However, if your headlights are severely damaged. For instance, if they have deep scratches or significant yellowing, you may not achieve perfect results. Headlight restoration is not a permanent solution. The headlights will eventually cloud again, especially if they are not protected from UV exposure. Proper aftercare, such as applying a sealant or UV protectant, can extend the life of your headlights.
- Mild Cloudiness: Expect a significant improvement in clarity with the vinegar method.
- Moderate Damage: You may see a good improvement, but some cloudiness might remain.
- Severe Damage: The vinegar method might not be enough. More aggressive techniques may be necessary.
When to Consult a Professional
Knowing when to seek professional help is also essential. If you have attempted cleaning and are not satisfied with the results, it may be time to consult a professional. Professionals have the tools, expertise, and resources to perform more in-depth restoration work. If your headlights have deep scratches, cracks, or severe yellowing, a professional restoration will usually provide better outcomes. Another consideration is if you are uncomfortable working with polishing compounds, or don’t have the time. If the cleaning process seems too complex or time-consuming, professional help may be the right option. This ensures that the job is done correctly. It ensures optimal headlight performance and overall road safety.
- Persistent Cloudiness: If cloudiness remains after multiple cleaning attempts.
- Deep Scratches or Cracks: If your headlights have significant physical damage.
- Unsatisfactory Results: If you are not happy with the results of DIY cleaning.
- Lack of Time or Experience: If you do not have the time, tools, or experience to clean the headlights yourself.
Frequently Asked Questions
Question: Is vinegar safe for all headlight materials?
Answer: Yes, white vinegar is generally safe for most headlight materials, including plastic. It’s less harsh than some commercial cleaners. Always test a small, inconspicuous area first to ensure no adverse reaction.
Question: How often should I clean my headlights?
Answer: The frequency depends on your driving conditions and exposure to the elements. Inspect your headlights every few months. Clean them whenever you notice cloudiness or reduced brightness.
Question: Can I use apple cider vinegar instead of white vinegar?
Answer: It’s best to use white vinegar, as it has a higher concentration of acetic acid, which is key for cleaning. Apple cider vinegar may be less effective because of its lower acidity.
Question: What’s the best way to prevent headlights from getting cloudy?
Answer: Applying a UV protectant after cleaning can help prevent future clouding. Parking your car in the shade or a garage whenever possible will also reduce UV exposure.
Question: How long does the vinegar method take?
Answer: The entire process typically takes about 30-45 minutes, including preparation, cleaning, and rinsing. This can vary depending on the severity of the cloudiness.
Final Thoughts
Cleaning headlights with vinegar is an effective and accessible method. You’ve learned how to clean headlights with vinegar in a few straightforward steps. You can gather the supplies from your home, mix a vinegar solution, and gently scrub your headlights. Remember to rinse thoroughly and apply a UV protectant to extend the life of your efforts. You have the tools to significantly improve your car’s appearance and enhance your night-time driving experience. Regular maintenance and preventative measures are essential to keep your headlights in excellent condition. Remember, brighter headlights are safer headlights. So, take the initiative, explore the process, and see the difference it makes. You can easily improve your car’s look and improve your road safety. Make your headlights shine bright again!