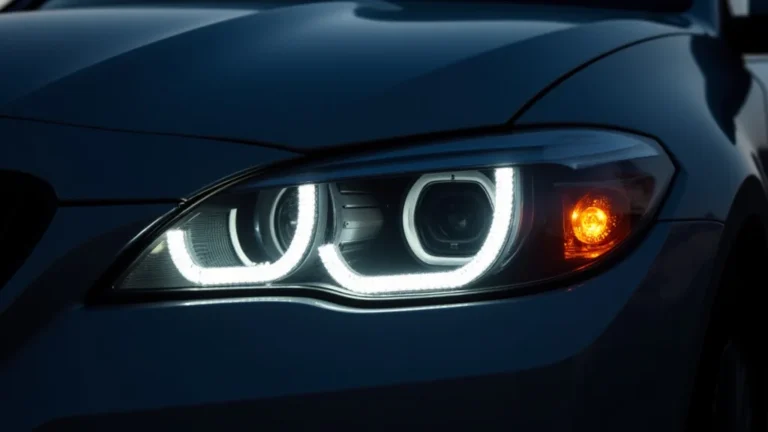
How to Change a Car Headlight: A Step-by-Step Guide
Changing a car headlight can seem tricky, especially if you’re new to car maintenance. It’s a common task, though, as headlights burn out and need
Gathering Your Supplies and Getting Ready
Before you even think about touching your car, preparation is important. This means getting all the needed items together and making sure you are safe and ready to begin the process of changing your headlight. Being prepared helps prevent frustration and ensures you complete the task correctly. It saves time and allows you to focus on the job at hand.
What You Will Need
- Replacement Headlight Bulbs: You obviously need these! Check your car’s manual or the old bulb to determine the correct type. There are many different bulb types (like H7, H11, and 9005), so it’s critical to get the right ones. Using the wrong bulb can cause problems like poor lighting or even damage to your car’s electrical system. You can purchase these at any auto parts store, and many online retailers also offer them.
- Gloves: It’s best to wear gloves to protect the bulb from oils from your skin. Oils can cause the bulb to burn out sooner. These can be simple, disposable latex or nitrile gloves. This will extend the life of your new bulb.
- Screwdriver or Wrench: Depending on your car, you might need a screwdriver or a wrench to remove the headlight assembly or any retaining clips. Have a basic set handy.
- Owner’s Manual: Your car’s owner’s manual will provide important information specific to your vehicle, including the location of the headlight assembly and how to access it.
Different headlight bulb types are designed for different vehicles and lighting applications. The “H” series bulbs are common and typically found in European vehicles, while “9000” series bulbs are widely used in American and Asian cars. Choosing the correct type ensures your headlights provide adequate illumination for safe driving at night and are compatible with your car’s electrical system, preventing potential issues.
The oils on your skin can create hotspots on the bulb, leading to premature failure. Handling the new bulb with gloves prevents these oils from contaminating the glass surface. Even a small amount of oil can affect the bulb’s lifespan and performance. The goal here is to make sure your new headlight lasts as long as possible, and using gloves is a simple way to achieve that.
These tools are essential for removing screws or bolts that hold the headlight assembly in place. The type and size of the tools you’ll need will depend on your vehicle’s make and model. While some cars have simple clips that don’t need tools, others require specific sizes of screwdrivers or wrenches. It’s smart to have a basic toolkit nearby so you can deal with any situation.
The owner’s manual is a treasure trove of information about your car. It tells you where the headlight is, and gives detailed instructions on the specific steps you need to take to change the bulb. Using the manual ensures you don’t accidentally damage anything and find the job easier and faster. Ignoring it could lead to frustration or even damage.
Safety First
Before you begin, ensure your car is parked on a level surface and the engine is off. Safety is the top priority. Always double-check that your headlights are off, too. Next, locate the headlight assembly. It’s usually near the front of the car, but the exact location can change based on the make and model. Familiarize yourself with how the assembly is held in place. This will give you a better idea of what you are dealing with before starting the work.
Accessing the Headlight Assembly
The next step is to gain access to the headlight itself. This might require removing some parts. The exact method varies depending on your car. Patience and paying attention to detail are key during this stage. Refer to your owner’s manual for specific instructions for your vehicle. Taking your time here can prevent errors that cause damage or extra work.
Removing the Assembly
- Open the Hood: Use the hood release lever inside your car to open the hood. Secure it with the hood prop rod.
- Locate the Headlight Assembly: Find the headlight unit. It might be obvious, or it might be hidden behind covers or panels.
- Remove Any Necessary Covers or Clips: Some cars have plastic covers or clips that need to be removed to access the headlight assembly.
- Unscrew or Unclip the Assembly: Depending on your car, you might need to unscrew or unclip the headlight assembly to remove it.
Opening the hood is the first step because the headlight assembly is usually found inside the engine compartment. Ensure the hood is securely propped open to prevent it from falling on you while you’re working. Make sure it stays in place during the entire process so that you have enough room to do the work. Remember to check if it’s the right place before you take it off to prevent problems.
The location of the headlight assembly can vary depending on your car. Often, it’s in the front of the car, next to the grille. In some cars, it might be behind a plastic cover. Your owner’s manual will help you find its exact location. The process depends on what your particular car needs.
These covers and clips help protect the headlight assembly from the elements and keep it securely in place. They might be held by screws, clips, or a combination of both. Carefully remove these covers and clips to expose the headlight assembly. Always keep track of the parts you remove, and put them somewhere safe.
There are different ways to attach the headlight assembly to the car. Some use screws, others use clips, and some may have a combination of both. You will likely need a screwdriver or a wrench for screws. Carefully remove all the fasteners to release the assembly. Then, gently pull the assembly away from the car.
Disconnecting Electrical Connectors
- Locate the Wiring Harness: Once you can access the headlight assembly, you’ll see a wiring harness connecting to the back of the bulb.
- Disconnect the Wiring Harness: Carefully unplug the wiring harness from the back of the bulb.
- Note the Connection: Pay attention to how the wiring harness is connected. Some harnesses have specific alignment guides.
The wiring harness provides power to the headlight bulb. It’s usually a plastic connector that plugs directly into the back of the bulb or the headlight housing. Knowing how to remove this connection is a critical step in the procedure.
Removing the wiring harness is an important step. To unplug the harness, you might need to press a release tab or lever. Be gentle here. Pull the connector straight back to remove it. You don’t want to damage the wiring harness or the bulb socket. Sometimes, the connection is tight, so take your time.
Before you remove the wiring harness, notice how it connects. Some harnesses have specific shapes or tabs that fit together a certain way. This will make it easier to reconnect the new bulb later. Taking note of how the connection is made prevents mistakes when installing the new bulb. You may need to refer to your owner’s manual if there’s any uncertainty.
Replacing the Headlight Bulb
After you have removed the headlight assembly and disconnected the wiring harness, you can finally remove the old bulb and install the new one. This part needs caution to prevent damaging the bulb or the headlight assembly. This is the moment you’ve been preparing for, and by following these steps carefully, you will replace the bulb successfully.
Removing the Old Bulb
- Release the Bulb: Depending on your car, the bulb might be held in place by a retaining clip, a spring, or a twist-lock mechanism.
- Remove the Old Bulb: Once the mechanism is released, carefully pull the old bulb out of the assembly.
- Dispose of the Old Bulb: Dispose of the old bulb responsibly. Do not throw it in the trash.
Various methods are used to secure the bulb to the headlight assembly. Identify the mechanism in your car and release it. This might involve pressing a clip, unhooking a spring, or twisting the bulb to unlock it. Refer to your owner’s manual if the method isn’t immediately obvious. Releasing the old bulb is a critical step to remove the headlight.
Once you’ve released the retaining mechanism, gently pull the old bulb straight out. Avoid twisting or forcing the bulb, as it can damage the bulb or the headlight assembly. Ensure the bulb isn’t hot. It’s usually easier if the old bulb is not damaged or broken, as it is simple to grasp and pull out. Proper removal here makes replacing the bulb straightforward.
Old headlight bulbs contain small amounts of hazardous materials. Check local regulations for disposal guidelines. Many auto parts stores will accept old bulbs for recycling. This action prevents the environment from being polluted by hazardous materials. It is a responsible part of your headlight replacement process.
Installing the New Bulb
- Handle the New Bulb Carefully: Avoid touching the glass part of the new bulb with your bare hands.
- Insert the New Bulb: Align the new bulb with the socket and insert it, ensuring it’s properly seated.
- Secure the New Bulb: Reattach the retaining clip, spring, or twist-lock mechanism to secure the new bulb in place.
Oils from your skin can create hotspots and shorten the bulb’s lifespan. If you do touch the glass, clean it with a clean cloth and rubbing alcohol. Remember to use gloves when handling the new bulb. This will help maximize the life of the bulb and reduce the chances of failure. Proper handling is one of the most important things here.
The bulb usually only fits one way. Look for alignment guides on the bulb and the socket. Once the bulb is in place, it should fit snugly without being forced. This will ensure proper contact and optimal lighting performance. Check that it fits correctly. Use a steady hand during this step to avoid problems.
Once the bulb is properly seated, secure it. Ensure the bulb is held firmly in place and won’t vibrate loose while driving. Make sure the retaining mechanism clicks or locks into place. Reattaching the retaining mechanism correctly ensures the bulb stays in place and functions properly. Double-check to make sure it is in place before putting the assembly back.
Reassembling and Testing the Headlight
After you’ve successfully installed the new bulb, you’ll need to reassemble all the parts you took apart and test the new headlight to make sure it works correctly. This step confirms your work and gives you peace of mind knowing your vehicle’s lighting is working correctly. It ensures you have a safe and functioning car.
Reattaching the Assembly
- Reconnect the Wiring Harness: Plug the wiring harness back into the new bulb.
- Reinstall the Headlight Assembly: Carefully align the headlight assembly and reattach it to the car.
- Secure the Assembly: Tighten any screws or clips to secure the headlight assembly.
Make sure the connection is secure. If you noted how it was connected during removal, this step should be easy. The harness should click into place, signaling a secure connection. A secure connection is essential for the headlight to function correctly. A proper connection means the electrical current can flow from your car’s electrical system to the bulb.
Carefully align the headlight assembly with its mounting points. Gently push it into place. Make sure the assembly is flush and sits correctly. Make sure that all the bolts or clips go in smoothly. This prevents any rattling or movement while driving. Ensuring the assembly is correctly reinstalled is important for optimal performance.
Once the headlight assembly is properly aligned, tighten any screws or clips you removed. Be sure not to overtighten. Over-tightening can damage the assembly or strip the threads. Tightening the screws and clips secures the headlight and prevents it from vibrating or falling out. A properly secured headlight is crucial for safety and function.
Testing the Headlight
- Close the Hood: Close the hood of your car.
- Turn on the Headlights: Turn on your car’s headlights to see if the new bulb works.
- Check the Beam Pattern: Observe the light beam pattern to ensure it is aligned correctly.
Make sure the hood is securely closed. Ensure it latches properly. Close the hood to allow you to test your new headlight. A securely closed hood ensures that nothing will affect the light function. It is important to close the hood completely before testing so you don’t damage anything.
With the headlight assembly back in place and the hood closed, turn on your car’s headlights to test the new bulb. Make sure the new bulb emits light. If the headlight doesn’t work, review the steps to find any errors. This step is to verify that the replacement was successful. Now, make sure it is bright enough and shines correctly.
Look at the light beam pattern on a wall or a flat surface. The pattern should be even and not excessively angled up or down. A properly aligned beam pattern ensures that your headlights provide the best visibility. You may need to adjust the beam alignment if it is not correct. Misaligned beams can reduce visibility and pose safety risks. Make sure you can see well at night.
According to the National Highway Traffic Safety Administration (NHTSA), approximately 40% of all traffic accidents occur at night. Good headlights and proper illumination can reduce your chance of an accident. Replacing a burnt-out headlight promptly enhances safety for you and other drivers by improving visibility. By following these simple steps, you can help stay safe on the road.
Advanced Tips and Troubleshooting
Sometimes, things don’t go perfectly, and it is necessary to troubleshoot any problems. Knowing a few extra tips can help you handle difficulties you might encounter. This section provides ways to deal with complex issues and ensure you get the job done right. This also provides information in case of problems with your car.
Common Problems and Solutions
- Headlight Doesn’t Work: Check the bulb’s connection and the fuse.
- Headlight Flickers: This could mean a loose connection or a faulty bulb.
- Headlight Is Foggy: Condensation inside the headlight assembly can cause fogginess.
If the new bulb doesn’t light up, the first thing is to ensure the bulb is properly connected. Make sure the electrical connector is firmly attached. Check the fuse that controls the headlights. The fuse may be blown. You can find the fuse box in your car’s manual.
If the headlight flickers, the problem is most likely a loose connection or a faulty bulb. Recheck the bulb’s connection. Make sure it is secure. If that doesn’t work, replace the bulb, as it might be damaged. Try swapping the bulbs between the sides to eliminate the bulb as the cause of the problem.
Condensation inside the headlight assembly can reduce the light’s performance. Make sure all the seals around the headlight assembly are secure and undamaged. If condensation is excessive, you might need to replace the entire headlight assembly. Ensure the ventilation is not blocked. This will help prevent future fogging. Check the seals to avoid more moisture.
When to Seek Professional Help
While replacing a headlight is a common DIY task, there are times when it’s best to seek professional help. If you have any difficulties, consult a professional. If you are not certain of something, then do not guess. If you are uncomfortable, then it’s best to reach out to a professional mechanic.
- Complex Electrical Issues: If you suspect any wiring issues beyond the bulb replacement, it is best to seek professional help.
- Damage to the Headlight Assembly: If you damage the headlight assembly during the removal or replacement, you should get a professional’s help.
- Unfamiliarity with Car Models: If you are unfamiliar with working on your car model, get some help.
If you find frayed wires or electrical shorts, this can be dangerous. A professional can identify and correct any underlying electrical problems. Electrical problems can be risky and a qualified mechanic has the tools and expertise to address them. Don’t take chances with electrical safety. Seeking assistance keeps you safe.
A damaged headlight assembly can compromise your vehicle’s lighting and safety. A mechanic can properly repair or replace the damaged component. Prevent further damage by letting a professional handle the situation. A professional helps ensure the light functions correctly and securely. Save yourself extra time by having a professional handle damage.
If you’re not comfortable with auto repair, don’t worry. A professional mechanic has the knowledge and experience to
According to the Insurance Institute for Highway Safety (IIHS), properly functioning headlights are linked to a 28% reduction in nighttime crashes. Maintaining your headlights is a key element of vehicle safety, so it pays to make sure they function properly.
Different Headlight Types Explained
Understanding the different types of headlight bulbs can help you choose the right replacement for your car. Knowing about these options can enhance your knowledge. This section explores several different types and helps you choose what’s best for your car. Getting the right bulb type is critical for functionality.
Halogen Bulbs
Halogen bulbs are the most common and often the most affordable type of headlight. They use a tungsten filament surrounded by a halogen gas. The light is produced when the filament is heated. They provide good light output. They are available in various wattages. They are generally easy to replace and suitable for most cars.
- Affordability: Halogen bulbs are budget-friendly.
- Brightness: Halogen bulbs have a good brightness for their cost.
- Lifespan: Halogen bulbs have a moderate lifespan.
Their lower cost makes them a popular choice. They are easily accessible and are a good option if you want to save money. Halogen bulbs represent a solid value and are widely available. Their affordability makes them a practical choice for vehicle owners on a budget.
They provide adequate illumination for everyday driving. They are a good option for drivers who mainly drive in well-lit areas. They meet the needs of those seeking a reliable light. They strike a balance between cost and performance for general driving conditions.
They typically last for several hundred hours of use. Their lifespan is less than other bulb types. They are still a good value considering their performance and affordability. They are known for providing consistent brightness throughout their lifetime. The typical lifespan allows for regular replacement as needed.
LED Bulbs
LED (Light Emitting Diode) bulbs are becoming popular due to their efficiency and performance. They use light-emitting diodes to produce light. They are much more efficient than halogen bulbs. They have a longer lifespan. LED bulbs offer a modern look and improved visibility. They are often a little bit more expensive than halogen bulbs.
- Energy Efficiency: LED bulbs consume less power.
- Lifespan: LED bulbs have a longer lifespan than halogen bulbs.
- Brightness: LED bulbs offer higher brightness and better visibility.
LEDs convert more energy into light. They are a more efficient choice compared to halogen bulbs. They can help extend the life of your car’s battery. Their efficiency is a long-term benefit for users. This also reduces your car’s overall energy consumption.
They can last for thousands of hours of use. This reduces the need for frequent replacements. You’ll save money on replacement costs. It reduces the time spent on vehicle maintenance. They are a more durable and long-lasting choice for your vehicle’s headlights.
They produce a brighter, clearer light output. They improve your ability to see the road at night. Their superior brightness enhances safety for drivers. It also helps to prevent accidents and improve night visibility. LED bulbs provide a clear, bright light output.
HID Bulbs
HID (High-Intensity Discharge) bulbs, also called xenon bulbs, produce light by arcing electricity across a chamber filled with xenon gas. These bulbs produce a very bright light. They provide excellent visibility at night. They are more costly than halogen bulbs. They are frequently used in luxury vehicles. They are known for their bright white light and extended lifespan.
- Brightness: HID bulbs provide very bright, intense light.
- Lifespan: HID bulbs have a longer lifespan compared to halogen bulbs.
- Installation: HID bulbs may require more complex installation.
They offer excellent visibility and can illuminate the road farther ahead. Their brightness contributes to safety. They provide better visibility in various conditions. They are also known for producing a very white or blue-toned light. They are useful in darker conditions.
They can last for several years with normal use. Their longevity reduces the need for frequent
These bulbs might need ballasts and other components. You should consult a professional if you’re not familiar with HID systems. A professional can ensure a proper installation to prevent performance issues. Professional installation ensures proper functionality. Following these steps prevents any risk.
In a recent study, researchers found that drivers using LED or HID headlights experienced an average of 30% increase in visibility compared to those using halogen bulbs. This means safer driving conditions. Improved visibility helps prevent accidents. Modern headlight technology makes the roads safer.
Frequently Asked Questions
Question: How often should I change my headlight bulbs?
Answer: It depends on the bulb type and how often you drive. Halogen bulbs typically last for about 500-1000 hours, while LED bulbs can last for years. Check your car’s manual and monitor your headlights.
Question: What do I do if my new headlight bulb doesn’t work after I install it?
Answer: Check the connection of the bulb and inspect the fuse. Make sure the connector is firmly attached. If the fuse is blown,
Question: Can I touch the new headlight bulb with my bare hands?
Answer: No, it’s best to avoid touching the glass part of the bulb with your bare hands. The oils from your skin can cause the bulb to burn out prematurely. Always handle the bulb by the base or use gloves.
Question: Where can I buy replacement headlight bulbs?
Answer: You can buy replacement headlight bulbs at most auto parts stores, online retailers, and sometimes at large retail stores like Walmart or Target. Be sure to know the correct bulb type for your vehicle.
Question: Is it necessary to replace both headlight bulbs at the same time?
Answer: While not always necessary, replacing both bulbs at the same time is usually a good idea. This helps ensure even lighting and consistent performance. This is especially true if one bulb has already burned out.
Final Thoughts
Changing a car headlight doesn’t have to be a scary task. The process of how to change a car headlight involves preparing your vehicle, gathering your supplies, and accessing the headlight assembly. Then, you’ll need to remove the old bulb, put the new one in, and reassemble everything. It’s important to remember safety while you work, such as using gloves and making sure your car is parked safely. Don’t be afraid to consult your owner’s manual for specific instructions for your vehicle. By following the steps outlined in this guide, you can successfully