How High Should Headlights Be Aimed? A Simple Guide
Figuring out how high should headlights be aimed can seem tricky at first, especially for new drivers. It’s common to wonder if your headlights are shining too high, too low, or just right. This matters a lot for safety; headlights that aren’t aimed correctly can make it hard to see or even blind other drivers. Don’t worry, though! We’ll explore this and show you a simple, step-by-step method to adjust your headlights so you can drive safer and feel more confident. Get ready to learn how to do it right!
Understanding Headlight Aim
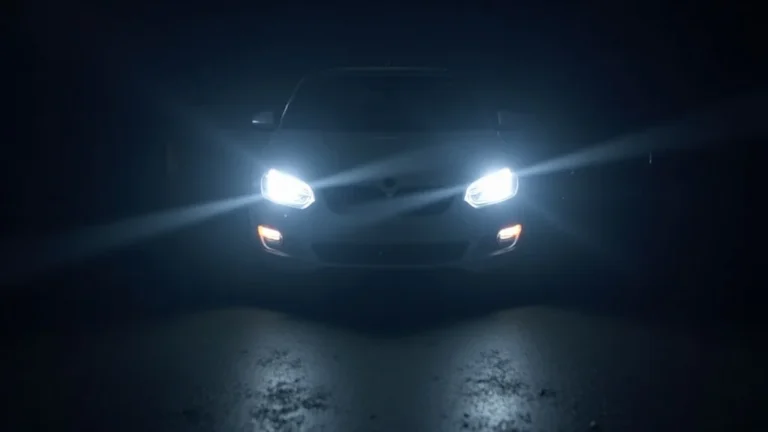
Headlight aim is all about getting the angle of your headlights correct. This ensures they illuminate the road far enough ahead without blinding oncoming drivers. Correctly aimed headlights are key to safe nighttime driving. They provide the necessary visibility to react to hazards, see pedestrians and cyclists, and avoid accidents. A poorly aimed headlight can cause several issues, including reduced visibility for the driver, which directly impacts reaction time and overall safety. It’s like having a flashlight that’s pointed in the wrong direction – you won’t see what you need to. Improper aim can also be a safety hazard for other road users, which might even result in legal problems in some areas if it’s noticed by traffic police. The goal is a balance: enough light to see and avoid blinding others.
The Importance of Proper Headlight Alignment
Proper headlight alignment goes beyond just safety. It contributes to a better driving experience. If your headlights are aimed too low, you may not be able to see far enough ahead, especially on dark roads. This can create a feeling of insecurity and increase driver stress. Headlights aimed too high, on the other hand, can create a dangerous situation for oncoming drivers, potentially causing glare and making it difficult for them to see the road. Regular checks and adjustments, especially after repairs or modifications to your vehicle’s front end, are essential to ensure the headlights are aimed correctly. This is one of the most important preventive maintenance tasks a car owner should do to ensure the safety of others.
- Improved Visibility: Properly aligned headlights significantly improve a driver’s ability to see the road, pedestrians, and obstacles. This is especially vital in low-light conditions like night, dawn, or dusk. This enhanced visibility gives drivers more time to react to potential hazards, which reduces the chance of accidents. Think of it as giving yourself extra seconds to prepare for the unexpected.
- Reduced Glare for Other Drivers: Misaligned headlights are a significant contributor to glare, which can temporarily blind other drivers. This glare can make it hard for oncoming drivers to see the road and react to hazards. Aiming your headlights correctly ensures that the light beam is directed downward, which lessens the risk of distracting or blinding drivers.
- Optimal Light Distribution: Correct headlight alignment leads to optimal light distribution. This means the headlights project the light where it’s needed most – on the road ahead and the sides of the road. This helps drivers to better perceive the road surface, lane markings, and any potential obstacles.
- Compliance with Regulations: In most places, there are rules about headlight aiming. Correctly aiming your headlights helps ensure that your vehicle follows these rules. This prevents tickets or, in some cases, failed vehicle inspections.
- Enhanced Driver Confidence: Driving at night or in low-light situations can be stressful. Properly aligned headlights provide better visibility. This can significantly increase a driver’s confidence and reduce anxiety. Feeling secure about your ability to see the road ahead allows you to drive with greater ease.
The Impact of Headlight Types on Aiming
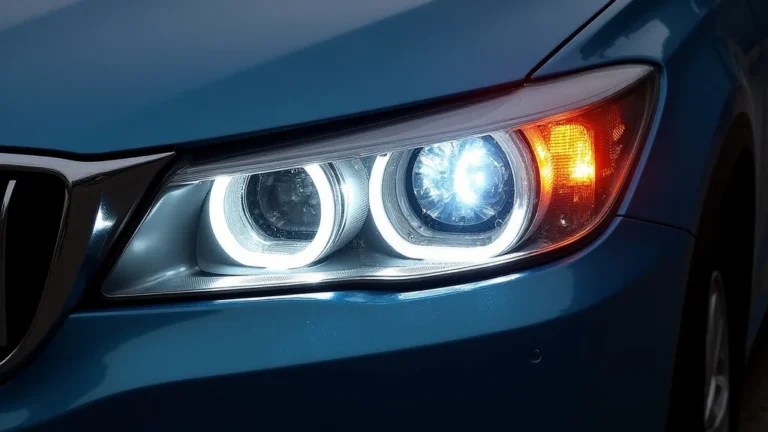
Different types of headlights, like halogen, LED, and Xenon (HID), have various light output characteristics. Understanding these characteristics can help when aiming your headlights. For instance, LED headlights often produce a brighter, more focused beam compared to halogen lights. Xenon lights, also known as High-Intensity Discharge (HID) lights, also generate intense light. Because of the difference in light output, they can affect how far and wide the light projects. Therefore, it’s very important to ensure proper alignment for each type. When replacing headlights, it is important to always match the type of headlight to the existing system. For instance, if you change from halogen to LED, you will likely need to adjust the aiming to account for the increased brightness and different beam pattern.
Checking and Adjusting Headlight Aim
Checking and adjusting your headlights is a simple, straightforward process that any car owner can do. You don’t need fancy tools; the steps are mostly common-sense. This is a task that’s worth the time and effort. It contributes to safety and also provides peace of mind on the road. Remember, it’s about seeing clearly without causing problems for others. By taking these actions, you can quickly improve your night driving and safety.
Gathering Your Supplies
Before you begin, gather the necessary supplies. These are simple tools that should be easy to find. This will help make the process simple and stress-free. It’s usually a good idea to have a helper if possible, especially for some parts of the process. Being prepared can save time and frustration.
- A Level Surface: Find a flat, level surface, like a garage floor or a driveway. It’s crucial that your car is parked on a level ground for proper aiming. This will ensure that the headlight beams are symmetrical and project correctly.
- A Wall or Flat Surface: A wall or flat surface is needed to measure the height and beam pattern of your headlights. This wall should be perpendicular to your car. You can also use a garage door if you have one.
- Measuring Tape: You will need a measuring tape to measure the height of your headlights from the ground. This will help you find the correct aiming point on the wall. A measuring tape is a very helpful tool during this process.
- Screwdriver (or Wrench): You’ll need the right tool to adjust your headlight aim. Different car models use different types of adjustment screws. The owner’s manual will tell you which one to use.
- Masking Tape (Optional): Masking tape can be useful to mark the headlight positions on the wall. This makes the aiming process easier.
- Your Car Owner’s Manual: This is probably the most important tool. It will show you where the adjustment screws are located on your car. The manual is also a good source for any specific instructions.
Step-by-Step Guide to Headlight Adjustment
Here’s a clear, step-by-step guide to help you adjust your headlights. Follow these instructions carefully. It’s important to be accurate. Take your time, and don’t rush the process. If you follow these steps, you can correctly adjust your headlights to see the road clearly.
- Park Your Car: Park your car on a level surface facing a wall. Ensure the wall is smooth and even. The car should be directly facing the wall, at a distance of about 25 feet. Make sure your headlights are clean, and the car’s fuel tank is at least half full.
- Measure and Mark: Measure the distance from the ground to the center of your headlights. Use the measuring tape. Then, make a mark on the wall at the same height. This mark is where the top of your headlight beam should hit. You can also use masking tape to mark this spot.
- Locate the Adjustment Screws: Consult your car’s owner’s manual to find the headlight adjustment screws. These are usually near the back of the headlight assembly. They are normally labeled for up/down and left/right adjustments.
- Turn on Your Headlights: Turn on your headlights, but make sure they’re not on high beam. Look at the light pattern on the wall. The beam should have a clear cutoff – a distinct line where the light stops.
- Adjust the Vertical Aim: Use the screwdriver or wrench to adjust the vertical aim. Turn the adjustment screw. Adjust until the top of the brightest part of the headlight beam is at or slightly below the mark you made on the wall. The goal is to get the top of the beam at or just under the correct height.
- Adjust the Horizontal Aim: Check the owner’s manual again for the horizontal adjustment screw. This adjustment affects the side-to-side aim. Most headlight beams will have a slight tilt towards the right to illuminate the side of the road. Ensure the beam is generally straight.
- Repeat for the Other Headlight: Repeat the steps for the other headlight. Make sure both headlights are aimed correctly. The light patterns should be even and symmetrical.
- Test Drive: After making the adjustments, take your car for a test drive at night. Check your headlights’ performance on the road. Make any minor adjustments, if needed.
Common Mistakes and How to Avoid Them
There are some common mistakes people make when adjusting headlights. They’re all very easy to avoid if you pay attention. These mistakes can reduce the effectiveness of your headlights, so it’s important to know about them.
- Incorrect Distance from the Wall: Parking your car at the wrong distance from the wall will cause aiming problems. Always follow the manufacturer’s recommended distance. Typically, this is around 25 feet. A different distance will cause the aim to be off.
- Not Leveling the Vehicle: If your car isn’t on a level surface, the headlight beams will be misaligned. Always make sure your car is parked on a flat, even surface. This ensures accurate adjustments.
- Using the High Beams for Adjustment: Do not use the high beams when adjusting your headlights. Low beams provide a clear pattern that is easier to align. High beams shine too far and won’t give a proper cutoff.
- Relying on Visual Inspection Only: Using just your eyes to estimate headlight aim is not as precise as using the wall method. It can be hard to judge the correct aim without a point of reference. Following the wall method gives you a clear target.
- Ignoring the Owner’s Manual: Your car’s owner’s manual is a great source of information. It gives specific instructions and the location of the adjustment screws. Missing this can lead to incorrect adjustments.
Legal Aspects and Vehicle Safety
Headlight aim isn’t just about seeing better; it’s about meeting legal requirements. Many places have rules about how headlights should be aimed. These rules are put in place for safety, and knowing them can keep you safe and legal. These regulations help to ensure that all vehicles on the road have headlights that do their job without causing a problem.
Local Regulations on Headlight Aiming
Most places have rules for headlight aim. These rules can vary, so it’s good to know the laws in your area. They often specify the acceptable range for headlight aim. These rules are usually designed to prevent glare and ensure road safety. If your headlights are not correctly aimed, you might face a fine or have to make adjustments. It’s always best to be aware of the rules.
- Height Requirements: Most places require the headlight beam to be aimed at a certain height. This is measured from the ground. This usually allows the beam to illuminate the road without shining into oncoming drivers’ eyes. Check your local regulations for specific height standards.
- Horizontal Alignment: There are also rules for how the headlights should align horizontally. Generally, the beam should be straight or slightly angled toward the right side. This can help with illuminating the side of the road.
- Inspection Requirements: Many places have vehicle inspections. During these inspections, headlights are checked to ensure they meet the legal requirements. Failing the inspection due to misaligned headlights might lead to a ticket.
- Penalties for Non-Compliance: If your headlights are misaligned, you can get a ticket. These can include a fine or even points on your driving record. Complying with the laws helps to avoid these penalties.
- Changes and Modifications: Any modifications to your headlights, like installing different bulbs, might have to comply with local regulations. Always be sure your vehicle’s lights are within the limits.
Vehicle Safety Inspections and Headlights
Headlights are typically checked during vehicle safety inspections. This is to ensure they’re working correctly and properly aimed. During these inspections, the headlights are checked for brightness, beam pattern, and alignment. If any problems are found, you may have to correct them before you can pass the inspection.
Here’s what typically happens during a vehicle safety inspection:
- Visual Inspection: The inspector will begin with a visual inspection. They will check the headlights for damage, cracks, or any other visible issues. They will also make sure the lenses are clean.
- Functionality Test: The inspector will turn on the headlights. They will make sure the low beams, high beams, and any other light functions work. This includes checking turn signals and brake lights.
- Alignment Check: The headlights will be checked to see if they are aimed correctly. This is usually done using a special machine or a wall. The inspector will make sure the beam pattern meets the local standards.
- Brightness Check: The inspector may check the light output of the headlights to ensure they are bright enough. This prevents them from being too dim. Dim headlights can cause visibility problems.
- Results and Corrections: If your headlights don’t pass, the inspector will tell you what needs to be fixed. You’ll then need to make the adjustments and get the headlights re-inspected.
According to the National Highway Traffic Safety Administration (NHTSA), properly maintained headlights can reduce nighttime crashes by up to 20%.
The Insurance Institute for Highway Safety (IIHS) also reports that vehicles with poor headlight performance are more likely to be involved in nighttime crashes.
Troubleshooting Headlight Problems
Even if you’re careful, problems can occur. It’s smart to know some basic troubleshooting steps. This will help you resolve common headlight issues, which will save you time and money. It can also help you feel more confident about your car maintenance skills. These are things you can do to address the problems you may find.
Common Headlight Issues and Solutions
Here are some of the most common issues drivers face, along with ways to solve them. You can usually fix these problems yourself.
- Dim Headlights: Dim headlights can be a safety issue. If your headlights are dim, check the bulb. Bulbs can burn out or become less effective over time. Replacing the bulb is the simplest fix. Make sure you use the correct type of bulb for your car. Another reason for dim headlights is a problem with the car’s electrical system. This could be a weak battery or a problem with the wiring. If changing the bulb doesn’t help, have the electrical system checked by a mechanic.
- Headlights Flickering: Flickering headlights can be distracting and dangerous. This can be caused by loose connections. Check the wiring and connections to make sure everything is secure. Also, the bulb could be loose in its socket. If the connections are all good, the issue could be with the headlight itself or the car’s electrical system. A mechanic may need to investigate the issue.
- Headlight Condensation: Condensation inside the headlight lens can reduce visibility. It can also cause problems. Condensation happens when moisture gets into the headlight housing. The best way to deal with condensation is to remove the moisture. Ensure the headlight seals are good and aren’t damaged. Sometimes, the issue resolves itself. If it doesn’t, you may need to replace the headlight assembly.
- Headlights Aimed Too High or Low: This is the most common problem. Aiming problems usually mean the headlights need adjustment. Follow the steps we’ve given to check and adjust the headlights. You may need to adjust the screws using your car’s owner’s manual. Make sure the car is parked on a level surface.
- One Headlight Not Working: If only one headlight is out, it’s often a simple fix. The bulb has likely burned out. Try changing the bulb. Also check the fuse. If the fuse has blown,
When to Seek Professional Help
While you can handle many headlight issues yourself, some problems require professional help. If you’re not confident about fixing something, it’s always best to ask for help from a professional. This ensures the repairs are done correctly and safely. A professional mechanic has the knowledge and tools for more complicated fixes. If you’re unsure about any step, don’t hesitate to seek professional assistance.
Here are some situations when you should visit a mechanic:
- Electrical Problems: If you suspect a problem with your car’s electrical system. It can be complex and a professional should handle it. This could include issues with wiring, fuses, or the car’s computer.
- Complex Bulb
- Internal Headlight Damage: If there’s damage to the internal components of the headlight assembly. This can involve replacing the entire headlight assembly, and a mechanic can properly carry out the work.
- Persistent Issues: If you’ve tried the common fixes and the problem persists. It’s time to seek a mechanic’s diagnostic services. This is especially true if you see issues like flickering or dimness.
- Modifications and Upgrades: If you are considering modifications to your headlight system. This can range from installing new headlights to upgrading to LED or HID systems. A mechanic can ensure the changes are done correctly.
Frequently Asked Questions
Question: How often should I check my headlight aim?
Answer: Check your headlight aim at least once a year, or whenever you notice a change in performance. It’s also a good idea to check after any work on your car’s front end, or after installing new headlights or suspension parts.
Question: Do I need special tools to adjust my headlights?
Answer: You usually only need a screwdriver or wrench and measuring tape to adjust your headlights. Check your car’s owner’s manual to find the specific tools you need.
Question: Can I adjust my headlights myself?
Answer: Yes, you can usually adjust your headlights yourself. The process is pretty straightforward if you follow the instructions carefully.
Question: What if my headlights are still misaligned after adjustment?
Answer: If your headlights are still misaligned after adjustment, check for damage, or consider a professional alignment. Sometimes, other issues can affect headlight aim, such as suspension problems.
Question: What type of headlights are best?
Answer: The best type of headlights depends on your needs. LED and HID headlights provide bright, efficient lighting. However, they may require careful aiming to avoid glare. Halogen headlights are less expensive and still provide good visibility. Consider your budget, driving conditions, and vehicle’s original equipment when choosing.
Final Thoughts
Getting your headlights aimed correctly is a simple yet crucial part of safe driving. You now know the basic steps: from parking your car on a level surface, to measuring and marking the wall, to turning those adjustment screws. You understand why it is important to check headlight aim regularly. You also know how to avoid common mistakes like parking at the wrong distance or not using the right tools. Also, you now realize how important it is to be familiar with the regulations and also recognize when to get a helping hand. Your headlights help you see and help other drivers see you. By taking the time to aim your headlights, you’re investing in your safety and the safety of everyone else on the road. So, get out there, check those lights, and drive with confidence!