How to Adjust Your Headlights: A Simple Guide
Figuring out how do i adjust the headlights can feel tricky, especially if you’re new to car maintenance. Many people find this task confusing because it involves understanding light beams, aiming, and potential legal requirements. Don’t worry, though! It’s usually a straightforward process. This guide breaks down the steps simply, ensuring you can adjust your headlights correctly. Next, we’ll look at the necessary tools and the basic steps to follow.
What You’ll Need to Adjust Your Headlights
Before you begin, gather the necessary tools. This ensures you can complete the job efficiently and safely. Having the right equipment makes the process much less frustrating.
Essential Tools
You’ll require a few basic tools. These are readily available at most auto parts stores or online retailers. They’re also relatively inexpensive, making it a cost-effective project. Let’s explore what you will need.
-
A Phillips head screwdriver or a specific headlight adjustment tool: This is the primary tool for turning the adjustment screws. The size and type depend on your car’s make and model. Some vehicles have adjustment screws that require a specialized tool instead of a standard screwdriver. Ensure you have the correct tool for your vehicle to avoid damaging the adjustment mechanism.
Headlight adjustment tools come in various shapes and sizes. Some are simply long, thin rods with a specific fitting for the adjustment screw. Others are ratcheting tools that make the process easier and quicker. Refer to your car’s manual or check online resources to determine the proper tool for your vehicle. Having the right screwdriver or tool ensures you can effectively adjust the headlights.
-
A level surface and a wall: You’ll need a level surface, such as a garage floor or a flat driveway, to park your car. A wall is essential for marking and checking the headlight beams. Ensure the wall is clear and free from obstructions. This helps accurately visualize the headlight’s beam pattern.
The level surface ensures that your car is positioned correctly, and the wall serves as a visual guide to where the headlights should be aimed. The wall should be approximately 25 feet away from your car. This distance is standard for headlight aiming, providing an accurate representation of the beam’s position and direction. Ensure the wall is perpendicular to the car for precise alignment.
-
Measuring tape: A measuring tape is used to measure the distance from the ground to the center of your headlight lenses. This measurement will be used to mark the wall accordingly.
Accurate measurements are important for getting the proper headlight alignment. The measuring tape helps ensure the measurements are accurate for both the height and the horizontal distance. Precise measurements of the car and the wall will play a crucial role in the adjustment process. This step is about precision and making sure you get it right.
-
Painter’s tape or masking tape: Tape is used to mark the wall where the headlight beams should fall. This helps maintain the right vertical and horizontal position during the adjustment.
Painter’s tape is preferable because it’s less likely to damage the wall’s paint. Use the tape to create horizontal lines that mark the height of your headlight lenses and vertical lines that mark the center of each headlight. These lines serve as reference points for aligning the beams properly. The tape ensures that you can see exactly where the beam pattern falls and how it needs to be adjusted.
-
Safety glasses and gloves: While not strictly necessary, safety glasses and gloves can protect your eyes and hands, especially if working in a dusty or dirty environment.
Safety is a priority, especially when working on a car. Safety glasses protect your eyes from debris, and gloves protect your hands from dirt and potential hazards. Ensure you have proper lighting when working, and be mindful of any electrical components. Proper safety habits are vital for a successful outcome.
Understanding Headlight Components and Beam Patterns
Before you adjust your headlights, it is helpful to understand their parts and how the light works. This knowledge will provide a clearer picture of the adjustment process and enable you to identify potential issues.
Key Headlight Components
Headlights are complex, but understanding their main parts makes everything simpler. There are several components that work together to produce and direct light onto the road.
-
The Headlight Housing: This is the outer shell that protects the internal components and secures the headlight to the vehicle. The housing also helps to direct some of the light.
The housing can be made of various materials, such as plastic or metal. It’s often designed to fit the car’s body lines and provide protection from the elements. Different housing styles are available, including those that accommodate various bulb types and features, like daytime running lights.
-
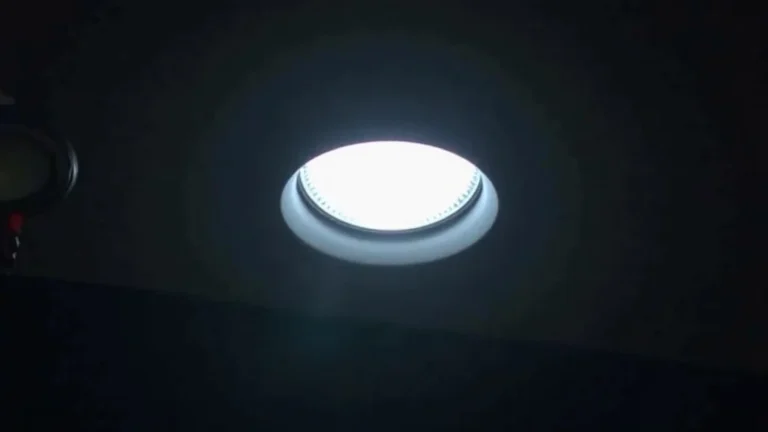
The Headlight Bulb: The light source, which comes in various types like halogen, LED, or xenon (HID). Each type has different brightness, energy efficiency, and lifespan.
Choosing the correct bulb type is important. Make sure it is compatible with your vehicle’s headlight system. Different types of bulbs also emit different colors of light, which can affect visibility. Regular inspection of your headlight bulbs helps identify any problems such as dimming or burning out, ensuring optimal performance.
-
The Reflector: A curved surface inside the headlight housing that directs the light from the bulb forward. It helps shape the beam and controls the light’s intensity.
Reflectors are usually made from materials that can withstand high temperatures. They are designed to provide the correct beam pattern, which is crucial for visibility and road safety. Over time, reflectors can become less effective due to dust and degradation. Cleaning or replacing the reflector can often improve headlight performance.
-
The Lens: The clear or textured cover over the headlight. It protects the bulb and reflector while allowing light to pass through. The lens can also help to shape the beam pattern.
Headlight lenses can be made from plastic or glass. Plastic lenses are more common due to their impact resistance, while glass lenses offer superior clarity. Proper maintenance, such as regular cleaning, is important for clear lenses. Over time, lenses can become cloudy or yellowed, reducing light output. Polishing or replacing the lens can improve visibility.
-
Adjustment Screws: These are the mechanical parts that allow you to adjust the vertical and horizontal aim of your headlights. They are usually located on the back or side of the headlight housing.
These screws are essential for the headlight adjustment process. They control the position of the reflector and, consequently, the light beam. You will need a screwdriver or a specific tool to turn these screws and adjust your headlights. Before adjustment, it is wise to consult your car’s manual for screw locations.
Headlight Beam Patterns Explained
The beam pattern is the shape of the light projected by your headlights. Understanding this is key to getting them aimed correctly. Incorrect beam patterns can cause poor visibility or blind other drivers.
-
Low Beam Pattern: Designed for use in normal driving conditions, the low beam pattern is asymmetric. It directs more light to the right side of the road and lower, to avoid blinding oncoming traffic.
The low beam should provide sufficient illumination of the road ahead, allowing the driver to see the path clearly. The cutoff line ensures that the light does not shine into the eyes of other drivers. The height of the low beam is regulated by law, so knowing how to adjust these beams is important for safety and road compliance.
-
High Beam Pattern: High beams provide a more intense and focused beam of light, covering a greater distance. High beams are for driving on dark roads where there is no oncoming traffic.
High beams should be used responsibly, as they can cause temporary blindness to other drivers if used incorrectly. The high beam pattern is usually symmetrical. It provides maximum visibility over a long distance. Always dim your high beams when you see other vehicles approaching.
-
Beam Pattern Types: Various technologies, such as halogen, LED, and xenon (HID), affect beam patterns. Newer headlight systems offer better beam control.
Different headlight systems produce varying light intensities and patterns. LED and HID headlights often provide a brighter, more focused beam. Halogen lights are the most common but may not be as bright. Newer systems include features like adaptive headlights, which adjust the beam pattern based on driving conditions.
Step-by-Step Instructions: Adjusting Your Headlights
Now, let’s explore the step-by-step instructions. Following these instructions will allow you to get the correct headlight aim, ensuring your safety and compliance with traffic laws.
Preparing Your Vehicle
Proper preparation is key. It ensures an accurate adjustment and minimizes any potential issues.
-
Park on a Level Surface: Find a flat and level surface to park your vehicle, like a garage floor or a driveway. This ensures the car sits evenly, and the headlights project accurately. Any slope in the parking area can affect the adjustment.
A level surface is key to the headlight aim process. Place your vehicle on a flat surface and make sure it is not tilted to any side. Check the ground using a level if there’s any doubt. This step will guarantee accurate results.
-
Prepare the Wall: Position your vehicle approximately 25 feet away from a wall. Ensure the wall is clear, clean, and free from obstructions. This distance is standard for headlight adjustment.
The wall serves as a visual guide during the adjustment process. Make sure the wall is clean and clear to ensure you can see the headlight beam pattern clearly. This step is about having a clear target to work with.
-
Check Vehicle’s Load: Make sure your vehicle is loaded as it would typically be used. This usually means the fuel tank is full. Avoid having any heavy items in the trunk that could affect the car’s balance.
The vehicle’s weight distribution affects the headlight aim. Your headlights need to be adjusted to reflect your normal driving condition. Keeping the vehicle loaded properly ensures the headlights are aimed correctly.
Marking the Wall for Adjustment
Precise marking of the wall will ensure the beams are aligned correctly. Follow these steps for accurate markings.
-
Measure Headlight Height: Measure the distance from the ground to the center of your headlight lenses. Then, transfer this measurement to the wall and mark a horizontal line across the wall. This will be your reference line.
Using a measuring tape, carefully measure the height. This line will serve as the reference for adjusting the vertical aim of your headlights. This measurement is very important because it determines where the headlight beams should fall. Make sure your vehicle is parked on a level surface before measuring.
-
Mark the Headlight Centers: Measure the distance between the center of each headlight lens. Use a measuring tape, and then transfer these measurements to the wall. This determines the placement of each headlight’s beam.
Mark the wall to indicate the center point of each headlight. You’ll need to know the horizontal separation of the headlights. This helps you to adjust the beams horizontally. The accuracy of this measurement will help keep the beams aligned on the road.
-
Apply Painter’s Tape: Use painter’s tape to mark both the horizontal and vertical lines on the wall. The horizontal line shows the headlight height, and the vertical lines show the center points of each headlight.
Painter’s tape is an excellent tool for marking the wall. The tape allows you to easily see where the headlight beams should fall. The tape is also easily removable without damaging the paint. Make sure to clearly and carefully apply the tape to create accurate guidelines.
Adjusting the Headlight Beam
The actual adjustment process involves using the adjustment screws. Follow these steps carefully.
-
Locate Adjustment Screws: Find the adjustment screws on the back or side of your headlight housings. Consult your car’s manual if you are unsure where to find them. These screws control the vertical and horizontal aim.
Adjustment screws are usually near the headlight’s back or side. Look for small, notched wheels or screws. Knowing where these screws are will make the adjustments easier. Vehicle manuals often show the screw locations. The screw may require a screwdriver or a specialized tool.
-
Vertical Adjustment: Use a screwdriver or adjustment tool to adjust the vertical aim of your headlights. Turn the appropriate screw to raise or lower the beam. The goal is to align the top of the beam with the horizontal line marked on the wall.
Adjusting the vertical aim is usually the most important adjustment. The aim should be at or slightly below the horizontal line marked on the wall. Turn the screw clockwise to lower the beam and counterclockwise to raise it. Small adjustments can make a big difference.
-
Horizontal Adjustment: Adjust the horizontal aim to center the light beam on the vertical lines marked on the wall. This process helps ensure that your headlights illuminate the road directly in front of you. Turn the corresponding screw to adjust the horizontal direction.
The horizontal aim ensures your headlights shine down the road rather than to the side. The goal is to center the beam pattern on the vertical lines. Turn the adjustment screw left or right until the beam is correctly positioned. This ensures that the beam pattern is aligned correctly.
Verification and Fine-Tuning
Once you make the adjustments, it’s necessary to verify and fine-tune the settings.
-
Recheck Beam Pattern: After making adjustments, check the beam pattern against the marked lines on the wall. Make sure the beams are correctly aimed. Look for consistent alignment.
Look at the beam pattern carefully to make sure you have it right. This is where you confirm that the adjustments have been successful. Ensure that the light beams align with the tape lines. Fine adjustments may be needed to ensure the lights are properly aligned.
-
Test Drive: Take your car for a short test drive on a dark road. Check how your headlights perform in real-world driving conditions. Make note of any areas where the lighting is insufficient.
A test drive will confirm if the adjustments are correct. Drive on a dark road to test the headlight’s performance. Make sure the road is properly illuminated. Watch how the headlights illuminate the road and check for any issues. Fine-tune your adjustments after reviewing your experience.
-
Final Adjustments: If needed, return to the wall and make any final adjustments. Make sure you don’t over-adjust. Small changes can make a big difference.
Do a final check to confirm that the headlights are functioning correctly. Fine-tune any issues by returning to the wall and making small adjustments. Avoid making large adjustments. Repeat your test drive after each adjustment.
Common Problems and Solutions
Some common issues can occur during headlight adjustment. Understanding these problems will help you troubleshoot and resolve any difficulties.
Misalignment Issues
Misalignment is a common issue that often arises. There are several contributing factors, which may include physical damage or incorrect adjustment.
-
Headlight Drooping: The headlight beam is aimed too low, causing reduced visibility. This can result from incorrect vertical adjustment or physical damage to the headlight housing.
If your beam is drooping, it means the light is pointing down. The road may not be illuminated properly. Make adjustments using the vertical adjustment screw. This can also be caused by physical damage. Carefully inspect your headlight components.
-
Headlight Aimed Too High: The headlight beam is aimed too high, which can blind other drivers. This typically occurs because of an over-adjustment of the vertical screw.
If your headlights are aimed too high, the beams will point upwards. You risk blinding other drivers. Make sure you are adjusting the headlights in a well-lit location. Use the vertical adjustment screw to correct this problem and lower the beam to an acceptable level.
-
Headlight Aimed to the Side: The headlight beam is not centered, leading to poor road illumination. This usually results from an incorrect horizontal adjustment.
Make sure you are adjusting the horizontal aim correctly. An improperly aimed headlight may illuminate to the side of the road. Use the horizontal adjustment screw to correct this and center the beam. Then, perform a test drive to make sure you have it correct.
Headlight Problems
There are multiple problems that may prevent proper adjustment. Recognizing them is very important for effective troubleshooting.
-
Bulb Issues: A faulty or incorrect type of bulb will affect the headlight beam pattern. The bulb may not be seated correctly, or it could be burnt out or damaged.
A damaged or incorrectly installed bulb can cause the headlight to not work correctly. Always make sure the bulb is in place and the correct type. Check that the bulb is correctly installed, using the proper bulb type. Replace damaged or burnt-out bulbs.
-
Reflector Issues: A damaged or degraded reflector can affect light output and beam focus. Reflector surfaces can wear out over time.
The reflector inside the headlight directs the light. A damaged reflector can greatly impact the beam’s performance. Clean the reflector or replace it. Clean your headlights regularly to maintain proper lighting.
-
Lens Issues: A cloudy or damaged lens can reduce the light intensity. The lens protects the internal components and may become scratched or yellowed.
A cloudy lens can make it hard for the light to pass through. You may need to clean or replace a damaged lens. Consider cleaning your headlight lenses regularly to improve visibility.
Addressing Difficulties
Some of the difficulties can be resolved. It is important to know the right approach to resolve any adjustment issue.
-
Stuck Adjustment Screws: Sometimes, adjustment screws can become rusted or difficult to turn. Use penetrating oil or lubricants. Be gentle.
If the screws are stuck, it might be challenging to make adjustments. Apply penetrating oil to loosen the screw. If the screw is severely damaged, consider replacing the headlight assembly.
-
Vehicle Suspension Problems: Suspension issues, such as worn shocks, can affect headlight alignment. The vehicle’s suspension affects the aiming process.
If there are suspension problems, the headlight adjustment might not be accurate. Check the suspension components and replace any worn parts. Consider taking your car to a mechanic if there are suspension issues.
-
Professional Help: If you can’t fix it yourself, it’s wise to take your car to a mechanic or an auto shop. Experienced technicians can identify and fix the problems.
If you face any issues that you are unable to fix on your own, consider getting help. A professional will have the expertise to get your headlights adjusted correctly. Professional services ensure that your headlights are aligned properly, improving visibility and safety.
Frequently Asked Questions
Question: How often should I check and adjust my headlights?
Answer: It’s good practice to check your headlights at least twice a year, or when you notice a change in lighting performance or after any major repairs or accidents.
Question: Can I adjust my headlights myself?
Answer: Yes, in most cases, you can adjust your headlights yourself using basic tools and following the steps. Always consult your car’s manual for specific instructions.
Question: What’s the best distance to adjust headlights?
Answer: The standard distance is 25 feet (7.6 meters) from a wall or flat surface.
Question: What do I do if my headlights are still not working correctly after adjustment?
Answer: If the problem persists, check the bulbs, wiring, and headlight housing for damage. Consider seeking professional assistance from a mechanic.
Question: Are there any legal requirements for headlight adjustments?
Answer: Yes, headlight alignment is regulated to ensure that your headlights aren’t blinding other drivers. Make sure your headlights are adjusted properly to comply with local laws.
Final Thoughts
Adjusting your headlights might seem complicated, but it is manageable by following a few steps. You learned about the required tools, the different parts of a headlight, and the correct aiming procedure. Remember, preparing your vehicle correctly and marking the wall precisely is important for success. Make sure the high and low beams are properly adjusted. Should there be any issues, explore the common problems and solutions provided, which will allow you to diagnose and correct any problems.
Now that you know how do i adjust the headlights, you can ensure a safer driving experience. Check your headlights regularly to make sure the light is at the correct level. Take the time to regularly assess the headlight performance and make adjustments to improve visibility. Drive with confidence, knowing your headlights are doing their job, keeping you and others safe on the road!