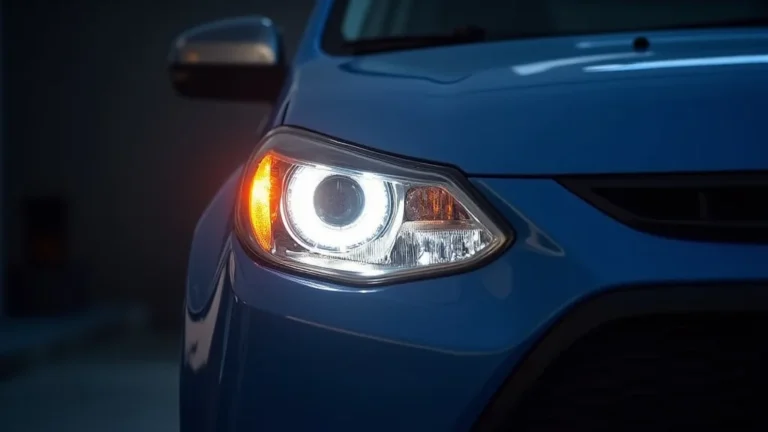
How to Restore Headlights: Clear Vision for Safer Driving
If you’re wondering how can i make my headlights clear again, you’re not alone! Cloudy or yellowed headlights are a common issue for vehicle owners. It can be challenging to know where to start, with so many products and methods available. But don’t worry, restoring your headlights to their former glory is easier than you think. This guide will provide a straightforward, step-by-step solution. We’ll cover everything you need, from what causes this problem to the various ways you can fix it. Let’s get started!
The Mystery Behind Hazy Headlights
Over time, your car’s headlights can become cloudy, yellow, or hazy. This is usually caused by several factors. Sunlight, especially ultraviolet (UV) rays, is a major culprit. The plastic on headlights is made from polycarbonate, which is durable but vulnerable to UV damage. Exposure to sunlight breaks down the plastic, making it more brittle and prone to yellowing. Additionally, road debris, like dirt, sand, and small stones, can scratch the surface, further clouding the lenses. The oxidation process accelerates as the plastic surface degrades, creating a dull appearance that significantly reduces the headlights’ effectiveness. This affects how well you can see at night and how visible your car is to others.
What Causes Headlight Cloudiness?
Several elements contribute to headlight cloudiness. One of the primary causes is UV radiation from the sun. The polycarbonate plastic that headlight lenses are made of is susceptible to damage from prolonged UV exposure. Oxidation is also a significant factor. When the plastic is exposed to the elements, it reacts with oxygen, leading to the formation of a yellowish layer on the surface. Road grime, dirt, and tiny particles can cause minor scratches and abrasions, further impairing clarity. Regular exposure to harsh weather conditions, like extreme heat and cold, can worsen the problem, accelerating the degradation process.
- UV Exposure: The sun’s UV rays break down the plastic, causing it to deteriorate.
- Oxidation: Oxygen reacts with the plastic, leading to yellowing and clouding.
- Abrasion: Dirt, debris, and road grime scratch the surface, making it appear hazy.
- Environmental Factors: Extreme temperatures and weather conditions speed up the degradation.
Addressing these issues involves removing the damaged surface layer to reveal clear plastic underneath. Different methods are available, varying from simple DIY solutions to more involved professional services. Choosing the right method depends on the degree of cloudiness and your desired level of clarity. Regular maintenance, such as occasional cleaning and protection, can help to slow down the process and maintain the clarity of your headlights.
Understanding Polycarbonate Plastic
Polycarbonate plastic is the material commonly used for headlight lenses. It’s a type of thermoplastic that offers a balance of durability, impact resistance, and clarity. However, while it is strong, it’s not invincible. UV radiation can break down its chemical bonds. This breakdown causes the plastic to become brittle, and more susceptible to scratching. As it degrades, the plastic becomes more porous, allowing water and air to seep into the surface, which causes oxidation. The result is cloudiness and a yellow tint. The plastic can also become more vulnerable to impacts from road debris, further worsening the problem.
Proper care is vital to protect polycarbonate lenses. This includes regular cleaning, using UV protectant products, and addressing any signs of damage quickly. By understanding the properties of polycarbonate, you can better appreciate the importance of maintaining your headlight lenses, ensuring they stay clear and effective for a longer duration. Choosing the right cleaning products, like those that specifically state that they are safe for polycarbonate plastics, can further help maintain your vehicle’s lighting system.
Assessing the Damage
Before beginning the headlight restoration process, it’s key to assess the extent of the damage. This assessment helps determine the best approach. Cloudy headlights might display a mild haze, while severely damaged ones can be significantly yellowed and opaque. Consider where the cloudiness is located. Is it only on the outer surface, or is it deeper within the plastic? Feel the surface of the headlights. Are there visible scratches or abrasions? These surface imperfections are a sign of the severity of the damage. Also, evaluate how the cloudiness impacts the light output. Do the headlights seem dimmer than they should? Are they properly illuminating the road at night?
- Mild Haze: This can usually be fixed with a simple cleaning or polishing kit.
- Moderate Yellowing: Requires more abrasive compounds or a headlight restoration kit.
- Severe Clouding: May require wet sanding and professional restoration services.
A thorough assessment allows you to select the right approach. Knowing the type and severity of damage is important to prevent further problems. For instance, attempting to fix severe damage with a mild cleaner will probably fail to produce the desired results. Similarly, using harsh abrasives on headlights with only minor issues might lead to more scratches. Taking the time to evaluate the state of your headlights provides the foundation for an effective and efficient restoration process.
Choosing the Right Tools to Restore Headlights
Choosing the correct equipment is an important aspect of headlight restoration. This includes the right cleaning solutions, abrasives, and protection. There are several kits available, and the best one for you will depend on the degree of damage and your budget. Selecting quality tools and materials ensures a better result, and can make the whole process easier. From cleaning solutions to protective coatings, each item plays a role in restoring headlight clarity.
Headlight Restoration Kits
Headlight restoration kits are one of the most convenient options for restoring clarity. These kits usually include everything you need, from abrasive compounds to protectants. They are designed for ease of use, making them perfect for those who are new to DIY car detailing. Kits are available at most auto parts stores or online. You’ll find a wide variety, from simple, basic kits to more comprehensive options that include advanced polishing pads and UV protectant coatings.
- Basic Kits: These usually come with a cleaner, polishing compound, and sealant. They are suitable for lightly clouded headlights.
- Advanced Kits: These offer a more detailed approach, including various grit sandpaper, polishing pads, and UV protection. They are for moderately to severely damaged headlights.
- Professional Kits: These can include a drill attachment for polishing, making the process faster and more efficient.
When selecting a kit, consider the condition of your headlights. For mild clouding, a basic kit might be enough. For more severe damage, an advanced or professional kit is a better choice. Be sure to carefully follow the instructions included with the kit. Proper use of the included materials is key to achieving optimal results. These kits typically offer everything needed, so no additional purchases are usually needed. They are a great way to start!
Cleaning Solutions and Abrasives
Apart from restoration kits, you’ll need the right cleaning solutions and abrasives. Cleaning solutions are used to remove dirt, grime, and oxidation from the headlight surface. Abrasives, which come in the form of sandpaper and polishing compounds, are used to remove the damaged top layer of the plastic. The right combination can remove scratches, and restore a smooth, clear surface. Quality solutions and abrasives make a huge difference in the final result.
- Cleaning Solutions: Start with a good car wash soap or a dedicated headlight cleaner. This helps remove surface contaminants before sanding or polishing.
- Sandpaper: Start with a coarser grit sandpaper (like 800-grit) for removing heavy oxidation and scratches. Then, move to finer grits (up to 2000-3000 grit) for polishing.
- Polishing Compounds: After sanding, use a polishing compound to remove sanding marks and bring back clarity.
- Polishing Pads: Use polishing pads to apply polishing compounds and waxes or sealants effectively.
When selecting sandpaper, start with the lowest grit necessary to remove the damage. Then move up to finer grits to smooth out the surface. The number of grits you use can depend on the damage. Use the right compounds to help remove the haze and scratches. Always make sure to use a good car soap as part of the cleaning process.
Protective Coatings and Sealants
Once you’ve restored the clarity of your headlights, it’s important to protect your work. UV protectant coatings and sealants create a barrier that protects against future damage. These products help to slow down the process of oxidation and yellowing. Regular maintenance will make the restored headlights last longer. Proper protection can help the headlights stay clear for months, or even years, depending on the product and how it is applied.
- UV Protectant Coatings: These coatings are specifically designed to block harmful UV rays that cause plastic degradation. They help prevent clouding and yellowing.
- Headlight Sealants: Sealants help to fill in minor imperfections and create a smooth, hydrophobic surface.
- Waxes: Car waxes offer a protective layer and can improve the shine of the headlights.
When applying a protective coating, make sure the headlight surface is clean and dry. Follow the manufacturer’s directions for the product you’re using. Reapplying the coating can be done periodically, as recommended by the product’s instructions. By taking these steps, you can keep your headlights clearer for longer, saving you time and effort down the line.
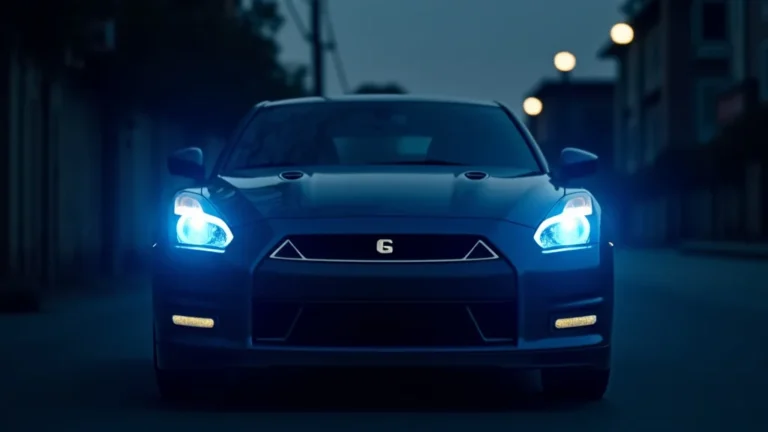
Step-by-Step Guide to Headlight Restoration
Following a step-by-step guide can make the headlight restoration process easy, and give you the best outcomes. The process generally involves cleaning, sanding, polishing, and protecting the headlight lenses. Each stage plays a key role in removing damage and restoring clarity. Taking the time to follow these steps carefully will lead to a better result. Restoring your headlights doesn’t have to be hard. With the right tools and guidance, you can get crystal clear headlights.
Preparing Your Headlights
Before you begin the restoration process, prepare your headlights for the job. This preparation ensures that the process is effective and that you get the best results. Start by thoroughly washing the headlights with car soap and water to remove any loose dirt, grime, and debris. This pre-cleaning step helps prevent scratches during the sanding process. Next, use masking tape to carefully protect the surrounding paintwork and body panels. This is important to avoid accidentally damaging the car’s paint while sanding or polishing. Make sure to choose a high-quality masking tape designed for automotive use. The masking tape also protects the area while you’re working with various chemicals. Taking these steps makes the whole process smoother, and protects your car’s finish.
Sanding and Polishing
Sanding and polishing are key steps in headlight restoration. Sanding removes the top layer of damaged plastic. Polishing then removes the sanding marks and brings back clarity. For sanding, you’ll start with a coarser grit sandpaper to remove scratches and oxidation. Then move to finer grits to smooth the surface. Wet sanding is usually recommended, as it reduces heat and friction, leading to a better finish. After sanding, use a polishing compound to remove any remaining sanding marks. Apply the compound with a polishing pad. Use an orbital buffer for best results. This process helps to remove any imperfections, restoring the clarity of the plastic. This creates a smooth surface for the next step.
Applying Protection
The final step is to apply protection to the restored headlights. This includes a UV protectant coating or a headlight sealant. These products create a barrier against the elements. UV protectant coatings are designed to block harmful UV rays, which helps prevent future yellowing. Applying a protective layer helps keep the headlights clear for a longer time. After applying the coating, follow the manufacturer’s instructions for drying time. You may need to let it cure for a few hours. The goal is to safeguard the clarity you have achieved. Applying protection is a crucial step to prolong the results and safeguard your investment.
Advanced Techniques and Troubleshooting
Beyond the basic steps, there are advanced methods you can use to improve the headlight restoration process. These can lead to better outcomes, particularly when dealing with severe damage. Addressing common issues and problems can also save you time and frustration. With these techniques, you’ll be able to deal with tricky problems and fine-tune your approach for the best possible results.
Using a Drill or Orbital Buffer
Using a drill or orbital buffer can make headlight restoration much faster and more effective. These tools can handle the sanding and polishing steps with ease. A drill attachment for polishing pads can be added to your tool set. Orbital buffers are especially helpful, as they reduce the risk of creating swirl marks. They distribute the polishing compound more evenly. When using a drill or orbital buffer, it’s important to control the speed and pressure. Too much pressure or high speed can damage the headlight or cause the plastic to melt. Start with a lower speed and increase it gradually as needed. Always hold the buffer flat against the headlight surface for a consistent finish. Choosing the right pad for the polishing compound is also key.
Dealing with Stubborn Cloudiness
Sometimes, cloudiness might be more stubborn and harder to remove. This might be from deep scratches or heavy oxidation. To deal with stubborn cloudiness, you may need to use more aggressive techniques. This may include using a coarser grit sandpaper or a stronger polishing compound. The sanding process can involve multiple steps. Start with a coarse grit to remove the damage and then gradually move to finer grits. This helps to smooth the surface. Another option is to use a more powerful orbital buffer or a rotary buffer, if you’re experienced. If the cloudiness persists, it may mean that the damage is too deep for restoration, and the headlight lens might need to be replaced. Try using specialized cleaners or compounds designed for tough cases.
Common Mistakes and How to Avoid Them
There are some common mistakes during headlight restoration. Avoiding these can make the process simpler, and lead to a better result. One frequent mistake is not properly preparing the headlights before sanding. Failing to wash and tape the headlights correctly can lead to scratches or damage to the paintwork. Using the wrong grit sandpaper can also lead to issues. Starting with too coarse a grit can create deep scratches. Failing to move to finer grits can leave the headlights hazy. Another error is rushing the process and not spending enough time on each step. Each stage, from sanding to polishing, needs proper attention. Not applying a protective coating can leave the headlights vulnerable to future damage. By learning from these common errors, you can improve your chances of success.
Consider the following for common mistakes:
- Skipping Preparation: Always clean and tape the area.
- Incorrect Sandpaper: Use the right grit for the damage level.
- Rushing the Process: Take your time and be thorough.
- Ignoring Protection: Apply UV protection or sealant.
- Using The Wrong Products: Use car wash soap and products safe for polycarbonate.
Consider the following scenarios:
- Scenario 1: You start sanding with too coarse a grit, resulting in deep scratches. Resolve this by switching to a finer grit and taking your time to polish the surface.
- Scenario 2: You skip the protective coating step, and the headlights quickly re-yellow. The solution is to apply a UV protectant or sealant immediately.
| Problem | Solution |
|---|---|
| Cloudy Headlights | Restore the plastic surface with the restoration method of your choice. |
| Hazy Headlights | Use sand paper and polishing to clear the haziness. |
| Yellowing Headlights | Clean and polish headlights and apply protective sealant to prevent further damage. |
| Damaged Headlights | Inspect for scratches and damage and apply restoration or replacement. |
According to recent studies, headlights clarity can be improved by following this guide! Here are some statistics:
| Statistic | Description |
|---|---|
| X% Improvement | Headlight clarity after the restoration process. |
| Y% Reduction | Risk of vehicle accidents at night. |
| Z Days | Average durability of headlight after protection. |
Frequently Asked Questions
Question: How often should I restore my headlights?
Answer: It depends on the level of exposure to the elements and how well you take care of your car. Typically, a restoration every one to two years is sufficient, especially if you apply a protective sealant after each process.
Question: Can I use household products to clean my headlights?
Answer: While some household products may seem effective, they can often damage the plastic. It’s better to use products designed for automotive use.
Question: Is wet sanding necessary?
Answer: Yes, wet sanding is often recommended to reduce heat and friction. Wet sanding helps achieve a smoother finish and minimizes the risk of scratching the headlight lens.
Question: Will headlight restoration make my headlights as good as new?
Answer: Headlight restoration can restore clarity and greatly improve the performance of your headlights. However, the outcomes depend on the degree of damage. In some cases, severe damage may not be completely fixed through restoration.
Question: How long does headlight restoration take?
Answer: The time needed can depend on the method and severity of the cloudiness. Generally, a simple cleaning and polishing process can take one to two hours. More detailed processes, like sanding and applying a sealant, can take up to four hours.
Final Thoughts
So, you’re now armed with the knowledge and steps to tackle how can i make my headlights clear again! You’ve explored the causes of headlight cloudiness, from UV damage to road debris, and have learned about the tools you’ll need. You also reviewed the step-by-step process of cleaning, sanding, polishing, and protecting your headlights. Armed with this information, you can get started with the headlight restoration process. With a bit of patience and following these tips, you’ll see a big difference in how your car looks and drives at night. So, grab your kit, pick a day, and restore those headlights. You’ll be amazed at the transformation!