LED Fog Lights Problems Troubleshooting and Solutions
If you’re new to the world of car modifications, facing an led fog lights problem can feel a little tricky. There are many reasons why these lights might not work as expected, from simple wiring issues to more complicated electrical problems. Don’t worry, though! This guide will break down the common issues and offer easy-to-follow steps to fix them. Let’s explore how to get your fog lights shining bright again without the technical jargon.
Common LED Fog Lights Issues
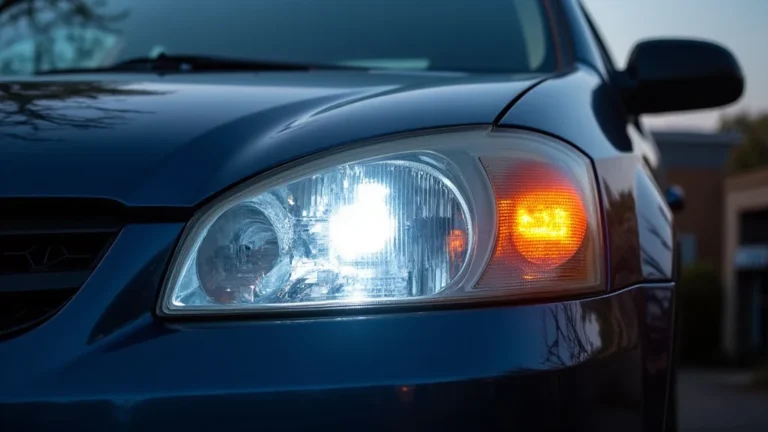
One of the first things people encounter when switching to LED fog lights is that they don’t work right away. There might be flickering, they might be dim, or they might not turn on at all. It can be frustrating when you expect a brighter, clearer light and you get something less than what you were hoping for. Several issues can contribute to these problems. This includes the vehicle’s electrical system, the LED lights themselves, and the way they’re installed. Knowing the common issues helps to pinpoint the actual cause and find the solution. Each problem has specific causes.
Wiring Problems
Wiring issues are a top reason for issues. Incorrect wiring can prevent the lights from functioning correctly. This includes loose connections, wires that are connected backward, or wires that aren’t properly grounded. A poor ground connection, for instance, is a common issue that can cause lights to flicker or not illuminate at all. Wires that are exposed can corrode over time, and if that happens, it can interrupt the flow of electricity to the lights. Proper wiring is the foundation for any electrical system to function, and fog lights are no different. It’s often the first place to start when you are troubleshooting.
- Loose Connections: Loose connections are like a break in the path of electricity. They can make the lights flicker, or they may not work at all. It’s important to ensure that all wire connections are tight and secure.
- Incorrect Polarity: Polarity means that electricity needs to flow in the right direction. LEDs, in particular, need their positive and negative wires connected correctly. If the wires are reversed, the light won’t turn on.
- Poor Grounding: Grounding is like an anchor for the electrical system. If the ground connection is bad, the electrical circuit isn’t complete. This can cause the lights to flicker, be dim, or fail completely.
To fix this, check all the connections, including the ones going into the light itself, the connectors, and the ground wire. Make sure each wire is firmly seated and has a good connection. You can use wire connectors to make sure the wires stay connected.
To address this, double-check that you’ve connected the positive wire (usually red) to the positive terminal and the negative wire (usually black) to the negative terminal on both the light and the vehicle’s wiring harness. Many LED lights have built-in polarity protection, but it’s still good practice to connect them correctly. Look for markings on the light or in the instruction manual to identify the terminals.
Ensure that the ground wire is securely connected to a clean, metal surface on the vehicle’s frame. You may need to use a wire brush to remove any rust or paint from the grounding point to ensure a solid connection. Grounding issues are common, so they should be checked carefully.
Faulty LED Lights
Sometimes, the problem isn’t the wiring; it’s the LED lights themselves. Like any electronic component, LED fog lights can fail. Manufacturing defects, such as a short circuit within the LED unit or a defective driver circuit, can cause a light to malfunction. Furthermore, if the lights are exposed to the elements without proper sealing, moisture can get inside and damage the internal components. High heat, which can occur near the engine or if the lights have poor heat dissipation, can also damage the LEDs. Testing the lights and understanding their limits can prevent these problems.
- Defective LEDs: Sometimes, the LED itself is the problem. If a single LED on the light has burned out, or if the internal components of the LED are faulty, the light may not work.
- Driver Circuit Failure: The driver circuit regulates the power going to the LED. If this circuit fails, the light may not turn on or may flicker.
- Moisture Damage: LED fog lights are exposed to various weather conditions. If the lights aren’t sealed properly, moisture can get inside, causing corrosion and electrical failures.
To check this, inspect the LED visually for any signs of damage or burn marks. You can also use a multimeter to test the light’s circuitry to confirm whether it’s receiving power and functioning as expected. If the LED is faulty, the light needs to be replaced.
The driver circuit is more complicated to diagnose. If you suspect this is the problem, check for any signs of overheating or physical damage on the driver circuit itself. If possible, test the light with a known good driver circuit or consult a professional.
Inspect the light for any cracks or gaps in the housing. Ensure the seals are in good condition. If moisture is present, you may need to replace the light or attempt to reseal it if possible. However, replacement is often the best solution.
Electrical System Issues
The vehicle’s electrical system has a big role in how your fog lights perform. Problems with the battery, the fuse box, or the switch that controls the lights can all lead to issues. The vehicle’s voltage regulator, which controls the amount of electricity flowing to various components, may also be at fault. Understanding how these components work together will help you find the source of the problem. Many problems are not caused by the lights themselves. They are caused by issues in the vehicle’s electrical system. This makes troubleshooting more difficult.
- Blown Fuses: A fuse is a safety device that protects the electrical system from overloads. If the fuse for the fog lights blows, the lights won’t work.
- Switch Problems: The switch that turns on the fog lights can fail. This may prevent the lights from getting power.
- Battery and Alternator Issues: If the battery or alternator isn’t working correctly, there may not be enough power to run the fog lights properly.
Check the fuse box in your vehicle (the location is usually in the owner’s manual) to find the fuse for the fog lights.
Test the switch with a multimeter to see if it’s sending power to the fog lights. If the switch is faulty, you’ll need to replace it. A faulty switch is a common problem in older vehicles.
Test the battery and alternator to ensure they’re providing enough voltage and current. A weak battery or a failing alternator can cause the fog lights to be dim or to flicker. These components have a huge influence over how your lights operate.
Troubleshooting Steps for Your LED Fog Lights Problem
When you’re dealing with an led fog lights problem, a systematic approach is key. It’s important to avoid guessing and start with the simplest checks. Begin with the most obvious and then work your way to the more complex. You’ll need some basic tools, such as a multimeter, a wire stripper, and perhaps a wire crimper. This method will help you discover the problem efficiently, saving you time and money.
Step-by-Step Diagnostic Guide
This is a structured way to troubleshoot. It goes from the simple to the complex. Following these steps helps you isolate the issue and fix it. Begin by gathering the necessary tools and ensuring your vehicle is safely parked. Safety is always important, especially when working with electrical components.
- Visual Inspection: Begin by visually inspecting the fog lights, wiring, and connections. Look for any obvious signs of damage, such as loose wires, corrosion, or broken components.
- Check the Fuse: Find the fuse for the fog lights in the vehicle’s fuse box. The location of the fuse box is usually found in your owner’s manual. Remove the fuse and inspect it.
- Test the Switch: Use a multimeter to test the switch that controls the fog lights. Check for continuity when the switch is turned on and off.
- Verify Power and Ground: Use a multimeter to check for power and ground at the fog light connector.
- Inspect the Wiring: Examine the wiring for any breaks, shorts, or loose connections. Pay close attention to areas where the wires bend or are exposed to the elements.
- Test the LED Light: If you’ve checked all the previous steps and the lights still don’t work, test the LED lights themselves. You can use a multimeter to check the resistance and voltage.
Inspect the fog lights for any physical damage, such as cracks in the lens or housing. Check the wiring for any signs of wear, fraying, or damage. Ensure that all connectors are securely attached.
If the fuse is blown,
If the switch doesn’t have continuity, it may be faulty and need to be replaced. Ensure the switch is receiving power from the vehicle’s electrical system. If the switch isn’t the problem, move on to the next step.
Test the power wire for voltage when the lights are turned on. Also, test the ground wire to ensure it has a proper ground connection. If there is no power or a poor ground, trace the wiring back to the source to find the issue.
Repair or replace any damaged wiring. Make sure all connections are secure and properly insulated. Check the ground connections for any corrosion or rust. Clean or repair as needed.
If the LED light is faulty, you’ll need to
Tools Needed
Working on electrical systems requires the right tools. Having the right tools makes the process easier, safer, and more effective. You may already have these tools at home. If you don’t, they are usually inexpensive to purchase.
- Multimeter: This tool is essential for testing voltage, continuity, and resistance in the electrical circuits. It helps you diagnose and confirm electrical problems.
- Wire Strippers and Crimpers: These tools are used for preparing and connecting wires. Wire strippers remove the insulation from wires, and crimpers are used to secure connectors.
- Screwdrivers and Wrenches: You’ll need these tools to access and remove parts of the vehicle. These are useful for removing panels, accessing the fuse box, and tightening connections.
- Wire Connectors and Electrical Tape: These are used to repair and insulate wires. Use high-quality wire connectors and electrical tape to make secure connections.
- Work Light: A work light allows you to see the components. It’s helpful when working under the dashboard or in dark areas of the vehicle.
A multimeter is a multi-purpose tool that helps you diagnose various electrical issues. Make sure it is set to the appropriate settings before testing (voltage, ohms, etc.).
Wire strippers are critical for removing the insulation without damaging the wire. Crimpers help you attach the connectors securely, avoiding loose connections.
Choose the correct sizes and types of screwdrivers and wrenches for the job. Having the correct tools prevents damage to the parts and helps with the work.
Wire connectors, such as butt connectors or wire nuts, help you make secure wire connections. Electrical tape ensures that the connections are insulated and protected from the elements.
Use a bright and portable work light to illuminate the area you’re working on. Ensure the light is positioned so you can see your work clearly.
Example Scenario
Let’s say you’ve installed new LED fog lights, and they don’t turn on. After doing a visual inspection, you notice a loose wire at one of the light connectors. Here’s a step-by-step approach to fixing this:
- Inspect the Wire: Carefully examine the loose wire to see if it is broken or damaged. If so, you will need to replace the wire.
- Reconnect the Wire: Use wire connectors to properly and securely reconnect the loose wire to its corresponding terminal on the fog light.
- Test the Lights: After reconnecting the wire, turn on the fog lights to check if they are working. If they are now working, then the issue was simply a loose connection.
In this example, the issue was a loose wire. The fix was simple: reconnecting the wire. This highlights how a single, seemingly minor problem can prevent the lights from working. This also shows the value of following a step-by-step process.
Advanced Troubleshooting of LED Fog Lights
After the basics have been covered, more complex issues may arise. This section delves into more advanced troubleshooting techniques, which will help you solve difficult led fog lights problems. This includes checking for CANbus compatibility, addressing radio interference, and dealing with voltage fluctuations.
CANbus Compatibility and LED Fog Lights
CANbus systems can be problematic. Many modern vehicles use Controller Area Network (CANbus) systems to communicate between the various computers. If your vehicle has a CANbus system, you might encounter issues such as flickering or error messages when you install LED fog lights. This happens because the CANbus system monitors the current draw of the lights. Standard LEDs draw less current than traditional halogen bulbs. This can trigger an error message or cause the lights to malfunction.
- What is CANbus? CANbus is a vehicle communication network. It allows different electronic control units (ECUs) within a vehicle to communicate with each other. This includes controlling lights, monitoring sensors, and managing other vehicle functions.
- CANbus-Compatible LEDs: The solution to CANbus issues is to use LED fog lights specifically designed to be CANbus-compatible. These lights have built-in resistors that mimic the current draw of the halogen bulbs. This prevents the error messages and flickering.
- Error Message Troubleshooting: If you are still seeing error messages after installing CANbus-compatible lights, there could be other issues. Check the wiring, and ensure that the LED lights are properly connected.
It’s important to understand the role of CANbus in modern cars, as it directly impacts the functionality of LED fog lights.
When selecting LED fog lights, check to see if they are designed to work with your vehicle’s CANbus system.
Sometimes, the resistors may not fully emulate the original bulb, so the system displays an error message.
Radio Interference
Sometimes, LED fog lights can cause radio interference. This is more common with cheaper LED lights. The interference can make the radio static or cause other problems with the vehicle’s electrical system. This can be caused by the LED’s driver circuit or the LED itself.
- Causes of Interference: The driver circuit in many LEDs can emit electromagnetic interference (EMI). This can affect the radio reception. Also, poorly shielded wiring and connectors can radiate interference.
- Minimizing Radio Interference: To fix this, use LED fog lights with built-in EMI shielding. High-quality lights are designed to reduce interference. Ensure the wiring is properly routed and that the connectors are secure. Using shielded wiring can also reduce the interference.
- Testing for Interference: To check for interference, turn on your LED fog lights and listen to your radio. If you hear static or other disruptions, the lights might be causing interference.
The radio or other electronic devices could experience reduced performance because of EMI.
EMI issues can be minimized by making sure your lights are of high quality and that the wiring is done right.
If you suspect radio interference, test the radio after the installation is complete. If the interference is noticeable, then adjustments are needed.
Voltage Fluctuations and LED Fog Lights
Voltage fluctuations can also cause led fog lights problems. LEDs are sensitive to voltage changes. If your vehicle’s voltage fluctuates due to a weak battery, a failing alternator, or other electrical issues, the lights may flicker, be dim, or fail completely. Understanding and dealing with these issues helps extend the life of your lights.
- Effects of Voltage Fluctuations: If the voltage drops below the minimum operating voltage for the LED, the light will likely turn off. Excessive voltage can damage the light’s components.
- Testing Voltage: Check the voltage going to the fog lights. You can use a multimeter to measure the voltage while the engine is running and the lights are turned on. The voltage should be within the specified range (usually between 12 and 14 volts).
- Voltage Stabilizers: In extreme cases, a voltage stabilizer can be used to regulate the voltage going to the LED lights. This is particularly useful in vehicles with known electrical issues.
These fluctuations can cause various performance problems. These can range from intermittent flickering to complete failure.
If there’s an unusual voltage reading, you can start troubleshooting the electrical system.
Voltage stabilizers help to keep the voltage consistent, which makes your LED lights work consistently.
Frequently Asked Questions
Question: Why are my LED fog lights flickering?
Answer: Flickering can be caused by several issues. These include loose connections, a faulty LED, or voltage fluctuations within the vehicle’s electrical system. CANbus issues can also contribute to flickering in some vehicles. Check the connections, test the voltage, and make sure the LEDs are compatible with your car’s system.
Question: My LED fog lights won’t turn on at all. What should I do?
Answer: Start by checking the fuse that controls the fog lights, and ensure that it’s not blown. Examine the wiring for any breaks, loose connections, or corrosion. Verify that the switch that controls the lights is functioning properly. If all these seem good, test the LED bulbs themselves.
Question: Can I install LED fog lights in any car?
Answer: Yes, you can usually install LED fog lights in most cars, but it’s important to make sure the lights are compatible with your vehicle’s electrical system. This is especially true if your car has a CANbus system. You might also need to consider the size and shape of the fog light housing.
Question: How long do LED fog lights last?
Answer: LED fog lights have a long life. They generally last much longer than traditional halogen bulbs. They can last for tens of thousands of hours. However, the lifespan can be affected by factors such as heat, voltage fluctuations, and build quality.
Question: Do LED fog lights need any special wiring?
Answer: Most LED fog lights are designed to be a direct replacement for halogen bulbs. As such, they often use the same connectors and wiring. However, if your car has a CANbus system, you might need special lights or additional resistors. Also, ensure all the connections are solid and well-insulated.
Final Thoughts
Dealing with an led fog lights problem doesn’t have to be a headache. Whether the lights aren’t turning on, are flickering, or are exhibiting other issues, the process starts with knowing your equipment and knowing your car’s electrical systems. This guide has covered the major issues, from simple wiring problems to more complex electrical system issues. By following the troubleshooting steps, you can pinpoint the source of the problem and apply the necessary fix. Remember to start with the basics, check connections, inspect the fuses, and test the power supply. Don’t be afraid to consult a professional if the problems become too involved. With the right approach and a little patience, you’ll have your LED fog lights shining brightly and working properly. Now you’re ready to get back on the road!