Fog Lights Not Bright Enough Reasons and Solutions
It’s frustrating when your fog lights not bright enough make driving in bad weather tougher. Many people experience this, especially those new to car maintenance. Don’t worry, it’s a common issue! There are several reasons why your fog lights might seem dim, and simple fixes often make a big difference. We’ll explore these reasons and the easy steps to get your fog lights shining brighter, making your drives safer. Ready to explore what you can do?
Reasons Why Fog Lights Fail to Illuminate Effectively
There are many reasons why your fog lights might not be performing as expected. From issues with the bulbs themselves to problems with the electrical system, several factors can affect their brightness. Discovering the root cause is the first step to a solution. We’ll look at the most common issues that cause dim fog lights and the underlying causes, helping you pinpoint the problem with your lights.
Bulb Issues: The Heart of the Problem
The bulbs are the core of your fog lights, and their condition is the most frequent cause of diminished brightness. Bulbs can diminish over time due to wear and tear or exposure to the elements. Halogen bulbs, the most common type, have a lifespan determined by usage and quality. High-quality bulbs generally last longer than cheaper ones. Xenon HID (High-Intensity Discharge) bulbs, also found in fog lights, can lose their intensity as they age, becoming less bright and emitting a different color temperature.
LED (Light-Emitting Diode) bulbs are an energy-efficient choice and can last for many years. However, even these can fail, especially if they are exposed to extreme temperatures or if there are electrical problems. To identify a bulb problem, first, inspect it for any visible damage like cracks or a clouded appearance. If one bulb is out or dimmer than the other, the issue is likely the bulb itself. If both bulbs seem dim, other issues, like wiring problems or inadequate voltage, may be contributing.
- Burned-Out Bulb: The most obvious issue is a bulb that has simply burned out. If one or both lights are completely dark, this is the prime suspect.
- Dimming Over Time: Even if the bulbs are not completely out, they can become less bright over time. This is particularly true for halogen and HID bulbs, which gradually lose their intensity as they are used.
- Incorrect Bulb Type: Using the wrong type of bulb can lead to dim fog lights. Make sure the bulb is the correct size and wattage specified for your vehicle’s fog light housing.
- Damaged Bulb: Even before the bulbs completely fail, damage can occur to the glass or the internal elements, causing a reduction in light output.
- Color Temperature: The color of your fog lights can also impact their performance. Bulbs with different color temperatures may appear brighter or dimmer, depending on the conditions.
If a bulb burns out, it means the filament inside the bulb has broken or the internal components have failed. This is a common occurrence because the heat generated by the bulb eventually leads to its failure. This is why you need to ensure you change bulbs in pairs to avoid one new and one older bulb producing different brightness levels.
Halogen bulbs lose their brightness as the filament inside burns and degrades over time, reducing the amount of light they emit. HID bulbs slowly lose their intensity as the gases inside the bulb change and the electrodes wear down. These changes make the light appear dimmer and could even change the color temperature.
Different bulb types have different light outputs and power requirements. If you use a bulb that is not designed for your specific fog light assembly, it may not produce the intended brightness. It could also cause overheating or even damage the electrical system. Always check your car’s manual or the markings on your fog light housing for the correct bulb type.
When the glass is damaged, it can let moisture into the bulb, which can lead to corrosion and damage to the filament or other components. This can result in a significant drop in light output and could eventually cause the bulb to fail completely. Always inspect the bulb’s glass and internal elements for any signs of damage.
Color temperature is measured in Kelvin (K). Halogen bulbs typically have a color temperature around 3000K, which produces a yellowish light. Xenon HID bulbs can range from 4300K to 8000K or higher, with higher numbers producing a blue or white light. LED bulbs come in various color temperatures and it’s essential to check local guidelines.
Electrical System Problems Affecting Light Output
Even with new bulbs, your fog lights can still be dim if there are electrical problems. Issues such as low voltage, corrosion, and faulty wiring can all restrict the electricity flowing to your fog lights, reducing their brightness. Regularly checking the electrical system is a good way to maintain your vehicle’s fog lights to work effectively.
- Low Voltage: A low voltage supply to the fog lights can drastically reduce their brightness. This is like trying to light a fire with not enough fuel.
- Corrosion in Connectors: Corrosion on the electrical connectors is a common problem that can reduce the flow of electricity to your fog lights. It’s like a clogged pipe that stops water from flowing.
- Faulty Wiring: Damaged or loose wiring can interrupt the flow of electricity, causing your fog lights to be dim or not work at all. Think of it as a break in the path that electricity must travel.
- Grounding Issues: A poor ground connection can also cause dim fog lights. The ground connection completes the electrical circuit, and if it’s not working correctly, the lights will suffer.
- Fuse Problems: A blown fuse is a common culprit for fog lights that don’t work at all, but a partially damaged fuse can also cause dimness.
The voltage can be low for several reasons, including a weak battery or a problem with the alternator, which charges the battery. Wiring issues, such as corrosion or damage, can also cause voltage drops. When the voltage is too low, the bulbs don’t receive enough power, and they won’t shine as brightly as they should. You can check the voltage reaching the fog lights with a multimeter to make sure it’s at the correct level.
Corrosion can build up on the connectors due to moisture, salt, and other environmental factors. This corrosion can create resistance, reducing the voltage reaching the bulbs. You will need to clean the connectors to restore the electrical connection. Cleaning the connectors is usually done using electrical contact cleaner, which removes the corrosion and ensures a good connection.
Wiring can be damaged by physical impact, heat, or wear and tear. Loose wires create poor connections, leading to voltage drops and reduced light output. Check the wiring for any signs of damage, such as frayed insulation or broken wires. Secure or replace any damaged wiring and make sure that all connections are secure and tight.
A ground connection is a path for electricity to return to the battery. Corrosion, loose connections, or rust can compromise this path, causing a drop in voltage. Inspect the ground wires and their connections, and clean any corrosion or rust. You can also try using a different ground location to ensure a good electrical connection.
Fuses are designed to protect the electrical circuits from overcurrent. If a fuse is damaged or blown, it can disrupt the flow of electricity. Check the fuse box and
Fog Light Lens Issues: Obstacles to Brightness
Over time, the lenses of your fog lights can become clouded or damaged, which can reduce their effectiveness. This is comparable to looking through a dirty window. The condition of the lens directly affects how much light passes through, influencing the brightness of your fog lights. Maintaining the lenses is key for optimal light output.
- Clouded or Yellowed Lenses: This is a common issue where the lens becomes hazy, reducing light transmission. This is similar to looking through a dirty or fogged-up window.
- Scratches and Cracks: Scratches or cracks on the lens can scatter the light and reduce brightness. The more damage, the less light that gets through.
- Internal Condensation: Moisture inside the fog light housing can also reduce brightness and could lead to corrosion.
- Dirt and Debris: Dust, dirt, and other debris can accumulate on the lens, blocking light output. Regular cleaning is a simple but vital maintenance task.
- Lens Material: The type of material used for the lens can affect how it performs over time. Some materials resist yellowing and degradation better than others.
Over time, the plastic lenses of fog lights can become cloudy or yellowed due to exposure to UV light, road debris, and general wear and tear. This reduces the amount of light that can pass through the lens, making the fog lights appear dimmer. You can restore the clarity of your lenses using specialized headlight restoration kits that polish away the top layer of the plastic.
Scratches can be caused by road debris or contact with other objects. These imperfections scatter the light as it passes through the lens, reducing the amount of light that reaches the road. Cracks can allow moisture to enter the fog light housing, which can further damage the bulb and electrical components. If the lens is severely damaged, replacement may be necessary.
Condensation can occur due to temperature changes or small cracks in the lens or housing. This moisture fogs up the lens from the inside, significantly reducing light output. If you see condensation, inspect the lens and housing for any damage. Also, ensure the vents in the housing are clear, as they help regulate internal air pressure and reduce moisture buildup. If the condensation is severe, it’s advisable to check for water leaks.
Road grime, dirt, and other debris can build up on the lens and obstruct the light. This reduces the amount of light that reaches the road. Regular cleaning of the lenses with a mild soap and water can improve light output. Make this a habit when you wash your vehicle. Be sure to dry the lenses thoroughly to avoid water spots or streaks.
Most modern fog light lenses are made of polycarbonate plastic, which is durable but can still degrade over time. High-quality lenses are often treated with UV-resistant coatings to help them last longer. When replacing lenses, select those that are known for their clarity and durability.
Step-by-Step Solutions to Brighten Fog Lights
Once you understand why your fog lights aren’t bright enough, it’s time to take action. This section provides a step-by-step guide to help you find and fix the problem. The process will involve a few basic tools and some knowledge of car maintenance, but it can often be done at home. Following these steps can help you restore your fog lights’ brightness and improve visibility.
Inspecting and Replacing Fog Light Bulbs
The bulb is the most common reason for dim fog lights, so checking and replacing it is often the first step. Inspecting the bulbs can quickly identify whether they have burned out or are nearing the end of their lifespan. This process involves checking the bulbs, selecting replacements, and safely installing them.
- Accessing the Fog Lights: Begin by locating and accessing the fog lights. This usually involves finding the area under the bumper or in the front fascia.
- Removing the Old Bulbs: Carefully disconnect the wiring harness from the fog light assembly and remove the old bulb. Be gentle to prevent damage.
- Choosing Replacement Bulbs: Select replacement bulbs that match the original type and wattage specified in your vehicle’s manual.
- Installing the New Bulbs: Install the new bulbs into the fog light housing, making sure they are securely in place.
- Testing the New Bulbs: Turn on your fog lights to confirm that the new bulbs work correctly.
Consult your vehicle’s manual for the exact location of the fog lights and the most effective way to access them. Depending on your car’s design, you might need to reach up from under the bumper or remove a panel. Always make sure the vehicle is parked on a level surface and that the engine is turned off before you start.
Once you’ve accessed the fog light, locate the electrical connector that attaches to the bulb. Gently detach the connector from the bulb. Next, remove the bulb from the housing. Some bulbs are held in place with clips or a twist-and-lock mechanism. Review your vehicle’s manual to understand the specific method required for the bulb type in your car. Wear gloves to keep oil from your skin from touching the glass of the new bulb.
Check the markings on the old bulb or consult your car’s manual to find the correct bulb type. You can also find this information online or at an auto parts store. Using the right bulb is vital to ensure optimal brightness and avoid damage to your electrical system. Select bulbs from a trusted brand that can provide quality and longevity.
Carefully insert the new bulb into the housing, ensuring it sits correctly in its socket. The bulb should fit snugly. Once the bulb is in place, reconnect the wiring harness. Ensure the connection is secure. If the bulb doesn’t sit properly or the connector doesn’t attach easily, review the steps.
Once the bulbs are installed, turn on the fog lights to check the brightness and alignment. You may need to start the car or turn on the headlights to activate the fog lights. If the fog lights light up brightly, the problem was likely with the old bulbs. If they don’t light up, review the electrical connections or check the fuse.
Checking and Fixing Electrical Connections and Wiring
If new bulbs don’t solve the problem, the next step is to examine the electrical system. Electrical issues can significantly reduce fog light brightness. Problems include loose connections, corrosion, and damaged wiring. This part requires some basic electrical knowledge, but it’s often something you can do yourself with basic tools.
- Inspecting Connectors for Corrosion: Check the connectors for corrosion or dirt. These can reduce the flow of electricity, dimming the lights.
- Checking Wiring for Damage: Inspect the wiring leading to the fog lights for any damage, such as frayed wires, cuts, or loose connections.
- Testing for Voltage Drops: Use a multimeter to measure the voltage reaching the fog lights. Compare it to the expected voltage to see if there is a voltage drop.
- Repairing or Replacing Wiring: Fix any damaged wiring by using proper connectors, or replace the wiring if necessary.
- Cleaning Ground Connections: Check and clean the ground connections for the fog lights. A bad ground can greatly reduce their brightness.
Inspect the electrical connectors for the fog lights. Look for any signs of corrosion, which can appear as a white or greenish buildup on the metal contacts. Corrosion restricts the flow of electricity, which causes the lights to be dimmer. Disconnect the connectors and carefully clean them using electrical contact cleaner and a small brush or cloth. Allow the connectors to dry before reconnecting.
Carefully inspect the wiring for the fog lights, looking for any visible damage like cuts, fraying, or loose connections. Damaged wiring can cause electrical shorts or reduce the voltage reaching the bulbs. Trace the wires from the fog lights back to their source, checking for damage along the way. If you find any damaged wiring, repair it by splicing in new wire or replacing the entire wire if the damage is severe. Be sure to use wire connectors rated for automotive use and ensure that all connections are secure and insulated.
To check for voltage drops, use a multimeter to measure the voltage reaching the fog lights when they are turned on. Compare this reading to the expected voltage. If the voltage is significantly lower than the standard 12 volts, there’s a voltage drop somewhere in the circuit. Test the voltage at different points along the wiring, such as the fuse box and the connector at the bulb, to pinpoint where the drop is happening. This helps to identify any resistance in the circuit caused by corrosion or damaged wiring.
Repair any damaged wiring you discover, ensuring you use appropriate connectors and electrical tape to prevent short circuits. In cases of severe damage, the entire wiring harness might need to be replaced. Proper wiring repairs are vital to restoring the lights to full brightness.
Examine the ground connections for the fog lights, which often attach the wiring to the vehicle’s frame or body. A corroded or loose ground connection can reduce the voltage supply to the bulbs, causing them to be dim. Locate the ground connection points and disconnect them. Clean the ground connection using a wire brush to remove any rust or corrosion. Securely reconnect the ground connection, ensuring a firm and solid contact. This helps to improve the ground circuit and improve the lights’ performance.
Lens Restoration and Maintenance Techniques
Cloudy or damaged lenses can drastically reduce the brightness of your fog lights. Lens restoration techniques can restore clarity and improve light output. This involves cleaning, polishing, and sometimes applying protective coatings to help extend the life of your lenses. If the damage is too serious, replacement is the way to go.
- Cleaning the Lens Surface: Start by cleaning the lens with soap and water to remove any dirt and debris.
- Assessing Lens Damage: Inspect the lens for scratches, yellowing, or other damage to decide the best restoration method.
- Using a Polishing Compound: Apply a polishing compound to remove minor scratches and restore clarity. Follow the instructions on the product.
- Sanding the Lens (If Necessary): For more severe damage, you may need to sand the lens. Start with a fine-grit sandpaper and work your way up to a finer grit before polishing.
- Applying a Protective Coating: After polishing, apply a protective coating to prevent future damage and UV exposure.
Begin by washing the fog light lenses with soap and water. Use a soft sponge or microfiber cloth to avoid scratching the lens surface. Rinse thoroughly and allow the lens to dry completely. This initial cleaning removes surface contaminants, which can improve the effectiveness of the subsequent restoration steps. It’s often surprising how much of a difference this simple step can make.
Examine the lens for any scratches, yellowing, or other damage. Minor imperfections might be fixed with polishing, while severe damage may need more extensive restoration. Yellowing and cloudiness can often be addressed with a polishing compound or a headlight restoration kit. Deep scratches might require a more aggressive approach, such as sanding before polishing. Be sure to address any cracks or significant damage. If they’re present, it’s advisable to replace the lens or the entire fog light assembly.
Apply a polishing compound specifically designed for plastic lenses. Apply a small amount of the compound to a clean microfiber cloth or a polishing pad. Rub the compound onto the lens using a circular motion. Apply firm, even pressure. Continue polishing until the lens becomes clear, paying attention to any areas with cloudiness or minor scratches. Wipe away any excess compound and inspect the results. Repeat as needed to achieve the desired clarity.
If the lens has more severe damage, you might need to sand the lens. Begin by cleaning the lens and drying it completely. Then, use fine-grit sandpaper, typically around 1000 to 2000 grit, and lightly sand the lens surface. Use water or a sanding lubricant to keep the lens and sandpaper lubricated. Sand in a circular motion, covering the entire lens surface evenly. After sanding, wipe the lens clean and repeat with finer grades of sandpaper until you achieve a smooth surface. Finish by polishing the lens with a polishing compound to restore its clarity.
After polishing the lens, it’s vital to protect it from future damage and UV exposure. Apply a clear protective coating or sealant specifically designed for plastic lenses. This coating can help prevent future yellowing, clouding, and damage from environmental factors. Apply the coating evenly, following the manufacturer’s instructions, and allow it to dry completely. Reapply the coating as needed to maintain its protective properties. This step helps to extend the life of your restored lenses.
Real-Life Examples and Scenarios
To better grasp these concepts, let’s explore some real-life situations that show how the solutions can be used. These examples help illustrate what can happen when fog lights are not bright enough and how to fix them. They provide insights into the problems people face and what can be done to solve them.
- Scenario 1: Dim Fog Lights Due to Corrosion
- Scenario 2: Fog Lights Dimmed by Yellowed Lenses
- Scenario 3: Voltage Drop Causing Reduced Brightness
A driver noticed that their fog lights were not working, especially during rainy nights. They checked the bulbs and realized that these were fine. They decided to check the wiring and connectors. Upon inspection, they found significant corrosion on the electrical connectors. After cleaning the connectors with electrical contact cleaner, the fog lights started working as bright as new. This resolved the issue, and the driver enjoyed improved visibility.
A car owner noticed that their fog lights were not illuminating the road. They determined the bulbs and wiring were working correctly. On closer inspection, the lenses were yellowed and cloudy. Using a headlight restoration kit, they cleaned, sanded, and polished the lenses, then applied a protective coating. This made a significant difference in brightness. The driver could now see clearly during foggy conditions.
A vehicle’s fog lights appeared dim. After new bulbs, the lights were still dim. With a multimeter, they checked the voltage at the battery and at the fog lights. They found a significant voltage drop. Inspecting the wiring, they found a loose ground connection. Tightening the ground connection solved the voltage drop issue, and the fog lights returned to their full brightness.
Consider these scenarios for how the solutions work in practice. By following these steps, you can tackle the problems and improve the performance of your fog lights. Being able to take action makes driving safer and increases visibility during difficult weather conditions.
| Problem | Cause | Solution |
|---|---|---|
| Fog Lights Not Bright Enough | Burned-out Bulb | Replace the bulb. |
| Fog Lights Not Bright Enough | Corroded Connector | Clean connectors. |
| Fog Lights Not Bright Enough | Yellowed Lens | Restore the lens. |
| Fog Lights Not Bright Enough | Loose Ground Connection | Tighten/clean the connection. |
| Fog Lights Not Bright Enough | Wiring Damage | Repair or replace the wiring. |
Frequently Asked Questions
Question: How often should I replace my fog light bulbs?
Answer: It’s a good idea to check your fog light bulbs annually or every 2 years, depending on usage. If you notice any dimming or reduced brightness, replace them immediately.
Question: Can I use higher wattage bulbs in my fog lights?
Answer: It’s generally not recommended. Using higher wattage bulbs can overheat the wiring and the fog light housing, potentially causing damage or even a fire. Always use bulbs with the specified wattage.
Question: What’s the best way to clean my fog light lenses?
Answer: Use soap and water to wash the lenses. Rinse thoroughly and dry completely. For more stubborn issues, headlight restoration kits are available that can remove cloudiness and scratches.
Question: Why do my fog lights keep burning out quickly?
Answer: Frequent bulb burnout could be due to several reasons, including loose connections, a faulty voltage regulator, or vibrations. Check the connections, and if the issue persists, have your electrical system checked by a professional.
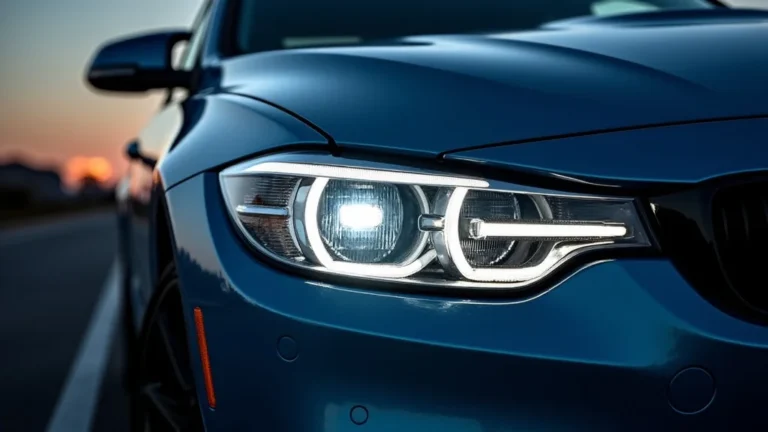
Question: How do fog lights differ from headlights?
Answer: Fog lights are typically mounted lower to the ground and are designed to project a wide, flat beam that helps to reduce glare in foggy conditions. Headlights are positioned higher and have a more focused beam to illuminate the road ahead.
Final Thoughts
Keeping your fog lights bright is vital for your safety while driving. If you’ve been dealing with the issue of fog lights not bright enough, you now have the tools to discover the reason and find a fix. From checking your bulbs to examining electrical connections and lenses, each step plays an important role. When you understand the basic principles, you can take action.
Whether you’re dealing with dim lights, foggy weather, or any other challenging driving condition, you’re now equipped to take charge. Start by checking your bulbs, the connections, and the lenses. By being proactive, you’ll make every drive safer. With a little effort, your fog lights can be restored to their original brightness, ensuring you get the best visibility in any driving condition. So, take action today and stay safe on the road!