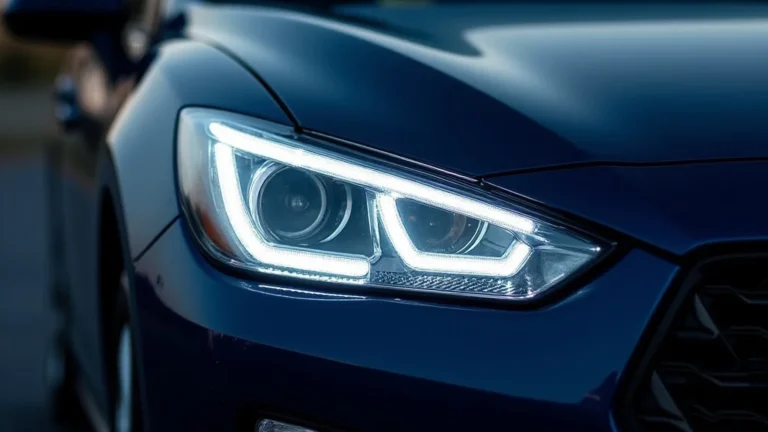
How to Convert Halogen Headlights to LED: A Simple Guide
Switching your car’s headlights can seem tricky, especially if you’re a beginner. The thought of messing with car parts might feel a little overwhelming. But don’t worry! How to convert halogen headlights to led is a pretty common upgrade, and it’s easier than you might think. This guide is here to help you every step of the way, making the whole process simple and straightforward. We’ll explore the basics, the necessary tools, and the exact steps to get those bright, efficient LED headlights installed. Let’s get started!
Choosing the Right LED Headlights
Before you begin the conversion, picking the right LED headlights is very important. There are many options, and making the correct choice ensures a good outcome. It’s like picking the right size shoe – if it doesn’t fit, it doesn’t work! This section will assist you in figuring out what to look for when choosing LED headlights. Consider factors like bulb type, brightness, color temperature, and of course, compatibility with your car model. These elements determine the quality of light and the overall look of your car.
Bulb Types and Compatibility
One of the first things to consider is the bulb type. Each vehicle uses a specific type of headlight bulb, like H1, H4, H7, or others. You’ll need to figure out which type your car requires. This information is usually found in your car’s owner’s manual or on the old halogen bulb itself. Incorrect bulb types lead to installation issues or poor performance. Always double-check your vehicle’s requirements before making a purchase. Knowing your bulb type will also help you find the correct LED
- H4 Bulbs: These are a very popular type, often found in older vehicles. They typically contain both high and low beam functions in a single bulb. If your car uses H4 bulbs, finding an LED replacement will be relatively easy.
- H7 Bulbs: Primarily used for low beams, and are also often present in high beam setups. Make sure you confirm whether your vehicle uses H7 bulbs for both high and low beam before you purchase.
- 9005/HB3 & 9006/HB4 Bulbs: These types are often used for high and low beams, respectively, in many modern vehicles. They’re common in North American cars. Ensure you get the correct number.
- Checking the Owner’s Manual: Always consult your car’s manual. This will detail the exact bulb type and often provide other useful information about upgrading your headlights.
Brightness and Color Temperature
Brightness is often measured in lumens. The higher the lumen count, the brighter the light. Color temperature, measured in Kelvin (K), affects the color of the light. LED headlights often have a color temperature that ranges from cool white to blueish white. Choosing the right brightness and color temperature will significantly impact your night visibility. A good balance provides a strong, clear beam without being too dazzling for other drivers. The brightness should be adequate for safe driving, especially on poorly lit roads, while the color temperature will affect the aesthetics. Too bright and you may cause issues for other motorists.
- Lumens: A lumen measures the total amount of visible light emitted by a light source. For LED headlights, look for a lumen rating that offers excellent visibility.
- Color Temperature (Kelvin): The color temperature of your headlights affects how the light appears. Cooler colors (higher Kelvin) appear whiter or bluish, while warmer colors (lower Kelvin) appear more yellow. For driving, 4000K-6000K is typically a good range.
- Beam Pattern: The beam pattern is how the light is distributed. It’s important to choose LED headlights that provide a good beam pattern that doesn’t blind oncoming drivers.
- Consider Driving Conditions: If you frequently drive in foggy conditions, a slightly warmer color temperature may offer better visibility.
Other Important Considerations
Other things you should look into include the quality of the LED chips (which impacts the lifespan and light output), the construction materials of the headlight (aluminum is common for heat dissipation), and the overall design. Consider how well the LED headlights dissipate heat, as this impacts their lifespan. Additionally, you may want to look into additional features, such as built-in fans or heat sinks, to prevent overheating. Warranties are always a good idea, as they offer protection against defects. These details will impact the longevity and usability of your upgraded headlights, so do some searching and find the best fit for your needs and budget.
- Heat Dissipation: LED headlights generate heat. Make sure the headlights you buy have a good heat dissipation system to extend their lifespan.
- Quality of LED Chips: The quality of the LED chips affects the brightness and longevity of the headlights. Research the brands and read reviews to assess the quality of the chips used.
- Warranty: Look for LED headlights with a warranty, which can cover manufacturing defects and provide peace of mind.
- Reviews and Ratings: Read reviews from other buyers to determine the best LED headlights.
Tools and Materials You’ll Need
Before you begin the installation, collect the tools and materials you’ll need. Gather everything beforehand to make the process smoother and faster. Having the correct tools prevents delays and ensures a well-done job. Here’s a list to help prepare for your LED headlight conversion. Remember that proper preparation significantly simplifies the process.
Essential Tools
A few tools are essential for the conversion. Many of these tools are things you may already own. If not, it’s worth it to purchase these before starting. Remember, having the right tools makes the task safer and ensures everything goes smoothly.
- Gloves: Wear gloves to keep your hands clean and safe. They also help you grip things better.
- Screwdrivers (Phillips and Flathead): These are usually needed to remove screws or clips holding the headlight assembly in place.
- Socket Set or Wrenches: You’ll need these to remove any bolts. Make sure you have a range of sizes.
- Pliers: Pliers are useful for removing clips and connectors.
- Work Light or Flashlight: A good light source is a must-have for visibility. It helps you see what you’re doing in the dark corners of the car.
Materials to Have Ready
In addition to tools, gather these materials. Make sure you have the new LED headlights. Having extra supplies like zip ties can be handy if any clips break during removal. This preparation will make the installation efficient.
- New LED Headlights: Make sure you have purchased the correct LED headlights, as described above.
- Owner’s Manual: Keep your vehicle’s owner’s manual handy. It provides specific instructions for your vehicle.
- Zip Ties or Electrical Tape: These can be useful for securing wires or components.
- Cleaning Supplies: If you need to clean the headlight lenses, have some glass cleaner and a microfiber cloth ready.
Safety First
Before beginning any work on your car, prioritize safety. Safety should be your top concern, ensuring a safe experience. The following steps will make sure you’re following safe practices.
- Disconnect the Battery: Disconnect the negative (black) terminal of your car battery before beginning work. This prevents electrical shorts.
- Wear Safety Glasses: Wear safety glasses to protect your eyes.
- Work in a Well-Lit Area: Make sure you’re working in a well-lit place.
- Use Jack Stands (If Necessary): If you’re working under your car, make sure you use jack stands.
Step-by-Step Installation Guide
Now, let’s proceed with the actual installation of your LED headlights. This section provides a detailed, step-by-step guide to help you convert your headlights. Follow these steps carefully to ensure a successful outcome.
Preparing Your Vehicle
Before you get started, prepare your vehicle properly. This includes essential safety steps and accessing your headlights. The preparation work is critical. It ensures both your safety and access to the necessary components.
- Park Your Vehicle: Park your car on a level surface and engage the parking brake.
- Disconnect the Battery: Locate the negative terminal of your car battery and disconnect it. This is a critical safety step to prevent electrical shocks.
- Locate the Headlight Assembly: Open the hood of your car and locate the headlight assembly. The exact location may vary depending on your car model.
- Remove Any Protective Covers: Some cars have covers or panels around the headlights. Carefully remove these to access the headlight assembly.
Removing the Old Halogen Bulbs
The next step is to remove the old halogen bulbs. This part involves unscrewing, unclipping, or detaching the halogen bulbs. If you follow these steps carefully, you shouldn’t have any issues. Take your time, and don’t rush through this part of the process.
- Unplug the Wiring Harness: Carefully unplug the wiring harness from the back of the halogen bulb.
- Release the Retaining Clips or Screws: Depending on your vehicle, you may need to release retaining clips or unscrew screws to remove the bulb. Your owner’s manual will show you the exact procedure.
- Remove the Halogen Bulb: Once the clips or screws are released, gently pull the halogen bulb out of the headlight assembly. Be careful not to touch the glass part of the bulb, as this can affect its lifespan.
- Store the Halogen Bulbs Safely: Keep the old halogen bulbs in a safe place. You may want to keep them in case you need to switch back.
Installing the New LED Headlights
Once you’ve removed the old halogen bulbs, it’s time to install the new LED headlights. Make sure the LED bulbs are properly aligned and seated, as this affects their performance. This section will guide you through the process, ensuring correct and effective installation.
- Insert the LED Bulb: Insert the new LED bulb into the headlight assembly, aligning it correctly.
- Secure the LED Bulb: Secure the LED bulb with the retaining clips or screws. Make sure it’s seated firmly.
- Plug in the Wiring Harness: Reconnect the wiring harness to the back of the LED bulb. Make sure the connection is secure.
- Test the LED Headlights: Before you close up the headlight assembly, turn on your headlights to ensure the LED bulbs are working correctly.
Final Steps and Testing
Once the LED bulbs are installed and tested, it’s time for the final touches. Putting everything back together and checking the beam pattern are essential to make sure everything looks right. These steps will make sure everything is properly installed and working. Checking your work is an important step in any process.
- Reassemble the Headlight Assembly: Carefully reassemble the headlight assembly, ensuring all clips and screws are securely in place.
- Replace Any Protective Covers: Replace any covers or panels you removed earlier.
- Reconnect the Battery: Reconnect the negative terminal of your car battery.
- Test the Headlights Again: After reconnecting the battery, turn on your headlights again to make sure everything is still working.
- Check the Beam Pattern: Park your car facing a wall. Turn on your headlights and check the beam pattern to ensure it’s correct.
Addressing Potential Issues
Even with careful planning and following the instructions, some issues may arise during the conversion. You must know how to troubleshoot and resolve these issues. Knowing how to resolve them will make the whole process easier.
Flickering or Not Working
Flickering or complete failure of the LED headlights is a common problem. This typically results from incompatibility with your car’s electrical system. This can be resolved with additional components or adjusting the wiring. It’s useful to know the root causes and how to address them.
- Check Connections: Make sure all wiring connections are secure. Loose connections are a common cause of flickering.
- CANbus Errors: Some vehicles have a CANbus system that monitors the headlights. LEDs may cause errors. You may need a CANbus adapter.
- Polarity Issues: Verify the polarity of the wiring connections. If the polarity is incorrect, the LED may not work.
Beam Pattern Problems
Incorrect beam patterns can result from improperly installed LED bulbs or incompatibility issues. A bad beam pattern can reduce visibility and potentially blind other drivers. Taking the time to adjust the beam pattern ensures optimum light distribution. Knowing how to correctly adjust the beam is essential.
- Adjust the Headlight Alignment: Many headlights have adjustment screws to change the beam’s direction. Use these to adjust the beam height and direction.
- Ensure Proper Bulb Orientation: Make sure the LED bulb is oriented correctly in the headlight housing. Incorrect positioning can mess up the beam pattern.
- Check for Obstructions: Check to see if there are any obstructions. Sometimes, parts of the car can interfere with the beam pattern.
Other Common Problems
Besides flickering and beam pattern issues, other problems may occur. These can include issues with the lights turning on, overheating, and other performance issues. Being aware of these issues will help you troubleshoot them effectively.
- Overheating: LED headlights can overheat if they don’t have adequate heat dissipation. Make sure the cooling system is working correctly.
- Dimming: If your headlights are dim, it can be due to a poor connection or low voltage.
- Water Intrusion: Ensure the headlight assembly is sealed properly to prevent water from entering.
Frequently Asked Questions
Question: Is it legal to convert halogen headlights to LED?
Answer: The legality depends on your location and the specific headlights. In some areas, it’s legal if the LED headlights meet the same standards as the original halogen headlights. Check local laws.
Question: Do I need any special tools for the conversion?
Answer: You’ll typically need basic tools like screwdrivers, pliers, and a socket set. The specific tools depend on your car’s model, so check your owner’s manual.
Question: Will converting to LED affect my car’s warranty?
Answer: It could potentially void the warranty on your headlights or electrical system. Check your car’s warranty details before converting.
Question: How long do LED headlights last compared to halogen?
Answer: LED headlights typically last much longer, often 20,000 to 50,000 hours, compared to halogen bulbs, which last around 1,000 hours.
Question: Can I install LED headlights myself, or do I need a professional?
Answer: Many people install LED headlights at home, if you’re comfortable with basic car maintenance. If you’re not comfortable, then hiring a professional is recommended.
Final Thoughts
Switching from halogen to LED headlights can make a big difference in how you see the road and how well others can see you. By knowing how to convert halogen headlights to led and following the steps above, you can improve your car’s lighting. The most important things are to pick the right LED bulbs for your car, have the necessary tools ready, and follow the installation instructions carefully. Remember, safety should always be your top concern when working on your vehicle. If you’re not sure about any part of the process, it’s always a good idea to ask for help from a professional. The result will be safer and brighter nighttime driving. Enjoy the improved visibility!