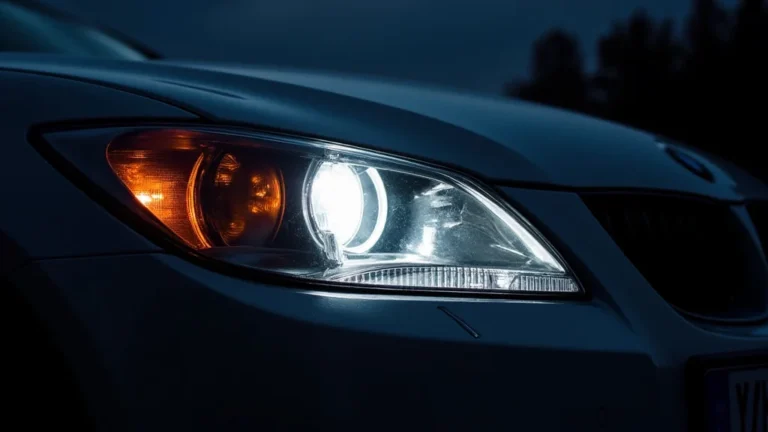
How to Test Headlight Relay for a Brighter Drive
Figuring out how to test headlight relay can seem tricky if you’re new to car repair. It involves some basic electrical knowledge, which might sound challenging at first. Don’t worry, many people find this process manageable with the right guidance. This article will show you a straightforward, step-by-step method to test your headlight relay, so you can diagnose and fix your car’s headlight issues. Let’s get started, and you’ll be on your way to brighter lights in no time!
What a Headlight Relay Does
A headlight relay is a small electrical switch that helps your headlights work correctly. Its main job is to control the flow of power to your headlights. Think of it like a gatekeeper for electricity. When you turn on your headlights, the relay receives a signal and opens the “gate,” allowing power to flow from the battery to the headlights. Without a working relay, your headlights might not turn on at all, or they could flicker or dim. Relays are essential for protecting the car’s electrical system, as they reduce the load on the headlight switch and other components.
How Relays Work
Relays function using electromagnetism. Inside the relay, there’s a coil of wire wrapped around an iron core. When current flows through this coil, it creates a magnetic field. This magnetic field pulls a switch closed, allowing power to flow through to the headlights. When the signal to turn off the headlights is sent, the current to the coil stops, the magnetic field disappears, and the switch opens, cutting off power to the lights. The design prevents excessive current from running through the switch in the car’s cabin, protecting the sensitive controls there. Relays are durable and reliable but can fail over time.
- Electromagnetic Coil: This coil is the heart of the relay. When electricity flows through it, it generates a magnetic field. This field is what causes the switch inside the relay to change state.
- Switch Contacts: These contacts are the physical parts that open and close to allow or block the flow of electricity to the headlights. They are usually made of a conductive metal to ensure a good connection.
- Power Supply: The relay requires a power supply to energize the coil and switch the contacts. This power typically comes from the car’s battery.
- Control Signal: A low-current signal, often from the headlight switch, triggers the relay. This signal activates the coil, initiating the process of switching power to the headlights.
Common Relay Problems
Relays can fail due to several issues. Over time, the contacts inside the relay can wear down, leading to poor connections and intermittent headlight operation. Corrosion or oxidation on the contacts can also cause problems, restricting the flow of electricity. Furthermore, heat and vibration can damage the internal components of the relay, causing it to malfunction. You might notice your headlights flickering or turning off randomly. These symptoms often indicate a failing relay.
Consider this real-world example. A driver’s headlights began flickering, especially when going over bumps. After testing the headlight relay, it was found that the contacts were corroded, causing an unreliable connection. Replacing the relay solved the issue, restoring full functionality to the headlights. This shows how crucial a functioning relay is for safe driving at night.
Necessary Tools for Testing
Before you start testing how to test headlight relay, you’ll need a few essential tools. These tools will help you safely and effectively diagnose the relay. Having the right equipment ensures you can perform the test correctly and accurately. Safety is essential when dealing with any electrical system in a vehicle. Always disconnect the negative battery cable before working on electrical components. This helps prevent short circuits and other potential hazards.
Essential Tools
The tools required are relatively basic and easily accessible. A multimeter is the most important tool for electrical testing, allowing you to measure voltage, resistance, and continuity. A wiring diagram specific to your car model is also beneficial, helping you identify the relay and its related wiring. A set of pliers and a screwdriver will be needed to remove and replace the relay. Safety glasses are crucial to protect your eyes from debris.
- Multimeter: This is the primary tool for electrical testing. Use it to check voltage, resistance, and continuity. Ensure it’s set to the correct settings before each test.
- Wiring Diagram: A car’s wiring diagram shows the electrical layout. It’s essential for locating the relay and identifying its terminals.
- Pliers: Pliers are useful for removing and installing the relay, particularly if it’s tightly placed.
- Screwdriver: A screwdriver might be needed to remove any covers or panels to access the relay.
- Safety Glasses: Protect your eyes from any debris or sparks that might occur during the testing process.
Safety First
When working with your car’s electrical system, safety should always be the priority. Disconnect the negative battery cable before starting any work. This prevents any accidental short circuits. Avoid touching any exposed wires or connections while the battery is connected. If you are unsure about any steps, consult a professional mechanic. It’s always better to be cautious when dealing with electricity.
For example, a technician, while diagnosing a headlight issue, failed to disconnect the battery. When a wrench accidentally touched a live wire, it caused a significant short circuit, damaging several electrical components. This emphasizes the importance of following safety procedures. Always disconnect the battery and wear appropriate safety gear.
Testing the Headlight Relay Step by Step
Now, let’s explore how to test headlight relay. This section will walk you through a detailed, step-by-step process. This method will allow you to determine if your relay is working correctly. Follow these instructions precisely to get accurate results. The process includes several tests involving a multimeter and requires a clear understanding of the relay’s function within the headlight system.
Locating the Relay
The first step is locating the headlight relay in your vehicle. It is generally found in the fuse box or a relay box, usually in the engine compartment or under the dashboard. Consult your car’s manual to find its exact location. Many fuse boxes have diagrams showing which relay controls which component. Once you find the correct relay, note its position and any markings, as they can be helpful during testing and replacement.
Here is an example. A driver with dim headlights consulted their car’s manual. The manual showed the exact location of the headlight relay in the engine bay fuse box. This allowed the driver to easily access the relay. The manual also showed the pin layout, which helped with the multimeter testing. This highlights the importance of using your car’s manual for essential information.
Visual Inspection and Removal
Before testing, inspect the relay for any visible damage. Look for signs of burning, melting, or corrosion. Such visible damage often means the relay is faulty. Then, carefully remove the relay from its socket. Use a pair of pliers if necessary. Note the orientation of the relay in its socket before removal to make sure you put it back in correctly if it’s working.
Imagine you notice your headlights are dim. Upon inspection, the headlight relay shows signs of burning. This visual clue indicates that the relay is likely faulty. This situation shows the importance of visual inspection to save time.
Continuity Test
Set your multimeter to the continuity setting. Place the probes on the terminals of the relay that correspond to the switch contacts (usually terminals 30 and 87, as indicated in a relay diagram). The relay must be triggered to make the continuity test work. You can trigger the relay with a 12V power supply connected to the correct terminals (85 and 86). If the relay is working correctly, the multimeter should show continuity (a closed circuit), indicating a low resistance or a beep sound. If there’s no continuity, the contacts inside the relay are not closing properly.
- Prepare the Multimeter: Set your multimeter to the continuity setting. This setting is usually indicated by a symbol that looks like a sideways horseshoe or an audible beep. Make sure the multimeter is working correctly by touching the probes together. You should hear a beep, confirming the multimeter’s functionality.
- Identify the Contacts: Locate the terminals on the relay that correspond to the switch contacts (usually terminals 30 and 87). Refer to your car’s wiring diagram or the relay’s markings if you are unsure. This is where you will place the multimeter probes.
- Trigger the Relay: To test the switch contacts, you must simulate the relay’s operation. This is done by applying power to the relay’s coil. Connect a 12V power source to the coil terminals (terminals 85 and 86) on the relay. Ensure you connect the positive and negative terminals correctly.
- Test for Continuity: Place one multimeter probe on terminal 30 and the other on terminal 87. If the relay is working correctly and the coil is energized, the multimeter should display continuity. This means there is a complete electrical path through the relay contacts.
- Check the Results: If the multimeter beeps or shows a low resistance (typically near zero ohms), the switch contacts are closing and the relay is functioning. If there is no beep and the meter shows open circuit (OL or infinity), the contacts are not closing, and the relay is likely faulty.
Voltage Test
Use the multimeter to check for voltage at the relay terminals. With the relay plugged in and the headlights on, measure the voltage at the terminals that supply power to the headlights (usually terminal 30 or 87). You should see a voltage close to your car’s battery voltage (around 12V). If no voltage is present, the problem might be with the wiring or a blown fuse. If voltage is present, but the headlights still don’t work, the relay may not be making a proper connection, or the headlights themselves may have issues.
Consider a situation. A driver’s headlights failed to turn on. The voltage test at the relay’s power terminal revealed that no voltage was present. This led to a further investigation. It was discovered that a fuse was blown. Replacing the fuse fixed the problem. This shows the importance of checking voltage to identify and resolve electrical issues.
Resistance Test
With the relay removed, check the resistance across the coil terminals (usually 85 and 86). The resistance should be within a specific range, typically between 50 and 200 ohms, depending on the relay’s specifications. If the resistance is very high or infinite, the coil is broken, and the relay must be replaced. A short circuit or very low resistance might indicate damage, too.
Here’s how a short-circuit might happen. If the insulation of the relay coil breaks down, the wires can touch, creating a low-resistance path. The result is excessive current draw. This would cause the fuse to blow. This stresses the importance of regularly inspecting the insulation of electrical components.
Possible Issues and Solutions
During the testing of how to test headlight relay, you might encounter various problems. Understanding these issues helps you diagnose and resolve headlight problems. You will likely find the reason for the failure of your car’s headlight system. Several factors contribute to headlight issues, ranging from blown fuses to damaged wiring. Each problem requires a specific solution.
Headlights Don’t Turn On
If your headlights do not turn on, start by checking the fuse that protects the headlight circuit. A blown fuse is a common cause. Test the fuse with a multimeter to be sure. If the fuse is good, inspect the relay. Test the relay’s voltage and continuity as described. Replace the relay if it is faulty. Wiring issues or a bad headlight switch could also be the problem.
- Blown Fuse: The most common problem.
- Faulty Relay: Test the relay using the methods in this guide. Replace the relay if it doesn’t function correctly.
- Wiring Problems: Check for broken or loose wires in the headlight circuit. Repair or replace any damaged wiring. Make sure all connectors are clean and securely attached.
- Headlight Switch: A malfunctioning headlight switch can also cause this problem. Test the switch using a multimeter.
Headlights Flickering or Dimming
Flickering or dimming headlights often indicate an intermittent electrical connection issue. A faulty relay is a common culprit. If the relay contacts are corroded or worn, the headlights might flicker. Replacing the relay can often resolve this problem. Other causes can be poor ground connections. Check for corrosion on the ground wire connections. Also, loose wiring can cause intermittent issues. Inspect all connectors and wiring for damage or looseness.
Here’s an example. A driver reported that their headlights flickered when driving over bumps. After inspecting the headlight relay, it was discovered that the contacts were corroded, leading to an unreliable connection. Replacing the relay solved the problem, and the headlights operated correctly. This scenario highlights the importance of checking for loose connections and corrosion.
Headlights Only Work on High Beam or Low Beam
If only one beam setting works, the problem might be with the relay, the headlight switch, or the bulbs. The high beam or low beam relay might be faulty. Test both relays, as each beam has its own relay. Ensure the bulb filaments are not burned out. Inspect the headlight switch for any defects. A faulty switch may prevent the activation of the other beam setting.
No Headlights at All
If the headlights do not function at all, the problem might be more complex. First, inspect the fuse and the relay as described. Verify the bulbs are not burned out. Check the wiring for any breaks or disconnections. The headlight switch might also be faulty. Using a multimeter, check the voltage at each of these components.
Here’s a specific example. If you find no power at the fuse box, this could mean that the power supply wire from the battery to the fuse box is damaged or disconnected. This shows how multiple problems might cause headlight failures.
Replacing the Headlight Relay
If you have tested the headlight relay and found it to be faulty, replacing it is often the best solution. Knowing how to test headlight relay is useless without the knowledge to replace it. A faulty relay can cause multiple electrical issues. Replacing the relay is a straightforward process. Ensuring you buy the correct replacement is key. When choosing a replacement relay, match the part number. The steps for replacement are easy.
Acquiring a Replacement Relay
When buying a new relay, ensure it’s the correct type for your vehicle. The part number is essential, as relays can vary. You can find this number on the relay itself. You can also consult your car’s manual or an auto parts store. Using the correct relay will ensure it will function properly. Ensure the replacement relay matches the voltage and amperage specifications. This will prevent damage to your vehicle’s electrical system.
Replacing the Relay
Replacing the headlight relay is usually a simple process. First, disconnect the negative battery cable for safety. Locate the faulty relay and remove it from its socket. Insert the new relay into the socket, making sure it’s properly seated. Reconnect the negative battery cable. Then, test the headlights to ensure they work. If the new relay does not function, recheck the wiring and ensure it is installed correctly.
Suppose you replaced the relay but the headlights still did not work. Rechecking the installation and wiring would be necessary. Double-check all the connections to ensure they are secure and properly seated. You might have accidentally misplaced a wire during the installation. Following these steps ensures a successful headlight repair.
Troubleshooting Common Issues
Troubleshooting can involve checking and rechecking various aspects. Even if you’re skilled, you may still run into issues. By understanding the common issues, you can address any complications quickly. Many issues arise due to loose connections, faulty wiring, or incorrect installation of the new relay. Understanding these issues will help you resolve the problems.
Checking Connections
Start by inspecting all wiring connections related to the headlight circuit. Look for loose or corroded connections at the relay, the headlight switch, and the headlights themselves. Disconnect, clean, and reconnect each connection to ensure a good electrical path. Use electrical contact cleaner to remove any corrosion. Re-securing loose connections often resolves many electrical issues.
Verifying Wiring
Examine the wiring for any damage, such as cuts, fraying, or burns. Repair any damaged wires using electrical tape or wire connectors. Ensure the wiring is correctly routed and securely fastened. Incorrect wiring can cause shorts or other electrical problems. Use a wiring diagram to verify the connections are accurate. Following these steps reduces the risk of further electrical complications.
Double-Checking Installation
Carefully review the installation steps to make sure you have installed the new relay correctly. Make sure the relay is fully seated in its socket. Incorrect installation can result in the headlights not working. If the headlights do not function after the
Frequently Asked Questions
Question: What does a headlight relay do?
Answer: A headlight relay controls the flow of electricity to your car’s headlights, allowing them to turn on and off efficiently and safely.
Question: Where is the headlight relay located?
Answer: The headlight relay is typically in the fuse box or a separate relay box, often in the engine compartment or under the dashboard. Check your car’s manual for the specific location.
Question: What tools do I need to test a headlight relay?
Answer: You’ll need a multimeter, a wiring diagram (optional but helpful), pliers, and a screwdriver.
Question: How do I test a headlight relay with a multimeter?
Answer: You test for continuity across the switch contacts and measure the coil resistance. You also check for voltage at the relay terminals.
Question: What do I do if my headlight relay is bad?
Answer: You need to
Final Thoughts
Now that you’ve explored how to test headlight relay, you have a clear plan. You now know how a relay functions and the tools required to test it. The step-by-step process enables you to diagnose and fix the problem. You’ve also seen how to deal with potential issues, from loose connections to wiring problems. If you have tested the headlight relay and found it faulty, you can confidently