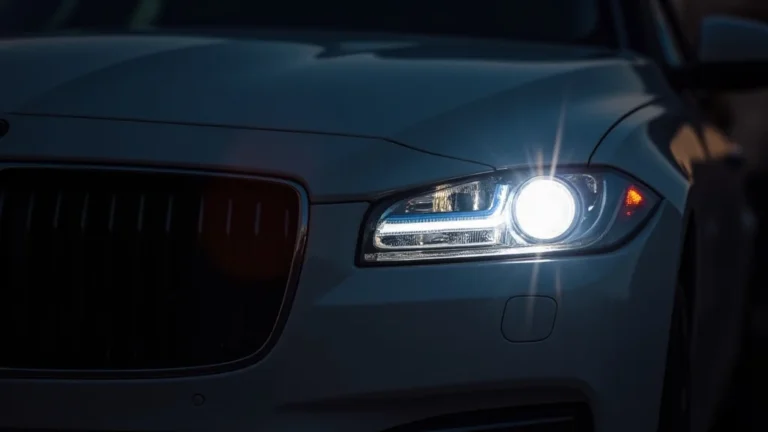
Why Are My Headlights Dim Exploring Common Causes and Solutions
If you’re wondering why are my headlights dim, you’re not alone! It’s a pretty common issue that can make driving at night more dangerous. Figuring out what’s causing the problem can sometimes feel tricky, especially if you’re not a car expert. Don’t worry, though; we’ll break down the most likely causes step by step, so you can easily understand what’s going on and what you can do to fix it. Get ready to explore the reasons behind those dim lights and discover how to get your headlights shining bright again!
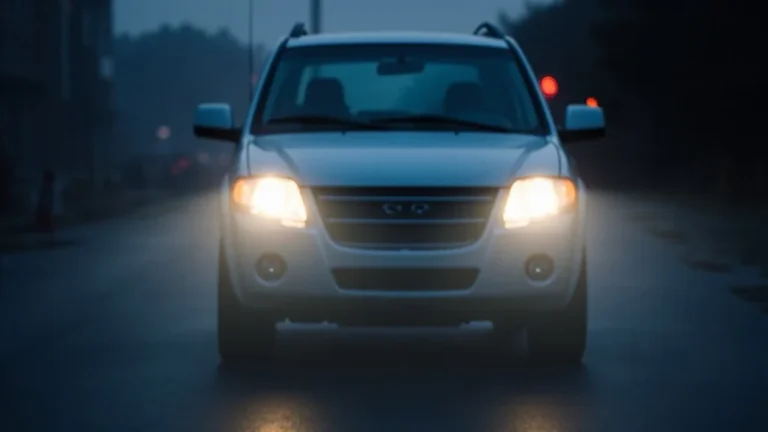
Common Causes Behind Dim Headlights
One of the first things people notice is that their headlights aren’t as bright as they used to be. The reasons can be simple, and often straightforward to fix. This section explores several of the most frequent causes, from problems with the bulbs themselves to issues with the electrical system. By exploring these potential causes, you’ll start to zero in on what’s making your headlights dim and how to fix it.
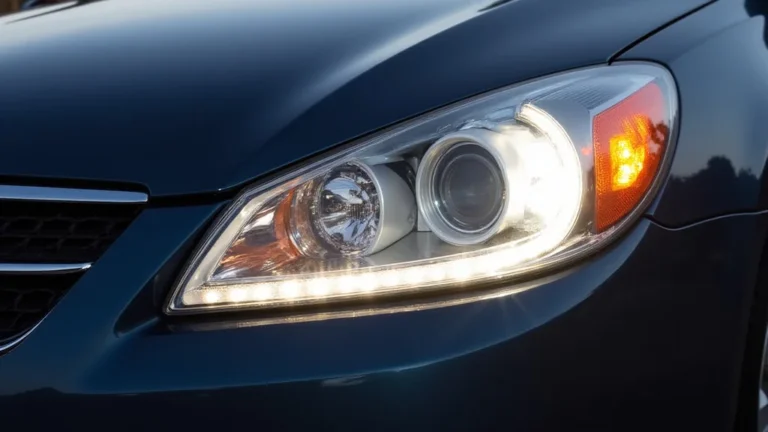
Bulb Issues
The bulbs are the most obvious part to check. Over time, all bulbs will lose their brightness and eventually burn out. It is important to remember that headlight bulbs don’t last forever. They gradually lose their brightness as they age. This dimming can happen over months or years, making it easy to miss until you notice how poorly you can see at night. Replacing the bulbs is often the easiest fix, and the change can be immediately noticeable. Different types of bulbs also have different lifespans. Halogen bulbs are the most common and typically last for about 500 to 1,000 hours of use. HID (High-Intensity Discharge) bulbs, which produce a brighter light, can last for around 2,000 hours, while LED (Light Emitting Diode) bulbs, known for their efficiency and long life, can last for up to 50,000 hours. This is why you must know when the bulbs were installed.
- Bulb Age: Headlight bulbs have a lifespan. As they age, the filament inside the bulb degrades, leading to dimmer light output.
- Bulb Type: Different types of bulbs (halogen, LED, HID) have varying levels of brightness. Using a bulb of the wrong type for your car can result in dim headlights.
- Bulb Installation: Incorrectly installed bulbs can cause them to function poorly or not at all. This might cause the headlight to appear dim.
Bulbs, particularly halogen bulbs, have a filament that burns out over time. This burning process gradually reduces the amount of light they produce. Even if the bulb hasn’t completely failed, it can still produce less light than it did when it was new. The age of the bulb is one of the top reasons why a headlight might be dim. As the filament ages, it becomes less efficient at producing light. Additionally, the bulb’s glass or plastic housing might accumulate a film or clouding that further reduces light transmission.
The choice of bulb type makes a big difference in light output. Halogen bulbs are the standard and generally provide adequate illumination. However, they are less bright than the newer technologies. HID (High-Intensity Discharge) bulbs, which use an arc to produce light, offer significantly more brightness. LED (Light Emitting Diode) bulbs, gaining popularity, are also very bright, energy-efficient, and have a longer lifespan than both halogen and HID bulbs. This variety means that if you switch from one bulb type to another without making the necessary adjustments, you might get unexpectedly dim headlights. For example, installing a lower-wattage bulb could result in a less bright light.
Proper installation of headlight bulbs is key. Even a new, high-quality bulb will perform poorly if it’s not installed correctly. Problems like incorrect alignment, loose connections, or improper positioning within the headlight housing can all affect how much light is emitted. For example, if the bulb isn’t seated properly in the socket, it can shift slightly and misdirect the light. This means the light beam isn’t focused correctly on the road, resulting in a dimmer appearance. Always follow the manufacturer’s instructions. This will make certain the bulb is correctly positioned and securely connected.
Electrical System Issues
The electrical system is what powers your headlights. It provides the electricity needed for the bulbs to function. Any problems in the electrical system, like a weak battery or faulty wiring, can result in your headlights being dim. Let’s look at the electrical parts that may be affecting your headlights. Some of these issues are easy to resolve, while others might need the help of a mechanic.
- Weak Battery: A battery that isn’t providing enough power can cause the headlights to appear dim.
- Wiring Problems: Corrosion or damage to the wiring can reduce the amount of power reaching the headlights.
- Alternator Issues: A faulty alternator might not be charging the battery properly, which can lead to dim headlights.
A car battery provides the energy for your headlights. If the battery is old or not fully charged, it won’t be able to supply the necessary power. This means the voltage supplied to the headlights is lower than needed. The headlights will produce less light as a result. A simple way to check this is to start the car and see if the lights get brighter. If they do, it’s a good sign that your battery may be causing problems. Keep in mind that a battery’s condition can also be affected by weather conditions. Cold weather, for instance, can reduce a battery’s performance and make it more likely to struggle to power your headlights.
The wiring in your car acts as the pathway for electricity to get from the battery to the headlights. If these wires are damaged, corroded, or have loose connections, it can significantly affect the amount of power that reaches the bulbs. Corrosion, often caused by moisture and exposure to the elements, increases resistance in the circuit, which reduces the voltage available to the headlights. Similarly, damaged wiring, such as frayed insulation or broken wires, can cause shorts and further reduce the power available. For instance, a small break in the wire can make the lights flicker, while more severe damage can make them appear consistently dim. It is always wise to inspect the wiring regularly to make sure it is in good shape. Replacing damaged or corroded wires is critical to restoring your headlights’ brightness.
The alternator is responsible for charging the battery while the engine is running. If the alternator isn’t working correctly, the battery won’t get enough charge. This can cause the headlights to become dim, especially when the engine is idling or under heavy electrical load (when you’re using other electrical components in the car like the air conditioning or the radio). A failing alternator can be identified by the headlights getting brighter when the engine revs and dimmer when it slows. It is a critical component for the proper function of your car’s electrical system. If you suspect an alternator issue, have it tested and repaired or replaced as needed.
Common Troubleshooting Steps
When you encounter dim headlights, you don’t necessarily need to rush to the mechanic. There are several steps you can take to figure out the problem yourself. This section will guide you through some of the most common troubleshooting steps you can take to diagnose the cause of your dim headlights. These steps, starting with simple visual checks and moving on to more involved tests, will help you identify the root cause. This information will give you the tools and knowledge to explore and fix those dim lights.
Visual Inspection
Starting with a simple visual check can often reveal obvious problems that are easy to fix. This means taking a close look at the headlights themselves, the wiring, and other parts of the system. This allows you to identify any visible issues that may be causing your lights to be dim. Let’s explore each step in detail.
- Check the Bulbs: Examine the headlight bulbs for any signs of damage or wear.
- Inspect the Headlight Housing: Look for any dirt, debris, or moisture inside the headlight housing.
- Examine the Wiring: Check the wiring for any visible damage, corrosion, or loose connections.
Take a close look at the headlight bulbs themselves. This is a quick and easy first step that can often reveal obvious problems. Look for any visible damage like cracks, chips, or clouding on the bulb’s surface. Check for any discoloration or blackening, which may mean the bulb is nearing the end of its life. If you see that the bulb has burned out or appears damaged in any way, replacement is the first thing to do. Carefully remove the bulb and inspect the connectors for any signs of corrosion or damage. A visual inspection will help you quickly identify the need for replacement.
Dirt, debris, or moisture inside the headlight housing can reduce the amount of light that shines through, making your headlights dim. Over time, dust and other particles can accumulate and cloud the lens. This can block some of the light and make it appear less bright. Moisture, especially, can cause a haze or film to form inside the housing, greatly reducing the visibility. Check the lenses for any cracks or damage that might let moisture in. If you find any of these issues, cleaning or replacing the headlight housing can often solve the problem.
Examining the wiring is a critical step because electrical problems are often a cause for dim headlights. Follow the wires from the headlights back to their connections and look closely. Search for any cuts, abrasions, or damage to the wire insulation, which could expose the wires. Look for any signs of corrosion at the connectors or terminals. This can happen from exposure to moisture and can reduce the flow of electricity. Loose connections also need to be identified, as they can cause intermittent power problems. If you find any damage, corrosion, or loose connections, you must fix these to ensure that the headlights receive sufficient power and shine at their optimal brightness.
Electrical Testing
If the visual inspection doesn’t give you an answer, you might need to use some basic electrical testing. This involves using tools to measure voltage and check the electrical flow to your headlights. Electrical testing is a more in-depth way to diagnose problems in your car’s electrical system and identify causes for dim headlights. Always make sure the car is off and the key is out of the ignition before working with any electrical components.
- Voltage Test at the Battery: Measure the voltage of the battery to ensure it’s providing enough power.
- Voltage Test at the Headlight Connector: Measure the voltage at the headlight connector to see if the headlights are receiving the correct power.
- Ground Connection Check: Make sure the ground connection for the headlights is clean and secure.
A battery that isn’t providing the correct voltage is a primary cause of dim headlights. To check the voltage, you’ll need a multimeter, a tool that measures electrical voltage. Set the multimeter to measure DC voltage (DCV). Place the red probe on the positive terminal (+) of the battery and the black probe on the negative terminal (-). A fully charged battery should show a voltage reading of about 12.6 volts or higher. If the voltage is significantly lower, the battery might not be providing enough power. A low voltage reading could mean that the battery is failing, has a poor charge, or has a drain somewhere in the electrical system. This test helps you determine if the battery is the cause of the dim headlights or if the issue lies elsewhere.
To verify if the headlights are receiving the proper voltage, you will need to measure the voltage at the headlight connector. This is where the electrical connection is made to the headlight bulb. Start by turning on the headlights. Use a multimeter set to measure DC voltage (DCV). Locate the headlight connector and carefully remove the bulb. Touch the probes of the multimeter to the terminals in the connector while the headlights are on. You should see a voltage reading close to the battery voltage (12 volts or more). If the voltage reading at the connector is much lower than the battery voltage, there is a voltage drop somewhere in the circuit. This may result from problems in the wiring, a faulty switch, or a bad ground connection. If you find a voltage drop, you’ll need to continue to check the wiring and connections for any problems.
A good ground connection is important for headlights to function properly. The ground wire completes the electrical circuit, allowing electricity to flow back to the battery. A bad ground connection can cause dim headlights. To check the ground connection, find where the headlight’s ground wire connects to the vehicle’s body or frame. This connection is typically near the headlight assembly. Inspect the connection for corrosion, rust, or any signs of looseness. Use a wire brush or sandpaper to clean any corrosion from the connection points. Tighten the connection to make sure it’s secure. Sometimes, a poor ground connection can be the sole reason for dim headlights. Cleaning and tightening the connection can be an easy fix.
Advanced Diagnostic Methods
If basic troubleshooting doesn’t resolve the dim headlight issue, you might need to explore more advanced diagnostic techniques. This section presents some methods that will help you narrow down the issue more precisely. You may need some advanced equipment like a circuit tester or access to a professional mechanic to perform these methods.
Circuit Testing with a Multimeter
A multimeter can be used in different ways to test the electrical circuits of your headlights, including voltage drop testing and continuity testing. These methods give a more detailed insight into any electrical problems.
- Voltage Drop Testing: Measure the voltage drop across the headlight circuit to find any areas of increased resistance.
- Continuity Testing: Verify the integrity of the wiring by checking for a complete electrical path.
Voltage drop testing is a good method to find areas of increased resistance in the electrical circuit. When there’s a problem in the circuit, like corrosion or damage in the wiring, it creates resistance that reduces the amount of voltage reaching the bulb. This test helps identify where this resistance is. First, turn on the headlights. With your multimeter set to DC volts, place one probe on the positive terminal of the battery and the other on the positive wire at the headlight connector. The multimeter will show the voltage difference between these points. If the voltage drop is high, there is a significant resistance issue. Repeat the test on the ground circuit, placing one probe on a good ground point on the vehicle’s body and the other on the ground wire at the headlight connector. This will help you pinpoint whether the problem is in the positive or ground side of the circuit. A high voltage drop can point to corroded connections, damaged wiring, or a bad switch.
Continuity testing is done to verify if there is a complete, unbroken electrical path in the wiring. The goal is to check whether electricity can flow from one point to another in the circuit. Use the multimeter in continuity mode (often represented by a symbol that looks like a sound wave). Disconnect the headlight bulb and place the probes on each end of the wire you’re testing. If the wire is good, the multimeter will beep or show a low resistance value. If there’s no beep or the resistance is high, there’s a break in the wire. A broken wire means that power cannot get to the headlights properly, so they will appear dim or not work at all. This test helps you find any damage or breaks in the wiring that could be contributing to the dimming of the headlights.
Load Testing
Load testing is a test used to assess the performance of the electrical components under a real-world load. This means testing the headlights while they’re using electricity. Load testing will let you know if the issue is a failure to properly supply voltage under load.
- Load Testing of the Battery: Check if the battery can maintain a stable voltage under load.
- Load Testing of the Alternator: Verify that the alternator can supply the necessary power when the headlights are on.
A battery that can’t maintain a stable voltage under load can cause your headlights to dim. This means that even when the headlights are on and drawing power, the battery voltage will decrease. The load test can be done using a specific battery tester, which simulates the load of the car’s electrical systems. A good battery will maintain its voltage when put under a load. If the battery’s voltage drops sharply when tested, the battery may need replacing. This test is important, since a failing battery is a common cause of dim headlights. If the battery can’t provide a steady voltage, the headlights will be dimmer than they should be.
The alternator is responsible for charging the battery and powering the vehicle’s electrical systems. To test the alternator, use a multimeter to measure the voltage across the battery terminals when the engine is running and the headlights are on. The voltage should be higher than the battery voltage when the engine is off (usually around 13.5 to 14.5 volts). This increase shows that the alternator is charging the battery. If the voltage is not rising or is dropping when the headlights are on, the alternator may not be working correctly. A bad alternator may not produce enough power, causing the headlights to appear dim. You can use a load tester specifically designed to test alternators to measure its output under load. This will help you determine if your alternator is failing. If the alternator is not working properly, you should get it checked or replaced.
Practical Solutions
Now that you’ve explored the possible causes and diagnostic methods, it’s time to consider the practical solutions. This section outlines some of the ways you can resolve dim headlight issues, from simple repairs you can do yourself to when you might need to seek the help of a professional mechanic. Following these solutions can help restore your headlights to their proper brightness and improve your safety while driving at night.
DIY Repairs
Many of the common causes of dim headlights can be fixed at home with basic tools and some know-how. This means replacing bulbs, cleaning the headlight lenses, and fixing simple wiring issues.
- Replacing Headlight Bulbs: Install new bulbs of the correct type and wattage.
- Cleaning Headlight Lenses: Clean the headlight lenses to remove any dirt or clouding.
- Checking and Repairing Wiring: Inspect the wiring for any damage, corrosion, or loose connections. Make any necessary repairs or replacements.
This is often the easiest and most common fix. First, make sure you buy the correct type of bulbs for your vehicle. Use the vehicle’s manual or check the markings on the old bulbs to be certain. Before starting, disconnect the car’s battery by removing the negative (-) cable. Remove the old bulb by following the instructions in your car’s manual. Be careful not to touch the glass part of the new bulb, as this can shorten its lifespan. Install the new bulb, making sure it is properly seated and secured in its socket. Reconnect the battery cable. Turn on the headlights to make sure the new bulbs are working correctly. Replacing the bulbs can be done quickly and cheaply, often resolving the problem and significantly improving visibility.
Over time, the plastic lenses of your headlights can become cloudy due to exposure to sunlight and road debris. This clouding reduces the amount of light that shines through. Clean the lenses using a headlight restoration kit. These kits usually include a cleaner or polish and a sealant. You may need to use sandpaper to remove any heavy clouding, followed by the polish to restore clarity. Clean the lenses thoroughly to remove all dirt and grime. Apply the polish, following the instructions on the kit, to restore the clarity and remove any scratches or clouding. Finally, apply the sealant to protect the lenses from future damage. Restoring the lenses can make a significant difference in the brightness of your headlights. This increases the amount of light and improves visibility at night.
Check the wiring connections in the headlight circuit, including the connectors and terminals. If you find any loose connections, make sure that they are securely fastened. Check the wiring for any corrosion, which might reduce the amount of power getting to the headlights. Clean any corroded connections with a wire brush or electrical contact cleaner. Look at the wires themselves for any damage like cuts or frayed insulation. If you find any damaged wires, you should repair them by using electrical tape or wire connectors. For major damage, you might need to replace the damaged sections of wiring. Be sure to disconnect the car’s battery before you begin working on electrical wiring. Fixing the wiring will ensure that electricity gets to the headlights and that they are as bright as possible.
When to Seek Professional Help
While many of the causes for dim headlights can be fixed at home, some situations require expert help. Here are a few instances when you should take your car to a mechanic to diagnose and fix the issue. Getting professional assistance in these situations makes sure the problem is correctly diagnosed and properly addressed.
- Complex Electrical Issues: When you can’t find the source of the problem, or if the wiring issues are complex.
- Alternator or Battery Issues: If you suspect a problem with the alternator or battery, get a professional to test and replace them.
- Headlight Housing Damage: If the headlight housing is cracked, broken, or severely damaged.
If you have explored the simpler DIY fixes and the headlights are still dim, it is probably time to seek a professional mechanic. Complex electrical problems, such as shorts, intermittent faults, or problems in the vehicle’s computer system, can be challenging to diagnose without special tools and experience. The mechanic can use advanced diagnostic tools like a scan tool to identify the issue accurately. They can also use their skill to find and fix the electrical issues to make certain your headlights function correctly. They can correctly trace the circuit issues, perform detailed tests, and offer any repairs or
If you suspect that the alternator or the battery is the cause of your dim headlights, it’s best to take your car to a professional. Battery testing, including load testing, needs specialized equipment that’s often available only in a shop. A mechanic can properly test the battery to make sure it’s working as it should and has the correct voltage output. Likewise, a mechanic can perform a comprehensive test of the alternator to check its output and charging abilities. If the tests confirm a problem with the alternator or battery, the mechanic can then
Severe damage to the headlight housing may prevent the headlight from working. This is something that may need professional repair or replacement. A damaged housing can allow moisture to enter, which can cause corrosion and impair the function of the bulb. Cracks or breaks in the housing can cause the light to shine in the wrong direction and reduce its effectiveness. A mechanic can examine the housing for any damage and determine whether it needs to be repaired or replaced. They can also make sure that the new housing is mounted correctly and the wiring is secure. This will ensure that your headlights are working optimally and are safe to use. Though you may be able to replace a headlight yourself, replacing the housing requires skill.
Sample Scenarios
- Scenario 1: Dim Headlights After Bulb Replacement
You
- Scenario 2: Flickering Headlights During Driving
If your headlights flicker, the most likely cause is a loose wire or a failing connection. Start by checking the headlight wiring for loose connections. Inspect the wiring and connections for corrosion or damage. A damaged wire, a loose connection, or a worn-out switch are all potential causes of flickering headlights. Repair or replace any damaged wiring and tighten any loose connections to resolve the issue and ensure a steady power supply to the headlights.
| Issue | Possible Cause | Solution |
|---|---|---|
| Dim Lights | Old bulbs, Low battery, Corroded wires | Replace bulbs, Charge or replace battery, Clean or replace wires |
| Lights Flicker | Loose connections, Worn switch | Tighten connections, Replace switch |
| One Light Dim | Bad bulb, Bad ground | Replace bulb, Clean ground connection |
Frequently Asked Questions
Question: Why are my headlights dim when I start my car?
Answer: This can be a sign of a weak battery or a problem with the alternator. The battery might not be providing enough power when the engine is starting, or the alternator may not be charging the battery effectively.
Question: Can I use higher wattage bulbs to make my headlights brighter?
Answer: While higher wattage bulbs can produce more light, it’s not always the best solution. Using bulbs that exceed the recommended wattage can overload the electrical system and potentially damage wiring or the headlight housing.
Question: How often should I replace my headlight bulbs?
Answer: It’s generally a good idea to replace your headlight bulbs in pairs, as the other bulb will likely fail soon after. Check your owner’s manual for the manufacturer’s recommendations or when the light output becomes noticeably less.
Question: What’s the difference between HID and LED headlights?
Answer: HID (High-Intensity Discharge) headlights use a gas-filled bulb that creates light by an electrical arc, producing a very bright light. LED (Light Emitting Diode) headlights use diodes, which are more energy-efficient and have a longer lifespan.
Question: What does it mean if my headlights are dim and the dashboard lights are dim too?
Answer: This typically points to an issue with the car’s electrical system, most likely the battery or alternator. A failing battery may not be able to supply the necessary power, while a faulty alternator might not be charging the battery sufficiently.
Final Thoughts
If you’ve been grappling with why are my headlights dim, you now have a solid foundation for exploring the underlying reasons and finding solutions. We’ve explored common culprits, from aging bulbs to issues within the electrical system, and discussed a range of troubleshooting steps you can take to identify the root of the problem. Remember, fixing dim headlights is often a manageable task, whether it’s as simple as replacing a bulb or cleaning the headlight lenses. By following these steps and considering the more involved diagnostics when needed, you can usually identify and correct the issue. With the right approach, you can restore your headlights’ brightness, ensuring safer driving at night. So, don’t hesitate to explore and test the different possible causes. With these insights, you’re well-equipped to tackle the problem head-on and keep the road well-lit.