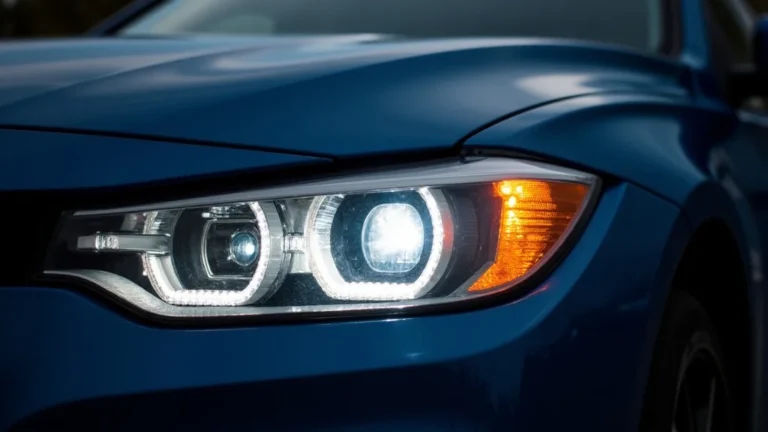
What Is The Best Headlight Restoration Method Explained
Figuring out what is the best headlight restoration method can feel tricky, especially if you’re just starting out. There are so many options and products available! Don’t worry, though. This process is simpler than you might think. Many folks have been in the same spot, wondering where to begin. We’ll explore different approaches and give you a straightforward, step-by-step guide to get your headlights looking clear and bright again. Ready to learn more?
Choosing a Headlight Restoration Approach
Before jumping into any restoration method, you must identify the extent of the damage. Headlight lenses can become cloudy, yellowed, or hazy over time due to sun exposure, oxidation, and road debris. This degradation affects how well your headlights illuminate the road, making nighttime driving dangerous. Choosing the right method depends on how bad your headlights are. For mild cases, a quick DIY kit might work. Severely damaged headlights could require more intensive methods, perhaps even professional help. Picking the right approach from the start is important for saving time and getting the best results. We’ll explore a few choices next.
DIY Headlight Restoration Kits
DIY headlight restoration kits are popular because they’re affordable and easy to use. These kits typically include all the necessary items: sandpaper of various grits, a polishing compound, and a sealant or protectant. The process usually involves sanding the headlight to remove the damaged top layer, then polishing the lens to clear it up. A sealant is applied afterward to protect it from future damage. Many find these kits a solid starting point. They’re accessible at most auto parts stores, and the instructions are usually easy to follow. Though DIY kits offer a convenient solution, the results might vary depending on the severity of the damage and your effort.
- Step-by-Step Instructions: Most kits provide clear, step-by-step instructions with pictures. This makes the process manageable, even for those new to car maintenance. Following the directions precisely is key to getting good results. You can use online guides to learn.
- Sanding Process: The sanding process uses progressively finer sandpaper. This smooths out the surface and removes scratches. Start with a coarser grit and work your way up to a finer one.
- Polishing Compound Application: After sanding, the polishing compound helps to remove the haziness. It restores the clarity of the plastic. This step is critical for getting a clear finish.
- Protectant Application: The sealant or protectant creates a barrier against UV rays and other environmental factors. This helps keep the headlights clear longer. Reapplication is usually needed.
Professional Headlight Restoration
Professional headlight restoration is the best choice for severely damaged headlights. Professionals have the tools, skills, and experience to handle even the toughest cases. They use specialized equipment, like advanced sanding techniques and high-quality polishing compounds. This ensures a thorough restoration. Professional services often include a warranty. They stand behind their work. While more expensive than DIY kits, the results are typically superior. They last longer. If you’re not comfortable working on your car, or the damage is extensive, seeking professional help is a wise move.
- Expert Skills and Equipment: Professionals have years of experience and use professional-grade tools. They can accurately assess the damage and choose the best approach.
- Advanced Techniques: Professionals use advanced sanding, polishing, and sealing techniques. These methods lead to long-lasting results. They also ensure a perfect finish.
- Higher Quality Products: They use high-quality products. They’re designed for long-term protection against UV rays and other hazards. This keeps your headlights clear and bright.
- Warranty and Guarantees: Professional services usually include warranties. This ensures you’re covered if anything goes wrong. This provides peace of mind.
Materials and Tools Needed
The materials and tools you need will depend on the restoration method. If you’re going the DIY route, you’ll need a restoration kit. For professional services, you won’t need to worry about providing anything. Having the right tools and materials is critical to the success of your project. This ensures you can perform each step correctly and achieve the best possible results. Whether you’re sanding, polishing, or sealing, make sure you have everything you need before you start. This simplifies the process and helps you avoid interruptions.
DIY Kit Essentials
DIY kits usually have everything you need. You may need to supplement the kit with a few extra items. Make sure you select a kit designed for the type of headlight lens on your car. Consider the level of haziness and damage when choosing a kit. The products should be simple to use and the instructions easy to understand. Reviewing customer reviews can help determine if a kit is suitable.
- Sandpaper: Sandpaper is crucial for removing the damaged layer of plastic. Kits will usually have different grits. Use coarse sandpaper for the initial sanding. Finer grits are used to refine the surface.
- Polishing Compound: The polishing compound restores clarity to the lens. It removes scratches left by the sanding process. Apply the compound to the headlight surface using a microfiber cloth.
- Sealer or Protectant: This is a key step. The sealer or protectant creates a protective barrier. This protects the lens from UV rays and environmental damage. Reapply according to the kit’s instructions.
- Microfiber Cloths: Microfiber cloths are gentle on the surface. They are important for cleaning, polishing, and applying protectant. Make sure you have several clean cloths to avoid cross-contamination.
Professional Service Materials
When you get professional help, the materials used are of a much higher quality. Professionals will have high-grade sandpaper, polishing compounds, and sealants. These materials are important for achieving a long-lasting, clear finish. If you seek professional help, the process is usually simple. You simply drop off your car. Then, you pick it up when the job is done.
- High-Grade Sandpaper: Professionals use high-quality sandpaper with varying grits. This allows them to remove deep scratches and imperfections.
- Specialized Polishing Compounds: Professional-grade polishing compounds restore clarity and remove any remaining haziness. These compounds are better than consumer-grade alternatives.
- UV Protectant Sealants: Professional services use UV protectants. These sealants create a durable barrier against sun damage. They ensure long-term clarity.
- Professional Grade Equipment: Professionals have a variety of tools. This may include a buffer or polisher. It speeds up the process and delivers a better finish.
Step-by-Step Restoration Guides
No matter which method you pick, following a detailed step-by-step guide is important. DIY kits come with instructions. Professional services follow a well-defined process. Each step of the process is important for removing damage and restoring clarity. Take your time, and follow instructions. Rushing could lead to less-than-perfect results. Whether you’re sanding, polishing, or applying protectant, accuracy is key to restoring your headlights.
DIY Headlight Restoration Steps
DIY headlight restoration can be broken down into key steps. Each step plays a part in restoring clarity and brightness. Preparing your vehicle is critical. When sanding, apply steady pressure and work in one direction. Allow enough time for each step.
-
Preparation:
Before you start, wash your headlights to remove dirt and debris. Dry them with a clean cloth. This prevents scratching during the sanding process. Then, tape off the areas around the headlights. This protects your paint from damage. Make sure you’re working in a well-ventilated area.
-
Sanding:
Begin with the coarsest sandpaper provided in your kit. Use a spray bottle to keep the headlight wet while sanding. This keeps the sandpaper from clogging. Sand in a back-and-forth motion. Keep the surface evenly wet. Work your way up to finer grits to smooth out scratches. This step removes the damaged top layer. You will notice the headlight lens becomes rough.
-
Polishing:
Apply the polishing compound to a clean microfiber cloth. Rub the compound onto the headlight in a circular motion. This step helps to restore clarity. You should work in small sections. Apply moderate pressure and rub until the haziness is gone. Repeat this process until all the scratches and haze are removed.
-
Sealing:
Once you’ve polished the headlights, apply the sealant or protectant. Apply it evenly using a clean cloth. The sealant provides a protective barrier against UV rays and environmental damage. Make sure the sealant is applied correctly. Reapply the sealant according to the manufacturer’s instructions. This step is important for long-lasting results.
Professional Headlight Restoration Process
Professional headlight restoration follows a similar process, but with more advanced techniques and equipment. The steps are designed to achieve a long-lasting, crystal-clear finish. Professional services save you time and provide a higher level of results. You don’t need to worry about the tools or materials. A professional handles all the steps, from preparation to sealing.
-
Assessment:
The professional assesses the damage to your headlights. They determine the best approach. This ensures the restoration method suits the damage. They inspect for any cracks, chips, or deep scratches that might impact the final result. The professional then explains the process. They outline what is involved.
-
Sanding and Polishing:
The professional sands the headlights using advanced techniques. They use a variety of grit sandpaper. This removes the damaged layer. After sanding, they polish the headlights. A professional-grade polishing compound removes any remaining imperfections. They will use a buffer to make sure that the finish is even.
-
Sealing:
The final step is to apply a UV protectant sealant. This protects the headlights from future damage. This sealant ensures the headlights stay clear for years. This sealant creates a barrier. It blocks harmful UV rays. The professional will usually apply multiple coats. They want to ensure long-term clarity.
Comparing Headlight Restoration Methods
When selecting a headlight restoration method, it’s helpful to compare the different options. Considering the level of damage, your budget, and the amount of time you are willing to invest is important. Comparing the advantages and disadvantages of each method can help you decide. Assess how long the restoration will last. Also, note any warranty options.
| Method | Cost | Time Required | Durability | Best For |
|---|---|---|---|---|
| DIY Kit | Low | 2-4 hours | 6 months – 1 year | Mild to Moderate Damage |
| Professional | High | 2-4 hours | 1-3 years | Severe Damage, Long-Term Results |
Cost Analysis
The cost of headlight restoration varies depending on the method you choose. DIY kits are the most cost-effective. Professional services are more expensive but offer more durable and long-lasting results. Balancing your budget with your needs is critical when making a decision.
- DIY Kits: These are affordable. They typically cost between $15 to $50. You can get them at most auto parts stores. This makes them a great option for a budget-friendly project. Keep in mind the durability may not be as high.
- Professional Services: Professional restoration costs more. Prices can vary. They typically range from $75 to $200 per headlight. However, this includes labor and the use of professional-grade products.
Time Commitment
DIY kits take more time. You’re doing the work yourself. Professional services are quicker. They’re done by experts, using faster methods. Consider your time and how important it is to you. For some, a quick job is the best option.
- DIY Kits: DIY restoration typically takes 2-4 hours per vehicle. The time can depend on the condition of your headlights. The process includes preparation, sanding, polishing, and sealing.
- Professional Services: Professionals can restore headlights faster. Restoration can take 1-3 hours. This includes the assessment, sanding, polishing, and sealing of the headlights.
Maintaining Restored Headlights
After you have restored your headlights, taking care of them is important. Proper maintenance can extend the lifespan of your restoration. This keeps your headlights clear and bright for a longer time. Simple steps can prevent damage.
Regular Cleaning
Regular cleaning is key to keeping your headlights clear. Clean them regularly to remove dirt and debris. Avoid using harsh chemicals or abrasive cleaners. Use a mild soap. Then, wipe with a soft cloth. This helps prevent scratches and maintain clarity.
- Gentle Cleaning: Use a mild car wash soap. This won’t damage the protective coating. Avoid any harsh or abrasive cleaners.
- Soft Cloth: Use a microfiber cloth. This prevents scratching the surface. Soft cloths are gentle and effective at removing dirt.
- Regularity: Clean your headlights regularly. Clean them as you wash your vehicle. This prevents dirt buildup.
Protective Measures
To protect your restored headlights, consider using some extra measures. These steps are a great way to extend the life of your headlights. They keep the surface clear and protected. Consider parking in shaded areas. Avoid harsh conditions. This keeps them looking great longer.
- UV Protection: Park your car in shaded areas. This minimizes exposure to harmful UV rays. Some headlight sealants include UV protection. Consider using a UV-protective product to extend the life of your headlights.
- Avoid Abrasive Cleaners: Avoid using harsh chemicals. Abrasive cleaners can damage the protective coating. Use gentle cleaners. This protects the clarity of the headlights.
- Regular Inspection: Regularly inspect your headlights for any signs of damage. Address minor issues promptly. This prevents them from becoming worse. If you notice any issues, repair them right away.
Frequently Asked Questions
Question: How often should I restore my headlights?
Answer: It depends on the damage and the method used. DIY restorations typically last 6 months to a year, while professional restorations can last 1-3 years. Factors like exposure to sunlight and driving conditions will also affect how long it lasts.
Question: Can I use household items to restore my headlights?
Answer: While some claim to use household items like toothpaste, it’s not recommended. These methods are usually not as effective. They can cause more damage. For the best results, stick with restoration kits or professional services.
Question: Is it difficult to restore headlights with a DIY kit?
Answer: DIY kits are designed to be easy. Most kits come with clear, step-by-step instructions. You might find the process a bit time-consuming. However, you can learn the process by reading the instructions carefully.
Question: What’s the difference between sanding and polishing?
Answer: Sanding removes the damaged top layer. Polishing smooths out the surface. Sanding removes the scratches. Polishing makes the lens clear. Polishing restores the clarity.
Question: When should I choose a professional restoration service?
Answer: Choose a professional if your headlights are severely damaged, you’re not comfortable with DIY projects, or you want a long-lasting solution. Professionals have the tools and experience to deliver superior results.
Final Thoughts
When you’re trying to figure out what is the best headlight restoration method, understanding your options is the first step. DIY kits are good if the damage is light, giving you a chance to save money and get hands-on. However, if the damage is worse or you want the best results, professional restoration is the way to go. Consider things like how much time you have, your budget, and the condition of your headlights. Regardless of what you choose, don’t let cloudy headlights reduce your safety. By following the tips in this guide, you can confidently choose the method that works best for you and your car. Getting clear headlights is achievable for everyone. Take action today, and get back to seeing the road clearly.