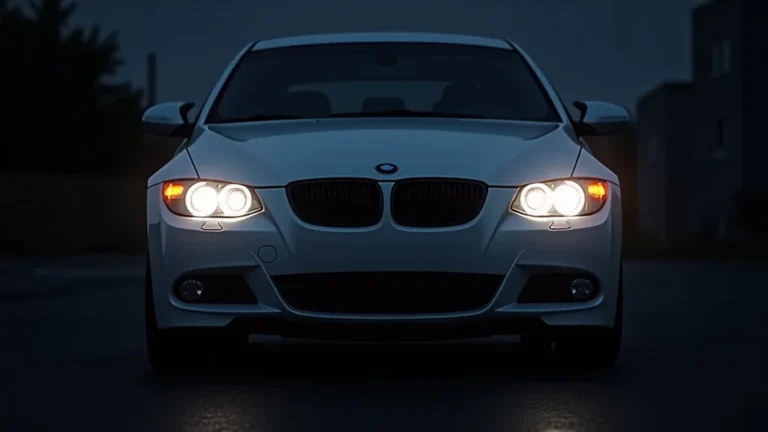
How to Install Headlight Bulbs Simple Steps for a Brighter Ride
Changing your headlight bulbs might seem tough, but don’t worry! Many people find it a little tricky at first. This is usually because cars have different designs, and it can be hard to reach the bulbs. But with some simple steps, you can easily learn how to install headlight bulbs and save money on a mechanic. This guide will take you through everything you need to know. Next, we will cover the supplies you will need before we start.
Gathering Your Gear Before You Start
Before you start, it’s important to gather everything you need. This ensures you can complete the job quickly and safely. Having the right tools and knowing what type of bulbs you need will make the process much easier. It’s like preparing for any project, the better the prep, the smoother the execution. Choosing the right bulbs is just as important as having the tools. This also avoids frustration and potential damage to your car. Let’s explore what you will need.
Necessary Tools and Supplies
-
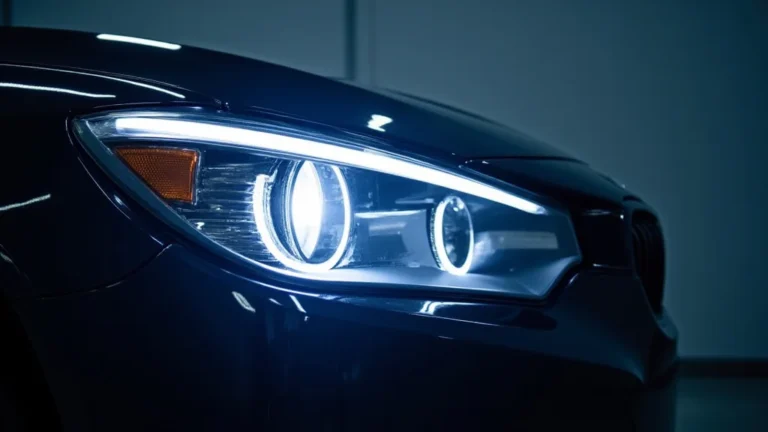
A new set of headlight bulbs: This is the most obvious, but make sure you have the correct type for your car. The bulb type is usually written on the old bulb or in your car’s manual. There are many different types of headlight bulbs available, each with unique specifications and advantages. Understanding these differences can assist you in selecting the best option for your vehicle. For example, some headlight bulbs are designed for longevity, while others prioritize brightness. Some common bulb types include:
- Halogen Bulbs: These are the most common and generally the most affordable type. They provide a warm, yellowish light and are a direct replacement for many older vehicles. Halogen bulbs have been a staple in automotive lighting for many years.
- LED Bulbs: These are more energy-efficient and offer a brighter, whiter light. They often last longer than halogen bulbs but may require additional components, depending on the car model. LED bulbs are becoming increasingly popular due to their high brightness and efficiency.
- Xenon/HID Bulbs: High-Intensity Discharge (HID) bulbs, also known as xenon bulbs, provide a very bright light and are often used in luxury vehicles. They require a ballast to function. These produce a bright, intense light.
- Gloves: This helps to keep your hands clean and protect the bulbs from oil. Touching the glass part of a halogen bulb with bare hands can shorten its life because oil from your skin can create hotspots. Gloves offer a safeguard against heat and potential burns. They also offer a better grip, aiding in handling the bulbs.
- A screwdriver or other tools (if needed): This varies depending on your car. You might need a screwdriver, pliers, or other tools to remove parts of the headlight assembly. Always make sure you have the right tools to easily remove any clips, screws, or panels that may cover the headlight bulbs.
- Your car’s owner’s manual: This is super important. Your manual will tell you the type of bulb you need and how to access your headlights.
Different bulbs have different lifespans. Halogen bulbs typically last 500-1,000 hours, LED bulbs can last up to 30,000 hours, and xenon/HID bulbs generally last between 2,000-4,000 hours.
When selecting gloves, it’s helpful to consider the material. Latex or nitrile gloves offer great tactile sensitivity and protection from oils, while thicker work gloves might be useful if you expect to encounter sharp edges. Make sure the gloves fit snugly to avoid getting caught on any components during the installation.
The type of tools needed depends largely on your car’s make and model. Some vehicles use simple clips, while others have screws or bolts that secure the headlight assembly. It’s important to familiarize yourself with your car’s specifications before you begin. A basic tool kit usually includes a variety of screwdrivers (Phillips head and flathead), a set of pliers, and possibly a socket set.
The owner’s manual is one of your most helpful resources. It offers details specific to your car model, including the location of the headlight assembly, the type of bulb used, and step-by-step instructions for replacement. Consulting your owner’s manual before starting can prevent mistakes and save you time.
Safety Essentials
- Safety glasses: To protect your eyes from debris that might fall while you are working.
- Work light or flashlight: You’ll need good lighting, especially if you’re working in a garage or after dark.
- Wheel chocks: To prevent your car from rolling.
Safety glasses are a simple yet vital piece of equipment for any automotive task, including changing headlight bulbs. They protect your eyes from any particles or fluids that may be released or dislodged during the process. Particles can be created when you are removing or installing bulbs and potentially cause eye injuries.
A good light source is essential. When you are working in dimly lit conditions, it can be extremely difficult to see the small details. A flashlight or work light can help you see clearly, which is very important for removing clips, screws, or other parts. It also allows you to identify any possible issues. A headlamp can provide hands-free lighting, making your job easier.
Wheel chocks are an easy, effective way to keep your car stationary. They wedge against your tires and prevent any unwanted movement. Placing them is a simple safety step that can prevent any potential accidents. If you are working on a slope, chocks are particularly important.
Step-by-Step Instructions: How to Install Headlight Bulbs
Now that you have all the gear, let’s explore the process of how to install headlight bulbs. Although cars have different designs, the basic steps are similar. We will go through the steps in detail. Following these steps will help you get the job done easily.
Prepping Your Vehicle
- Park on a level surface: Make sure the car is on a flat surface, not a hill or slope.
- Turn off the engine and remove the key: This is a critical safety step to prevent any electrical issues.
- Engage the parking brake: This gives extra protection against the car rolling.
- Pop the hood and locate the headlight assembly: Locate the headlight assembly. It’s usually behind the front bumper.
Parking on a level surface prevents your car from rolling. This simple step can prevent serious injuries. This is important for your safety and makes sure you can work safely.
Turning off the engine and taking out the key prevents any power from flowing through the electrical system. This reduces the risk of electrical shock. It also ensures that the headlights cannot accidentally turn on while you are working. This is a very easy safety measure, but one that is very important.
The parking brake is designed to keep your car stationary. Engaging it provides additional stability, especially when working on a surface that is not perfectly level. Even if you’ve parked on a flat surface, the extra safety measure of applying the parking brake is always a good idea.
Open the hood of your car. Now you need to find the headlight assembly. The exact location will vary. Consulting your owner’s manual can help you find it quickly. The headlight assembly is often located behind the front bumper or inside the engine bay.
Accessing the Headlight Bulbs
- Remove any covers or clips: Remove any covers or clips that block access to the bulb.
- Unplug the electrical connector: Carefully remove the electrical connector from the back of the bulb.
- Remove the old bulb: There will be a clip or a twist-lock. Remove it to free the old bulb.
- If removing clips, squeeze and unclip them. For twist-locks, turn the bulb counterclockwise.
The headlight bulb is sometimes protected by a cover. These can be made of plastic or rubber. Use the proper tool to remove them. Be very careful. Many times these covers can break easily. Removing the cover exposes the back of the headlight bulb, allowing you to access it. Sometimes, these covers have clips or screws.
The electrical connector supplies power to the headlight bulb. This connector is usually a simple plug that can be easily detached. Be gentle when removing the connector, and don’t tug on the wires. It’s a good idea to inspect the connector for any damage or corrosion. This connection is how the electricity is delivered.
Most headlight bulbs are held in place by a clip or a twist-lock mechanism. Carefully release the clip or twist the lock to remove the old bulb. There are many different designs. The design will vary between different car models. Knowing how your car’s system works is very important. Always be gentle when removing the old bulb.
Depending on your car’s design, you will either need to squeeze and unclip the retaining clips or twist the bulb to release it from its housing. If your car uses retaining clips, gently squeeze them to release the bulb. For twist-locks, turn the bulb counterclockwise to unlock it. If you encounter any resistance, make sure you’re working with the right mechanism for your car.
Inserting the New Headlight Bulb
- Avoid touching the glass: If you are using halogen bulbs, do not touch the glass part with your bare hands.
- Insert the new bulb: Carefully put the new bulb into the headlight housing.
- Secure the bulb: Reattach the clip or twist-lock to secure the new bulb in place.
- Reattach the electrical connector: Plug the electrical connector back into the new bulb.
The glass part of a halogen bulb gets extremely hot. Oils from your skin can leave marks on the bulb, which can lead to premature failure. If you accidentally touch the glass, clean it with rubbing alcohol. Handling the bulb carefully will help extend its life.
Align the new bulb with the housing and insert it gently. It’s important to make sure the bulb is correctly seated and properly aligned. This often involves matching the tabs or grooves on the bulb to the corresponding slots in the housing. Inserting the new bulb is a very important step to make sure you get the right light pattern.
Once the new bulb is inserted, secure it using the clip or twist-lock mechanism. Make sure the bulb is firmly in place to ensure it doesn’t vibrate or come loose while you’re driving. The secure fit of the bulb is essential for both the function of the headlights and for the overall safety of your driving experience.
Carefully reattach the electrical connector to the back of the new bulb. Make sure the connection is snug and secure. A loose connection can cause the bulb to flicker or fail. Check that the connector is properly locked in place.
Final Steps
- Replace the cover or clips: Put the covers or clips back on to protect the bulb from dirt and moisture.
- Test the new bulb: Turn on your headlights and check to make sure the new bulb works.
- Repeat for the other side: Do the same steps for the other headlight.
Once the new bulb is installed and the electrical connector is attached, replace any covers or clips you removed earlier. These covers provide protection. Make sure they are correctly fitted and sealed to prevent moisture and debris from damaging the new bulb.
After installing the new bulb, turn on your headlights to ensure they are working. This is a crucial step to check if the new bulb is properly installed and functioning. Verify that the light is bright and that the beam is aligned correctly. If the bulb doesn’t light up, double-check all connections and make sure everything is properly seated. If the bulb still doesn’t light up, you may need to check the fuse.
If you replaced one headlight bulb, it is a good idea to replace the other one at the same time. Many times when one headlight bulb fails, the other one is not far behind. This will ensure that both headlights are operating at the same level of brightness. Following the same steps as you did for the first headlight bulb, you can efficiently replace the other bulb.
According to a 2023 study by AAA, 19% of cars on the road have at least one headlight that is out. Regularly checking your headlights can help increase your safety.
Advanced Tips and Tricks
Learning how to install headlight bulbs is just the beginning. There are some extra tricks that can help. These tips will make the process easier and get better results.
Troubleshooting Common Issues
- The bulb doesn’t fit: Double-check the bulb type to make sure you have the correct one for your car.
- The bulb doesn’t light up: Make sure the electrical connector is properly attached. Check the fuse.
- Moisture inside the headlight: Check the seals and covers for proper fit to prevent water from entering.
One of the most common issues is the bulb not fitting. Make sure you have the right bulb type. Your car’s manual will tell you the correct bulb for your vehicle. There are different sizes and types. Double-checking this information can save you time and frustration. Look at the old bulb. There will usually be a part number on the bulb.
If the new bulb doesn’t light up, the problem is usually a loose connection or a blown fuse. Check the electrical connector to ensure it is firmly connected. Your car’s fuse box has fuses that power the headlights. You can find the fuse box in the car’s manual. If you have to replace a fuse, always use the same amperage rating as the original.
Moisture inside the headlight assembly can reduce the light output and damage the bulb. Ensure the rubber seals and covers are properly in place and provide a tight seal. Water and moisture can damage the bulb or the internal components of the headlight assembly. To keep the light working well, it is important to prevent moisture.
Upgrading Your Headlights
- Consider brighter bulbs: Upgrade to LED or HID bulbs for improved visibility.
- Research local laws: Make sure the upgrades you want are allowed in your area.
- Professional installation: If you are not comfortable with DIY, consider professional installation.
You can improve your car’s lighting with brighter bulbs. LED (Light Emitting Diode) and HID (High-Intensity Discharge) bulbs provide more light than regular halogen bulbs. LED and HID bulbs give you a brighter, clearer view of the road. Upgrading can improve your visibility.
Before you upgrade, be sure to research your local rules and laws. Some areas have restrictions on the type of bulbs and modifications you can use. Understanding the rules can prevent legal issues. It’s always a good idea to know the local laws before starting. Check if the lights you plan to install are approved for use on public roads.
If you’re not comfortable with the work, consider having the headlight bulbs replaced by a professional. This guarantees the bulbs are installed correctly. A professional mechanic has the skills and tools. A professional installation saves time and avoids mistakes.
Long-Term Maintenance
- Regularly inspect your headlights: Check for any cracks or damage on the lens.
- Clean your headlight lenses: Clean your headlights to remove dirt and grime.
- Replace bulbs in pairs: Replace both bulbs at the same time to ensure even lighting.
Regularly check the condition of your headlights for optimal performance. Look for cracks, damage, or cloudiness on the lens, as these issues can reduce the light’s effectiveness. Any damage can impact your visibility, so it’s a good idea to check your lights when you check your tires or fluids.
Keeping your headlight lenses clean can significantly improve visibility. Dirt, grime, and other build-up can reduce the amount of light that passes through. You can use a special headlight cleaner. Over time, headlights can become cloudy and yellow. By keeping the lenses clean, you can make sure your headlights are doing their best to light your way.
When one headlight bulb goes out, it’s often a good idea to replace both. The other bulb is very likely to fail soon. Replacing both bulbs ensures even light distribution and brightness. If you only replace one bulb, you might notice that the new bulb is brighter than the older one. Replacing both at the same time is usually more convenient.
Frequently Asked Questions
Question: How often should I replace my headlight bulbs?
Answer: It depends on the bulb type. Halogen bulbs typically last 500 to 1,000 hours, while LEDs can last up to 30,000 hours.
Question: Can I touch the glass part of a headlight bulb?
Answer: It’s best to avoid touching the glass part of halogen bulbs with your bare hands. The oils from your skin can shorten the bulb’s life.
Question: What should I do if my new headlight bulb doesn’t work?
Answer: Check the electrical connector to make sure it’s properly attached. Also, check the fuse related to your headlights.
Question: Are there different types of headlight bulbs?
Answer: Yes, there are many types of headlight bulbs, including halogen, LED, and HID (xenon) bulbs. Each has its own features.
Question: How can I tell what type of headlight bulb my car needs?
Answer: Check your car’s owner’s manual or look for the bulb type written on the old bulb. You can also look up your car’s make and model online.
Final Thoughts
You now have a better idea of how to install headlight bulbs. You know the steps, and you also have some tips to make the job easier. You know what you need to do to make sure your car is ready before you start, and you also know what to do if you have any problems. You can now take this project on with confidence. The next time a headlight burns out, you will have no problem replacing it yourself. Get out there and make your ride brighter and safer!