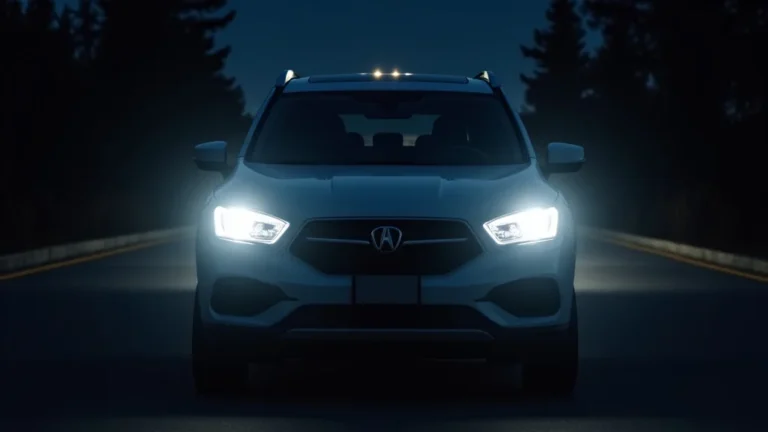
How to Get Rid of Foggy Headlights Easily and Effectively
Dealing with cloudy or hazy headlights is a super common problem for anyone who drives a car. It’s often tricky for beginners because there are so many different things that can cause it, from sun damage to simple wear and tear. But don’t worry, it’s not a disaster! This post is all about helping you figure out how to get rid of foggy headlights and get your car looking its best. We’ll break down the process step by step, so you can easily tackle this problem yourself. Get ready to explore the best ways to bring back that headlight shine!
What Causes Foggy Headlights?
Before you learn how to get rid of foggy headlights, it’s helpful to know what causes the problem in the first place. Headlights are usually made of polycarbonate plastic, which is strong and light. But this material is vulnerable to the environment. Over time, the plastic can become cloudy or yellowed due to UV rays, the sun’s powerful beams that break down the plastic’s protective surface. Besides UV damage, road debris such as small stones and sand can gradually scratch the headlight’s surface, leading to a blurry appearance. Exposure to extreme temperatures and moisture can further accelerate the process.
UV Radiation Damage
Sunlight is a car’s worst enemy. Specifically, ultraviolet (UV) radiation breaks down the polycarbonate plastic of your headlights. This breakdown causes the plastic to oxidize, leading to yellowing and cloudiness. Imagine the plastic’s surface is like a layer of tiny, clear tiles. UV rays can weaken the “glue” holding these tiles together, making the surface rough and scattering light. This is why headlights often start to look hazy or yellow over time, especially in areas with lots of sun.
- The Science of UV: Ultraviolet light is a type of electromagnetic radiation invisible to the human eye. It carries enough energy to damage the bonds in the plastic, especially in the long term.
- Protective Coatings: Many headlights have a protective coating to reduce UV damage. However, this coating degrades over time, exposing the plastic underneath.
- Geographical Impact: Cars in sunny climates are more likely to experience faster headlight degradation because of increased UV exposure.
UV damage isn’t the only concern. A car’s location can determine the life of headlights. For instance, cars in states like Florida or Arizona see more sun exposure than those in Washington or Oregon. This makes UV damage a more severe issue in sunny areas. Regularly parking your car in a garage or using a headlight protectant can make a huge difference, extending the lifespan and clarity of your headlights.
Environmental Factors
Besides UV rays, many environmental factors play a role in making headlights foggy. Road debris, such as rocks and sand, can create tiny scratches on the headlight surface. These scratches scatter light and make the lens appear cloudy. Humidity and moisture can seep into the plastic, further clouding the lens. Temperature changes also contribute; when it gets hot, the plastic expands, and when it gets cold, it contracts. This process can cause cracks and allow water to enter.
- Road Debris: Driving on gravel roads or behind trucks can increase the impact of flying debris on your headlights.
- Moisture Intrusion: Cracks or small gaps in the headlight housing allow water vapor to condense inside, resulting in a foggy appearance.
- Temperature Fluctuations: Extreme heat and cold can worsen the breakdown of the plastic and protective coatings, speeding up the fogging process.
Think about how extreme weather changes can affect your headlights. In the winter, snow and ice can accumulate, leading to more exposure to salt and chemicals used to melt the ice, which can damage the headlight surface. During the summer, intense heat can cause the plastic to become brittle. These environmental factors show how vital it is to protect your headlights to maintain visibility and improve overall car appearance.
Oxidation and Yellowing
Oxidation is the chemical process that causes the plastic of your headlights to yellow and become cloudy. When the plastic is exposed to sunlight, oxygen reacts with the plastic’s surface. This reaction creates oxides, which change the light’s appearance. The process is similar to what happens when metal rusts, but in this case, it’s the plastic that’s changing. Over time, oxidation degrades the plastic’s clarity, reducing the amount of light that passes through.
- The Role of Oxygen: Oxygen molecules from the air react with the plastic, altering its structure and color.
- Preventing Oxidation: Applying a UV protectant or sealant can create a barrier against oxygen and slow down the oxidation process.
- Cleaning and Restoration: Restoring your headlights involves removing the oxidized layer to reveal the clear plastic beneath.
The progression of oxidation can affect a car’s appearance and driving safety. As the headlights become less clear, their ability to project light is reduced. This is a potential hazard when driving at night or in low visibility conditions. It’s essential to check the headlights regularly and take steps to address early signs of oxidation, such as slight yellowing or cloudiness. Early intervention can prevent further damage and maintain optimal headlight performance.
Easy Steps to Clean Foggy Headlights
Now, let’s explore how to get rid of foggy headlights effectively and with ease. There are several methods you can try, from basic cleaning techniques to more advanced restoration processes. The best approach depends on the degree of fogging and the materials you have available. The key is to carefully assess the condition of your headlights first and select the method that best suits your needs.
Preparation and Assessment
Before beginning, it’s crucial to assess the condition of your headlights and gather the necessary materials. Determine the severity of the fogging by inspecting the headlights under good lighting. Minor fogging might be handled with a simple cleaning solution, while significant yellowing or cloudiness may require more advanced restoration techniques. This initial step will guide your choice of method, ensuring the best possible results.
- Inspect the Damage: Look closely at the headlight lenses to determine the extent of fogging, yellowing, and any surface damage such as scratches.
- Gather Supplies: Collect the necessary items, including automotive soap, water, microfiber cloths, and any restoration products such as a headlight restoration kit.
- Protect the Vehicle: Tape off the painted surfaces surrounding the headlights with painter’s tape to prevent any damage from the cleaning or restoration process.
Proper preparation is key. Make sure your workspace is well-lit and that your vehicle is positioned in a shaded area to avoid direct sunlight. This helps you get a clearer view of the damage and reduces the chance of premature drying of cleaning solutions. Gather all the supplies and wear safety glasses and gloves to protect your eyes and skin. This process ensures safety and more effective results.
Cleaning with Common Household Items
In some cases, you can use basic household items to clean your headlights and restore their clarity. These are easy and accessible methods for minor fogging. These methods work by gently removing the top layer of dirt and oxidation. However, these methods are not the best solutions for extensive damage. If the fogging is severe, you might need a more intensive restoration process.
- Toothpaste Method: Apply regular (non-gel) toothpaste to the headlight, scrub gently with a soft cloth, and then rinse. The abrasives in toothpaste can help remove oxidation.
- Baking Soda and Vinegar: Make a paste of baking soda and vinegar, apply it to the headlights, scrub gently, and rinse. This combination can help dissolve built-up grime.
- Soap and Water: Wash the headlights with car wash soap and warm water, using a microfiber cloth. This will remove loose dirt and grime.
The toothpaste method has become a popular solution because toothpaste is easily accessible. The abrasive nature of toothpaste, when gently applied, helps remove the top layer of oxidized plastic. The baking soda and vinegar mixture combines gentle abrasion with a mild chemical reaction that helps clean the surface. Regular car wash soap and water are the base for removing dirt and surface contaminants. While these methods may not fully restore severely damaged headlights, they can be helpful for minor fogging.
Using a Headlight Restoration Kit
For more severe fogging, using a headlight restoration kit is a great option. These kits provide everything you need to polish and protect your headlights. They typically include abrasive compounds, polishing pads, and a sealant. Using a restoration kit provides a comprehensive approach to remove the oxidized layer and restore clarity. The steps are usually straightforward, but following the instructions carefully is essential for the best results.
- Preparation: Clean the headlights with soap and water and tape off the surrounding paint with painter’s tape.
- Sanding: Use the included sandpaper, starting with a coarse grit and working your way to a finer grit. This removes the damaged layer of plastic.
- Polishing: Apply the polishing compound with a polishing pad. Polish until the headlight is clear.
- Sealing: Apply a sealant to protect the headlights from future damage and UV exposure.
When selecting a headlight restoration kit, consider the different types available. Some kits use hand-powered methods, while others include a polishing tool. Evaluate the condition of your headlights and the amount of work you are comfortable doing. Make sure to follow the instructions carefully for each step, and be patient, as the process takes time. The end result is restored clarity and improved headlight performance.
Advanced Techniques and Long-Term Protection
Besides simple cleaning and restoration methods, there are advanced techniques to maintain your headlights’ appearance and extend their life. These methods include using specialized products for long-term protection, such as UV protectants and sealants. By following these steps, you can keep your headlights clear and protected from future damage, ensuring that they provide maximum light output and enhance your vehicle’s aesthetics.
Using Specialized Products
Specialized products are specifically designed to protect and maintain headlight clarity. These products are often formulated with advanced polymers and UV inhibitors. Using these products provides a layer of protection against environmental damage and prolongs the life of the headlight lenses. Applying these products is a critical step in preserving the headlights’ clarity and preventing future yellowing or cloudiness.
- UV Protectant Sprays: These sprays create a protective barrier against UV radiation, reducing the rate of plastic oxidation.
- Headlight Sealants: Sealants create a clear, durable layer that fills tiny scratches and protects the plastic from moisture and contaminants.
- Ceramic Coatings: Ceramic coatings provide a super-durable, long-lasting layer of protection that repels water, dirt, and UV rays.
When selecting specialized products, consider the specific needs of your headlights. Look for products containing UV inhibitors to prevent sun damage. Choose sealants with excellent water-repelling properties to prevent moisture damage. For maximum protection, consider ceramic coatings, which provide a durable, long-lasting barrier that resists scratches and environmental damage. The proper use of these products will significantly improve headlight clarity.
Regular Maintenance Tips
Regular maintenance is essential to keeping your headlights clear and in good condition. Regularly cleaning the headlights and applying protective products will help to maintain their clarity and extend their lifespan. By adopting these simple practices, you can prevent damage and ensure optimal headlight performance. Here are some easy steps to follow regularly.
- Regular Cleaning: Wash your headlights with car soap and water every time you wash your vehicle to remove dirt and grime.
- Periodic Inspection: Check your headlights regularly for signs of fogging, yellowing, or damage. Address issues promptly to prevent further deterioration.
- Protective Application: Apply a UV protectant or sealant every few months to maintain the protective layer and repel damaging elements.
Regular washing is an easy way to remove dirt and grime. A quick visual inspection can catch early signs of fogging or damage. Applying a UV protectant or sealant at regular intervals provides continuous protection. These simple maintenance practices will extend the life of your headlights and ensure their optimal performance. Making these regular practices a part of your car care routine will help prevent fogging and maintain clarity.
When to Seek Professional Help
While many techniques can be used to clean and restore headlights, there are times when professional help is needed. If you’re dealing with extensive damage, such as deep scratches or severe yellowing, it might be more beneficial to have a professional handle the restoration. This will help get better, long-lasting results. A professional can assess the damage and use specialized tools and techniques for optimal results.
- Severe Damage: If the headlights have deep scratches, significant yellowing, or internal moisture, professional restoration is often the best approach.
- Difficult Procedures: Complex procedures like wet sanding or polishing require specific equipment and expertise to avoid damaging the headlights.
- Time Savings: Professional services can save you time and effort. They often provide long-lasting results due to their experience and access to the best products.
Consider the cost and the potential risks of DIY projects versus the expertise of a professional. If you are unsure about a restoration process or lack the right tools, it is best to leave it to the professionals. They can ensure the headlights are restored to their original clarity and protected from future damage. They have the knowledge and experience to fix problems that might exceed your abilities.
Troubleshooting Common Problems
Even with careful cleaning and maintenance, you might encounter issues. This section will help you tackle common problems and find the best solutions. Knowing how to handle these issues will let you achieve the best outcomes, no matter what challenges you might meet. You can preserve the clarity of your headlights and enhance your car’s appearance by understanding these troubleshooting tips.
Dealing with Persistent Fogging
Sometimes, fogging persists even after you’ve tried cleaning and restoration methods. This can be annoying, but you can find a solution. Understanding the potential causes of continuous fogging is key to resolving the issue. Persistence can be a sign of underlying problems. It helps identify issues and allows you to use more advanced repair methods. Here are a few things to consider.
- Internal Condensation: Moisture inside the headlight lens is a sign of a leak. The headlight housing might have a crack or the seal has broken down.
- Ineffective Cleaning: The method might not be strong enough for the type of damage. Using a headlight restoration kit will remove the damaged surface.
- Improper Sealing: If you’ve restored the headlights, the sealant might not be covering the entire surface. You might need to apply another coat.
To deal with persistent fogging, check for any visible cracks or damage to the headlight housing. If you find a crack, replacement might be necessary. Ensure you have properly cleaned and dried the headlights before applying a restoration product. If the fogging remains, consider a professional restoration service, which may be needed. Finding and solving the root cause will give you the most satisfying and enduring results.
Addressing Scratches and Surface Damage
Scratches and surface damage can impair headlight clarity, and you can take steps to fix them. Understanding the nature of the damage and using suitable repair methods can significantly improve your results. This ensures that light output is not compromised. Depending on the depth and extent of the scratches, several different approaches may be used. The right approach can restore the headlights and preserve their appearance.
- Minor Scratches: Minor scratches may often be removed with polishing compounds, which will gently smooth the surface.
- Deep Scratches: Deep scratches may require wet sanding with finer and finer grit sandpaper before polishing to get rid of them.
- Protective Measures: Apply a sealant or a ceramic coating to provide a barrier. This will protect the headlight from future scratches and damage.
Assess the depth of the scratches to determine the right method. Shallow scratches can usually be fixed with polishing. More serious scratches may need a wet sanding process to level the surface, followed by polishing. After the repair, the application of a sealant or ceramic coating will add a layer of protection and increase the headlights’ durability. These approaches will help you restore clarity and ensure your headlights stay in top shape.
Managing Yellowing and Discoloration
Yellowing and discoloration are typical signs of oxidation, which is another common headlight problem. The issue is usually related to the breakdown of the plastic from UV exposure. You can solve it by choosing the best repair methods for headlight appearance. This can include anything from easy cleaning to more thorough restoration procedures. Understanding how to handle yellowing ensures that headlights regain their clarity.
- Mild Yellowing: A headlight cleaning kit or abrasive polish may be enough to remove the oxidized layer and restore clarity.
- Severe Yellowing: More extreme cases may need wet sanding with varying grits before polishing to remove the damaged surface.
- UV Protection: Using UV-protective sealants or coatings after restoring the headlights will help prevent future yellowing.
Assess the extent of the yellowing to pick the correct process. Mild yellowing is often treated by cleaning products and simple polishing. Severe cases will need a more thorough sanding and polishing process. After restoring the headlights, apply a UV-protective coating to seal the surface. This will offer protection from sun damage. A complete approach ensures that the headlights regain their visual appeal.
Frequently Asked Questions
Question: How often should I clean my headlights?
Answer: It’s best to wash your headlights every time you wash your car. This will help remove dirt and grime.
Question: Can I use regular car wax on my headlights?
Answer: Regular car wax isn’t designed to protect plastic headlights, so it’s best to use a specialized sealant.
Question: How long does a headlight restoration last?
Answer: The length of time a restoration lasts depends on the method and the care you give your headlights. Proper maintenance and protective coatings can extend the results for a year or more.
Question: Is it safe to use sandpaper on my headlights?
Answer: Yes, it is safe as long as you use the correct grit of sandpaper and follow the instructions carefully.
Question: Can I prevent foggy headlights?
Answer: Yes, you can help to prevent foggy headlights by parking in a garage whenever possible and applying a protective sealant or coating.
Final Thoughts
Figuring out how to get rid of foggy headlights doesn’t have to be hard. By exploring the causes and the many ways to restore clarity, you can bring back the shine of your headlights. Remember that fogging and yellowing are often caused by the sun’s rays and general wear and tear, and that there are several ways to address these issues. Whether it’s a simple cleaning with household items or using a headlight restoration kit, the path to clearer headlights is within reach.
You can keep your headlights bright by using preventive measures and regular maintenance. Make it a habit to clean your headlights and apply protectants to prevent future damage. With these easy steps, you can greatly improve your car’s appearance and, more importantly, ensure your safety on the road. So, take action today and keep your headlights shining brightly!