How to Restore Plastic Headlights Step-by-Step for a Clear View
Do you notice your car’s headlights looking hazy or yellow? It’s a common problem! Over time, plastic headlights get cloudy from the sun, making it harder to see at night. For many, figuring out how to restore plastic headlights seems tough, but it’s really not. This guide will make it easy! We’ll show you exactly how to do it, step by step, so you can bring back that bright, clear light. Prepare to rediscover how much clearer your headlights can be, and how easy the whole process really is.
What Causes Cloudy Headlights?
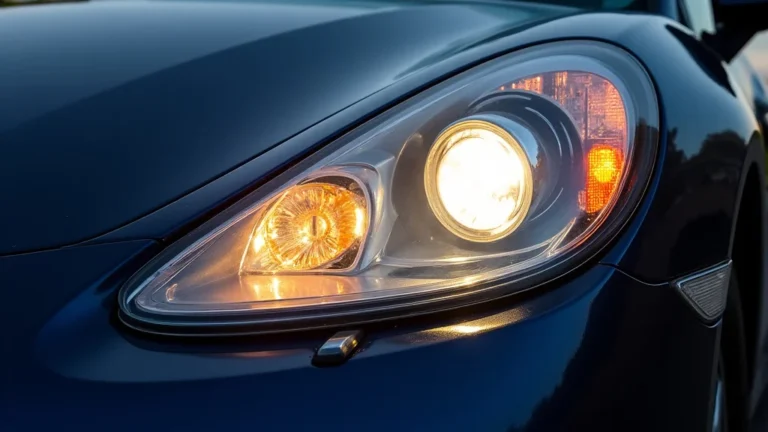
The cloudiness you see on your car’s headlights is usually caused by oxidation. Oxidation happens when the plastic on your headlights reacts with sunlight, specifically the ultraviolet (UV) rays. This reaction breaks down the plastic, creating a yellow or hazy layer on the surface. Air pollution, road grime, and harsh weather conditions can make this process happen even faster. You might also notice small cracks or pits, further reducing the light output. The good news is that this is usually just on the surface and can be fixed without replacing the entire headlight assembly. Knowing what causes the cloudiness helps you realize why cleaning and restoring the plastic is the right approach.
The Science Behind Headlight Degradation
Your headlights are generally made from polycarbonate plastic. This type of plastic is strong and durable, but it’s vulnerable to UV radiation. When sunlight hits the headlight, the UV rays break the molecular bonds in the plastic. This causes the plastic to change. It’s similar to how skin gets sunburned. The breakdown causes microscopic imperfections on the surface, which scatter light and create the hazy appearance. Add to this the constant exposure to elements like rain, snow, and salt, and the degradation process speeds up. That is why maintaining your headlights over time is important. Once you get them cleaned, the key is to protect them and keep them from degrading again. This is similar to how a person protects their skin with sunscreen.
- UV Exposure: Sunlight is the primary cause of oxidation. UV rays break down the plastic, causing it to become yellow and cloudy.
- Environmental Factors: Rain, snow, road salt, and air pollution can also damage headlights over time.
- Manufacturing: Some headlight designs and materials might be more prone to oxidation.
- Lack of Protection: Headlights without protective coatings oxidize faster.
Spotting the Signs of Cloudy Headlights
Recognizing the signs of cloudy headlights is the first step toward fixing them. The easiest sign to see is the yellowing or haziness on the plastic surface. This can range from a light fog to a deep, noticeable yellow tint. Another sign is reduced light output. If your headlights seem dimmer than they used to be, especially at night, cloudiness might be the reason. Inspect the surface closely for cracks or pits. These imperfections scatter the light and diminish visibility. All these factors combine to make it harder to see. Addressing these issues can help improve your safety. Also, remember that regular inspection is a simple way to stay on top of any developing problems.
- Yellowing or Haziness: A yellow or cloudy appearance is the most obvious sign.
- Reduced Light Output: Dim headlights mean reduced visibility at night.
- Surface Cracks and Pits: Small cracks or pits can scatter light and diminish visibility.
- Uneven Light Distribution: The light beam may become uneven or have dark spots.
Gathering the Right Tools and Supplies
Before you begin the process of learning how to restore plastic headlights, it’s essential to have the correct tools and supplies. A good headlight restoration kit usually includes everything you need. This saves you time and ensures you have the right products. Alternatively, you can buy the items separately. Make sure you get quality products to achieve the best results. Having everything on hand makes the job quicker and easier. Getting prepared is the first step towards getting bright, clear headlights and improving your night-time visibility.
Essential Tools for Headlight Restoration
For most headlight restoration jobs, you will need a few basic tools. These can include a sandpaper kit. Sandpaper comes in various grits (the roughness of the sandpaper). You’ll typically need several different grits, ranging from coarse to fine. A polishing compound is essential for removing scratches and cloudiness. A sealant will help protect the headlights after the restoration. Microfiber cloths are great for wiping away dust and applying products. Finally, you might want masking tape to protect the paint around the headlights. Gathering all the items first will ensure a smooth process. You may want to invest in a good kit, or you can purchase items separately.
- Sandpaper Kit: Includes sandpaper of different grits, from coarse to fine.
- Polishing Compound: To remove scratches and cloudiness.
- Headlight Sealant or UV Protectant: To protect the restored headlights.
- Microfiber Cloths: For wiping and polishing.
- Masking Tape: To protect the surrounding paint.
Choosing the Right Restoration Kit
Choosing the right restoration kit can greatly impact your results. Many kits are available, from basic to professional-grade. Read reviews and compare features. Make sure the kit includes sandpaper, a polishing compound, and a sealant or protectant. Some kits come with a drill attachment, which can speed up the process. A good starting point is a kit designed for beginners, as it will likely include clear instructions and all necessary materials. Regardless of the kit you select, make sure that it comes with a protectant for the headlight. This will ensure that the headlight maintains its cleanliness for a longer period of time.
- Check Reviews: Read what other users say about different kits.
- Compare Features: Look for sandpaper, polishing compound, and sealant.
- Consider the Drill Attachment: This can save time.
- Check for UV Protection: A good sealant or protectant is important.
Step-by-Step Guide to Restoring Headlights
Now, let’s explore the process of how to restore plastic headlights! This is a simple process, and the results can be really rewarding. With the right tools and a little bit of patience, you can dramatically improve the look and function of your headlights. This step-by-step guide will walk you through each stage. Following these directions will make the process as easy as can be. You’ll be amazed at how much clearer and brighter your headlights will become. The difference is immediately noticeable.
Preparation is Key
Before you begin, proper preparation is important. Start by parking your car in a well-ventilated area, preferably out of direct sunlight. Clean the headlights with soap and water to remove any dirt or debris. Use masking tape to protect the paint around the headlights. This will prevent accidental scratches. After you clean the headlights, give them a chance to dry completely. All of these steps help ensure a smooth and effective restoration process. Preparing your car beforehand is a crucial step.
- Park in a Shaded Area: This prevents the products from drying too quickly.
- Clean the Headlights: Wash with soap and water to remove dirt and grime.
- Protect the Paint: Use masking tape around the headlights.
- Dry the Headlights: Make sure they are completely dry before proceeding.
Sanding the Headlights
Sanding is a crucial step in the restoration process. Start with coarse sandpaper (usually 800-grit) to remove the top layer of oxidation and any deep scratches. Then, move to finer grits (1000, 2000, and sometimes even 3000) to smooth out the surface. Always sand in a crosshatch pattern. Use a spray bottle with water to keep the surface wet while sanding. This helps prevent the sandpaper from clogging and reduces scratching. Be patient and work evenly across the entire surface. Sanding might seem challenging, but this helps the polishing compound to do its work. Keep checking your work to see how the headlights are improving.
- Start with Coarse Sandpaper: Use 800-grit to remove heavy oxidation.
- Use Finer Grits: Progress to 1000, 2000, and 3000 grit for smoothing.
- Sand in a Crosshatch Pattern: Ensure even sanding.
- Keep the Surface Wet: Use a spray bottle with water.
Polishing and Sealing
After sanding, it’s time to polish the headlights. Apply a polishing compound to the surface. Use a polishing pad (or a microfiber cloth) to buff the headlights. You can use an orbital buffer or do this by hand. If you are using a buffer, start on a low speed. Work in circular motions until the headlights become clear. After polishing, clean the headlights with a microfiber cloth to remove any residue. Apply a headlight sealant or UV protectant to protect the restored headlights from future oxidation. This is the last step that will ensure that the headlight remains clear for the long haul.
- Apply Polishing Compound: Use a polishing pad or microfiber cloth.
- Buff the Headlights: Use an orbital buffer or polish by hand.
- Clean the Headlights: Remove any residue with a microfiber cloth.
- Apply Sealant or Protectant: Protect the headlights from UV rays.
Maintaining Your Restored Headlights
Maintaining your headlights will help preserve your hard work and keep them clear for a longer period. There are several things you can do to protect them from future oxidation and damage. Regular cleaning is a great starting point. Try using a quality car wash soap or headlight cleaner. Parking your car in a garage or shaded area when possible will reduce UV exposure. Applying a headlight sealant or protectant periodically provides a protective barrier. With a bit of care, your headlights will look and perform like new for an extended time. Maintenance is key to keeping those headlights clear!
Regular Cleaning and Care
Regular cleaning is a simple way to maintain your headlights’ clarity. Wash your headlights with soap and water when you wash your car. Avoid harsh chemicals or abrasive cleaners that can damage the plastic. Regularly inspect your headlights for any signs of cloudiness or damage. If you notice any issues, address them right away. This could include spot-cleaning or reapplying sealant. Proper cleaning and inspection will help you catch any issues before they become major problems. It takes a small amount of time, and it will keep those headlights looking their best.
- Wash Regularly: Use soap and water or a headlight cleaner.
- Avoid Harsh Chemicals: Do not use abrasive cleaners.
- Inspect Regularly: Check for signs of cloudiness or damage.
- Address Issues Promptly: Take action if you see any problems.
Protective Measures for Headlights
Taking a few protective measures can extend the life of your headlight restoration. One of the best things you can do is park in a garage or a shaded area whenever possible. This limits the headlights’ exposure to UV rays. You can also apply a headlight sealant or UV protectant every few months. This will create a protective barrier against the sun’s harmful rays and other environmental factors. If you drive in areas with harsh weather, consider using a headlight film. Headlight film adds a layer of protection against scratches and UV damage. These simple steps can make a big difference.
- Park in a Garage: Limit UV exposure.
- Apply Sealant Regularly: Create a protective barrier.
- Use Headlight Film: Add extra protection.
- Avoid Harsh Weather Exposure: Minimize driving in harsh conditions.
Cost and Benefits of Headlight Restoration
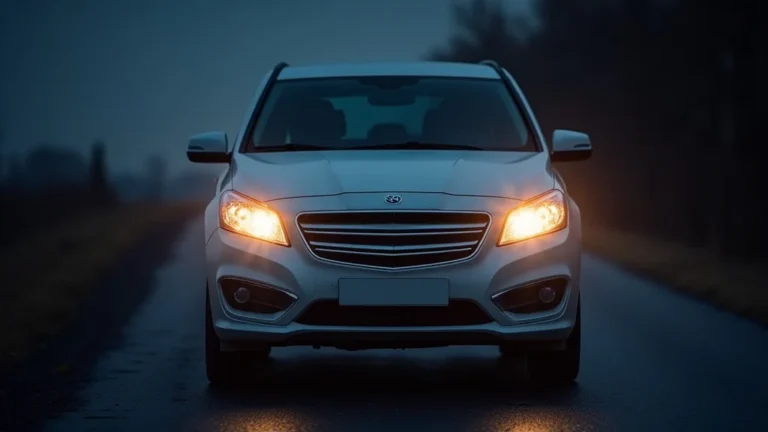
Restoring your headlights is a cost-effective way to improve your car’s appearance and safety. Replacing your headlights can be expensive, but restoring them usually costs much less. The cost of a headlight restoration kit is generally affordable, and you can save money by doing the job yourself. More importantly, restoring your headlights can greatly improve your visibility while driving at night. Clear headlights provide a brighter and more focused light beam, which will improve your driving safety. It is a worthwhile process with benefits that you can see.
Comparing Costs
The cost of headlight restoration is usually much lower than replacing the headlights. A good headlight restoration kit typically costs between $20 and $50. However, the price of replacing your headlights can range from $100 to several hundred dollars per headlight. The cost also depends on the type of car you own. Another great benefit of restoration is that you are saving materials from the landfill. Given that the process is easy to perform, the overall costs are low. With the costs considered, it makes economic sense to try restoring them.
| Expense | Estimated Cost |
|---|---|
| Headlight Restoration Kit | $20-$50 |
| Professional Restoration (per headlight) | $50-$100+ |
| New Headlight Assembly (per headlight) | $100-$500+ |
Safety and Aesthetic Advantages
Restoring your headlights is not just about the way they look; it’s also about safety. Clear headlights offer better visibility at night and in poor weather conditions. This enhances your ability to see the road, pedestrians, and other vehicles. This improves your reaction time and helps you avoid accidents. Besides the safety aspect, restoring your headlights can significantly enhance your car’s appearance. It makes it look newer and more well-maintained. A clean and polished car makes a good impression. The benefits of headlight restoration are evident in these advantages.
- Improved Night Visibility: Brighter, clearer headlights improve visibility.
- Enhanced Safety: Better visibility helps prevent accidents.
- Improved Appearance: Restored headlights make your car look better.
- Increased Vehicle Value: Well-maintained headlights can increase your car’s value.
Frequently Asked Questions
Question: How often should I restore my headlights?
Answer: It depends on the level of cloudiness and your driving conditions. However, many people restore their headlights every year or two.
Question: Can I use household items to restore my headlights?
Answer: While some people have tried using toothpaste or baking soda, these methods are often ineffective and might cause more harm than good. It is best to use a restoration kit.
Question: How long does a headlight restoration last?
Answer: With proper maintenance and protection, the restoration can last for one to three years.
Question: Is it possible to damage the headlights during restoration?
Answer: Yes, you can damage the headlights if you use harsh chemicals or sand too aggressively. Always follow the directions carefully and use the proper materials.
Question: Can I restore my headlights if they are cracked or severely damaged?
Answer: If your headlights have deep cracks or severe internal damage, restoration might not be effective. In these cases, it is important to replace the headlights.
Final Thoughts
So, you’ve learned how to restore plastic headlights. With these steps, you can remove cloudiness and bring back bright, clear light. The main idea is that it is not as hard as you might have thought. Remember, you start by cleaning, sanding, polishing, and sealing. You will need a kit and some elbow grease! By taking care of your headlights, you’re not only improving your car’s look but also increasing your driving safety at night. The process is cost-effective, with great benefits. Now, give it a shot and enjoy the improved visibility!