How to Clean Headlights Using Everyday Stuff
Cleaning your car’s headlights can seem tricky, especially if you’re new to it. Many people think it needs special tools or expensive products. But the truth is, you can often do a great job with items you probably already have at home! This guide will show you exactly how to clean headlights with household items. We’ll explore a simple, step-by-step method that’s easy to follow. Get ready to see your headlights shine like new!
What Makes Headlights Cloudy?
Headlights get cloudy because of a few things. The main culprit is the sun. Ultraviolet (UV) light from the sun slowly breaks down the plastic, making it look yellow or hazy. Weather, like rain and snow, also plays a part. Road grime and tiny scratches from driving can add to the problem, too. Over time, all these factors combine to make your headlights less bright. This affects how well you can see at night, and it can also make your car look older than it is.
The Impact of UV Light on Headlights
The plastic used in headlights, usually polycarbonate, is very strong. But it’s not perfect. UV rays are like tiny hammers, slowly chipping away at the plastic’s surface. This process is called oxidation. It causes the plastic to become rough and uneven. This unevenness scatters the light from your headlights, making them appear dimmer and cloudier. This is why headlights often start to look hazy after a few years, especially if the car spends a lot of time outside.
- Ultraviolet Light’s Role: UV light degrades the polycarbonate plastic in headlights over time. This breakdown is the primary cause of yellowing and cloudiness. It can also cause the plastic to become brittle.
- Oxidation Process: Oxidation is the chemical reaction that occurs when the plastic reacts with UV light and oxygen. This process breaks down the surface, creating microscopic pits and imperfections that scatter light.
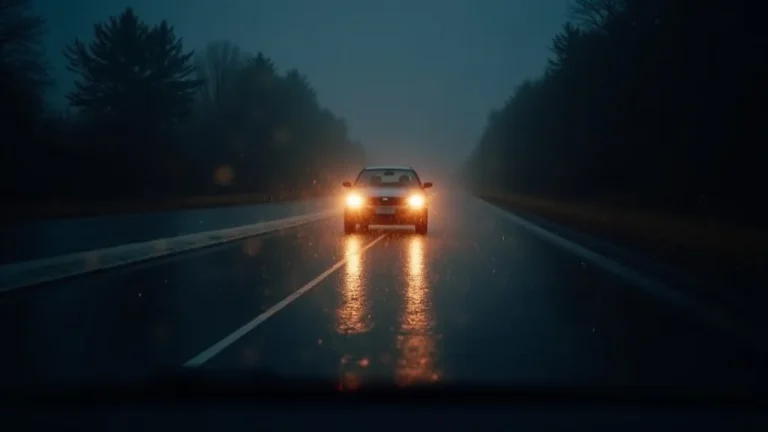
- Impact on Visibility: Cloudy headlights significantly reduce visibility, especially at night. This increases the risk of accidents. Dim headlights make it harder to see the road, pedestrians, and other vehicles.
- Heat Exposure: Heat from the sun also accelerates the degradation process. Cars parked in direct sunlight experience more rapid headlight clouding. Extreme temperatures also can cause the plastic to distort.
Weather’s Role in Headlight Degradation
Weather plays a huge role in how quickly your headlights get cloudy. Rain, snow, and even humidity can wear down the plastic. Road salt and other chemicals used during winter can also make things worse. These elements scratch and damage the plastic surface. This damage allows UV rays to penetrate more easily. As a result, the headlights start to look dull and yellow.
- Rain and Snow: Water, particularly when it contains minerals or pollutants, can act as a mild abrasive, slowly eroding the headlight surface. Frequent exposure speeds up the wear process.
- Road Salt and Chemicals: Road salt and de-icing chemicals are very harsh. These chemicals often contain abrasives that scratch the plastic. They can also cause chemical reactions that degrade the plastic.
- Humidity: High humidity can accelerate oxidation. Moisture gets trapped inside the headlight lenses. This creates the right conditions for damage from UV rays.
- Temperature Fluctuations: Changes in temperature, like going from hot to cold, cause the plastic to expand and contract. This can lead to cracks and other damage over time.
The Effects of Road Grime and Scratches
Road grime and tiny scratches also contribute to cloudy headlights. Dirt, dust, and other particles hit your headlights while driving. These particles scratch the surface over time. These scratches scatter light and reduce brightness. Regular cleaning can help, but eventually, you’ll need to do something more to restore them. The more often you drive, the quicker your headlights will get worn down.
- Abrasion from Driving: Tiny particles of sand, gravel, and other debris hit the headlights at high speeds. This causes microscopic scratches.
- Dirt and Dust Accumulation: Road grime and dust build up on the headlight surface. This blocks light and reduces visibility. Regular washing can remove some of this, but it doesn’t solve the cloudiness.
- Scratches and Imperfections: Scratches scatter light in all directions, reducing the amount of light that shines forward. Deeper scratches can also weaken the plastic.
- Impact from External Factors: Pebbles and other objects can also cause impact damage. This creates small chips that lead to further degradation.
Materials You’ll Need to Clean Headlights
You don’t need to spend a lot of money to clean your headlights. In fact, many common household items work perfectly well. This is good news, especially if you’re trying to save money. Gather these materials before you start, so you’re ready to go. The process is easy, and you’ll be amazed at the difference it makes.
Essential Cleaning Supplies
You’ll need a few key items to get started. These are the basics, and you might already have them in your home. Be sure to gather these items before you begin to make the process smoother.
- Cleaning Agent: You’ll need a cleaning agent. Options include toothpaste (non-gel), baking soda paste, or a specialized headlight restoration kit. Toothpaste is a common choice because it contains mild abrasives.
- Water: You’ll need water to rinse and dilute your cleaning agent. Have a bucket or hose ready to go.
- Microfiber Cloths: Microfiber cloths are essential. They’re soft and won’t scratch your headlights. You’ll need several to avoid spreading dirt.
- Tape: Painter’s tape or masking tape is good to protect the paint around the headlights. Tape helps prevent accidental damage.
Optional Items for Enhanced Results
These items aren’t strictly necessary, but they can make the job easier or provide better results. Consider including these in your supplies if you want the best possible outcome.
- Spray Bottle: A spray bottle filled with water helps keep the headlights wet during cleaning. This reduces friction and makes the cleaning process easier.
- Polishing Compound: If your headlights are severely cloudy, a polishing compound can help. This provides an extra layer of protection and shine.
- Sandpaper (Fine-Grit): For very bad cases, fine-grit sandpaper (1000-grit or higher) might be necessary to remove the top layer of damage. Use it carefully and only when needed.
- UV Protectant Sealant: After cleaning, a UV protectant sealant helps prevent future clouding. This keeps your headlights clearer for longer.
Safety Precautions to Keep in Mind
Safety is important. Always take care when using any cleaning product. If you’re using power tools, make sure you understand how to use them safely. Doing this can make all the difference in the world.
- Protect Your Skin and Eyes: Wear gloves and safety glasses. Some cleaning agents can irritate your skin or eyes. Protect yourself from splashes and contact.
- Work in a Well-Ventilated Area: Ensure you are working in an area with good airflow. This prevents you from breathing in harmful fumes.
- Avoid Harsh Chemicals: Never use harsh chemicals or strong solvents. These can damage your headlights and the surrounding paint. Stick to the recommended cleaning agents.
- Test on a Small Area: Before cleaning the entire headlight, test the cleaning agent on a small, hidden area. This ensures that it doesn’t damage the plastic.
Step-by-Step Guide to Clean Headlights
Follow these steps to clean your headlights with household items. This process has been simplified for you. Just follow the steps, and you’ll see a big difference in the clarity of your headlights.
Prepping Your Headlights for Cleaning
Before you start, get your car ready. This involves preparing the area around your headlights. Properly preparing your car can make the cleaning process easier and help prevent damage.
- Wash the Headlights: Start by washing your headlights with soap and water. This removes loose dirt and grime. Rinse thoroughly and dry the headlights with a clean cloth.
- Tape Around the Headlights: Use painter’s tape or masking tape to protect the paint around the headlights. This keeps the cleaning agent off the car’s paint.
- Gather Your Supplies: Make sure you have all the necessary supplies within reach. This includes your cleaning agent, water, microfiber cloths, and any other items you plan to use.
- Park in a Shaded Area: Park your car in a shaded area. Direct sunlight can cause the cleaning agent to dry too quickly. This can make the cleaning process more difficult.
Applying Your Cleaning Agent
Now, apply your chosen cleaning agent to the headlights. The cleaning agent does the hard work. Apply it evenly for the best results.
- Choose Your Agent: Select your cleaning agent, such as toothpaste or baking soda paste. If you choose toothpaste, make sure it is a non-gel formula.
- Apply the Agent: Apply a generous amount of the cleaning agent to the headlight surface. Spread it evenly across the lens.
- Add Water: If the agent starts to dry, use a spray bottle to keep the surface wet. A little water goes a long way.
- Avoid Oversaturation: Don’t use too much water. You want the surface to stay damp, but not dripping wet. Excess water can dilute the cleaning power of the agent.
Polishing and Rinsing the Headlights
The polishing and rinsing steps are important for removing the grime and restoring clarity. Follow these steps carefully to ensure the best outcome.
- Polish the Headlights: Use a microfiber cloth to polish the headlights. Rub the agent in small, circular motions. Apply gentle pressure.
- Rinse Thoroughly: Once you’ve polished the headlight, rinse it thoroughly with clean water. Make sure to remove all traces of the cleaning agent. Any residue can affect the clarity.
- Inspect the Headlights: Inspect the headlights to see if they’re clear enough. If not, repeat the process. Don’t be discouraged if you need to repeat the steps.
- Dry the Headlights: Finally, dry the headlights with a clean microfiber cloth. Ensure the headlights are completely dry before you apply any protectant.
Comparing Cleaning Methods
Several methods exist for cleaning headlights. Each method has its pros and cons. Understanding these differences can help you choose the best approach for your car. This overview provides insights to help you get the best results.
Toothpaste vs. Commercial Headlight Restorers
Toothpaste is a popular, cost-effective method. Commercial restorers are often more effective. Knowing the differences can help you make the right choice.
| Feature | Toothpaste | Commercial Restorers |
|---|---|---|
| Cost | Low | Higher |
| Effectiveness | Moderate | High |
| Ease of Use | Easy | Varies |
| Durability | Short-term | Longer-term |
- Cost: Toothpaste is very affordable, making it a budget-friendly option. Commercial restorers can be more expensive. They often come with additional tools or components.
- Effectiveness: Toothpaste can improve the clarity of slightly cloudy headlights. Commercial restorers often contain stronger abrasives and UV protection.
- Ease of Use: Toothpaste is simple to use. Commercial restorers might have more steps or require more effort. Some kits include sanding pads or polishing compounds.
- Durability: The effects of toothpaste may not last very long. Commercial restorers can provide longer-lasting results, especially if they include a sealant.
Baking Soda Paste vs. Other Abrasives
Baking soda is another common household abrasive. Understanding its capabilities, compared to other options, is important.
- Abrasive Properties: Baking soda is a gentle abrasive that can remove light oxidation and surface grime. Other abrasives, like polishing compounds, are more aggressive and can remove deeper scratches.
- Application: Baking soda paste is applied with a microfiber cloth and polished in circular motions. Other abrasives may require the use of power tools for optimal results.
- Effectiveness on Severe Damage: Baking soda is best for mild cases of clouding. Polishing compounds and sanding provide better solutions for significant damage.
- Protection: After using baking soda, it’s advisable to apply a UV protectant. Other abrasives might come with built-in UV protection, simplifying the process.
Comparing Different Application Tools and Methods
Different tools and methods can affect the final results. Choosing the right approach depends on the state of your headlights and the amount of effort you want to invest.
- Manual Polishing: Manual polishing involves using a microfiber cloth and applying pressure to the headlights. It’s a low-cost, hands-on method, but it can be time-consuming.
- Power Drill Attachments: Power drill attachments, such as buffing pads, can speed up the cleaning process. This helps remove clouding more quickly.
- Sandpaper: Sandpaper is effective for removing deep scratches and severe oxidation. It should be used carefully, starting with fine-grit sandpaper and progressing to finer grits.
- Headlight Restoration Kits: Headlight restoration kits come with everything you need. These kits include cleaning compounds, polishing pads, and sealants. This ensures a comprehensive solution.
Maintaining Your Clean Headlights
Keeping your headlights clean helps preserve their clarity. Regular maintenance is key to protecting your headlights and preventing future clouding. These simple steps will make a big difference.
Regular Cleaning and Washing Tips
Regular cleaning is a simple way to maintain your headlights. Washing your car helps remove road grime. This cleaning will keep your headlights clear for longer.
- Wash Regularly: Wash your car, including the headlights, at least once a month. This removes dirt and grime that can contribute to clouding.
- Use Car Wash Soap: Use a car wash soap that is safe for plastic. Many household soaps can be too harsh and damage the surface.
- Avoid Abrasive Cleaners: Avoid using abrasive cleaners, like kitchen cleaners. These can scratch the headlight surface.
- Dry Thoroughly: After washing, dry the headlights thoroughly with a clean microfiber cloth. This prevents water spots and residue.
Applying Protectants and Sealants
Applying protectants and sealants helps shield your headlights. These products act as a protective layer, guarding against UV rays and other environmental factors.
- Choose a UV Protectant: Choose a UV protectant or sealant designed for headlights. This will help prevent future clouding and yellowing.
- Apply After Cleaning: Apply the protectant after cleaning and drying your headlights. This ensures the product adheres to a clean surface.
- Follow Instructions: Always follow the product’s instructions for application. This ensures the best results.
- Reapply Regularly: Reapply the protectant periodically. This will provide consistent protection. Depending on the product, you might need to reapply it every few months.
Protecting Your Headlights from UV Damage
Protecting your headlights from UV damage is essential. Even with the best cleaning, they’ll cloud up if exposed to the sun. Here are some extra steps you can take to minimize damage.
- Park in the Shade: When possible, park your car in a shaded area. This limits the headlights’ exposure to direct sunlight.
- Use a Car Cover: Use a car cover when parking outdoors for extended periods. This provides an additional layer of protection against UV rays.
- Consider Garage Storage: If you have access to a garage, storing your car indoors is the best way to protect your headlights. This helps prevent exposure to sun and weather.
- Inspect Regularly: Regularly inspect your headlights for any signs of clouding or damage. Address issues early on to prevent them from worsening.
Frequently Asked Questions
Question: Can I use dish soap to clean my headlights?
Answer: It’s best to avoid dish soap. Many dish soaps are harsh and can damage the plastic over time.
Question: How often should I clean my headlights?
Answer: Clean your headlights every few months, or more often if they start to look cloudy.
Question: Can I use sandpaper on my headlights?
Answer: Yes, but use very fine-grit sandpaper (1000-grit or higher) and only if the clouding is severe. Be gentle.
Question: How long will the cleaning last?
Answer: The cleaning results can last for several months. Applying a sealant helps extend the protection.
Question: Is it safe to use toothpaste on my headlights?
Answer: Yes, non-gel toothpaste is generally safe. The mild abrasives can help remove light clouding.
Final Thoughts
Cleaning your headlights with household items is a simple task that can significantly improve your car’s look and safety. You learned how to clean headlights using ingredients from your home. The methods are easy to follow. Remember to gather your supplies, prepare your headlights, and follow the step-by-step guide. Compare different methods like toothpaste or commercial cleaners. You also explored the effects of UV rays, weathering, road debris, and the best way to maintain your headlights. Take action now and start cleaning your headlights! By doing so, you’ll improve your car’s appearance and enhance your night-time visibility. It’s time to make those headlights shine!