How to Clean Headlights With Baking Soda For Bright and Clear Vision
Do your headlights look foggy or yellowed? Many people want to know how to clean headlights with baking soda because it seems like an easy fix, but they’re not always sure where to start. It can feel like a tricky task. Don’t worry, it’s simpler than you think! This guide will break down the process step-by-step. Get ready to explore the easy way to make your headlights shine again!
What Causes Cloudy Headlights?
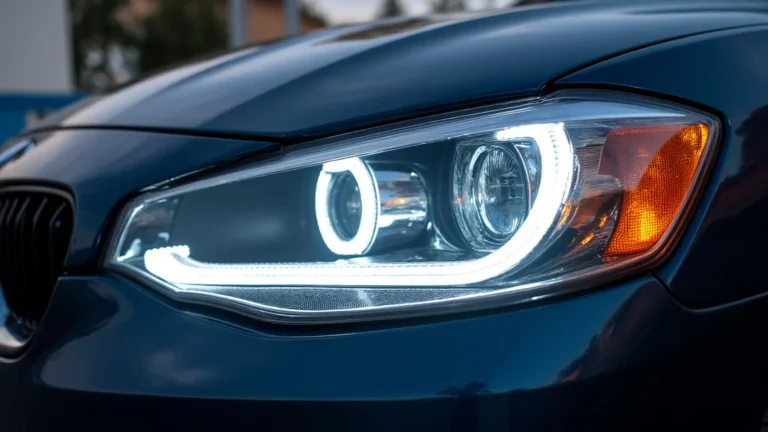
Headlights, those essential components of a car, often face the relentless impacts of the environment. Over time, the clear plastic or glass covering the bulbs can become clouded or yellowed. This cloudiness is more than just an aesthetic issue; it drastically reduces the brightness and range of your headlights, compromising visibility during nighttime or inclement weather conditions. Many factors contribute to this deterioration. Sunlight, particularly the ultraviolet (UV) rays, plays a significant role in breaking down the plastic’s surface. Exposure to road debris, such as dust, dirt, and tiny rocks, causes scratches and abrasions. The accumulation of these minute damages leads to light scattering. This scattering is what makes the headlights appear hazy. Lastly, the chemical composition of the plastic itself degrades over time.
Environmental Factors and Headlight Degradation
The clear plastic or glass of headlights endures constant external challenges. Sunlight, a primary culprit, emits UV radiation that weakens the plastic molecules. Think of it like a sunburn for your car. Regular exposure to sunlight causes the plastic to become brittle. Road debris, ranging from tiny stones to airborne particles, acts like sandpaper. These small particles create a web of scratches. These scratches scatter light, reducing its effectiveness. Even the temperature fluctuations, from scorching summers to freezing winters, can affect the integrity of the headlight material. The constant expansion and contraction can lead to internal stresses and cracking. Oxidation, a chemical reaction with oxygen, further degrades the surface, leading to a yellow or cloudy appearance. All these elements work together to cloud headlights over time.
- Sunlight and UV Damage: UV rays from the sun break down the plastic’s molecular structure, causing it to become brittle and yellow.
- Road Debris: Small particles and impact cause scratches that scatter light, reducing clarity.
- Oxidation and Weathering: Exposure to oxygen, moisture, and temperature changes causes the plastic to oxidize and degrade.
The UV radiation weakens the bonds within the plastic material, leading to a breakdown that makes the headlight hazy. Consider this the sun’s version of aging for your car’s headlights.
Think of it like tiny scratches, each scattering a portion of the light emitted by your headlights, which severely impairs their ability to illuminate the road ahead.
This process results in a yellow or cloudy appearance, which not only looks unattractive but also reduces the light output. Like rust on metal, oxidation slowly erodes the plastic’s clarity.
Headlight Materials and Their Properties
Most modern headlights use polycarbonate plastic because it is durable and lightweight. Polycarbonate is a type of plastic that is very strong and can withstand impacts. It also helps protect the headlight from UV rays. Polycarbonate is resistant to cracking and shattering. This offers great protection in the event of an accident. Although polycarbonate is durable, it is still vulnerable to the effects of the environment. Unlike glass, which is also used in some headlights, polycarbonate is more prone to scratching and discoloration over time. The properties of glass make it more scratch-resistant. Glass is less likely to become hazy due to its inherent resistance to UV light and weathering. Some headlights use a specific coating that protects the plastic from scratches and UV rays. However, even with these coatings, headlights will still eventually degrade.
- Polycarbonate Plastic: The primary material in most headlights, known for its impact resistance.
- Glass: Some headlights still use glass, prized for its clarity and scratch resistance.
- Coatings and Treatments: Protective layers that enhance UV resistance and scratch protection.
This is commonly used because it is lightweight. The plastic is strong, but susceptible to UV damage and scratching. It is a good balance of cost and durability.
Glass is resistant to environmental factors. Glass is not as common due to its heavier weight and a higher risk of breaking upon impact. The clarity is a big advantage.
These coatings act as a barrier against environmental damage, but they will wear down over time. Regular maintenance can extend their lifespan.
Materials You’ll Need to Clean Headlights With Baking Soda
Gathering the right supplies makes the process of restoring your headlights simpler. Using the right tools will achieve the best results. You will want to use common household items that are accessible. This prevents you from having to purchase specialized cleaning products. The key ingredients are simple. First, you need baking soda, which is your main cleaning agent. Next, you will need water to create a paste. You will also need some kind of applicator, such as a soft cloth or a sponge, for applying and scrubbing the paste. You will also need a bucket of water for rinsing. The bucket is also needed for rinsing any debris from the headlight surface. To protect the surrounding paintwork, you can also use painter’s tape to cover the area around the headlights.
Essential Supplies for Cleaning
To begin the restoration, you’ll need a few essential items. The heart of the process is, of course, baking soda. This mild abrasive is gentle enough not to scratch the headlight but effective enough to remove oxidation and grime. You’ll need water to mix with the baking soda. You will create a paste with a consistency like toothpaste. A soft cloth or sponge is necessary. It should be non-abrasive to prevent scratching the plastic. A separate bucket of clean water is needed for rinsing the headlights. It is also needed for rinsing the cloth or sponge. Painter’s tape helps to protect the car’s paintwork from the abrasive mixture. This can also prevent any accidental damage. These simple supplies are readily available.
- Baking Soda: Acts as a mild abrasive to remove oxidation and grime.
- Water: Used to mix with the baking soda and create a paste.
- Soft Cloth or Sponge: Applied to gently scrub the headlight surface.
- Bucket of Water: Used for rinsing the headlights and the cloth/sponge.
- Painter’s Tape: Helps protect the car’s paintwork during the process.
This household staple provides a gentle cleaning action. It will help to remove the surface cloudiness without causing scratches.
Water helps in creating the ideal consistency of the paste. This also helps distribute the cleaning solution evenly over the headlight surface.
This applies the cleaning mixture without scratching the plastic. Make sure the material is clean and won’t leave behind any fibers.
Clean water helps to remove the cleaning solution and any loosened dirt. Keep the bucket clean to avoid re-depositing debris.
This is a protective measure against any accidental contact with the cleaning mixture. It prevents damage and keeps your car looking great.
Optional Items for Enhanced Cleaning
While the basic supplies can do the trick, some extra items can enhance the process. Adding a plastic polish after the baking soda treatment can improve clarity. This also helps to protect the headlights. A microfiber cloth can be used for the final buffing. This will give you a streak-free finish. If you plan on doing a more in-depth restoration, consider using a headlight restoration kit. These kits usually include polishing compounds and sealants. They are designed to fully rejuvenate the headlights. A spray bottle can be useful for keeping the headlights wet. This also helps with the cleaning process. If you notice severe yellowing or cloudiness, you might want to use a more abrasive cleaning compound. It is important to know that these can potentially damage the headlights. Make sure you use the compound cautiously.
- Plastic Polish: Helps to improve clarity and protect the headlight surface.
- Microfiber Cloth: Provides a streak-free finish and gentle buffing.
- Headlight Restoration Kit: Provides polishing compounds and sealants for a complete restoration.
- Spray Bottle: Helps keep the headlight surface wet during the process.
This polishes away minor imperfections. The polish adds a protective layer. This layer prevents future clouding.
A microfiber cloth is gentle and effective. It removes any remaining cleaning solution. It also ensures a clear, polished surface.
These kits can tackle more serious damage. They come with everything needed for a complete headlight overhaul.
Spraying water keeps the baking soda paste from drying out. This aids the cleaning process and prevents scratching.
Step-by-Step Guide: How to Clean Headlights With Baking Soda
Cleaning your headlights using baking soda is a straightforward process. The most important step is to prepare your car. First, tape off the area around your headlights using painter’s tape. This will protect your car’s paintwork from the abrasive paste. Next, clean the headlight surface with soap and water to remove any loose dirt. Now you are ready to prepare your cleaning solution. Mix the baking soda with water until you have a thick paste, similar in consistency to toothpaste. Apply the paste evenly to the headlight surface. Start scrubbing using a soft cloth or sponge in a circular motion. Apply gentle pressure to remove the haze and oxidation. After scrubbing, rinse the headlight thoroughly with clean water. You can then dry the headlight with a clean cloth. If necessary, you can repeat the process for best results.
Preparing Your Vehicle for Cleaning
The first step is preparing your vehicle. Begin by cleaning the headlight surface. Use soap and water to wash away loose dirt and debris. This helps prevent scratches during the cleaning process. After washing, completely dry the headlights. Apply painter’s tape to the surrounding paintwork. This will protect the paint from the abrasive baking soda paste. Ensure the tape is firmly applied to prevent any cleaning solution from seeping underneath. You can now move on to the cleaning process. Proper preparation is very important for the best results.
- Wash and Dry: Start by washing the headlights with soap and water. Dry them thoroughly.
- Apply Painter’s Tape: Tape off the surrounding paint to protect it from the baking soda paste.
- Inspect Headlights: Before you begin, check the condition of your headlights.
Washing the headlights removes loose debris. The drying ensures that the cleaning solution adheres effectively.
Painter’s tape will protect the car’s finish from any accidental contact with the cleaning mixture.
This will help you determine the severity of cloudiness and how much effort you’ll need.
Applying and Scrubbing the Baking Soda Paste
Now you are ready to apply the baking soda paste. Make sure the headlight surface is clean and dry. Use a small bowl to mix baking soda with water. Stir the mixture until you get a thick paste. Apply the paste evenly across the headlight surface. Start scrubbing using a soft cloth or sponge. Rub the paste in a circular motion. Apply firm, but not excessive, pressure. You should see the haze and oxidation begin to lift. It might take a few minutes of scrubbing. Focus on areas where the cloudiness is most noticeable. If needed, reapply the paste. After you’re done scrubbing, make sure you rinse your headlight. Now, remove the painter’s tape and clean up any remaining paste.
- Mix Baking Soda and Water: Create a paste with the consistency of toothpaste.
- Apply the Paste Evenly: Cover the entire headlight surface with the baking soda paste.
- Scrub in Circular Motions: Use a soft cloth or sponge and apply moderate pressure.
- Focus on Problem Areas: Give extra attention to areas with more severe cloudiness.
This consistency helps the baking soda cling to the headlight surface. It allows it to effectively remove grime and haze.
Make sure you apply the paste evenly. This is to ensure consistent cleaning across the headlight surface.
Circular motions help lift the oxidation and grime. You can avoid creating scratches.
This will ensure a more even cleaning, particularly if your headlights have uneven damage.
Rinsing and Drying the Headlights
Once you are done scrubbing, it is time to rinse the headlights. Use plenty of clean water to completely rinse away the baking soda paste. Make sure there is no residue left on the headlight surface. This will help to prevent streaks and maintain clarity. You can use a hose or a bucket of water. Ensure you rinse the entire area thoroughly. After rinsing, dry the headlights with a clean, dry cloth. This will prevent water spots and enhance the clarity. Inspect your work. If there is still some cloudiness, you can repeat the process. Proper rinsing and drying are very important for a good finish.
- Thoroughly Rinse with Water: Make sure you completely remove all traces of the baking soda paste.
- Dry with a Clean Cloth: Use a clean and dry cloth to wipe the headlights.
- Inspect for Remaining Cloudiness: If there is still cloudiness, repeat the process.
Thorough rinsing ensures that no residue remains. This will help to prevent any streaking or a cloudy appearance.
Drying is essential for preventing water spots and restoring clarity. The cloth should be clean to avoid leaving any debris behind.
Sometimes, the process needs to be repeated to achieve the desired clarity. Multiple applications might be necessary.
Maximizing Results and Aftercare
After you have cleaned your headlights with baking soda, there are steps you can take to maximize the results and keep your headlights clear. One great method is to apply a headlight sealant or protectant. This will create a protective barrier. It will help prevent future damage from UV rays and road debris. You can also regularly clean your headlights. This keeps them looking great. Use a mild soap and water solution and avoid harsh chemicals. Consider parking your car in a garage. This provides additional protection from the elements. If you notice any signs of clouding or yellowing, you can repeat the baking soda cleaning. Following these steps will help you to maintain clear headlights.
Applying Headlight Sealant
Once you have cleaned and dried your headlights, consider applying a headlight sealant or protectant. This will provide a long-lasting barrier against UV rays and environmental damage. The sealant helps to prevent the clouding and yellowing of your headlights. Apply the sealant according to the manufacturer’s instructions. Usually, this includes a thorough cleaning of the headlight surface. Once applied, allow the sealant to dry completely. This creates a protective layer that helps maintain clarity. You can find many sealant products at automotive stores. They can enhance the durability of your headlight restoration.
- Choose a High-Quality Sealant: Look for products that offer UV protection and durability.
- Follow the Application Instructions: Proper application is key for effective protection.
- Reapply as Needed: Sealants eventually wear off and should be reapplied periodically.
A good sealant should protect against sun damage and road debris. Read reviews to find the best option for your needs.
Carefully read and follow the instructions on the product label. This ensures the best results.
You should reapply the sealant. The frequency will depend on the product and environmental conditions.
Regular Cleaning and Maintenance
Regular cleaning is necessary to maintain clear headlights. To maintain your headlights, clean them every few weeks. This will help to prevent the build-up of dirt and grime. Wash your headlights with a mild soap and water solution. Avoid harsh chemicals or abrasive cleaners. These can scratch or damage the plastic. When washing, use a soft sponge or cloth. Apply gentle pressure to avoid scratching the surface. Regular maintenance will prevent any minor issues. The regular cleaning can keep your headlights clear and bright for a longer time.
- Wash Headlights Regularly: Aim to wash your headlights with each car wash.
- Use Mild Soap and Water: Harsh chemicals can damage the plastic and cause clouding.
- Avoid Abrasive Cleaners: Abrasive cleaners or scrub pads can scratch the plastic.
This will prevent a build-up of dirt and grime, which can lead to clouding over time.
Mild soap and water will remove dirt without damaging the headlight’s surface.
Gentle cleaning methods will help to maintain the clarity of your headlights.
Frequently Asked Questions
Question: How often should I clean my headlights?
Answer: It’s a good idea to clean your headlights every few weeks. This will help keep them clear and bright.
Question: Can I use any type of baking soda?
Answer: Yes, standard baking soda from the grocery store works fine for cleaning your headlights.
Question: Is this method safe for all headlight materials?
Answer: It is safe for most plastic headlights. However, always test on a small area first to ensure there is no damage.
Question: How long does the cleaning process take?
Answer: The entire process takes about 30-45 minutes, depending on the severity of the cloudiness.
Question: What if my headlights are still cloudy after cleaning?
Answer: You can repeat the process or consider using a headlight restoration kit for more severe cases.
Final Thoughts
So, you’ve learned how to clean headlights with baking soda. It is simple and effective. You can restore your headlights’ clarity with just a few household items. The process involves some basic preparation. Next, you mix baking soda with water to create a paste. Then, you gently scrub this paste onto the headlight surfaces. Finally, a good rinse and dry. Keep in mind, you can add some extra steps. Sealants and protectants will enhance the results. Regular maintenance, such as washing your headlights, is also very important. Your headlights will be clear and bright again, improving your visibility on the road. Now, gather your supplies, and start cleaning those headlights!