Does Headlight Restoration Work? A Step-by-Step Guide
If you’re wondering, does headlight restoration work, you’re in good company! It’s a common question, especially for those new to car care. The idea of restoring cloudy headlights might seem tricky, but don’t worry. This guide makes it easy. We’ll explore exactly what headlight restoration is and how to do it yourself with simple steps, without using any fancy jargon. Get ready to explore the process and see how you can improve your car’s look and safety!
What Is Headlight Restoration?
Headlight restoration is the process of cleaning and removing the damage from your car’s headlight lenses. Over time, headlights can become foggy, yellowed, or hazy. This damage is usually from exposure to the sun’s UV rays, road debris, and general wear and tear. This reduces the headlights’ ability to project light, making it difficult to see at night. Headlight restoration aims to remove this damage and bring the lenses back to a clear, bright condition. It’s often cheaper than replacing the entire headlight assembly and can significantly improve both your car’s appearance and how well you can see when driving. The process is a combination of cleaning, sanding, and polishing.
The Causes of Headlight Degradation
Headlights are made from polycarbonate plastic, which is durable but not resistant to everything. Over time, the clear protective layer of your headlights breaks down. Several factors contribute to this process, leading to the yellowing or haziness that we see. The most significant culprit is ultraviolet (UV) light from the sun. Constant exposure to UV rays degrades the plastic’s surface, causing it to oxidize and become cloudy. Road debris, such as rocks, salt, and sand, also contribute by scratching the surface. Finally, the extreme temperature changes, from hot summer days to freezing winters, put stress on the plastic, accelerating its deterioration.
- UV Exposure: The sun’s UV rays are a primary cause of headlight degradation. The UV light damages the plastic, leading to oxidation and clouding.
- Oxidation: This is a chemical reaction where the plastic reacts with oxygen, leading to yellowing and cloudiness.
- Abrasion: Road debris, such as sand, gravel, and small rocks, constantly hits your headlights while driving.
To reduce UV damage, manufacturers often apply a UV-resistant coating, but this coating degrades over time. Parking your car in a garage or under shade can reduce the UV exposure your headlights receive, extending their lifespan.
Oxidation is a surface-level issue. The outer layer of the headlight’s plastic undergoes a chemical change. This creates a hazy look that scatters light and reduces visibility. Headlight restoration typically involves removing this oxidized layer through sanding and polishing.
Each impact creates tiny scratches, reducing clarity. Over time, these scratches accumulate, making the headlights look hazy. Regular washing can help to remove abrasive particles from your headlight surfaces, minimizing the damage from road debris.
The Importance of Clear Headlights
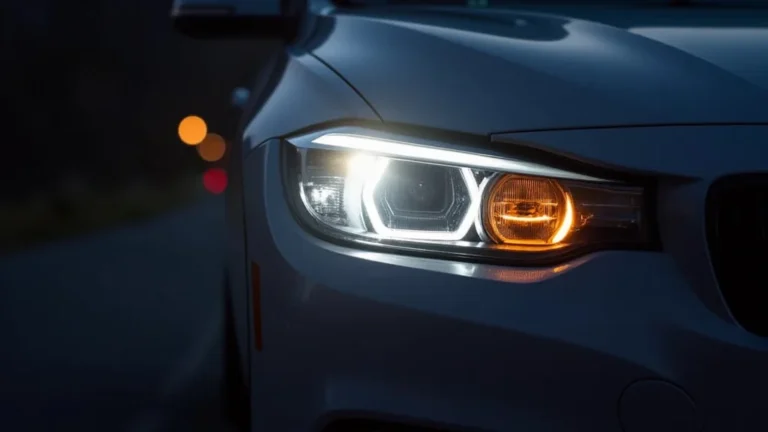
Clear headlights are not just about looks; they are vital for safety. They affect your ability to see the road clearly and allow other drivers to see you. Cloudy or yellowed headlights reduce the amount of light projected onto the road, making it harder to spot obstacles, pedestrians, and other vehicles, particularly at night or during bad weather. Reduced visibility increases the risk of accidents. Moreover, clear headlights improve your car’s overall appearance. They make the car look more well-maintained and add to its value. A simple headlight restoration can make a substantial difference in both safety and aesthetics, making it a worthwhile project.
- Increased Visibility: Clear headlights significantly improve your view of the road, especially at night or in bad weather. This enables you to see potential hazards sooner and react accordingly.
- Enhanced Safety: Clear headlights make your car more visible to other drivers, reducing the risk of collisions.
- Improved Aesthetics: Restoring your headlights can dramatically improve the overall look of your car.
The amount of light reaching the road can be dramatically reduced by cloudy headlights. By restoring your headlights to their original clarity, you can enhance your nighttime vision and boost your reaction time.
Being seen is just as important as being able to see. Other drivers need to see your car clearly to avoid accidents. Restoring your headlights helps to ensure your car is visible, contributing to a safer driving environment for everyone on the road.
Clean headlights give your car a more well-maintained, polished appearance, adding to its value. A small investment in headlight restoration can make a big difference in the way your car looks and feels.
Does Headlight Restoration Work? Step-by-Step Guide
The short answer is yes: does headlight restoration work! The process involves several steps to remove the damaged outer layer of the headlight and restore its clarity. Here’s a step-by-step guide to help you do it yourself. This will ensure great results. The key is to take your time and follow the instructions carefully. It also allows you to save money compared to buying new headlights or having a professional do the work. The total time depends on how bad your headlights are, but it can often be done in a few hours.
Gathering Your Supplies
Before beginning, gather all the necessary supplies. Having everything ready will make the process smoother. You’ll need some basic items, most of which you can find at any auto parts store or online retailer. It’s also important to follow all safety precautions, like working in a well-ventilated area and wearing gloves and eye protection.
- Sanding Discs: Get a variety of grits (e.g., 800, 1000, 2000, and 3000 grit) to gradually smooth the headlight’s surface.
- Wet/Dry Sandpaper: These are crucial for the sanding process.
- Polishing Compound: This will remove any remaining imperfections and restore the shine.
- Polishing Pad: Used to apply the polishing compound.
- Masking Tape: To protect the surrounding paint from scratches.
- Microfiber Cloths: For cleaning and wiping away residue.
- Headlight Protectant: A sealant to protect your newly restored headlights.
Different grits are used to remove scratches of different sizes. Starting with a coarser grit will remove the heaviest damage, followed by finer grits to refine the finish. The range allows you to progressively smooth out the headlight, leading to a clear, polished result.
The wet/dry sandpaper should be used with water to reduce heat and minimize scratches. It is more durable than regular sandpaper. It’s also better for sanding plastics. Using water also helps to flush away debris. This will give you a smoother sanding process and improve the final outcome.
Polishing compounds contain fine abrasives that smooth the headlight surface. This helps to eliminate any minor scratches that remain after sanding. The polishing stage restores the clarity of the headlight lens and enhances its light output.
Polishing pads can be attached to a drill or used by hand. They spread the compound evenly over the surface. The pad’s action works with the compound to remove minor scratches and restore clarity.
Masking tape is applied around the headlight. This prevents the sandpaper or polishing pad from accidentally scratching the car’s body. The tape creates a protective border.
Microfiber cloths are soft and non-abrasive. This makes them perfect for cleaning the headlight and removing any remaining compound or debris. Their absorbent qualities ensure a clean, streak-free finish.
A headlight protectant forms a protective layer, guarding against UV rays and other environmental factors. This sealant helps to prevent future damage and keeps your headlights clear for longer.
The Headlight Restoration Process
Once you have your supplies, start by cleaning the headlights with soap and water. This removes any loose dirt and debris. After cleaning, use masking tape to protect the paint around the headlight. This will prevent scratches to your car’s paint during sanding and polishing. Following these steps ensures a successful restoration, leaving your headlights clear and bright.
- Sanding: Start with the roughest grit sandpaper (e.g., 800 grit) and wet sand the headlight.
- Progression: Gradually work your way through finer grits (1000, 2000, 3000)
- Polishing: Apply polishing compound with a polishing pad.
- Protection: Apply a headlight protectant or sealant.
Wet sanding is essential as it reduces heat and prevents scratching. Wet the surface of the headlight and the sandpaper. Start with the roughest grit (800) and move in a consistent back-and-forth motion.
After the initial sanding, move to finer grits. This helps to smooth the surface gradually. Use each grit to remove the scratches left by the previous one. This progressive approach ensures you are left with a smooth surface.
After sanding, it’s time to polish. Use a machine polisher or a hand-held polishing pad. Apply the compound to the headlight surface and move the pad over it. Follow the pad manufacturer’s instructions for the best results. Polishing removes any remaining imperfections, bringing back the clarity.
Apply a protective sealant or UV protectant to help seal your headlights and protect against UV rays. Follow the product instructions for application and curing. This step is important for long-term protection.
Troubleshooting Common Issues
Sometimes, things don’t go perfectly the first time. Here are a few common issues and how to resolve them. Patience is key. If you’re not getting the results you expect, don’t worry. It’s usually a matter of adjusting your approach and taking the time to do it right. With a little troubleshooting, you can achieve professional-looking results.
- Cloudiness After Polishing: This may be due to not sanding enough or not using a fine enough grit.
- Uneven Sanding: This can occur if you don’t apply even pressure or spend enough time in each area.
- Scratches After Polishing: This may result from using a dirty polishing pad or applying too much pressure.
- Fogging After Sealant: This can happen if the sealant is applied too thick or in humid conditions.
If you have cloudiness after polishing, it’s likely that the sanding stage wasn’t thorough enough. To fix this, go back to a finer grit sandpaper (such as 2000 or 3000) and carefully sand the surface again. Then, re-polish to remove any remaining imperfections.
Uneven sanding causes some spots to be clearer than others. Ensure you use consistent pressure and spend an equal amount of time on each part of the headlight. This creates a uniform finish.
Scratches after polishing are usually caused by a dirty pad or too much pressure. Ensure your polishing pad is clean. Use a clean microfiber cloth. Reduce the pressure and go back over the affected areas. Repeat the polishing process.
Fogging after sealant application is often due to applying too much sealant or working in humid conditions. Make sure the headlight surface is clean and dry. Apply a thin, even layer of sealant. Allow the sealant to cure properly following the product instructions.
The Benefits of Headlight Restoration
Headlight restoration offers several advantages beyond just aesthetics. It’s a cost-effective way to improve your car’s safety and appearance, providing value for your money. Restoring your headlights makes driving safer and can even increase your car’s resale value.
Cost Savings
Headlight restoration is considerably cheaper than replacing your headlights. New headlight assemblies can be expensive, often running into hundreds of dollars per headlight. A headlight restoration kit, on the other hand, usually costs between $20 and $50. Plus, you can often find kits that include all the necessary items you need. The cost savings are a substantial incentive for doing it yourself, as it significantly reduces your expenses without sacrificing quality.
- Lower Cost: Significantly cheaper than replacing the entire headlight assembly.
- DIY Friendly: The process is easy to do yourself, with kits available that include all the materials needed.
- Preventative Maintenance: Regular restoration can prevent further damage, extending the life of your headlights.
Replacing headlights can be costly. Headlight restoration allows you to achieve nearly the same results at a fraction of the price. This makes it an attractive option for those looking to save money.
Restoration kits make the process simple. They come with clear instructions and all the necessary materials. You can do the restoration at home. This eliminates the need to pay for professional services, further reducing costs.
Regular maintenance will keep your headlights in good condition and keep you from having to replace them. By addressing minor issues early, you can avoid more serious damage that might require costly replacements in the future.
Improved Safety and Visibility
The primary benefit of headlight restoration is the improvement in safety. Clean, clear headlights dramatically enhance visibility at night and in bad weather. This enhancement directly translates to increased safety. By restoring your headlights, you can reduce the risk of accidents and ensure safer driving conditions for yourself and others on the road.
- Increased Light Output: Clear headlights allow more light to reach the road, improving your ability to see hazards.
- Better Night Vision: Clear headlights improve night vision.
- Enhanced Visibility for Others: Clear headlights make your car more visible to other drivers, reducing the risk of collisions.
Reduced light output is common when headlights are cloudy. Restoration removes the haze and clears the path for the light to shine, boosting visibility and improving reaction times.
Night driving can be challenging due to poor visibility. Restoring your headlights helps you see farther and react more quickly to objects in the road. This boosts your confidence and safety on the road.
Being seen is important to safety. Clear headlights are more visible to other drivers. This reduces the risk of accidents. Enhanced visibility provides a safer driving experience for everyone.
Enhanced Vehicle Appearance and Value
In addition to safety benefits, headlight restoration improves your car’s aesthetics, contributing to a better overall look. Clean headlights give your car a more well-maintained, newer appearance. This can be especially important if you’re looking to sell or trade in your car, as it can boost its perceived value.
- Improved Aesthetics: Restored headlights give your car a cleaner, more attractive appearance.
- Increased Resale Value: A well-maintained vehicle, including clear headlights, often fetches a higher price on resale.
- Overall Vehicle Care: Headlight restoration is part of a larger picture of vehicle care.
Clean, clear headlights can make a car look newer and better cared for. This visual upgrade adds to the overall appeal and can make your car more desirable.
When you’re ready to sell your car, a clean appearance is important. Clean headlights give the impression that the car has been well-maintained. This can positively impact the resale value, making your investment worthwhile.
Caring for your car extends beyond the engine and interior. Restoring your headlights shows that you pay attention to detail and care about your car’s overall condition. This includes its functionality and its appearance.
Does Headlight Restoration Work: Real-Life Examples
The effectiveness of headlight restoration can be seen in real-life cases. Many people have achieved impressive results. These examples illustrate the tangible benefits of the process and demonstrate that does headlight restoration work, providing improved visibility and a better overall look.
Case Study 1: A driver noticed that their headlights were extremely hazy. They followed a headlight restoration guide, including sanding and polishing. After the restoration, the headlights were clear, and the light output was significantly improved. They reported feeling much safer driving at night and noticed that other drivers could see their car better. The project was completed in a single afternoon.
Case Study 2: An owner of an older car decided to restore their headlights to improve the car’s appearance before selling it. After the restoration, the car looked much more modern and well-cared-for. The clearer headlights significantly enhanced the car’s curb appeal. The owner later mentioned the car sold more quickly and for a slightly higher price than they anticipated due to its improved condition. This small investment brought a strong return.
- Scenario 1: A driver struggles with poor visibility on their nightly commute. After restoring their headlights, they report a noticeable improvement in their ability to see the road, especially during bad weather. They see increased safety and confidence when driving at night.
- Scenario 2: A car owner wants to increase the value of their car before selling. Restoring the headlights makes the vehicle look more attractive and well-maintained. They report a better first impression from potential buyers, and the car sells faster.
- Scenario 3: A family takes a road trip. The parents notice the headlights of their car are not very clear. Before their trip, they restore their headlights and they can then see better at night. They can now travel more safely.
| Factor | Before Restoration | After Restoration |
|---|---|---|
| Light Output | Reduced, hazy | Increased, clear |
| Vehicle Appearance | Deteriorated | Improved, modern |
| Safety | Reduced visibility | Enhanced visibility |
Frequently Asked Questions
Question: How often should I restore my headlights?
Answer: It depends on the weather and how often you drive. Headlights exposed to a lot of sunlight may need restoration every year or two. Regularly inspect your headlights for clouding. If you notice a change, perform restoration.
Question: Can I use household items to restore my headlights?
Answer: There are many DIY methods using household items such as toothpaste or baking soda. These are often not very effective, and might damage the headlights. For better results, use a headlight restoration kit.
Question: Will headlight restoration damage my headlights?
Answer: When done correctly, headlight restoration is safe. Always follow the product instructions, and protect the surrounding paint with masking tape. Avoid excessive sanding or polishing.
Question: Is it possible to completely remove all the scratches and haziness?
Answer: With most kits, it’s possible to remove almost all scratches and haziness. Some deep scratches might remain, but the difference will be very noticeable. The goal is to maximize clarity and light output.
Question: How long does the restoration process take?
Answer: The restoration process can take anywhere from 1 to 3 hours, depending on the severity of the damage. Prep time and dry time affect how long the whole process takes.
Final Thoughts
In short, the answer to “does headlight restoration work” is a definite yes. It’s a straightforward process that provides great results. It improves your car’s appearance and also makes driving safer. By following a few simple steps, you can remove the damage to your headlights and significantly improve the clarity and brightness of your lights. This not only enhances your ability to see the road at night but also makes your car more visible to other drivers, decreasing the risk of accidents. More than just safety, this project is cost-effective. You save money compared to getting new headlights. If you’re looking for a simple, yet impactful, DIY project that boosts your car’s value and your driving safety, consider giving headlight restoration a try. With a little effort, you can make a big difference in the look and function of your car, leading to safer and more enjoyable drives.