Do It Yourself Headlight Restoration Guide for Crystal Clear Lenses
Thinking about tackling do it yourself headlight restoration? It’s super common! Headlights get cloudy because of the sun and weather, making your car look older and reducing how well you can see at night. Some folks might find this project a bit tricky at first. But don’t worry, it’s easier than you think! We’ll show you step-by-step how to make your headlights shine again, using simple techniques and common tools. Let’s get started and make those headlights sparkle!
What Causes Cloudy Headlights?
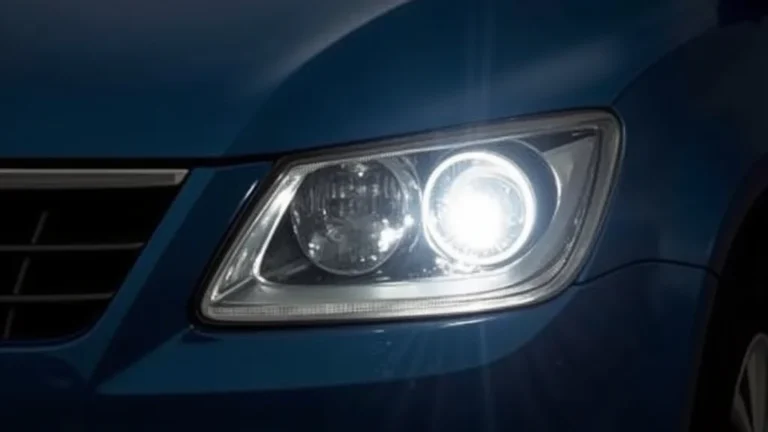
The cloudiness you see on your headlights is mostly from the sun’s ultraviolet (UV) rays. Car headlights are made of a clear plastic, usually polycarbonate. This material is great for impact resistance, but it’s vulnerable to UV damage. Over time, the UV light breaks down the plastic, making it oxidize. Oxidation is a chemical reaction where the plastic reacts with oxygen, causing the surface to become cloudy, yellow, and even cracked. This process degrades the plastic, reducing its clarity and performance. In addition to UV damage, other environmental factors play a role.
The Impact of UV Light
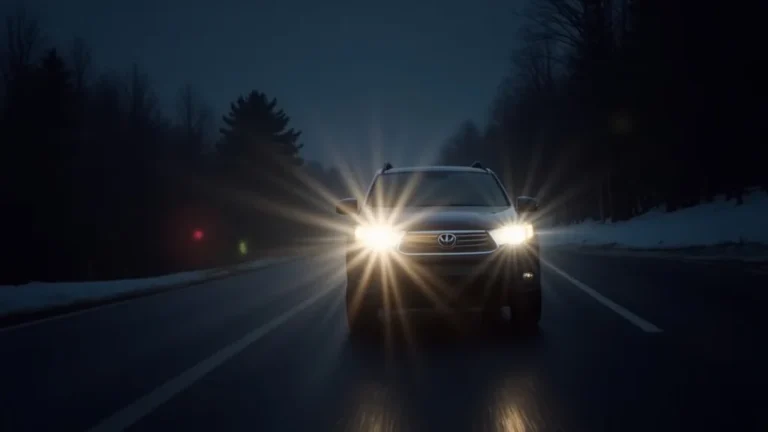
Ultraviolet (UV) light is a type of electromagnetic radiation emitted by the sun. It’s invisible to the human eye, but it packs a powerful punch. UV light is responsible for sunburns and can damage a variety of materials. In the case of headlights, UV rays break down the long chains of molecules in the polycarbonate plastic. This leads to the formation of small cracks and imperfections on the surface. These imperfections scatter the light, reducing the intensity of the light beam. This is what causes the headlights to look hazy or yellowed. Different regions of the country experience varying amounts of sunlight, which influences how fast this process occurs. This helps explain why some vehicles need do it yourself headlight restoration sooner than others.
- Breakdown of Plastic Molecules: The UV light breaks the bonds in the plastic’s polymer chains.
- Surface Imperfections: These changes cause tiny cracks and pits to form.
- Light Scattering: Imperfections on the surface cause light to scatter, making it less intense.
- Yellowing and Hazing: The oxidation process turns the plastic yellow and hazy.
- Reduced Visibility: This makes it harder to see at night.
Environmental Factors and Headlight Damage
Beyond UV exposure, other factors contribute to headlight cloudiness. Rain, snow, and road debris constantly bombard the headlight lenses. This can create scratches and abrasions. Exposure to extreme temperatures causes the plastic to expand and contract, which accelerates the breakdown process. Road salt, common in colder climates, also damages the lens surface. Furthermore, harsh chemicals like cleaning agents or wax can cause the plastic to deteriorate. These elements work in concert to compromise the clarity of your headlights. They also contribute to the necessity of do it yourself headlight restoration.
- Weather: Rain, snow, and ice wear away at the surface.
- Temperature: Extreme heat and cold make the plastic crack faster.
- Road Debris: Sand and small rocks scratch the lenses.
- Chemicals: Some cleaners or wax products cause damage.
- Air Pollution: Pollutants in the air can also cause damage over time.
Getting Started With Do It Yourself Headlight Restoration
Before you begin the do it yourself headlight restoration, gather your supplies and prepare your workspace. This part is about setting the stage for a successful restoration process. Having everything ready saves time and ensures a better outcome. Proper preparation also protects your car’s paint from scratches. This step is as important as the sanding and polishing itself. Let’s get your workspace organized and ensure you have all the tools you need for crystal-clear headlights.
Gathering Your Supplies
The materials you need are generally easy to find at any auto parts store, or even online. It’s often cheaper to buy a headlight restoration kit than individual items. These kits usually include everything needed for the process. If you prefer buying individual items, you’ll need sandpaper (various grits), polishing compound, a UV protectant sealant, masking tape, and a spray bottle of water. You’ll also need a clean microfiber cloth or two. These cloths are key for polishing and wiping away any residue. Make sure to get a kit or individual items specifically designed for plastic headlight lenses, not glass. The sandpaper grits will range from coarse (for removing oxidation) to very fine (for polishing). The polishing compound smooths the scratches left by the sandpaper.
- Sandpaper: Several grades like 600, 1000, 2000, and 3000 grit.
- Polishing Compound: Removes fine scratches and restores clarity.
- UV Protectant Sealant: Prevents future damage.
- Masking Tape: Protects the car’s paint from scratches.
- Microfiber Cloths: For wiping and polishing.
- Spray Bottle with Water: For wet sanding.
Workspace Preparation and Safety
Find a well-ventilated area, preferably outdoors, but in a shaded spot. Direct sunlight can cause the polishing compound to dry out quickly. This makes it harder to work with. Park your car on a level surface. Protect the surrounding paint with masking tape. Tape around the headlights, covering any painted surfaces. This prevents accidental scratches. Wear safety glasses and gloves to protect your eyes and skin from the cleaning products. Have a bucket of water and a sponge ready to wash off any sanding residue. Following these steps helps make the process safe and more efficient. Proper preparation is key to a professional outcome when doing do it yourself headlight restoration.
- Well-Ventilated Area: Outdoors or a garage with good air circulation.
- Shade: Avoid direct sunlight.
- Level Surface: Park on a flat surface.
- Masking Tape: Protect the paint around the headlights.
- Safety Glasses and Gloves: Protect your eyes and skin.
Step-by-Step Do It Yourself Headlight Restoration Process
Now, let’s get into the main part: the actual do it yourself headlight restoration process. This involves sanding, polishing, and sealing. This section provides a detailed guide on each step. It’s meant to make the process easier. Following each step carefully helps you achieve great results. Be patient and pay close attention to each stage, and your headlights will look much better.
Sanding the Headlights
Start by cleaning the headlights with soap and water. Then, use the coarsest grit sandpaper (usually 600-800 grit) and wet sand the headlight. Keep the surface wet using the spray bottle. This removes the top layer of oxidation and scratches. Sand in a back-and-forth motion, covering the entire surface evenly. Next, switch to a finer grit sandpaper (1000-1500 grit). Sand again, using the same wet sanding method, to remove the scratches from the previous grit. Repeat the process with even finer grit sandpaper (2000-3000 grit) to achieve a smooth surface. This creates a base for the polishing compound. Be sure to keep the surface wet and wipe away any residue as you go.
- Clean the Headlights: Wash with soap and water to remove dirt.
- Coarse Grit Sanding: Use 600-800 grit sandpaper. Wet sand in a back and forth motion.
- Medium Grit Sanding: Move to 1000-1500 grit sandpaper.
- Fine Grit Sanding: Use 2000-3000 grit sandpaper.
- Rinse and Wipe: Wash off the headlight and wipe it clean with a microfiber cloth.
Polishing and Protecting
Once you’ve sanded the headlights, it’s time to polish them. Apply the polishing compound to the headlight. Use a polishing pad (often included in the kit) or a clean microfiber cloth. Rub the compound into the headlight, using a circular motion. This removes the fine scratches and brings back clarity. Wipe away any excess compound with a clean microfiber cloth. After polishing, apply a UV protectant sealant. This protects the headlights from future damage. Follow the sealant’s instructions for applying and drying. This protects against the sun’s harmful rays. Be patient, take your time, and enjoy the results of your do it yourself headlight restoration efforts.
- Apply Polishing Compound: Use a polishing pad or microfiber cloth.
- Rub in Circular Motion: Apply even pressure.
- Wipe Away Excess: Use a clean microfiber cloth.
- Apply UV Protectant: Follow the product instructions.
- Allow to Dry: Let the sealant cure for the recommended time.
Final Touches and Results
After the sealant has dried, take a look at your work. Your headlights should be much clearer and brighter. Carefully remove the masking tape. Clean any residue from the surrounding paint. If any cloudiness remains, you may need to repeat the polishing step. For the best long-term results, consider applying a headlight wax every few months. This keeps the lenses protected. Now, you can enjoy improved visibility and a better-looking car. It’s a rewarding feeling to see the change your do it yourself headlight restoration efforts have made. The effort is often well worth the savings and improved vehicle appearance.
- Inspect the Headlights: Check for any remaining cloudiness.
- Remove Masking Tape: Carefully peel it off.
- Clean Any Residue: Wipe down the surrounding paint.
- Consider a Headlight Wax: Apply every few months.
- Enjoy the Results: Drive with clear, bright headlights.
Evaluating Different Headlight Restoration Methods
Besides the traditional sanding and polishing method, other options are available for do it yourself headlight restoration. The best choice depends on the level of cloudiness, your budget, and how much time you want to spend. This section explores different methods. We’ll look at the pros and cons of each approach. This helps you choose the best way to get your headlights looking new.
Comparing Headlight Restoration Kits
Headlight restoration kits are one of the most popular options. These kits offer all the materials you need in one package. They often include sandpaper, polishing compounds, and sealant. Some kits might include a polishing pad that attaches to a drill for ease of use. This can speed up the polishing process. Kits are convenient and usually come with detailed instructions, making them suitable for beginners. Different kits vary in quality and price. Cheaper kits may not offer the best results. Higher-end kits might include professional-grade products for superior results. Always check the reviews and choose a kit that meets your needs. Do it yourself headlight restoration kits provide a comprehensive solution.
| Method | Pros | Cons |
|---|---|---|
| Restoration Kits | Convenient, includes all needed items, detailed instructions. | Quality can vary, some kits may not offer the best results. |
| Individual Items | Allows for customization, can select higher-quality products. | Requires more research, may be more expensive. |
| Toothpaste Method | Low cost, easy to try. | Ineffective for severe clouding, may require several applications. |
| Professional Services | Guaranteed results, experienced technicians. | More expensive, may require leaving your car at a shop. |
Source: Car and Driver Magazine, “Headlight Restoration Kits: Do They Really Work?”
- Convenience: Kits provide all the materials needed.
- Instructions: Kits include step-by-step guides.
- Cost: Generally, kits are cost-effective.
- Quality: Look for kits with good reviews.
- Ease of Use: Suitable for beginners.
Alternative Restoration Techniques
Some alternative methods can be used. These methods are typically simpler and less time-consuming, but they might not be as effective for severe clouding. One common method is using toothpaste. This involves applying toothpaste to the headlight and rubbing it with a cloth. Toothpaste has mild abrasive properties that can remove light oxidation. However, this method is usually only effective for minor clouding. Another option is using a headlight cleaning solution. These solutions are sprayed onto the headlight and then wiped off. They can remove light oxidation and dirt. For more extreme cases, you might want to consider using a headlight restorer spray or compound. Remember that these methods may not always yield long-lasting results. For advanced cases, a do it yourself headlight restoration kit will give you the best results.
- Toothpaste Method: Effective for minor oxidation.
- Headlight Cleaning Solutions: Good for removing dirt and light haze.
- Restorer Sprays/Compounds: Can improve clarity.
- Limitations: May not work on severely clouded headlights.
- Maintenance: Regular cleaning helps prevent buildup.
Common Mistakes to Avoid in Do It Yourself Headlight Restoration
While do it yourself headlight restoration is achievable, certain mistakes can lessen the outcome. Knowing these mistakes helps you avoid them. This also helps you achieve the best possible results. This section guides you through the common pitfalls and suggests how to avoid them. This will make your project a success. Here is how to create those crystal-clear headlights you want.
Incorrect Sanding Techniques
One of the most common mistakes is using the wrong sandpaper or incorrect sanding techniques. Using too coarse sandpaper initially can cause deep scratches. These are difficult to remove later. Not sanding evenly can also create uneven results. It is important to start with the correct grit sandpaper, and apply even pressure during sanding. Also, always use water when sanding, to prevent scratching. This will reduce heat build-up. Changing grits correctly is also key. Don’t skip grits, and always work your way up to the finest grit. Rushing the sanding process is also a mistake. It is important to sand until all the oxidation has been removed and the surface looks smooth. When restoring your headlights, correct sanding methods are key.
- Wrong Sandpaper Grit: Starting too coarse can create deep scratches.
- Uneven Sanding: Causes inconsistent results.
- Skipping Sandpaper Grits: This can leave scratches.
- Dry Sanding: This can damage the plastic.
- Insufficient Sanding: Not sanding long enough can leave haze.
Improper Polishing and Protection
After sanding, incorrect polishing and sealing can affect the final results. Using the wrong polishing compound or not polishing thoroughly can leave fine scratches. Not applying the UV protectant sealant correctly can cause premature clouding. Also, skipping this step means your work won’t last long. Applying too much compound or using too much force can damage the plastic. Not waiting long enough for the sealant to dry also reduces effectiveness. Always follow the product instructions for polishing and sealing. This ensures the best protection and appearance. Applying a UV protectant is the last step of the do it yourself headlight restoration.
- Wrong Polishing Compound: Use a compound designed for plastic.
- Insufficient Polishing: Leaving fine scratches behind.
- Improper Sealant Application: Not following instructions can lead to failure.
- Skipping the Sealant: Headlights will get cloudy sooner.
- Using the Wrong Cloths: Always use microfiber cloths.
Frequently Asked Questions
Question: How often should I perform do it yourself headlight restoration?
Answer: It depends on your driving conditions and how quickly your headlights get cloudy. Typically, you may need to restore your headlights every 1-3 years.
Question: What’s the best way to maintain my headlights after restoration?
Answer: Clean your headlights regularly with soap and water, and apply a headlight wax or sealant every few months to protect them from UV rays and road debris.
Question: Can I use household items for this project?
Answer: While some people try using toothpaste or baking soda, these methods are often ineffective. It’s best to use dedicated headlight restoration products.
Question: Will the cloudiness come back?
Answer: Yes, the cloudiness can return over time due to UV exposure and environmental factors. Applying a UV protectant sealant and regular maintenance can slow the process.
Question: How long does the restoration process take?
Answer: The entire process can take 1-3 hours, depending on the severity of the cloudiness and your experience.
Final Thoughts
You now have a solid knowledge of how to perform do it yourself headlight restoration. We’ve covered everything. We’ve gone over what causes the problem and how to fix it, step-by-step. Remember, it’s about getting the right supplies, preparing your workspace, and taking your time. Follow the steps, from sanding and polishing to applying a protectant. Doing so will make a huge difference in how your car looks and how safely you can drive at night. With these tips, you can renew your headlights, improve your car’s look, and save money. So, gear up, pick your kit, and restore those headlights!