Under Glow Light Strip Remote Pairing Problems Solved
Having trouble getting your lights to work with the remote? You’re not alone! The under glow light strip remote pairing issue is a common headache for many. Setting up the remote to control your lights can sometimes feel tricky. But don’t worry, we’re here to help you get everything connected. We’ll explore why this can be challenging and then give you a simple, step-by-step solution to get those lights shining. Ready to get started?
Troubleshooting Your Remote Pairing Connection
Sometimes, getting your under glow lights and the remote to work together can be a little frustrating. This can happen for a few reasons. Maybe the remote isn’t correctly communicating with the light strip’s receiver. Or perhaps there’s an issue with the distance between the remote and the lights. Interference from other devices, like Wi-Fi routers or other electronics, can also cause problems. The good news is, by checking a few things and following some simple steps, you can usually fix any connection problems. Let’s explore some common issues and what you can do to fix them.
Checking the Basics: Power and Connections
Before you get into more complicated troubleshooting, always start with the basics. Make sure everything is plugged in securely. Check that the light strip is getting power from its power supply. Also, ensure the receiver – the small box that connects to the light strip – is properly connected to both the light strip and the power source. Double-check your remote’s batteries. Weak or dead batteries are a very common cause of pairing problems. You can avoid many frustrations by performing a simple preliminary check. Sometimes, the solution is easy to find, so there is no need to jump to more complex solutions straight away.
-
Power Supply Check: Verify the power adapter is plugged into a working outlet and the light strip is receiving power. A loose connection or faulty adapter is a common source of trouble.
A simple test involves unplugging and plugging the power supply back in. If the lights flash or don’t turn on, this can signal a power problem.
-
Receiver Connection: Inspect the connections between the light strip, the power supply, and the receiver. Ensure all connectors are securely in place.
Loose connections interrupt communication between the remote and the light strip.
-
Battery Test:
A quick battery change often resolves many pairing issues. Ensure the batteries are correctly inserted.
-
Visual Inspection: Look for any visible damage on the light strip, receiver, or remote. Check for frayed wires or broken components.
Physical damage can prevent the remote from connecting with the lights.
Remote Reset and Re-Pairing Techniques
If the simple checks haven’t worked, it’s time to try resetting and re-pairing the remote. Most under glow light strips have a specific pairing sequence that usually involves powering on the lights and pressing a button on the remote. This process helps the remote “find” and connect to the receiver. The exact steps can vary depending on the product, so always consult the manual for the specific instructions. Re-pairing will establish a new communication channel, which can resolve problems caused by interference or previous incorrect pairings. This is a vital step for restoring functionality.
-
Consult the Manual: Find the specific instructions for your light strip model. These instructions will provide the exact pairing steps.
Every brand may have a unique way to pair the remote with the lights.
-
Power Cycle: Turn off the light strip at the power source, then turn it back on. This resets the receiver.
A power cycle often clears temporary communication glitches.
-
Pairing Button: Locate the pairing button on either the receiver box or the light strip itself. Refer to the manual for its location.
Some receivers require you to press this button before trying to pair the remote.
-
Button Combination: Some remotes require holding down a specific button or a combination of buttons during the pairing process.
Different button combinations are used to initiate the pairing mode.
Distance and Interference Challenges
The distance between the remote and the light strip receiver can affect how well they communicate. Many remotes use radio frequencies, which can be affected by objects and interference. Obstacles, such as walls or metal objects, can weaken the signal. Other devices, like Wi-Fi routers, microwaves, or Bluetooth devices, can also interfere with the remote’s signal. To improve the connection, try reducing the distance between the remote and the lights. Also, try moving the receiver to a spot where there are fewer obstructions. This will reduce potential interference and improve the signal’s strength.
-
Reduce Distance: Move closer to the receiver while operating the remote. The ideal range is usually a few feet.
Reduce any possible obstruction between the remote and the lights.
-
Remove Obstructions: Check for objects that can block the signal, like walls, furniture, or metal components.
Ensure that there are no objects in the direct path.
-
Minimize Interference: Move the light strip or receiver away from other electronic devices that could cause interference.
Keep the light strips away from Wi-Fi routers, microwaves, and other devices.
-
Receiver Placement: Position the receiver in an open location where it can receive signals without interference.
Place the receiver in an easily accessible area.
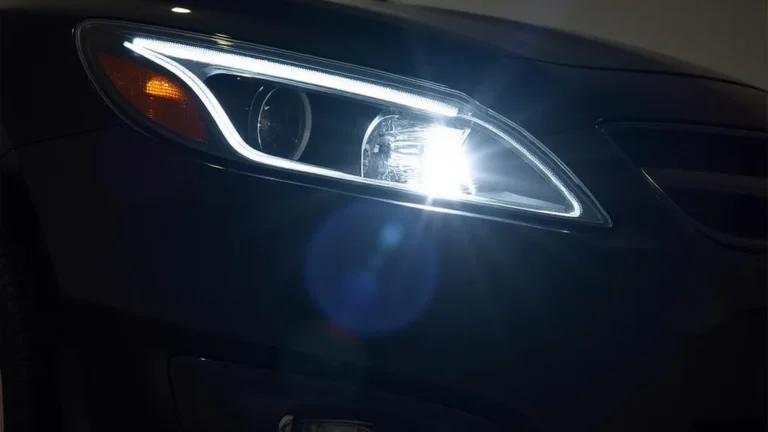
Understanding Under Glow Light Strip Technology
Under glow light strips are made up of LED lights mounted on a flexible circuit board. These are becoming more and more popular for their look and versatility. They’re often used in vehicles for car customization and in home settings for accent lighting. The strips are usually controlled by a remote that communicates with a receiver. The receiver, in turn, controls the lights. The technology is usually simple, but there are differences in the types of LEDs and communication methods used.
How LED Technology Works
LEDs, or Light-Emitting Diodes, are the heart of under glow light strips. LEDs are small, energy-efficient light sources that produce light when electricity passes through them. Unlike traditional incandescent bulbs, LEDs do not have a filament that burns out. They use semiconductors to generate light. This makes them more durable and longer-lasting. Many under glow light strips use RGB LEDs. These contain red, green, and blue LEDs in a single package. This allows them to produce a wide range of colors by mixing the light output.
-
Energy Efficiency: LEDs consume much less energy than traditional light bulbs, reducing power consumption.
Energy efficiency leads to lower electricity bills and less waste.
-
Color Control: RGB LEDs allow for a wide range of colors. They can produce nearly any color.
By adjusting the intensity of the red, green, and blue components, you can change the color.
-
Lifespan: LEDs have a long lifespan, often lasting tens of thousands of hours.
The long lifespan reduces the need for replacements.
-
Heat Output: LEDs produce less heat, reducing the risk of overheating.
The low heat generation of LEDs makes them safer to use in various applications.
Remote Control Communication Explained
Remotes communicate with the light strip’s receiver using different methods. The most common methods are infrared (IR) and radio frequency (RF). Infrared remotes work by sending light signals. They need a clear line of sight to the receiver. Radio frequency remotes use radio waves, allowing them to work through walls and other obstructions. RF remotes are generally more reliable for their signal range and ability to bypass physical obstacles. Remotes can also support features like color selection, brightness adjustment, and different lighting modes.
-
Infrared (IR): Infrared remotes use light signals that require a direct line of sight.
IR remotes can be less reliable if they’re blocked by any object.
-
Radio Frequency (RF): RF remotes use radio waves and offer a greater range and better performance.
RF remotes are generally more reliable as they don’t need a direct line of sight.
-
Control Range: Understand the effective range of your remote. This is usually specified in the product documentation.
Knowing the range ensures that the lights respond as expected.
-
Features: Check your remote for extra features such as color changing and flash modes.
Different remotes will provide different kinds of control over the light strips.
Receiver and Controller Components
The receiver is a key component of the light strip system. It’s the “brain” that gets signals from the remote and tells the lights what to do. The receiver typically includes a microcontroller, an antenna, and the necessary wiring. The microcontroller interprets the remote’s commands. The antenna receives signals from the remote, and the wiring connects to the light strip and power supply. More advanced systems may include features like Bluetooth or Wi-Fi connectivity for control via smartphones or smart home systems. It converts remote commands into actions.
-
Microcontroller: This is the processing unit that interprets signals from the remote and controls the lights.
The microcontroller is essential for all the functions of the receiver.
-
Antenna: The antenna receives the signals from the remote. The type of antenna depends on the type of remote signal.
A good antenna is crucial for consistent performance.
-
Wiring: The wiring connects the receiver to the power source and the light strip.
Check the wiring regularly for any wear and tear.
-
Power Input: The receiver requires a consistent power supply. The power source is usually a standard power adapter.
Check the power input to ensure that the light strip is receiving enough power.
Common Under Glow Light Strip Remote Pairing Issues
There are many reasons why pairing an under glow light strip remote can be difficult. Common challenges can be due to hardware issues, environmental factors, and user errors. Understanding these issues will enable you to find solutions quickly. If you are struggling with a persistent problem, knowing the most common issues will help you to troubleshoot more effectively. This will hopefully save you time.
Hardware Malfunctions and Defects
Sometimes, the trouble comes from the hardware itself. The light strip or receiver might have manufacturing defects. The receiver could be damaged or stop functioning correctly. The remote might be faulty. Issues within these components can prevent the remote from connecting to the lights. Inspecting the light strip, receiver, and remote for visible signs of damage is the first step. You can also test the receiver with another remote or test the remote with another light strip. Replacing the defective component usually resolves the issue if a hardware defect is present.
-
Defective Receiver: The receiver might have internal problems that prevent it from processing signals.
It’s important to inspect the receiver for any visible damage.
-
Faulty Remote: Sometimes, the remote might not be transmitting signals properly.
Changing the batteries can sometimes fix this.
-
Light Strip Issues: The LED light strip itself might be damaged or malfunctioning.
In this case, the light strip must be replaced for the whole system to function.
-
Damaged Wiring: Check for damaged wires on the receiver and light strip.
If you see damage, that can impact performance. This might be a simple fix.
Environmental Interference Factors
Environmental factors can affect remote performance. Radio frequency interference from other devices is a frequent problem. Devices that use radio signals, such as Wi-Fi routers, Bluetooth devices, and microwaves, can interrupt the signal between the remote and the receiver. This interference can result in unreliable control or a total lack of response. Positioning the light strip’s receiver away from these devices can help reduce interference. Using a remote with a different frequency or shielding the receiver may also reduce interference and improve performance.
-
Wi-Fi Routers: Wi-Fi signals can interfere with the remote’s signal, especially if the remote uses the same frequency.
Move the light strip and receiver away from the router.
-
Bluetooth Devices: Bluetooth devices also use radio frequencies that can interfere with the remote.
Keep these devices apart from the light strip components.
-
Microwaves: Operating a microwave can disrupt the remote signal, causing temporary problems.
Avoid using the remote while operating a microwave.
-
Obstructions: Walls, furniture, and metal objects can block or weaken the signal.
Ensure there are no physical obstacles between the remote and the receiver.
User Errors and Configuration Problems
User errors can also cause pairing problems. These can be as simple as not following the pairing instructions. Incorrectly inserting the batteries in the remote is another common mistake. Forgetting to power cycle the light strip before pairing is another potential error. Double-checking the instructions provided by the manufacturer can help to avoid these mistakes. Carefully following each step, checking the connections, and making sure that the remote batteries are correctly inserted are important in ensuring the light strip remote is working properly.
-
Incorrect Pairing Steps: The wrong sequence of steps during pairing can prevent the remote from connecting.
Re-reading the instructions is a great way to avoid this problem.
-
Battery Issues: Dead or incorrectly installed batteries can prevent the remote from working.
Always check the batteries and their installation.
-
Power Cycle Missteps: Forgetting to turn the light strip off and then back on before pairing can cause the remote to not connect.
This is an important step that should not be overlooked.
-
Signal Range Limits: Attempting to use the remote from too great a distance can prevent it from working.
Make sure you are close enough to the receiver to test it.
Step-by-Step Pairing Guide
If you are encountering problems, following a clear, step-by-step guide is important. This guide will provide detailed instructions for typical pairing procedures. These steps will guide you through the process, from preparing your light strip to finally testing the remote’s functionality. Note that specific steps vary by brand, so refer to your light strip’s manual for precise procedures.
Preparation for Pairing
Before you begin the pairing process, get everything ready. First, make sure your light strip is connected to a power source and turned on. Check that the receiver is properly wired and receiving power. Then, make sure your remote has new, correctly installed batteries. Read the instructions that came with your light strip, and familiarize yourself with the pairing process. Place the light strip and receiver in an area where there are no obstructions, like walls or furniture, between them and you. Preparation will ensure a smooth process.
-
Power Up: Turn on your light strip and receiver, confirming that the lights are receiving power.
Ensure that the light strip is getting power from its power supply.
-
Battery Check: Replace the batteries in the remote, ensuring they are correctly installed.
Make sure the batteries are positioned correctly and not dead.
-
Read Instructions: Review the manual and locate the pairing instructions specific to your model.
The manual will guide you on the exact procedure.
-
Positioning: Place the remote and the receiver close together, with no obstructions in between.
Clear line of sight will improve performance.
Initiating the Pairing Mode
The next step is to initiate the pairing mode on the light strip and the remote. This will enable the devices to find each other and establish a connection. Usually, you’ll need to press a button on the receiver or use a combination of button presses on the remote to enter the pairing mode. This process can be as simple as pressing the power button on the remote and holding it for a few seconds. The light strip might flash or change colors to indicate that it’s in pairing mode. Follow the instructions from your light strip’s manual.
-
Locate the Pairing Button: Find the pairing button on the receiver or the light strip itself. The manual will show you where it is.
Some receivers have a physical pairing button.
-
Press and Hold: Press and hold the pairing button on the receiver. The lights may start flashing.
Hold the pairing button for a few seconds.
-
Remote Action: Press a specific button or a button combination on the remote, as instructed in your manual.
Follow the instructions in the light strip’s manual.
-
Indicator Lights: Watch for any indicator lights on the receiver or the light strip that shows the pairing status.
The lights should give a signal to verify that the pairing is working.
Testing and Fine-Tuning the Connection
After initiating the pairing mode, test the connection by using the remote to control the light strip. Start with simple commands, like turning the lights on or off. Check whether the color and brightness controls work. If the basic controls work, try using different functions on the remote to see if everything responds as expected. If the lights do not respond, repeat the pairing process. Move the remote closer to the receiver, and try again. After getting the remote to work, try adjusting settings to fit your needs. Testing ensures the remote is working correctly.
-
Power On/Off: Use the power button on the remote to see if you can turn the lights on and off.
This is a fundamental test to check the connection.
-
Color and Brightness: Try changing the colors and adjusting the brightness using the remote’s controls.
Test to see if those functions are working.
-
Mode Selection: Use other controls, such as changing the color modes or the flash rate.
If you have different modes, check to see that they work.
-
Troubleshooting: If the lights don’t respond, double-check all connections, and retry the pairing process.
If there is a problem, find out where it is coming from.
Real-World Examples and Scenarios
To help you, let’s look at real-world examples of how to solve the under glow light strip remote pairing issue. These stories provide practical solutions. These examples will show you common problems and effective solutions.
-
Case Study 1: Car Enthusiast’s Dilemma: A car enthusiast bought an under glow light kit, but he couldn’t get the remote to connect to the lights. He found out the receiver was located inside the car. He went through the light strip’s manual. He discovered the pairing process involved a power cycle. He powered off the lights, and then on again, while pressing the pairing button on the remote. The lights flashed and he got the remote to work.
Result: Correctly pairing the remote fixed the connection problem. He was now able to change the colors.
-
Case Study 2: Home Theater Setup: A homeowner installed under glow lights behind his TV to improve his home theater experience. At first, the remote wouldn’t respond. He reviewed the receiver’s location. He found the receiver behind the TV. He saw that the remote’s range was blocked. Moving the receiver to the side, where it could get an unobstructed signal, made the remote work.
Result: After repositioning the receiver, the remote was able to communicate. The homeowner was thrilled with the improved home theater experience.
Here are some examples of what to do if you can’t get the remote to work:
- If the remote seems to work sometimes but not others, there might be interference. Try moving the light strip and receiver away from other electronics, such as Wi-Fi routers or microwaves.
- If the light strip is not working at all, you might need to troubleshoot further. If you’ve tried different solutions, contact the manufacturer of the light strip.
Frequently Asked Questions
Question: Why won’t my under glow light remote pair?
Answer: Common issues include dead batteries, obstructions, signal interference, and not following the pairing steps correctly.
Question: How do I reset the remote?
Answer: Usually, you’ll need to power cycle the light strip (turn it off and on) and then follow the specific pairing instructions in the manual.
Question: What do I do if the remote doesn’t work after pairing?
Answer: Double-check that the receiver has power, there are no obstructions, and try re-pairing the remote. Make sure to consult your manual for specifics.
Question: Can other devices cause interference?
Answer: Yes, devices like Wi-Fi routers, Bluetooth devices, and microwaves can interfere with the remote’s signal.
Question: Where should I position the receiver?
Answer: Place the receiver in an open space, clear of obstructions, and away from other electronic devices that could cause interference.
Final Thoughts
Hopefully, this guide has given you the knowledge to get those lights working! We’ve discussed the most common causes of the under glow light strip remote pairing issue, from power issues to interference. We’ve explored the technology of how light strips and remotes work. You now have a set of troubleshooting steps, including checking your connections, re-pairing the remote, and dealing with potential interference issues. Remember that patience is key. It might take a few tries, but by going through these steps, you should be able to get your light strip paired and working. With a little effort, you can transform your space. Now go on, get those lights glowing!