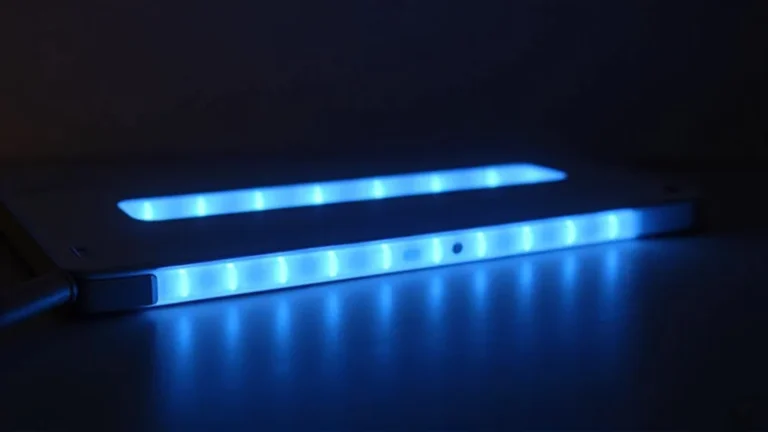
Under Glow Light Strip Waterproofing Troubleshoot Guide
So, you’re trying to add some cool underglow to your ride, but you’ve run into an under glow light strip waterproof problem. It’s a common challenge! Many people get frustrated when their lights get wet and stop working. Don’t worry, we’ll break down the issues and provide straightforward steps to fix them. We’ll look at the most common reasons why these lights might fail and the best solutions. Let’s get started and make your car glow!
Reasons For Failing Under Glow Light Strips
One of the biggest struggles with these light strips is protecting them from the elements. Water is the enemy, and it can cause all sorts of issues. Knowing the most common reasons for failure is the first step toward preventing them. This section will look at the main factors that can lead to problems with your under glow light strips. We’ll explore the things that cause the lights to fail, and how to avoid these issues.
Poor Sealant Application and Durability
The sealant is your first line of defense against water. If it isn’t applied correctly, or if it breaks down over time, water will find its way in. This is a big reason why many light strips fail. Applying sealant isn’t just about covering the strips; it’s about creating a strong, lasting barrier. It’s also important to pick the right kind of sealant, one made for outdoor use and able to handle changing temperatures. Think of it like a protective jacket for your lights; it needs to be tough and well-fitted.
- Inadequate Sealant Type: Not all sealants are created equal. Using a sealant that’s not designed for outdoor use or that doesn’t handle temperature changes will crack and let water in.
- Improper Application: Even with the right sealant, if it’s not applied correctly, it won’t work. Air bubbles, gaps, or uneven coverage create weak points where water can enter.
- Sealant Degradation: Over time, sealants break down from exposure to sun, heat, and cold. This leads to cracks and leaks.
Choosing the correct sealant is very important. You can find sealants specially made for automotive applications. These kinds of sealants are engineered to withstand things like UV exposure, temperature fluctuations, and vibrations. Silicone-based sealants are a good starting point because they’re flexible and stick well to different materials. They also resist water and are often easy to apply. Check product reviews and ratings to make sure you’re getting a reliable product.
Preparation is key for applying sealant. Make sure the surfaces are clean, dry, and free of any dust or grease. This allows the sealant to create a strong bond. Follow the sealant’s instructions carefully. This might mean applying multiple thin layers instead of one thick one. Be patient and take your time to ensure the coverage is uniform and complete. A well-applied sealant can prevent the under glow light strip waterproof problem.
Regular checks are important. Inspect your light strips and sealant periodically, especially after harsh weather. Look for cracks, chips, or areas where the sealant seems to be pulling away from the light strip or the vehicle. Repair or replace the sealant as needed. Taking action early can save your lights from damage and extend their life. A yearly inspection, especially if the vehicle is exposed to the elements, will help.
Weakness in Light Strip Design
The design of the light strip itself can be another cause of waterproofing problems. Some strips have weak points that are prone to water damage. The materials, the way the LEDs are covered, and how the electrical connections are made all play a role. These design flaws make the strips more vulnerable to moisture. Keep in mind that not all light strips are made the same, and some are better at dealing with water than others. You want to pick strips that are made to withstand the weather.
- Poor Material Quality: Using cheap materials for the light strip housing and the LED coverings often leads to leaks.
- LED Cover Imperfections: Cracks or weak spots in the plastic cover protecting the LEDs are a common entry point for water.
- Connection Vulnerabilities: The points where wires connect to the light strip are often weak spots. If these connections aren’t sealed properly, water can seep in.
Always go for light strips made from durable materials. Look for strips that use high-quality plastics or other materials that are made to resist water and the elements. These materials are less likely to crack or deteriorate, making them better at keeping water out. Check the product information for details about the materials used and consider reading reviews from other users. Good quality materials mean the lights will last longer and be less likely to fail.
The LED cover is an important part of the under glow light strip waterproof problem. The cover should be a solid, well-sealed barrier. Look for strips with strong, clear covers made from waterproof materials. Check the product information to be sure the covers are rated for outdoor use and can withstand UV exposure. When installing the strips, take extra care to make sure the covers are not damaged, bent, or scratched. A well-protected LED cover is vital to the life of the lights.
Check how the light strips connect to the power source. Look for strips that have sealed connectors and waterproof wiring. These are designed to keep moisture out of the connections. You might need to use extra sealant or heat shrink tubing to ensure the connections are completely watertight. A proper connection means the electricity will flow freely, and you won’t have to worry about water damage. Taking the time to protect the connections will save you headaches in the long run.
Environmental Factors and External Damage
The environment plays a big role in how well your light strips will hold up. Harsh weather, like heavy rain or extreme temperatures, can put extra stress on the strips and make them more likely to fail. Impacts from road debris or other objects can also cause damage. Your goal is to choose the right location for the lights and protect them from possible hazards. Thinking ahead about these factors will help your light strips last longer and work better.
- Weather Conditions: Consistent exposure to rain, snow, or extreme heat can wear down the light strips.
- Road Debris Impact: Rocks, gravel, and other road debris can damage the light strips, leading to water entry.
- Incorrect Installation Placement: Putting the light strips in areas where they’re constantly exposed to water spray or impacts greatly increases the chance of damage.
Consider the weather conditions in your area. If you live in a place with heavy rain, snow, or extreme temperatures, your light strips will need extra protection. Choose strips that are made to handle those conditions. Think about the location of the strips on your car, and avoid putting them in spots that get direct exposure to the elements. You might also want to inspect and maintain the strips more often. By being aware of your local weather, you can make smarter choices about the lights and how you take care of them.
Your light strips can be damaged by road debris. When placing your lights, consider where the strips will be in relation to the tires and the road surface. Install them where they are less likely to be hit by rocks and other debris. Add extra protection, such as a metal guard or cover, to stop damage. Regular checks can help you spot damage early so you can fix it before the problem gets worse. Preventing damage will keep your lights safe.
Choose the correct place for your light strips. Avoid areas where water spray is common, like right behind the tires. Think about the angle of the light strips and how exposed they are. When installing, make sure the strips are attached securely so they don’t fall off or move. Proper placement is important to protect the lights from both water and impacts. Careful planning at the start will pay off by keeping the lights working for a long time.
Effective Waterproofing Solutions For Under Glow Light Strips
There are several methods you can use to protect your light strips from water. Understanding these methods will help you fix the under glow light strip waterproof problem. From selecting the right products to applying them correctly, each step plays a part in a long-lasting and water-resistant setup. We’ll show you how to apply sealants and offer more robust protection to make sure your lights shine brightly, no matter the conditions.
Selecting the Right Waterproofing Products
The first step toward effective waterproofing is choosing the right products. You need products that will stick to the materials, keep water out, and last a long time. Think about the type of sealant, the quality of electrical tape, and the importance of heat shrink tubing. Picking the right products from the start will give your light strips the best chance against water damage.
- Sealant Selection: Opt for a high-quality, weather-resistant sealant specifically designed for automotive or outdoor use.
- Electrical Tape: Use waterproof electrical tape to seal electrical connections and protect wiring.
- Heat Shrink Tubing: Employ heat shrink tubing on any exposed wire connections to create a watertight seal.
When selecting a sealant, go for products that can withstand outdoor conditions. Look for sealants with UV resistance to prevent cracking from sun exposure. Silicone-based sealants are a good choice because they’re flexible and can handle temperature changes. Another option is polyurethane sealants, which can provide a strong, durable bond. Reading reviews and comparing products will help you choose the best sealant for your needs. Investing in good sealant will help to solve the under glow light strip waterproof problem.
Waterproof electrical tape can create a strong layer of protection for all the electrical connections. Make sure the tape is rated for outdoor use and can handle water exposure. When using electrical tape, cover the connections tightly, overlapping the tape to ensure a solid seal. Wrapping the connections in several layers provides better protection. Consider using heat shrink tubing underneath the electrical tape for added security. This will help keep the connections safe from moisture.
Heat shrink tubing is a great way to add an extra layer of protection to wire connections. When using heat shrink tubing, slide a piece over the connection before you make it. After the connection is made, use a heat gun or hair dryer to shrink the tubing. This will mold to the shape of the connection, creating a tight, waterproof seal. Make sure to use heat shrink tubing with an adhesive lining for a better seal. This is a very efficient way to keep water out.
Step-by-Step Waterproofing Process
Now that you have the right products, it’s time to start the waterproofing process. This involves preparing the surface, applying sealant, and securing the wiring. Following these steps will help you create a waterproof barrier that protects your light strips. Take your time, focus on each step, and you’ll have a great outcome. This process will help you fix the under glow light strip waterproof problem.
- Surface Preparation: Clean and dry the mounting surfaces to ensure the sealant adheres properly.
- Sealant Application: Apply the sealant carefully around the edges of the light strip and any areas where water could enter.
- Wiring Protection: Wrap all electrical connections with waterproof electrical tape and use heat shrink tubing.
Proper surface preparation is vital for a good seal. Start by cleaning the areas where you’ll be installing the light strips. Use a clean cloth and a degreasing cleaner to remove dirt, grease, and any other residue. Ensure the surface is completely dry before you apply the sealant. This will help the sealant create a strong bond and prevent water from seeping in. Taking the time to prepare the surface correctly is essential for the long-term protection of your light strips.
Applying the sealant correctly is very important to keep the water out. Use a sealant gun to apply an even bead around the edges of the light strip and at any points where wires or connections are exposed. Make sure the sealant covers all possible entry points for water. Avoid applying too much sealant, which can cause it to spread and look messy. Use a wet finger or a smoothing tool to get a smooth, even surface. This will provide a solid, waterproof seal that protects your light strips from damage.
Protecting the wiring is also key for waterproofing. Wrap all wire connections with waterproof electrical tape, making sure to overlap the tape for complete coverage. Then, use heat shrink tubing on any exposed wire connections. Position the tubing over the connection, and then use heat to shrink it tightly. This creates a solid, watertight barrier. By wrapping the wires and using heat shrink tubing, you will safeguard the electrical components of your light strips.
Enhancing Protection with Additional Methods
To take your waterproofing to the next level, think about adding extra protection. This might include using protective covers and improving drainage. These steps will add an extra layer of defense against water and increase the life of your lights. Using these additional methods will help you solve the under glow light strip waterproof problem.
- Protective Covers: Consider using protective covers or housings to shield the light strips from direct water exposure and impacts.
- Drainage Solutions: Ensure proper drainage around the light strips to prevent water buildup.
- Regular Inspection and Maintenance: Regularly inspect the light strips and sealant for any signs of damage or wear.
Using protective covers can offer an extra layer of defense against water and damage. These covers can be simple plastic guards or more elaborate housings that completely enclose the light strips. They work well for both waterproofing and protecting the strips from impacts. When choosing a cover, make sure it is made from a durable, waterproof material. Ensure the covers are well-sealed to keep moisture out. Protective covers are very useful for protecting your lights in rough conditions.
You can add drainage solutions to help prevent water buildup. Think about the location of your light strips. If they are in a location where water could collect, add small drainage holes or channels to allow water to escape. This is especially helpful if your light strips are in a horizontal position. Keeping water from collecting helps prevent corrosion and damage. Good drainage will help make your light strips last longer.
Regular checks are important for maintaining your light strips and ensuring they stay waterproof. Check the strips, sealant, and wiring on a regular basis. Look for any cracks, chips, or areas where the sealant seems to be pulling away. Check the wiring for any damage or corrosion. If you see any problems, address them quickly by repairing or replacing the damaged parts. Routine maintenance will help your light strips last a long time.
Troubleshooting Common Problems
Even if you take all the right steps, you might still run into problems. Troubleshooting common problems is a key part of the process. If your light strips fail, it’s helpful to be able to identify the issue and take action. This section will walk you through some common problems and the steps you can take to fix them. The goal is to quickly find the cause and get your lights working correctly. This knowledge will assist you in resolving the under glow light strip waterproof problem.
Light Strip Not Working
When the light strips don’t work, it is frustrating. Start with a check of the power supply and connections. This process should help you pinpoint the issue and take action. You can fix most problems by checking some basic things.
- Power Supply: Check the power source to make sure it’s working correctly and providing the right voltage.
- Connections: Inspect all the connections between the power source, the controller (if applicable), and the light strips to ensure they are secure and properly connected.
- Controller: If you have a controller, ensure it’s functioning correctly and not the source of the problem.
The first thing to do is to check the power supply. Make sure your power source is working and giving the correct voltage. Use a multimeter to measure the voltage at the power source and at the light strip connections. If the voltage is too low or not stable, the lights may not work. You may need to change the power source. Also, check the fuse to ensure it isn’t blown.
Check all the connections. Make sure that all the connections are securely joined and that the wires are properly connected to the power source and to the control box (if any). Look for any loose or corroded connections, which can prevent the power from reaching the lights. Also check the connectors on the light strips themselves to see if they are damaged or broken. Fix or replace any poor connections to make sure the lights are getting power correctly.
If you’re using a controller to operate your lights, ensure it’s working right. Check if the controller is getting power and that its settings are correct. Test the controller’s output by trying different modes or settings. If the lights do not respond, you might have to replace the controller. You can also bypass the controller by connecting the light strips directly to the power source. If they turn on, it suggests that the controller is the issue.
Water in the Light Strip
When water gets into the light strip, it can cause all kinds of damage. To solve the issue, you must determine how the water is getting in and take action. The important thing is to act quickly to limit the damage.
- Inspection: Carefully inspect the light strip to find any cracks, leaks, or points of entry where water might be entering.
- Drying and Cleaning: If water is found, carefully dry the light strip and clean any corrosion or residue.
- Repair or
The next step is to make repairs. Use a high-quality sealant to seal any cracks or openings you found during your inspection. Apply the sealant carefully, making sure it covers the damaged areas completely. If the light strip is badly damaged, it might be necessary to replace it. This will prevent water from causing more harm. If you’re replacing the light strip, be sure to use the waterproofing methods we discussed earlier during the installation to prevent future water problems.
Start with a close inspection of your light strips. Look for any cracks or holes in the light strip housing or the LED cover. Pay attention to the edges and the areas where the wires enter the strip. Any small opening can let water in. If you find a crack or other damage, mark the spot and prepare for repairs. It is easier to fix the problem if you know exactly where the water is entering.
If you find water, it’s important to remove it quickly. Unplug the light strip from the power source and remove it from the vehicle. Dry the light strip by gently wiping it down with a clean, dry cloth. You can use a hair dryer on a low setting to help remove any trapped water. If you notice any corrosion or residue, clean it carefully with a soft brush and a solution of baking soda and water. Make sure the light strip is completely dry before re-installing it.
Light Strip Flickering or Dimming
If your light strips are flickering or dimming, it may be a power or connection issue. A flickering or dimming light strip can be irritating. The cause might be something simple, like a loose connection or a low power supply. This section will look at the steps you can take to find out what’s going on and what you can do to fix it.
- Power Supply: Verify that the power supply is delivering consistent power to the light strips.
- Connections: Check all the connections for any loose wires or corrosion that might be affecting the light’s performance.
- Light Strip Damage: Examine the light strip itself for any signs of internal damage, such as burned-out LEDs or internal shorts.
Test the power supply. Use a multimeter to see if the voltage is consistent. If the voltage fluctuates or drops, this could be the source of the problem. If needed,
Check the connections. Check all the connections between the power supply, control box (if any), and the light strips. Look for loose wires, damaged connectors, or any signs of corrosion. Any of these problems can cause flickering or dimming. Tighten any loose connections and clean any corrosion with a wire brush or contact cleaner. If you find any damaged wires, replace them and make certain that you get good, secure connections. Clean and good connections are critical.
Examine the light strip itself for internal damage. Inspect the LEDs for any visible damage, such as burned-out or dim LEDs. Also, check for internal shorts or other issues that might be causing the flickering. To find out if any specific LEDs are bad, you can test them with a multimeter. If the light strip is damaged, you may need to repair the faulty LEDs or replace the entire light strip. Regular checks can help you find damage early, preventing more serious issues.
Frequently Asked Questions
Question: How can I tell if my under glow light strip is waterproof?
Answer: Check the product description and packaging. Look for terms like “waterproof,” “water-resistant,” or IP ratings (like IP67 or IP68), which indicate the level of protection against water and dust. You can also check reviews for user experiences in wet conditions.
Question: What’s the best type of sealant to use for under glow light strips?
Answer: Silicone-based sealants or polyurethane sealants are usually the best choices because they offer flexibility, durability, and strong adhesion. Look for those specifically designed for automotive or outdoor use and are UV resistant.
Question: Can I use electrical tape to waterproof the connections?
Answer: Yes, but you should use electrical tape in combination with other methods. Waterproof electrical tape is useful for sealing connections, but make sure the surfaces are clean and dry before applying. For best results, use heat shrink tubing and high-quality electrical tape.
Question: What if water gets inside my light strip?
Answer: Immediately disconnect the power and remove the light strip. Dry it thoroughly, using a cloth and potentially a hair dryer on a low setting. Clean off any corrosion. If the damage is severe, you may need to replace the strip or make repairs using sealant.
Question: How often should I inspect my under glow light strips for damage?
Answer: It’s a good idea to inspect your light strips at least every few months, and especially after exposure to harsh weather or extreme conditions. Regular checks can help you catch problems early and maintain your lights.
Final Thoughts
Fixing the under glow light strip waterproof problem doesn’t have to be hard. By understanding the common issues, choosing the right products, and following the steps outlined here, you can protect your light strips and keep them working well for a long time. Remember to select the best sealant and take care when you apply it. Also, make certain that all connections are secure and well-protected. Be proactive with maintenance, checking your lights often and dealing with any problems quickly. By doing these things, you will prevent water damage and keep your lights looking great. You’ve got this!