Aftermarket Interior LED Dome Light Troubles and Solutions
Getting new lights for your car can be exciting, but when you’re looking at aftermarket interior led dome light problems, it can feel like a tricky situation, especially if you’re new to car modifications. Don’t worry, many people experience the same struggles. These problems can seem complicated at first, but they usually have straightforward solutions. This guide breaks down common issues and gives you simple steps to get your lights working right. We’ll explore why those bright LEDs might not be shining, and how to fix it all. Ready to brighten up your car?
Common Issues with Aftermarket Interior LED Dome Lights
The switch to LED dome lights from standard bulbs is a popular upgrade, offering brighter light and longer lifespans. However, this change is not always simple, and there are many reasons why you might experience some issues. Some of these are: Compatibility issues with your car’s electrical system, poor installation, or defective lights. Knowing these problems beforehand will help you diagnose the situation better. Let’s explore the typical snags.
LED Compatibility Challenges
One primary concern with aftermarket interior led dome light problems is compatibility. Your car’s electrical system, designed for standard incandescent bulbs, may not fully align with the needs of LEDs. LEDs require less power and can sometimes cause issues like flickering, or even the lights not working at all. These problems occur because the car’s computer might misinterpret the low current draw of an LED. It might think the bulb is burned out. This is a common situation for many car owners when they first change the bulb type. Luckily, it is easily resolved.
- CANbus Systems: Many modern vehicles use a CANbus system, which monitors the electrical circuits. When you install an LED, the system may detect a lower resistance and generate a warning or prevent the LED from working properly. CANbus-compatible LEDs are specifically made to bypass these issues.
- Resistance and Load Resistors: Standard bulbs have a higher resistance than LEDs. To prevent issues, some LEDs include built-in load resistors. These resistors simulate the load of a traditional bulb. If your LEDs don’t have this, you might need to add external load resistors.
- Polarity Sensitivity: Unlike incandescent bulbs, some LEDs are polarity-sensitive, meaning they will only function correctly when installed in the right direction. Swapping the bulb’s orientation can fix this issue.
Installation Mistakes and Troubleshooting
Improper installation is a major cause of aftermarket interior led dome light problems. Even if the lights are compatible, a bad install can result in them not working. This is something that can happen if the new LED is not correctly positioned in the socket or if the wiring isn’t properly connected. Issues such as bent or broken connector pins and loose connections can interrupt the electrical flow, causing the lights to fail or flicker. Always remember to check for shorts or crossed wires as well. Let’s look at some things to avoid.
- Check the Socket Connection: Ensuring that the LED is securely placed into the socket is essential. Make certain the pins or connectors are making solid contact. Sometimes the contacts in the socket can get corroded. If so, clean them with electrical contact cleaner or a small brush.
- Wiring Errors: Double-check the wiring. Ensure all wires are connected properly to avoid short circuits. Always review the included instructions and your car’s wiring diagrams to avoid confusion. Incorrect wiring can damage the LEDs or the car’s electrical system.
- Testing with a Multimeter: If the lights still don’t work, use a multimeter to test for voltage at the socket. If you get a voltage reading, the issue may be with the LED itself. If there is no voltage, there might be a problem with the wiring or fuse.
- Verify Polarity: Some LEDs need a specific orientation to function. If your new lights don’t work, rotate the LED 180 degrees.
LED Quality and Defective Products
The quality of aftermarket LEDs can greatly affect their performance. Cheaper LEDs may use low-quality components, leading to a shorter lifespan, reduced brightness, and other issues. Defects include lights failing, flickering, or simply not functioning. Selecting high-quality LEDs from reputable manufacturers will reduce these issues. Be sure to check the warranty terms. These can offer some protection if problems arise.
- Manufacturer Reputation: Choose LEDs from trusted manufacturers. They often provide better quality control and customer support. Look for reviews and recommendations before making a purchase.
- Warranty and Returns: A good warranty is a sign of a quality product. Make sure the seller offers returns or replacements. This protects you in case of a product defect.
- Inspect the LED: Examine the LED for any physical defects before installing it. Look for cracked components, loose connections, or other signs of damage.
- Test Before Final Installation: Test the LEDs before fully installing them in your car. This makes sure they are functioning correctly before you start.
Solving Aftermarket Interior LED Dome Light Problems
When you encounter aftermarket interior led dome light problems, it’s not the end of the line. There are steps you can take to make sure your LED dome lights work well. It’s often just a matter of figuring out what’s causing the issue and taking the right actions. With some simple tools and basic knowledge, you can troubleshoot and fix these issues on your own. Let’s delve into solutions.
Troubleshooting Step-by-Step
Following a step-by-step approach to solve the common issues with your new LEDs is best. Start by checking the simplest things and then work your way to the more technical aspects. This methodical approach will help you pinpoint the issue quickly and prevent unnecessary work. Let’s get started.
- Verify Power Supply: Begin by making sure your car’s electrical system is active. Test other lights or accessories. If they are not working, the issue might be a blown fuse or a dead battery.
- Check the LED: Take out the LED and look for any physical damage. If it looks fine, try putting it back in, making sure it’s securely seated in the socket. Then, test if it is correctly oriented.
- Fuse Inspection: Check the fuse that powers the interior lights. Consult your car’s manual to find the right fuse location. Replace the fuse, if needed.
- Wiring Inspection: Examine the wiring connections for any loose wires. Ensure that the wires are properly connected. If you aren’t comfortable with electrical work, get help from a mechanic.
- Use a Multimeter: If the lights still aren’t working, use a multimeter to check the voltage at the light socket. A reading indicates power is getting to the socket. If not, there’s a problem with your car’s wiring.
- Consider Load Resistors: If the lights flicker or don’t work correctly, you might need to add load resistors to mimic the current draw of standard bulbs.
Tools and Materials Needed
Having the right tools and materials will make solving your aftermarket interior led dome light problems far easier. You likely will have most of what you need already. But it is always good to prepare. The tools are also helpful for other car maintenance tasks. Having the right tools and parts ready can save you time and prevent frustrations.
- Screwdrivers: A set of screwdrivers (both flathead and Phillips head) is essential. These are needed to remove the dome light housing and any trim.
- Multimeter: A multimeter is critical for testing voltage and checking for shorts. Choose one with a clear display and easy-to-use settings. This helps you identify wiring problems.
- Wire Strippers and Crimpers: These are helpful for making secure electrical connections when adding load resistors or other components.
- Electrical Tape: Use electrical tape to insulate any exposed wires. This avoids short circuits and ensures safe electrical connections.
- Load Resistors (if needed): If your LEDs flicker, you’ll need load resistors. Get ones that match the wattage of your original bulbs.
- Replacement Fuses: Keep a few spare fuses on hand. You should have some in the right sizes. This will avoid unexpected stops if a fuse blows during troubleshooting.
- LEDs from a Reputable Manufacturer: If the LEDs are bad, buy new ones from a brand you trust. This avoids repeating the same issues.
Detailed Installation Guides and Videos
Following detailed guides and videos can improve your chances of success. Several resources will show you step-by-step installation instructions for various car models. These guides are especially helpful if you’re new to car modifications or if your car has a complex electrical system. This helps you prevent common errors.
- Search Online: Look for guides or videos specific to your car model. Search for terms like ” LED dome light install”. This brings up custom instructions.
- Read the Instructions Carefully: Carefully read all included instructions before starting. Note the steps and the recommended tools.
- Watch Videos: Videos will show you the installation step by step. Look for videos that feature your car model.
- Follow Instructions Precisely: Follow the steps in the guide. Make sure you understand each step before moving on.
- Take Photos: Take photos of the wiring before removing anything. This assists in reversing the process if you face problems.
Understanding Electrical Systems in Cars
A basic understanding of a car’s electrical system helps a great deal when you deal with aftermarket interior led dome light problems. Cars use direct current (DC) electricity, which flows in one direction. Knowing the basics of how this system works, and the role of components like fuses, wiring, and the car’s computer, can make you more skilled at finding and fixing issues. Knowledge gives you the edge.
Basics of Automotive Electrical Systems
Your car’s electrical system is a network of components working together. Key parts include the battery, alternator, wiring, fuses, and various electronic control units (ECUs). The battery is your main power source, while the alternator recharges it as the car runs. Fuses protect circuits from overloads, and the ECU monitors and controls various systems. This understanding of how each part works will help you solve many problems.
- Battery: The battery provides power when the engine is off. It delivers the initial current to start the engine and powers the lights, radio, and other accessories.
- Alternator: The alternator charges the battery when the engine is running. It provides the necessary power to run the car’s electrical components while you are driving.
- Wiring: Wiring connects all electrical components. Wires carry electricity from the battery and alternator to various parts of the car. There are different wire gauges. The gauge is based on the amount of current a wire must carry.
- Fuses: Fuses safeguard the electrical circuits by melting if there’s an overcurrent. This prevents damage to the components from electrical shorts or surges.
- Electronic Control Units (ECUs): ECUs control many functions, from the engine to the lights. They receive information from sensors and send signals to control the different systems.
How LEDs Interact With Car Electrical Systems
LEDs differ from incandescent bulbs in how they use electricity, which causes problems in some cars. LEDs consume less power. LEDs also have different resistance levels. Some cars’ computer systems may not recognize these variations, leading to problems. LEDs are often more sensitive to polarity. Knowing these differences helps you solve the common aftermarket interior led dome light problems.
- Lower Power Consumption: LEDs require far less power than incandescent bulbs. This can lead to issues with the car’s computer, such as errors or failure to recognize the bulb.
- Different Resistance: Incandescent bulbs offer a higher resistance. This can be detected by the car’s monitoring systems. LEDs may not always match these resistance levels, which causes issues.
- CANbus Systems: Many cars use CANbus systems, which constantly monitor the electrical system and detect the current flowing through each circuit. LEDs can confuse these systems, resulting in error messages.
- Polarity Sensitivity: Most LEDs are polarity-sensitive. That means they only work when installed in the right direction. This differs from incandescent bulbs, which work no matter which way you put them in.
Load Resistors and CANbus Compatibility
Load resistors and CANbus-compatible LEDs provide solutions. Load resistors add resistance to an LED circuit. This mimics the resistance of a standard incandescent bulb. This prevents the car’s computer from detecting an “error” or preventing the LED from operating. CANbus-compatible LEDs, on the other hand, are specifically designed to work with these systems. These LEDs have built-in circuits that ensure that they are compatible. Understanding these two options is vital for preventing and solving aftermarket interior led dome light problems.
- Load Resistors: These components are added in parallel to the LED circuit to increase the load. This makes the car’s electrical system believe it’s still using an incandescent bulb. Resistors generate heat. You must mount them in a place where the heat will not cause problems.
- CANbus-Compatible LEDs: CANbus-compatible LEDs include built-in circuitry to avoid issues with your car’s monitoring system. These LEDs work immediately. They are also easier to install.
- Choosing the Right Resistor: When using load resistors, select the correct resistance and wattage. The wattage has to match the power draw of the original bulb.
- Installation of Resistors: Always install load resistors correctly, connecting them in parallel. Refer to the manufacturer’s instructions for the specific type of LED and resistor.
Advanced Tips and Tricks
Beyond the basics, several advanced tricks can help you solve aftermarket interior led dome light problems. These tips involve more in-depth troubleshooting and adjustments. They can be helpful if you continue to experience problems after trying standard solutions. With extra knowledge, you can solve these problems.
Identifying and Fixing Flickering
Flickering lights can be a result of various issues. Low voltage, loose connections, or compatibility problems are key factors to consider. To solve flickering, start by examining the connections and the voltage levels. Checking wiring is important, as is ensuring that the electrical circuit is getting stable power. These fixes can usually remove the flickering.
- Check Connections: Inspect all connections for looseness. Wiggle the LED and wires to see if the flickering changes. Ensure a snug fit.
- Test Voltage: Use a multimeter to measure the voltage at the LED socket while the light is on. Voltage instability can cause flickering.
- Add Load Resistors: Flickering can result from low resistance, particularly in CANbus systems. Adding load resistors can fix the problem by simulating the current draw of standard bulbs.
- Upgrade the LED Driver: If the problem is persistent, changing the LED driver or module might be needed. This is an advanced fix.
Dealing with Error Messages
Error messages on your car’s dashboard often pop up when aftermarket LEDs don’t match the car’s system. The message usually says that the light is out. This message is created by the car’s computer. The solution for these errors is usually to include components designed to prevent them. These messages are annoying but usually don’t affect performance. Let’s look at some things to do.
- Use CANbus-Compatible LEDs: The best way to avoid error messages is to use CANbus-compatible LEDs. These LEDs are built to work well with your car’s electrical system, avoiding the need for workarounds.
- Install Load Resistors: Load resistors mimic the current draw of traditional bulbs. This makes the car’s system think the original bulb is still present, and thus, the error messages do not appear.
- Reprogramming the ECU (Advanced): For advanced users, reprogramming the ECU might eliminate the error messages. This process will change the system’s settings to work well with the LEDs. It is a complex solution and needs special tools.
- Ignoring the Error Message (Temporary): If the error is only a warning light, and the LEDs are working fine, you can choose to ignore the message. However, make sure the lights are actually working.
Advanced Troubleshooting Techniques
Some problems with aftermarket interior led dome light problems may require advanced troubleshooting techniques. This includes more complex testing and diagnostics to pinpoint the precise problem. These advanced techniques help you address persistent issues that aren’t fixed by the simpler steps. By going through these, you can be sure you’ve explored all the options.
- Using an Oscilloscope: An oscilloscope can display the electrical signal waveform, enabling you to detect voltage fluctuations or other electrical disturbances that might be causing problems.
- Checking for Grounding Issues: Poor grounding can cause various electrical problems, including dim or flickering lights. Inspect the ground connections. Make certain they are free of corrosion. Ensure they are properly attached to the chassis.
- Analyzing the Car’s Wiring Diagram: Consult your car’s wiring diagrams. This is useful for identifying the specific circuits. It helps you track down the source of the problem, especially in complex electrical systems.
- Professional Inspection: If you’re still unable to fix the issue, consider having a professional mechanic inspect the electrical system. They can perform more in-depth diagnostics.
Real-World Examples and Case Studies
Studying real-world scenarios can assist with understanding and solving aftermarket interior led dome light problems. These situations show common problems and the steps taken to fix them. These cases present real results.
-
Case Study 1: Flickering LEDs in a Honda Civic:
A Honda Civic owner installed new LED dome lights, which started flickering. The owner discovered that the car’s electrical system detected the low current draw of the LEDs, creating the flickering. To solve the problem, the owner installed load resistors. These resistors simulated the load of the original bulbs. After adding the resistors, the flickering stopped, and the LEDs worked fine. -
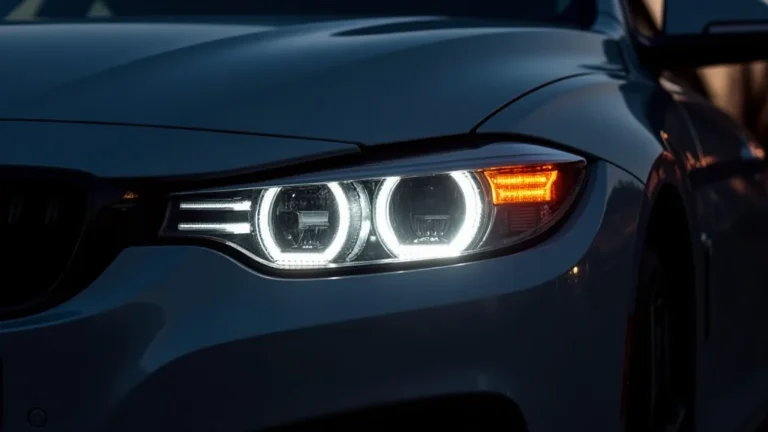
Case Study 2: Error Message in a BMW 3 Series:
A BMW 3 Series owner changed to LED dome lights but got an error message on the dashboard. The car’s computer was reporting the lights as “out.” To fix this, the owner changed to CANbus-compatible LEDs, built to work with the car’s system. They removed the error message. The lights worked. -
Case Study 3: Dim LEDs in a Ford F-150:
A Ford F-150 owner found that their new LED dome lights were not as bright as they wanted. They were dim. The issue was that the new LEDs were installed with the wrong polarity. By flipping the LEDs to the correct orientation, the owner fixed the problem, and the lights lit up fully.
| Problem | Symptom | Potential Causes | Solutions |
|---|---|---|---|
| Flickering | Lights flash on and off. | Loose connection, low voltage, CANbus incompatibility. | Tighten connections, check voltage, add load resistors, use CANbus-compatible LEDs. |
| Error Messages | Dashboard displays a light-out warning. | CANbus system detecting low current draw. | Use CANbus-compatible LEDs, install load resistors, ignore the message. |
| Dim Lights | Lights are not as bright as expected. | Incorrect polarity, low-quality LEDs. | Check and correct polarity, |
| Lights Not Working | Lights do not turn on at all. | Blown fuse, bad wiring, defective LED. | Replace fuse, check wiring, test the LED, check for shorts. |
Frequently Asked Questions
Question: Why do my new LED dome lights flicker?
Answer: Flickering often happens because of compatibility issues. Your car’s electrical system may detect the lower power draw of the LEDs and cause them to flicker. Load resistors or CANbus-compatible LEDs can solve this.
Question: What does CANbus-compatible mean?
Answer: CANbus-compatible LEDs are designed to work with vehicles that use a CANbus system, which monitors the electrical circuits. They prevent error messages and flickering.
Question: How do I know if I need load resistors?
Answer: If your LEDs flicker or cause error messages, you likely need load resistors. Load resistors provide the resistance of standard bulbs, fooling the car’s computer.
Question: What tools do I need to install LED dome lights?
Answer: You’ll need screwdrivers, a multimeter, wire strippers, electrical tape, and possibly load resistors. Also, good quality LEDs from a reputable seller.
Question: Where can I find installation guides for my car?
Answer: Search online for installation guides for your specific car model. Look for videos and step-by-step instructions. Many resources are available online.
Final Thoughts
Solving aftermarket interior led dome light problems doesn’t have to be hard. By understanding the typical issues and following a systematic approach, you can fix most issues. From basic troubleshooting steps like checking fuses and wiring to more advanced techniques like using load resistors, you have many options. If issues arise, follow these steps and take your time. With some patience and the right tools, you can solve these problems and enjoy the improved lighting. Get started today, and brighten your car.